Web API in ASP.NET Web Forms Application
With the release of ASP.NET MVC 4 one of the exciting features packed in the release was ASP.NET Web API.
Join the DZone community and get the full member experience.
Join For Free
with the release of asp.net mvc 4 one of the exciting features packed in the release was asp.net web api. in a nutshell, asp.net web api is a new framework for creating http services that can reach a broad range of clients including browsers and mobile devices. asp.net web api is also an ideal platform for building restful services.
microsoft shipped “asp.net and web tools 2012.2” update sometime in february 2013. this included updated asp.net mvc templates, asp.net web api, signalr and friendly urls. so if you take the latest you get all the latest bits asp.net has to offer so far. rest of this post assumes that you have installed the 2012.2 bits. i assume you know the web api fundamentals like api controller, action and route configuration as i wont get into discussing those.
in this post, we will see how web api can be created in a web form application or project. i will be using visual studio express 2012 for web as my ide for this post.
create asp.net web form project:
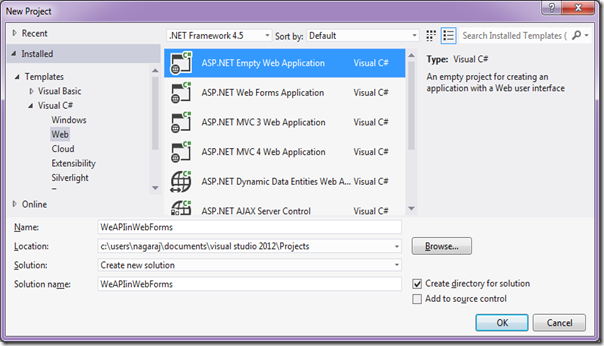
to start out with, create a empty “asp.net empty web application” or “asp.net web forms application”. both of these templates are web forms based. so doesn’t matter which one you choose. for the sake of the demo i will choose asp.net empty web application. fire up a visual studio express 2012 for web, file > new project > asp.net empty web application and give a name to the project.
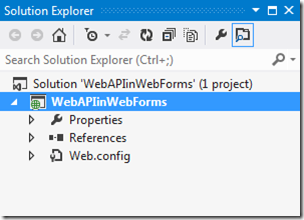
visual studio will create the project and you should have the infrastructure ready. and here is how the solution will look like:
adding a web api controller:
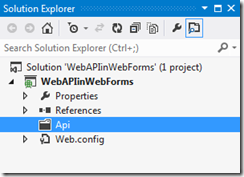
since web api is kind of api we are building lets bring in some best practice here. it is good to have a folder created with the name “api” and store all your web api controllers here. with the latest release of asp.net, you can create controllers in any folder you like. so go ahead and create a new folder and name it api. here is how the solution explorer will look like:
now lets add a web api controller. right click on api folder, select add > new item. you will find a new item template called “web api controller class”. select web api controller class item. note that visual studio names the class as valuescontroller1.cs – you can rename it to valuescontroller. make the changes and click add.
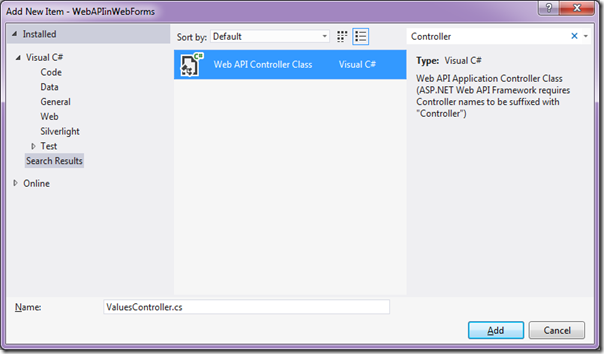
fig 4: adding web api controller class
here is the glimpse of the code inside valuescontroller class provided by default:
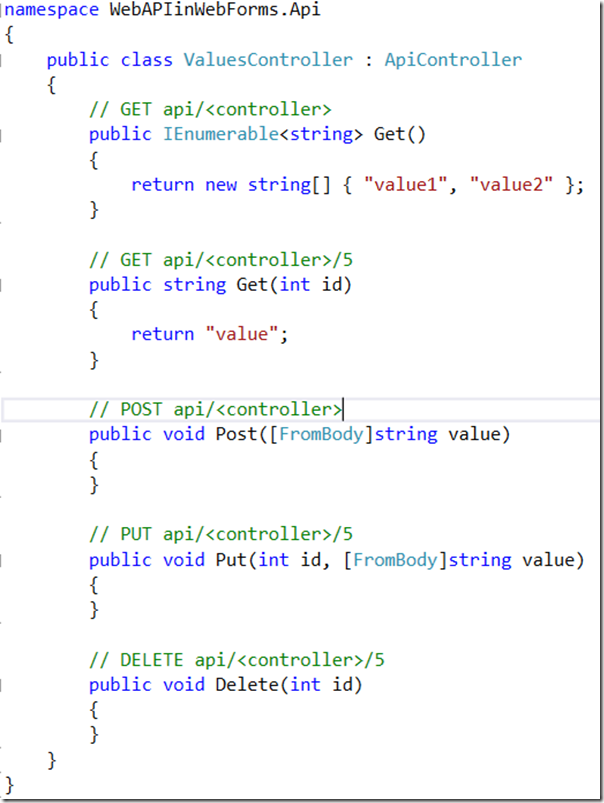
fig 5: values controller class
there is one magic visual studio does under the hood when you add a web api controller class. it adds the following packages which is required for making the web api work:
-
microsoft.aspnet.webapi
-
microsoft.aspnet.webapi.client
-
microsoft.aspnet.webapi.core
-
microsoft.aspnet.webapi.webhost
-
microsoft.net.http
-
newtonsoft.json
you can see that there is a packages.config file added to the solution and it is used by nuget package manager to keep track of the packages. the above packages make it possible for web api to be hosted within the web forms application or project. so, is this all to make the web api run – well not yet. web api works with the routes and we have not yet configured the routing engine to grab the request and see if it is web api request. lets do that in next section.
setting up web api routes:
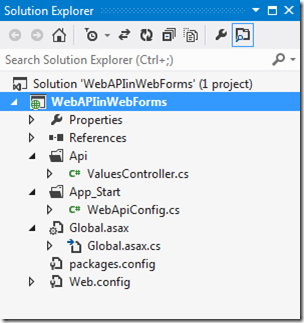
one thing you will notice in the solution is – it does not contain a global.asax file. well that’s why the name of the template “asp.net empty web application” its literally empty and you need to add things needed manually. so first lets go ahead and add a global.asax. right click on the project, select add > new item > global application class. you will get the blank global.asax i.e. the class will have all the event handler added up but empty. the event handler which is of importance for us is application_start. lets now configure the http routing. as a best practice create a new folder called app_start at the root of the project. add a new class, call it webapiconfig.cs and make it a static class. idea behind naming the folder as app_start is that, codes in this folder are the first to be called or executed when the app starts. so here is how the solution explorer looks like now:
now add the following code to webapiconfig.cs. we are creating a static method called register and it will register the http routes for the application:
public static void register(httpconfiguration config)
{
    config.routes.maphttproute(
        name: "defaultapi",
        routetemplate: "api/{controller}/{id}",
        defaults: new { id = routeparameter.optional }
    );
}
listing 1: webapiconfig register method
what we are doing in register method is:
-
get the httpconfiguration object
-
use the routes table to configure routes
-
map a http route to our api by providing a pattern
-
default pattern is to look for “api/{controller}/{id} – where {id} is optional
here is the complete code of webapiconfig.cs file:
using system;
using system.collections.generic;
using system.linq;
using system.web;
using system.web.http;

namespace webapiinwebforms.app_start
{
    public static class webapiconfig
    {
        public static void register(httpconfiguration config)
        {
            config.routes.maphttproute(
                name: "defaultapi",
                routetemplate: "api/{controller}/{id}",
                defaults: new { id = routeparameter.optional }
            );
        }
    }
}
listing 2: webapiconfig class
now, this is just a definition but where do we actually call it. remember we added a global.asax file – we will call the register method from the application_start event handler. here is the code to do that:
protected void application_start(object sender, eventargs e)
{
   webapiconfig.register(globalconfiguration.configuration);
}
listing 3: global.asax application_start event handler
and we have a web api created in web forms project now. next lets see how to test it out.
testing web api:
at this moment if you build and run the project, browser may show you 403 and that is expected as we do not have an default.aspx or index.html. don’t worry as we are interested in testing the api controller. remember the default patterns we set up for api routes – our web api is available at a url “ http://localhost:<port>/api/values ”. so type the url and hit enter. ie will show you the response as a json value. this is because ie always sends the accept header as application.json and web api server implementation will respect the content negotiation and send the appropriate data type to the client.
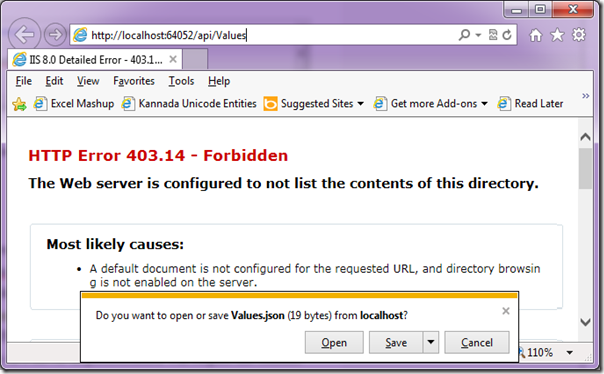
fig 7: testing api controller in ie
here is the same response when seen from firefox:
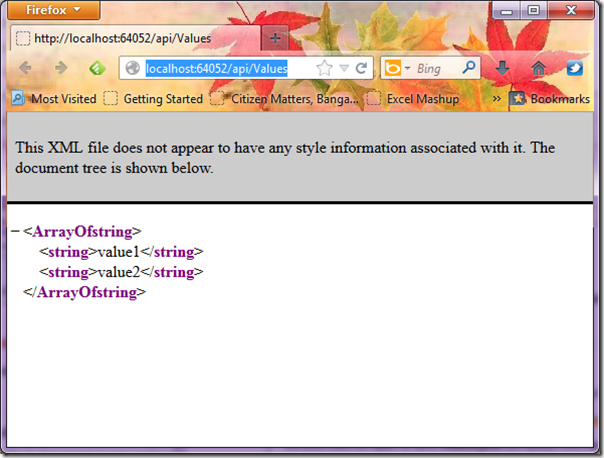
fig 8: testing api controller in firefox
summary:
this was a post intended to show case the fact that web api are not meant only for asp.net mvc project types but it can be hosted even in asp.net web forms project too. thanks to the tooling, visual studio does all the magic under the hoods when you add a item template of type “web api controller class”. we saw how easy it is to set up a api controller and test it. hope this gives you a jump start on creating web api in web forms project. do let me know if you have any feedback on this article. it will help me better myself.
till next time – happy coding. code with passion, decode with patience.
Published at DZone with permission of , DZone MVB. See the original article here.
Opinions expressed by DZone contributors are their own.

Comments