Quickly Setup LDAP User Directory for Jira
In this article, I will discuss how we can configure the OpenLDAP user directory for Jira Data Center Setup.
Join the DZone community and get the full member experience.
Join For FreeIn this article, I will discuss how we can configure the OpenLDAP user directory for Jira Data Center Setup. If you are looking for a Jira single node Data Center setup, follow my other article, Install Jira.
This article would be helpful for those users who either just have basic LDAP knowledge or no LDAP knowledge.
I only have a basic understanding of the LDAP protocol and underlying user directory; thus, I was looking for a quick LDAP setup that could help me in integration with my Application, and then I can authenticate with the LDAP users.
Prerequisites
- Docker should be installed.
- I used bitnami/OpenLDAP docker image.
- Jira admin rights would be required here.
I tested this in Ubuntu 22.04.1 LTS with docker installed. Jira version 8.20.11. So without wasting more time, let us begin our adventure.
1. Docker images are always helpful in such scenarios where we want to quickly test integrations and test certain use cases. The major benefit I find is that with docker images, we can create a new setup quickly, and if not required, we can stop docker containers. Otherwise, software installation takes a lot of time and effort; also, they take system resources if not uninstalled. Just note in the following command, here we are providing the LDAP admin username and LDAP users as an environment variable.
$ sudo docker run --detach --rm --name openldap   --env LDAP_ADMIN_USERNAME=admin   --env LDAP_ADMIN_PASSWORD=adminpassword   --env LDAP_USERS=user1,user2   --env LDAP_PASSWORDS=password1,password2 --publish 1389:1389  bitnami/openldap:latest
33d05b0665e536951fdd75543b9febb234ab64a949c5ea15038a870321427ca1

$ sudo docker ps
CONTAINER ID   IMAGE                     COMMAND                  CREATED             STATUS             PORTS                                                 NAMES
33d05b0665e5   bitnami/openldap:latest   "/opt/bitnami/script…"   About an hour ago   Up About an hour   0.0.0.0:1389->1389/tcp, :::1389->1389/tcp, 1636/tcp   openldap
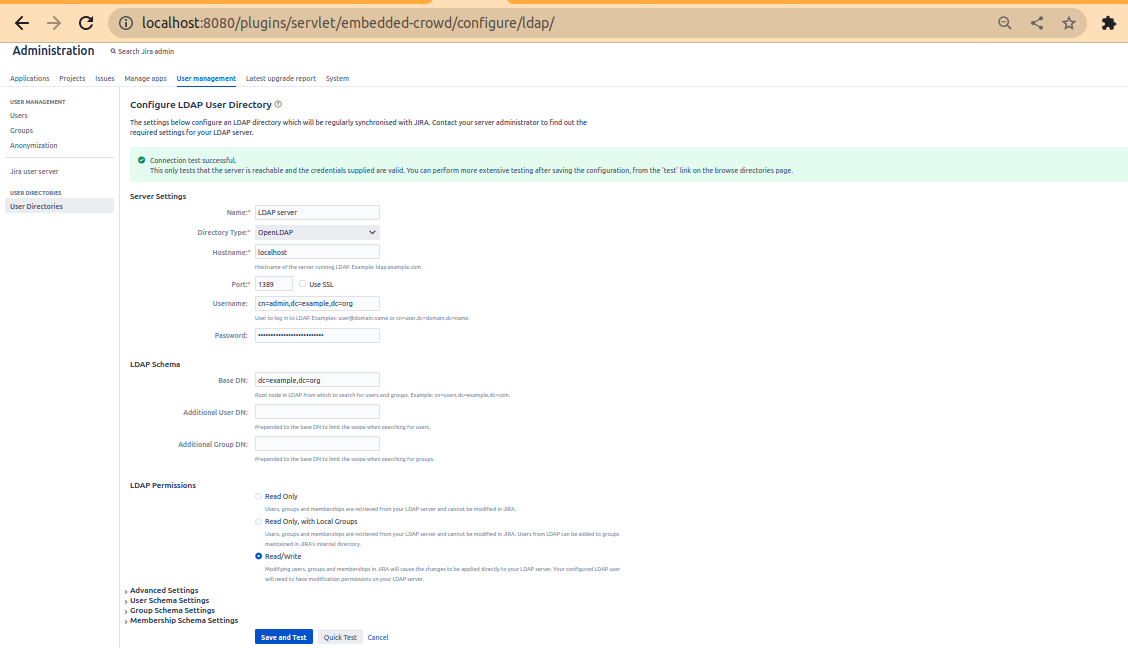
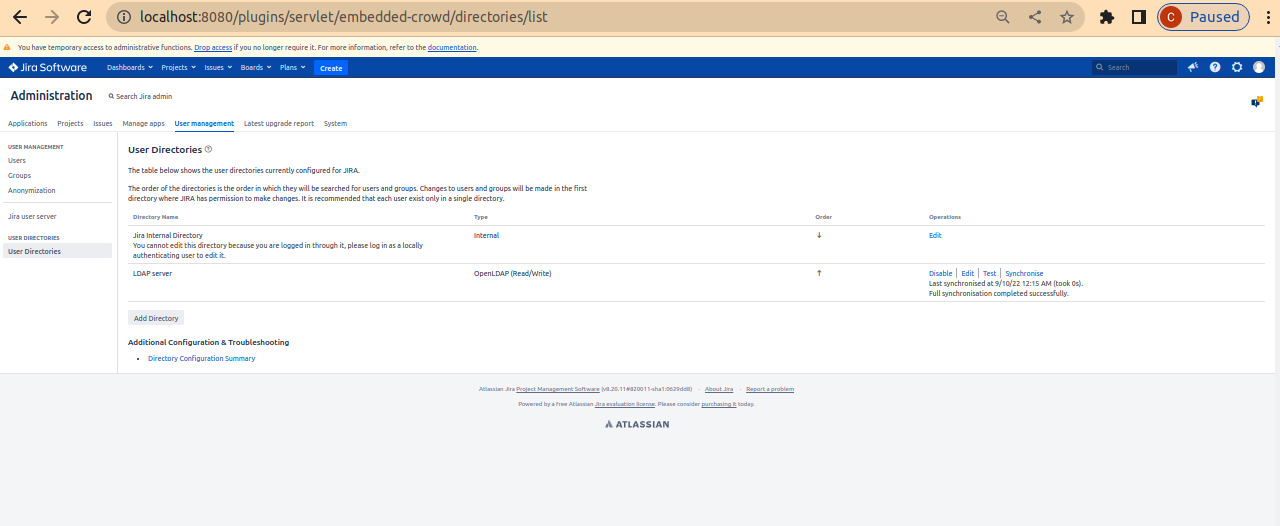
2. We have an LDAP server is running, which can be accessed on host port 1389. Now we can connect Jira with the LDAP server with the configuration as in the following screenshot. Here we should note that the username is "cn=admin,dc=example,dc=org" and the password is adminpassword which we configured as an environment variable while running the docker image. The following screenshot is captured after the execution of the Quick Test. It reflects a successful connection with LDAP.
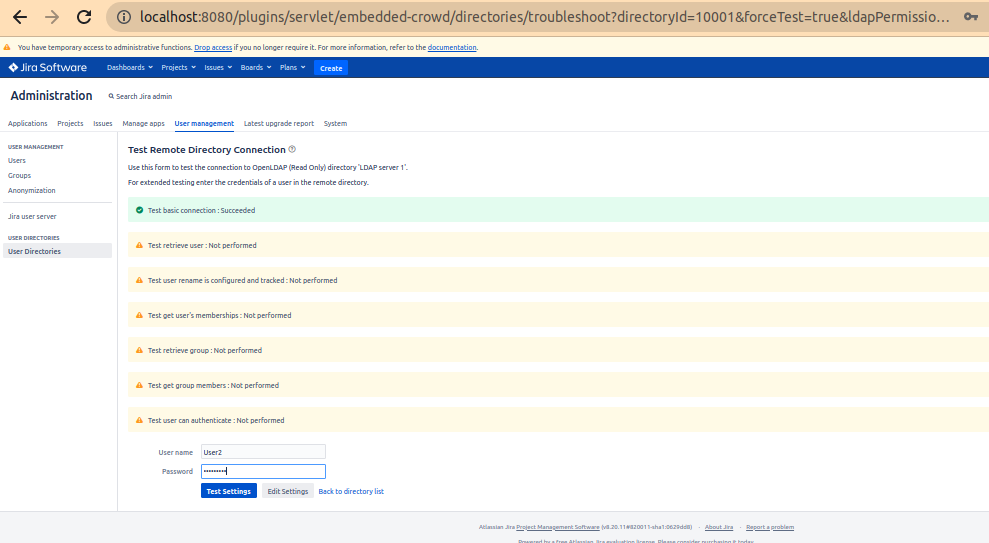
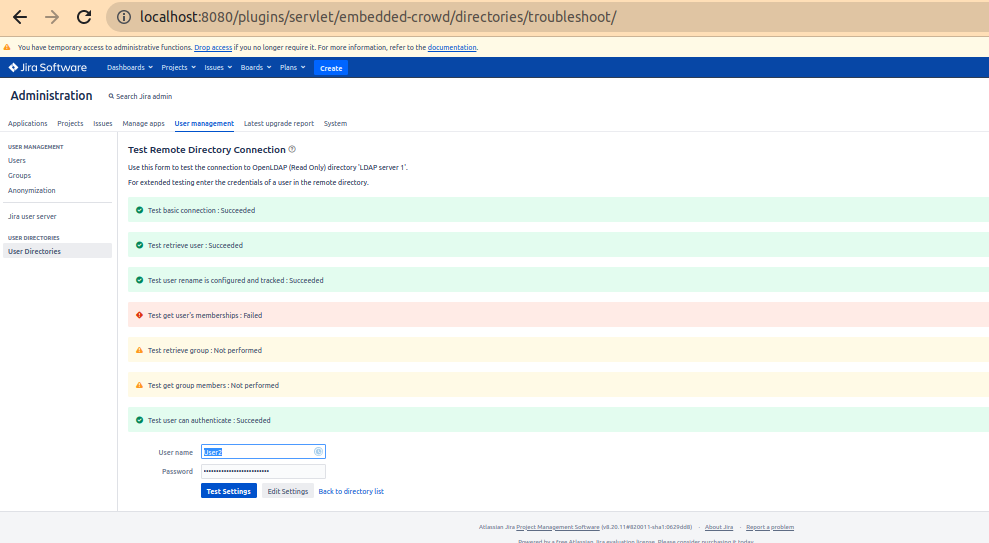
3. Further, we can Save and Test these configurations. We can also test with LDAP-user user1(password -password1 or user2(password2). We have also set these as environment variables LDAP_USERS and LDAP_PASSWORDS.
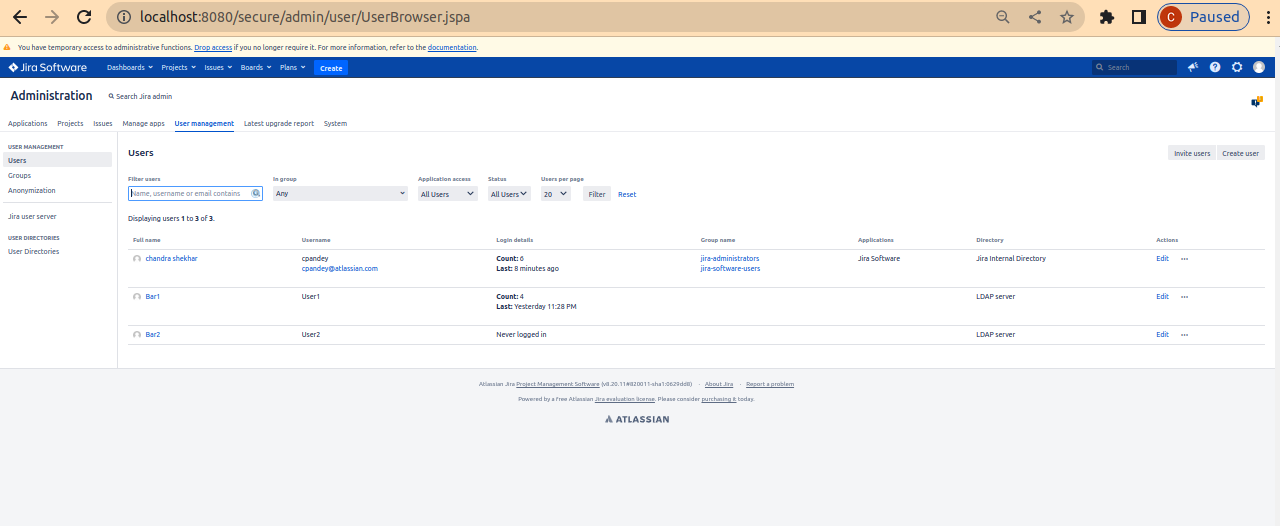
4. Now, we have the OpenLDAP user directory configured. We have users as well in our Jira setup. Check Users in the User Management section of Jira UI. The screenshot shows User1 and User2 from the directory LDAP server, which we configured in previous steps. But here, we don't have any group configured for User1 and User2; in the next step, we will assign groups to these users so they can be authorized and access Jira.
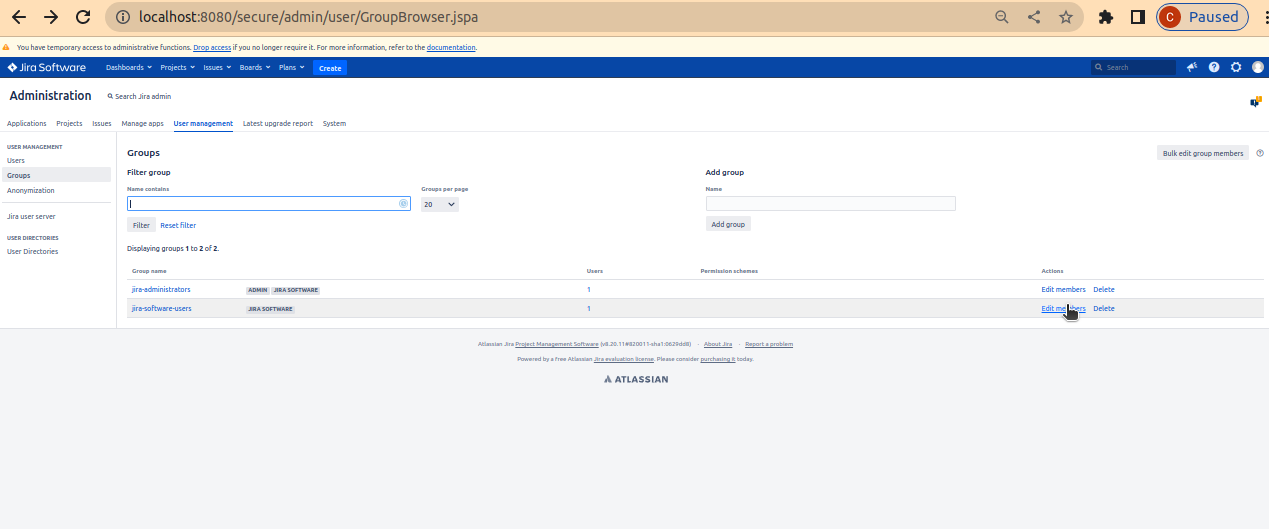
5. Now, we will add users to the group; we have to click on the Edit members button for the group. Here I will add User2 to the group jira-software-users.

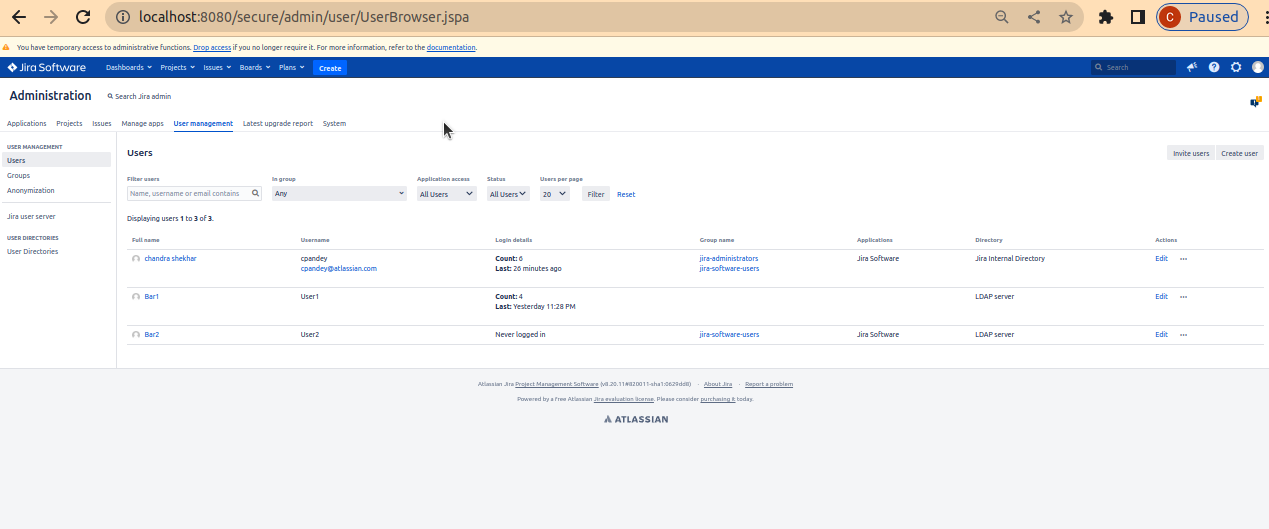
6. Now try to log in with user2 with password2 as the password, which we configured as an environment variable while running the LDAP docker image. Login should be successful, although user2, not being an admin user, would have limited access. In [JIRA_HOME}/log/atlassian-jira-security.log, we can also check if the login is a success or failure.
$ tail -f atlassian-jira-security.log

2022-10-09 01:13:21,781+0530 http-nio-8080-exec-23 User2 73x1538x1 opvbxj 127.0.0.1 /login.jsp The user 'User2' has PASSED authentication.
That is all I have for this article. I hope you will find it interesting and helpful.
Opinions expressed by DZone contributors are their own.

Comments