The New JSON/YAML Plugin: Using YAML in JMeter
Let's take a look at a tutorial that explains how the JSON/YAML plugin works by generating a simple test plan.
Join the DZone community and get the full member experience.
Join For FreeThe JSON Plugin was deprecated in Apache JMeter™version 4, following the donation of the JSON Assertion component from jmeter-plugins.org to core JMeter. Now, I have updated this plugin to support new features and abilities. In this new version, the two plugin components, the JSON Path Extractor, and the JSON Path Assertion have a new input format — YAML. So, users can choose between JSON and YAML input formats when running JMeter load tests. This provides more options and flexibility for performance testers — everything that was done before in JSON can now also be done in YAML.
Let's see how the JSON/YAML plugin works by generating a simple test plan. This test plan will take random values from two arrays (lists) in YAML and use them in a POST request as body parameters. The two arrays will be received from another request.
Let's get started.
1. Add the JSON/YAML plugin to your JMeter with the JMeter plugins manager.
2. Add a Thread Group to your Test Plan.
3. Add an HTTP Request and configure the URL parameters. (In my example, I will use a Dummy Sampler because I want to show the response in a YAML format).
For this example, my server will return the following response in YAML. The data from this will be used to simulate the response from submitting a form on the BlazeDemo website.
tickets:
  departure:
    cities:
      - Buenos Aires
      - Rome
      - London
      - Berlin
  destination:
    cities:
      - Boston
      - Milan
      - Paris
      - Moskow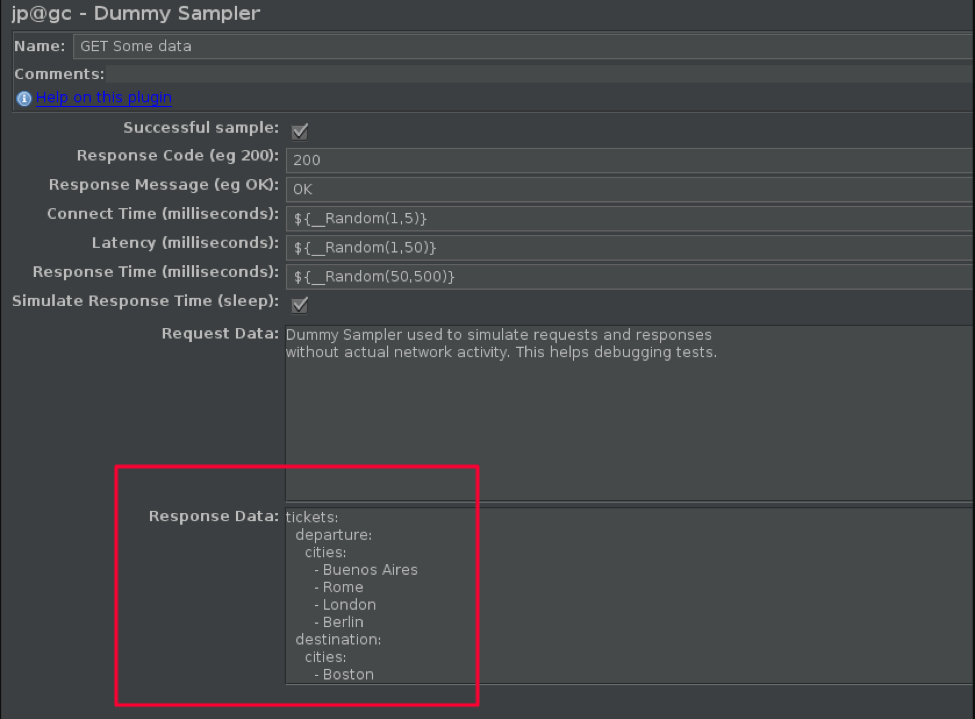
4. Add JSON/YAML Path Assertions
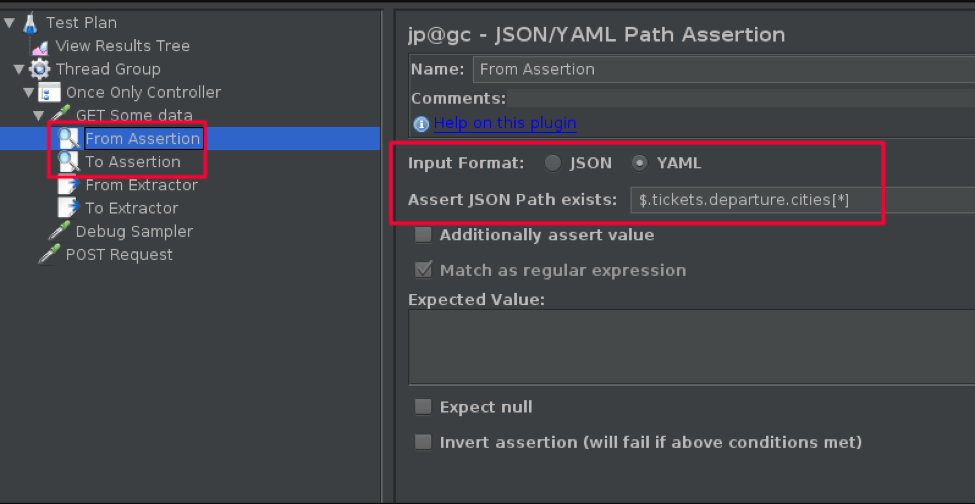
I added two assertions, that will check that my paths exist in the response. Each assertion has its own path:
- $.tickets.departure.cities
- $.tickets.destination.cities
5. Select the YAML Input Format in the assertion.
6. Add JSON/YAML Path Extractors
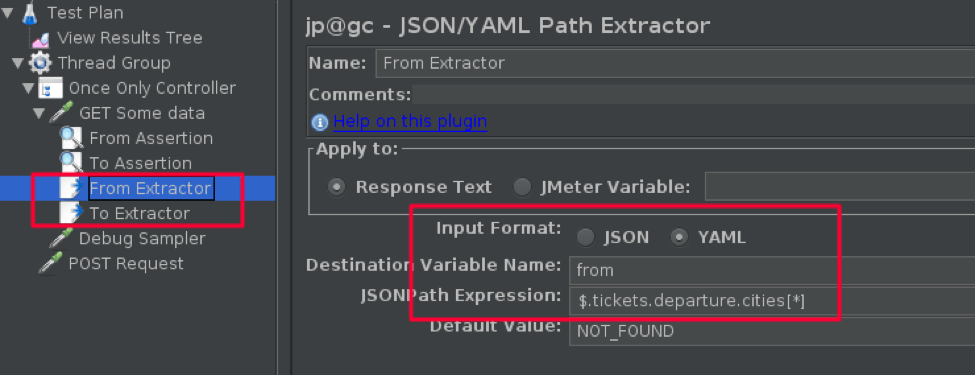
I added two extractors that will extract two arrays to variables. Each extractor has its own path:
- $.tickets.departure.cities[*] will extract to the variable 'from'
- $.tickets.destination.cities[*] will extract to the variable 'to'
7. Select the YAML Input Format in the extractor.
8. Let's look at the extractor's results. We can use the Debug Sampler and the View Results Tree listener.
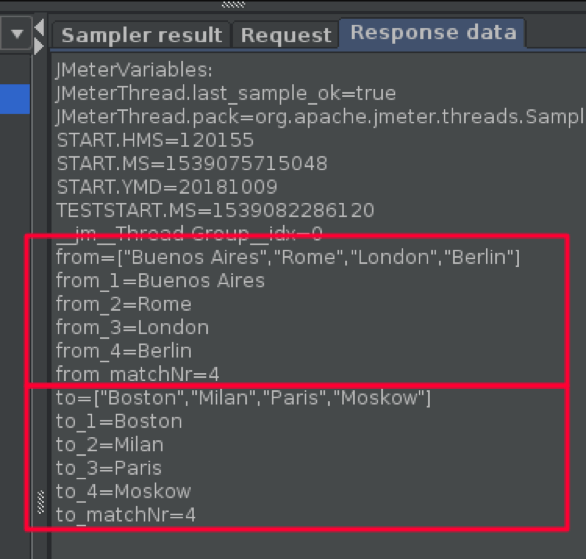
As you can see, the 'from' and 'to' variables show the full array from the YAML file. We also got the variables from_matchNr and to_matchNr that contain the size of each array. Finally, we see the set of variables from_* and to_* that contains each element from the arrays.
Now, let's see how we can get a random value from these YAML arrays (in the results) and use it in a POST request as parameters.
9. Create an HTTP Request, fill in the body parameters (server, protocol, etc.), and set the parameters values according to the function you need. In this case:
- Use random function ${__Random(1,${from_matchNr})}
- Use __V function to evaluate nested variable references.
- ${__V(from_${__Random(1,${from_matchNr})})}
- Change the same for 'to' variable: ${__V(to_${__Random(1,${to_matchNr})})}

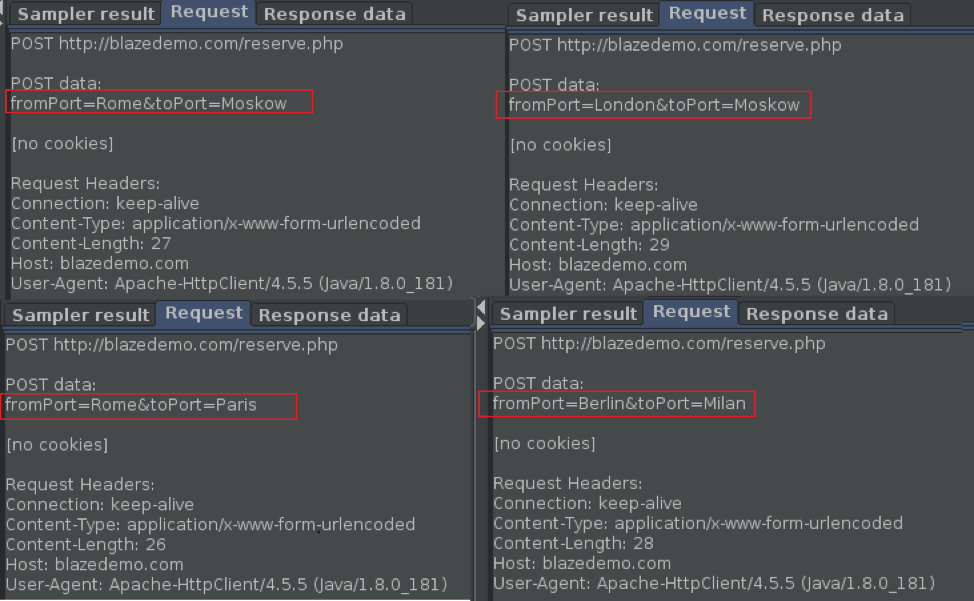
10. Now I can run my test script and look at the request bodies. You can see it has random values:
That's it! You can now use YAML inputs in JMeter just like with JSON. Then, after creating your JMeter script, you can run it in BlazeMeter from multiple geo-locations, integrate with CI tools, and get advanced reports. Start testing now: put your URL in the box below and your test will start in minutes.
Published at DZone with permission of Artem Fedorov, DZone MVB. See the original article here.
Opinions expressed by DZone contributors are their own.

Comments