How to Test PUT Requests for API Testing With Playwright Java
This tutorial demonstrates how to test PUT requests using the Playwright Java framework for API testing, including examples of updating data of an API.
Join the DZone community and get the full member experience.
Join For FreeAPI testing is a process that confirms that the API under test is working as expected. Generally, in Agile teams, due to shift left testing, API testing is performed earlier in the SDLC as it provides major benefits, like faster feedback and allowing the team to fix the bugs early in the phase.
There are multiple tools and frameworks available these days that help perform API testing quickly. Playwright is one such test automation framework that has gained a lot of popularity. Backed by Microsoft, it supports web and API automation testing in multiple programming languages.
In this tutorial, we will learn to use Playwright with Java and test PUT API requests in automation testing.
Getting Started
It is recommended to check out the previous tutorial blog where the details about prerequisite, setup and configuration are already discussed.
Application Under Test
We will be using RESTful e-commerce APIs that are available over GitHub and free to use.
This project has multiple APIs related to the e-commerce application’s order management functionality and allows creating, updating, fetching, and deleting orders. It can be set up locally using NodeJS or Docker.
What Is a PUT Request?
PUT requests are ideally used to update resources. It is used for replacing the data in the existing data of the target resource with the request.
Like POST requests, the Content-Type header plays an important role in sending the data to the resource in the required format. The PUT requests generally return Status Code 200 with the updated data in the response, however, it depends on the requirement, some APIs don’t return any data in response and that depends on how the response of that API is designed.
Difference Between POST and PUT Request
The major difference between PUT and POST request is that PUT is used for updating the resource while POST is used for creating a new resource.
PUT request is idempotent, meaning, if the same request with the same body is called multiple times, it has no side effects and keeps updating the resource.
PUT /updateOrder/{id} Endpoint
The /updateOrder/{id} endpoint updates the available order using its order ID. This API is a part of the RESTful e-commerce application. This API will be used further in the blog to demo-test the PUT request tests using Playwright Java.
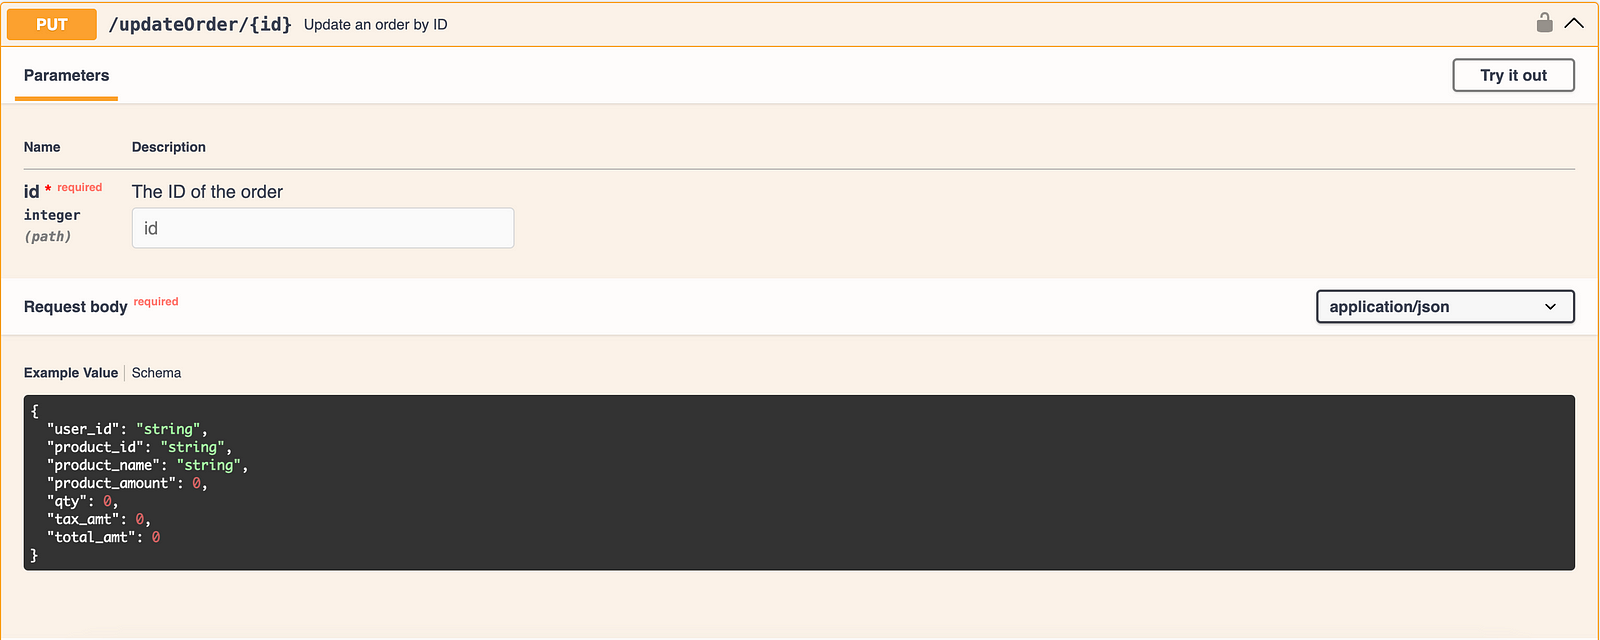
This API takes in the id (i.e.order_id) as a path parameter to check for the available order. The updated order details should be supplied in the request body in JSON format. It is important to note here that since it is a PUT request, we need to send the full Order details even if we need to update a single field in the order.
This API needs the Authentication token to be supplied considering which order will be updated else an error will be returned if the token is not supplied or if it is invalid.

The PUT request will return Status Code 200 with the updated order details in case of a successful order update.
In case the update fails, there are multiple response codes and error messages returned based on the criteria as follows:
- Status Code 400 — If the token authentication fails
- Status Code 400 — If the incorrect body/ no body is sent in the request
- Status Code 403 — If the token is not supplied while sending the request
- Status Code 404 — If there are no orders for the respective
order_idsupplied to update the order
How to Test PUT APIs Using Playwright Java
We will be using the following test scenario to demonstrate testing PUT APIs using Playwright Java.
Test Scenario 1: Update the Order
- Start the RESTful e-commerce service.
- Use POST request to create some orders in the system.
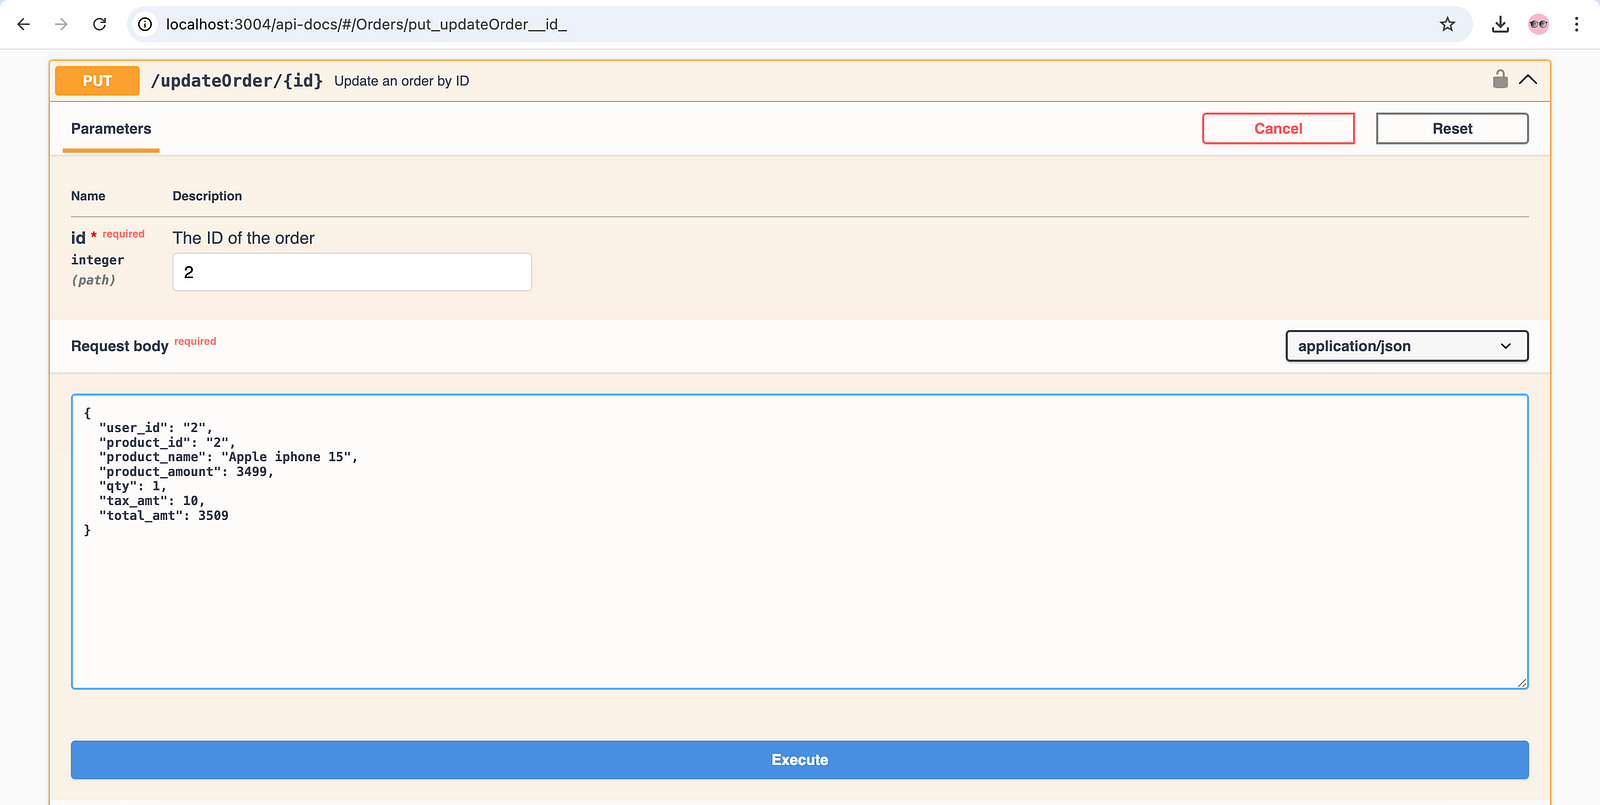
- Update all the order details of
order_id“2.” - Verify that the Status Code 200 is returned in the response.
- Verify that the order details have been updated correctly.
Test Implementation
This test scenario will be implemented in a new test method testShouldUpdateTheOrderUsingPut() in the existing test class HappyPathTests.
@Test
    public void testShouldUpdateTheOrderUsingPut() {

        final APIResponse authResponse = this.request.post("/auth", RequestOptions.create().setData(getCredentials()));

        final JSONObject authResponseObject = new JSONObject(authResponse.text());
        final String token = authResponseObject.get("token").toString();

        final OrderData updatedOrder = getUpdatedOrder();

        final int orderId = 2;
        final APIResponse response = this.request.put("/updateOrder/" + orderId, RequestOptions.create()
                .setHeader("Authorization", token)
                .setData(updatedOrder));

        final JSONObject updateOrderResponseObject = new JSONObject(response.text());
        final JSONObject orderObject = updateOrderResponseObject.getJSONObject("order");

        assertEquals(response.status(), 200);
        assertEquals(updateOrderResponseObject.get("message"), "Order updated successfully!");
        assertEquals(orderId, orderObject.get("id"));
        assertEquals(updatedOrder.getUserId(), orderObject.get("user_id"));
        assertEquals(updatedOrder.getProductId(), orderObject.get("product_id"));
        assertEquals(updatedOrder.getProductName(), orderObject.get("product_name"));
        assertEquals(updatedOrder.getProductAmount(), orderObject.get("product_amount"));
        assertEquals(updatedOrder.getTotalAmt(), orderObject.get("total_amt"));
    }
The following three steps are required to be taken care of while updating the order.
- Generate the Authentication token.
- Generate the Update Order Test Data.
- Update the Order using PUT request.
1. Generating the Authentication Token
The POST /auth API endpoint will allow you to generate the token and return the generated token in the response.
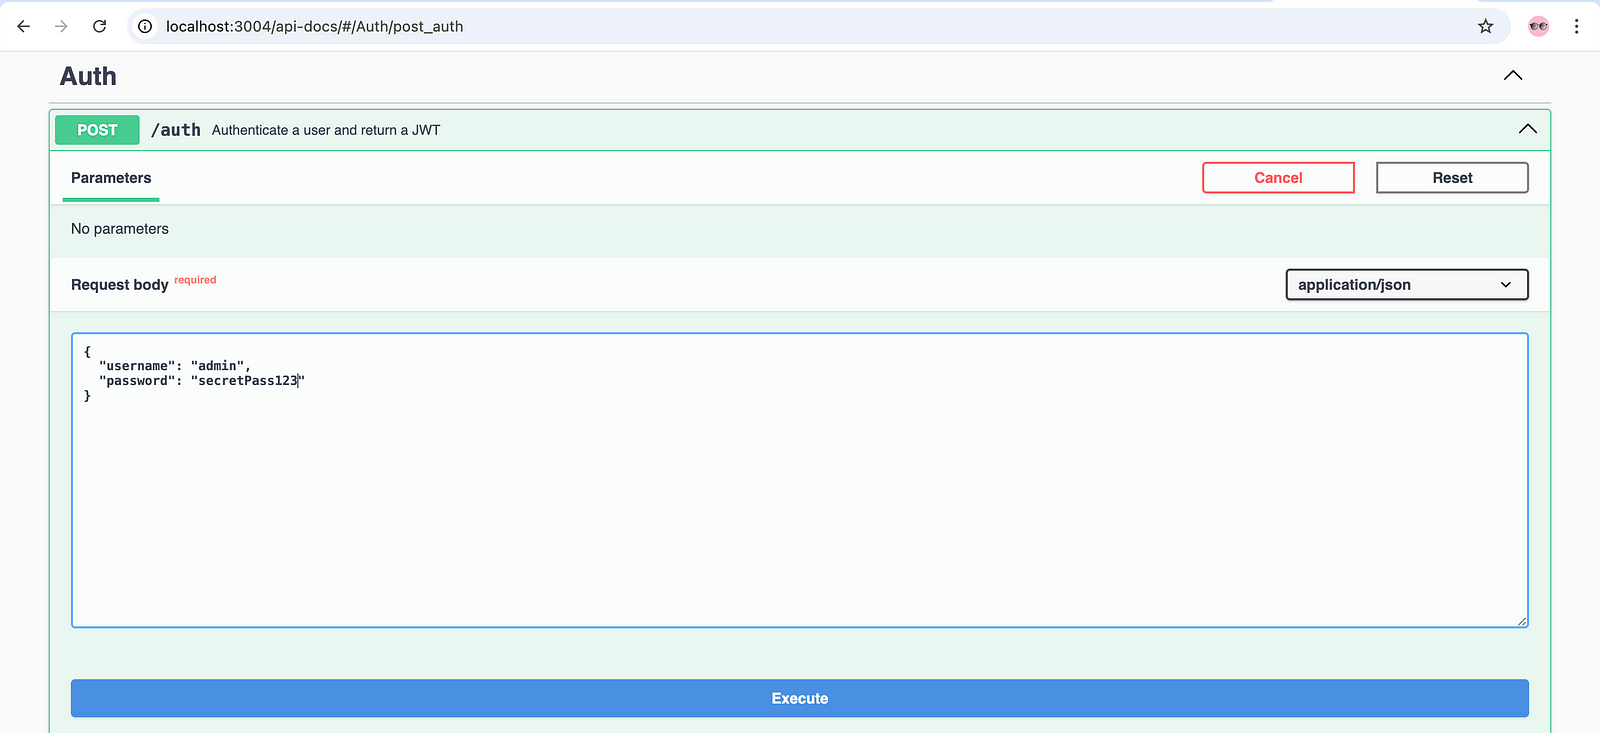
The login credentials for this API are as follows:
- username — “admin”
- password — “secretPass123”
When the correct credentials are passed in the POST request, the API returns Status Code 200, along with the token in response.
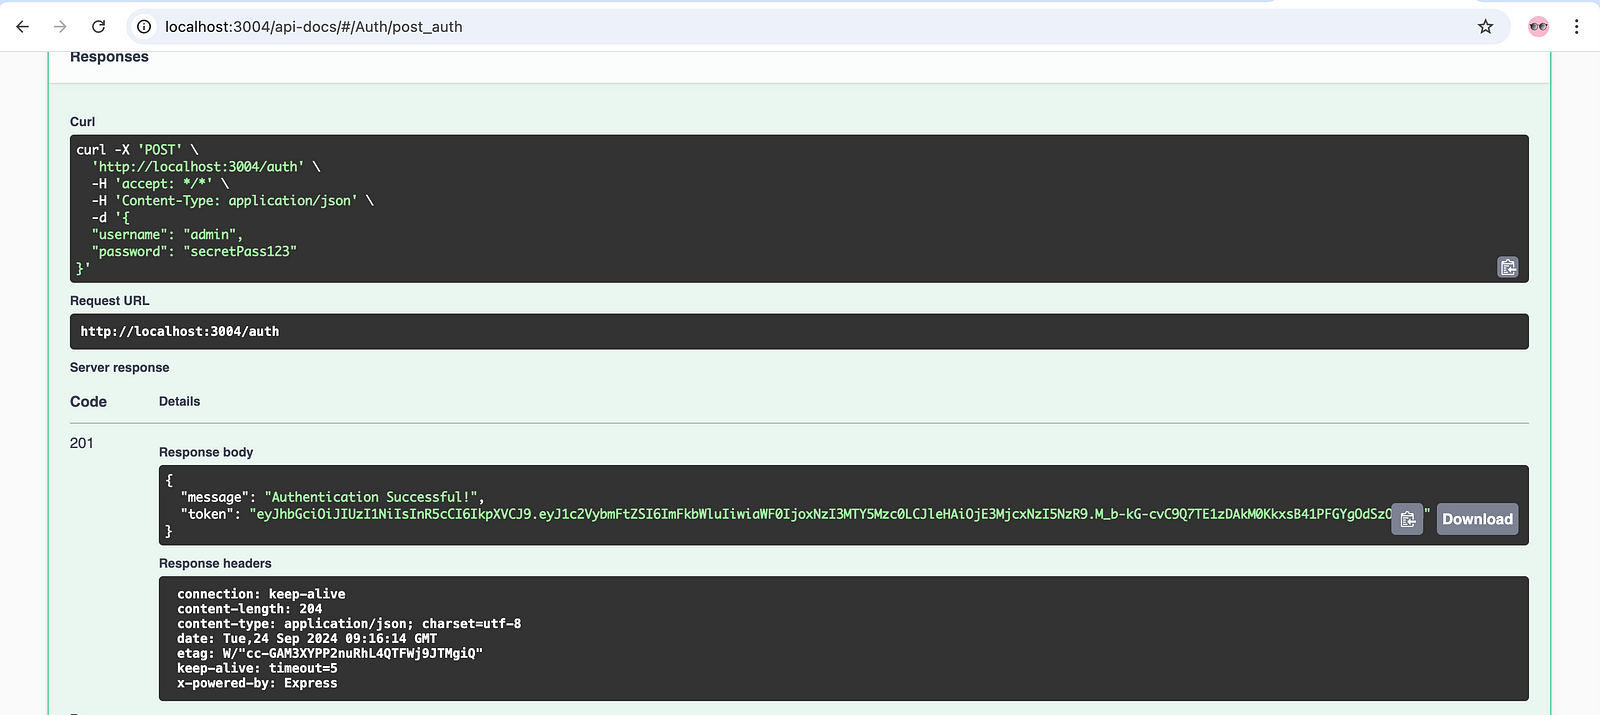
This token value can be used further in the test to execute the PUT request.
The token has been added as a security measure in the RESTful e-commerce app so only the users who know login credentials, i.e., trusted users, can update the order.
2. Generating the Test Data for Updating Order
The second step is to generate a new set of data that would replace the existing order details.
We would be creating a new method : getUpdatedOrder() in the existing class OrderDataBuilder We used it in the POST request tutorial blog to generate the new order test data.
public static OrderData getUpdatedOrder() {
        int userId = FAKER.number().numberBetween(4, 5);
        int productId = FAKER.number().numberBetween(335,337);
        int productAmount = FAKER.number().numberBetween(510, 515);
        int quantity = FAKER.number().numberBetween(1, 2);
        int taxAmount = FAKER.number().numberBetween(35,45);
        int totalAmount = (productAmount*quantity)+taxAmount;

        return OrderData.builder()
                .userId(String.valueOf(userId))
                .productId(String.valueOf(productId))
                .productName(FAKER.commerce().productName())
                .productAmount(productAmount)
                .qty(quantity)
                .taxAmt(taxAmount)
                .totalAmt(totalAmount)
                .build();
    }
This getUpdatedOrder() method generates totally new data for the order; hence, when this method is called in the PUT request, it will replace all the existing order details for the order ID.
3. Update the Order Using PUT Request
Now, we have come to the stage where we will be testing the PUT request using Playwright Java. We would be creating a new test method testShouldUpdateTheOrderUsingPut() in the existing test class HappyPathTests.
@Test
    public void testShouldUpdateTheOrderUsingPut() {

        final APIResponse authResponse = this.request.post("/auth", RequestOptions.create().setData(getCredentials()));

        final JSONObject authResponseObject = new JSONObject(authResponse.text());
        final String token = authResponseObject.get("token").toString();

        final OrderData updatedOrder = getUpdatedOrder();

        final int orderId = 2;
        final APIResponse response = this.request.put("/updateOrder/" + orderId, RequestOptions.create()
                .setHeader("Authorization", token)
                .setData(updatedOrder));

        final JSONObject updateOrderResponseObject = new JSONObject(response.text());
        final JSONObject orderObject = updateOrderResponseObject.getJSONObject("order");

        assertEquals(response.status(), 200);
        assertEquals(updateOrderResponseObject.get("message"), "Order updated successfully!");
        assertEquals(orderId, orderObject.get("id"));
        assertEquals(updatedOrder.getUserId(), orderObject.get("user_id"));
        assertEquals(updatedOrder.getProductId(), orderObject.get("product_id"));
        assertEquals(updatedOrder.getProductName(), orderObject.get("product_name"));
        assertEquals(updatedOrder.getProductAmount(), orderObject.get("product_amount"));
        assertEquals(updatedOrder.getTotalAmt(), orderObject.get("total_amt"));
    }
This method will generate the token, create a new set of updated order data, and send the PUT request to update the order. Let’s break this huge method into smaller chunks and understand it better.
The first part of this method generates the token. It will use the /auth endpoint and send a POST request along with the valid login credentials.

The getCredentials() is a static method that is available in the TokenBuilder class. It will generate and provide the valid credentials in the JSON format to be used in the /auth POST request.
public class TokenBuilder {

    public static TokenData getCredentials() {
        return TokenData.builder().username("admin")
                .password("secretPass123")
                .build();
    }
}
The getCredentials() method returns the TokenData object that contains the fields username and password.
@Getter
@Builder
public class TokenData {

    private String username;
    private String password;

}
The response will be extracted and stored as JSON Object in the authResponseObject variable.

Finally, the token value will be stored in the token variable in String format, which will be used in the test while sending POST requests.
Next, the updated order details need to be fetched. The getUpdatedOrder() is a static method, and every time, it will generate a new order when it is called.

We will be using the order with order_id “2” to update the order details. The order will be updated next using the put() method of Playwright.
The additional details, Authorization header, and request body will be supplied in the put() method parameter.
The RequestOptions.create() will create an object for the PUT request and allow attaching the header and request body. The setHeader() method will allow adding the Authorization header and the setData() will add the updatedOrder object as body to the request.
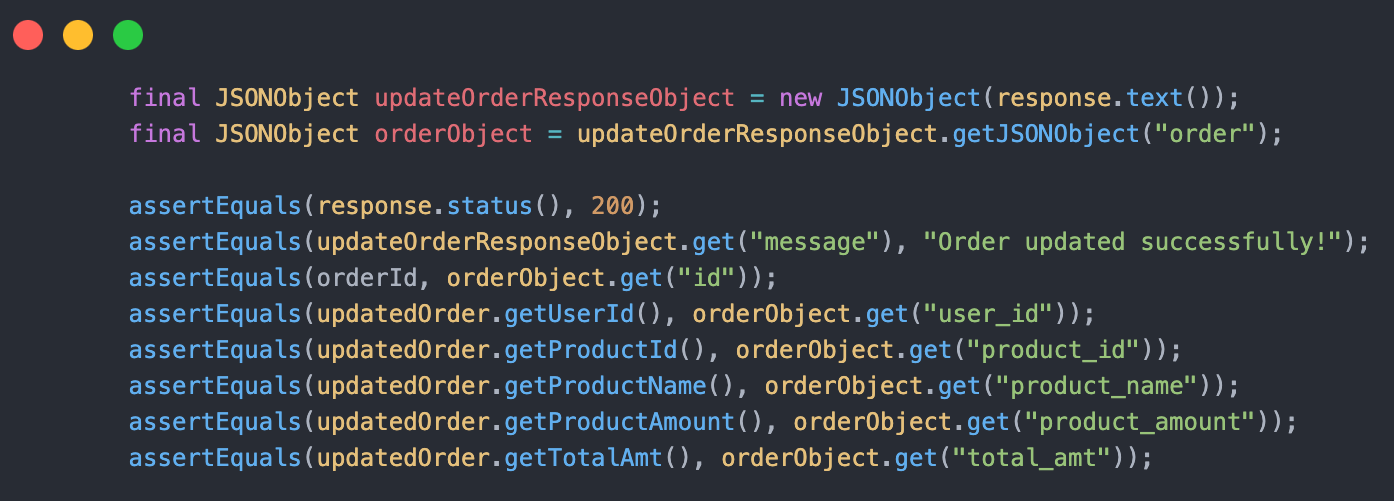
Once the request is executed, the response is parsed and stored in the updateOrderResponseObject variable in JSONObject type.
Response body:
{
  "message": "Order updated successfully!",
  "order": {
    "id": 1,
    "user_id": "1",
    "product_id": "1",
    "product_name": "iPhone 15 Pro Max",
    "product_amount": 503,
    "qty": 1,
    "tax_amt": 5.99,
    "total_amt": 508.99
  }
}
The details of orders are retrieved in the “order” object in the response, and hence, we are storing the array in the orderObject variable that has the JSONObject type.
The final part of the code performs assertions to check that the order details retrieved in the response are the same that were sent in the request body and accordingly the order has been updated.
The updatedOrder object stores all the values that were sent in the request; hence, it is kept as the expected result, and the data retrieved in the response, i.e., orderObject object, becomes the actual output.
Test Execution
We need to first create orders before updating them.
So, let’s create a new testng.xml file — testng-restfulecommerce-updateorder.xml to execute the update order tests. This testng.xml file will have only two methods to execute, the first one being testShouldCreateNewOrders() and then the update order test method — testShouldUpdateTheOrderUsingPut().
<?xml version="1.0" encoding="UTF-8"?>
<!DOCTYPE suite SYSTEM "http://testng.org/testng-1.0.dtd">
<suite name="Restful ECommerce Test Suite">
    <test name="Testing Happy Path Scenarios of Creating and Updating Orders">
        <classes>
            <class name="io.github.mfaisalkhatri.api.restfulecommerce.HappyPathTests">
                <methods>
                    <include name="testShouldCreateNewOrders"/>
                    <include name="testShouldUpdateTheOrderUsingPut"/>
                </methods>
            </class>
        </classes>
    </test>
</suite>
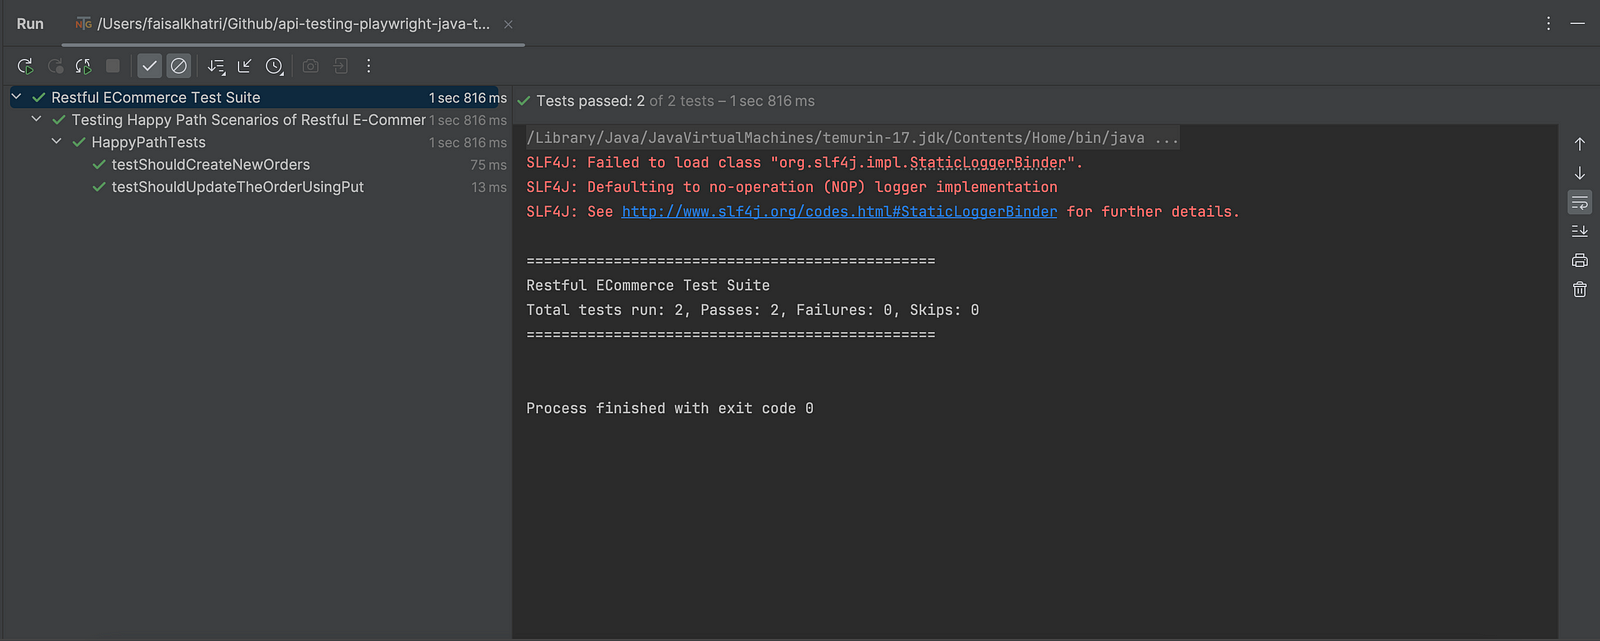
The following screenshot of the test execution shows that the tests were executed successfully. First, the orders were created, and then an order was updated using the PUT request.
Test Scenario 2: Try Updating the Order With an Invalid Order ID
This is a sad path scenario where we will be supplying an invalid order ID while updating the order using a PUT request.
- Using a PUT request, try updating an order with an invalid order that does not exist in the system. For example,
order_id = 90 - Verify that Status Code 404 is returned in the response
- Verify that the message text
“No Order found with the given parameters!”is returned in the response.
Test Implementation
We will be adding a new test method testShouldNotUpdateOrder_WhenOrderIdIsNotFound() in the existing test class SadPathTests.
@Test
    public void testShouldNotUpdateOrder_WhenOrderIdIsNotFound() {
        final APIResponse authResponse = this.request.post("/auth", RequestOptions.create().setData(getCredentials()));

        final JSONObject authResponseObject = new JSONObject(authResponse.text());
        final String token = authResponseObject.get("token").toString();

        final OrderData updatedOrder = getUpdatedOrder();

        final int orderId = 90;

        final APIResponse response = this.request.put("/updateOrder/" + orderId, RequestOptions.create()
                .setHeader("Authorization", token)
                .setData(updatedOrder));

        final JSONObject responseObject = new JSONObject(response.text());

        assertEquals(response.status(), 404);
        assertEquals(responseObject.get("message"), "No Order found with the given Order Id!");

    }
A hard-coded order_id “90” will be passed in the test as we need to send an invalid order ID.
The implementation of this test scenario remains the same as we did for the previous test scenario. All the steps remain the same; we need to generate the token first, then attach it to the Header and use the put() method from the APIRequestContext interface to finally send the PUT request to update the order.
The same getUpdatedOrder() static method from the OrderDataBuilder class would be used to send the request body.
Finally, we would be asserting that the Status Code 404 and message text “No Order found with the given Order Id!” is returned in the response.
Test Execution
Let’s add a new test block in the testng-restfulecommerce-updateorder.xml file and execute it.
<?xml version="1.0" encoding="UTF-8"?>
<!DOCTYPE suite SYSTEM "http://testng.org/testng-1.0.dtd">
<suite name="Restful ECommerce Test Suite">
    <test name="Testing Happy Path Scenarios of Creating and Updating Orders">
        <classes>
            <class name="io.github.mfaisalkhatri.api.restfulecommerce.HappyPathTests">
                <methods>
                    <include name="testShouldCreateNewOrders"/>
                    <include name="testShouldUpdateTheOrderUsingPut"/>
                </methods>
            </class>
        </classes>
    </test>
    <test name="Testing Sad Path Scenarios of Updating Order">
        <classes>
            <class name="io.github.mfaisalkhatri.api.restfulecommerce.SadPathTests">
                <methods>
                    <include name="testShouldNotUpdateOrder_WhenOrderIdIsNotFound"/>
                </methods>
            </class>
        </classes>
    </test>
</suite>
The following screenshot from the IntelliJ IDE shows that the test was executed successfully.
Summary
Testing PUT requests is equally important from an end-to-end testing perspective, as users will be using the PUT API requests to modify/update the records.
While updating the data using test automation, we should remember to supply the required headers and data in the desired format. If the authorization token is needed, it should be supplied as well.
Testing Happy and Sad Paths in test automation allows regression testing to be compact and can help uncover defects quickly.
Playwright Java can help in writing the API automation test scripts for PUT requests for updating the records. We learned how to run the tests in sequential order using testng.xml as it is a recommended way to run the tests locally as well as in the CI/CD pipeline.
Published at DZone with permission of Faisal Khatri. See the original article here.
Opinions expressed by DZone contributors are their own.

Comments