SharePoint Connector in Mule 4
This article takes a look at the SharePoint connector in Mule 4 and explains how to add it to AnyPoint Studio.
Join the DZone community and get the full member experience.
Join For Free
According to Microsoft, SharePoint is being used by 78% of Fortune 500 companies with 100 million+ users. It is commonly used for document management, collaboration, and maintaining lists for internal purposes to assist with bringing an organization together. So the chances are that you will be integrating SharePoint with many systems in your organization's landscape.
SharePoint Connector is one of the many things that has changed significantly with Mule 4. This article will help you get started with developing integrations with SharePoint in Mule 4.
Before you proceed further, ensure that you have at least an Edit Level access on a SharePoint site.
We will go through List Get, List Item Get, List Item Update, List Item Create, and File Add operations with "Online" SharePoint Connection Type. You can find information about all the Mule 4 SharePoint connection types and operations on the Mule 4 SharePoint Connector Reference page.
You may also be intersted in: Mulesoft Custom Connector Using Mule SDK for Mule 4
Adding Mule 4 SharePoint Connector to AnyPoint Studio
Before you can start developing the integrations, you will need to import the connector from MuleSoft Exchange. If you have already imported it or are familiar with the process of importing a connector in AnyPoint Studio, you can skip to the next section.
In Anypoint Studio, search and click on the Open Exchange icon, which is just below the Edit button, as seen in the image.
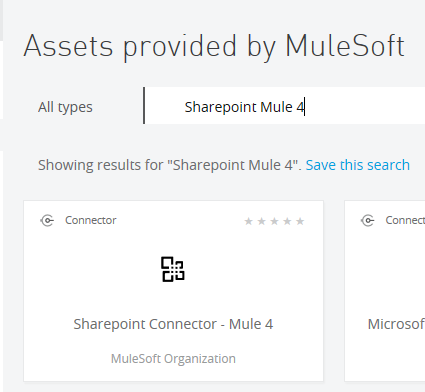
You may need to enter your Anypoint Platform credentials on the next window. Once in, search for SharePoint Mule 4 and locate the connector.
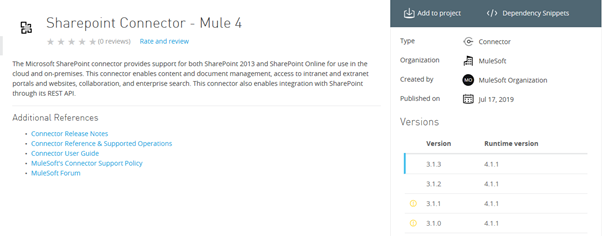
On selecting the connector, it will open the below page. Click on the Add to project button.
 The connector would now be available in the Mule Palette of your Studio.
Configuring the Connector
In the Global Elements of your flow XML, click on Create and locate the Sharepoint Online connector.
Choose the connection type as Online. The Site URL will be the link of your Sharepoint site's homepage where the lists are hosted.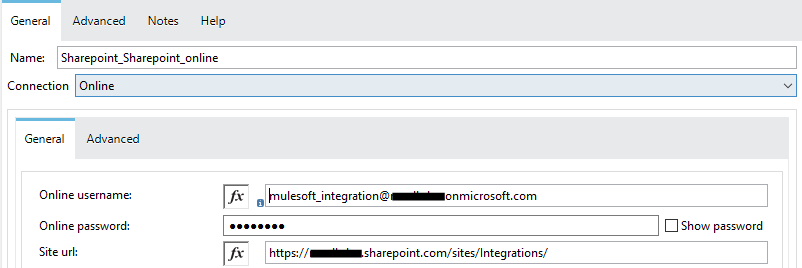
Test the connection to ensure the connection is working.
SharePoint List Operations
In order to perform any operation on a SharePoint List, you will need the List Id of your list.
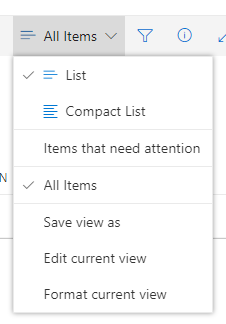
Open the SharePoint site in a browser and open the list's page. On the right side of the list's menu bar drop down the All Items menu and select Edit Current View.
On the next page, scroll all the way down and locate the URL for Web address for this mobile view.

Copy the value for the List parameter (in this sample, starting from '6b' to 'b8') in a notepad and replace the %2D with a hyphen (-). This is your list id. Assign this value to property with a key as list.id.
Drag the below List Operations from the Mule Palette in your flow.

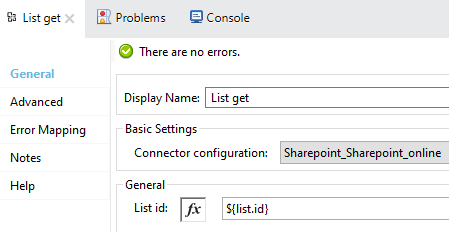
List Get operation gets the list. Select the component and provide list.id value in List Id input field.
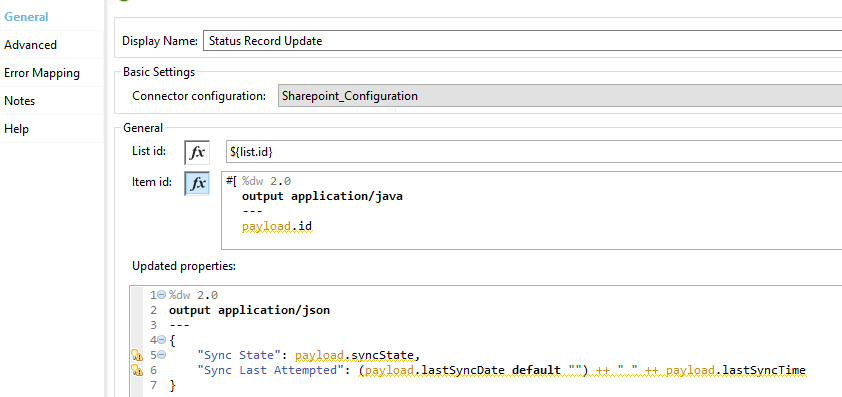
The List Item Update operation allows us to update an individual item from the list. In addition to List Id, pass the Item Id of the record to be updated.
In the Updated properties section, provide the field name and the value. For multiple properties, use transformation, as seen in the example.
 In order to find the Item Id, open the list in a browser, edit the current view from All Items dropdown menu, as done earlier. In the Columns section, enable the display for ID column, as seen below. Save.
ID column will now appear in your list's page.

The List Item Create operation is similar to List Item Update except for the need to pass the Item Id.
The List Item Query operation allows querying one or more records from a SharePoint list. Unlike Mule 3, the query is expected to be in OData format in Mule 4. In the adjoining example, the query returns values for fields Title & Source. Ignore the Datasense error displayed.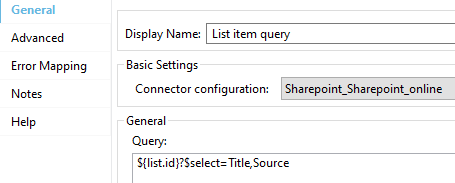
To capture the result, define a variable in the Advanced section.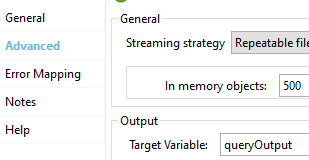 In this example, it is copied in the queryOutput target variable.
It is not possible to pass filters directly in the Query section. 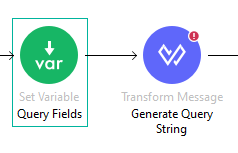 In order to overcome the problem, define the query ahead of the operation. One way to do that is shown below.
Define variable fields with all the query fields. 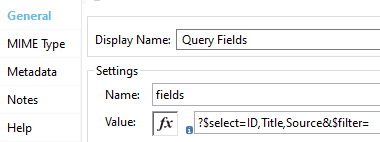
Assign the value in the below format
?$select=<field#1>,<field#2>,...,<field#n>&$filter=
Concatenate the list id, query fields, and filters in another variable queryString within a DataWeave.

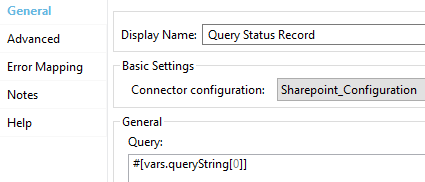
Assign the variable queryString in the Query field of the operation
Sharepoint File Operations
For performing file operations in SharePoint, you need a Document Library page on your site.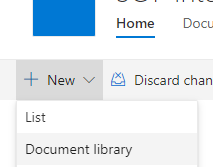
Go to the Home section of your site, select the New dropdown list, and then choose Document Library. Name the library and save.
File Add operations allow adding a file to SharePoint.
Drag the operation, and in the settings, provide the File Server Relative URL as the path as similar to as seen in the image. In this example, the name of the document library is DocumentLibrary, and Test.txt is the filename.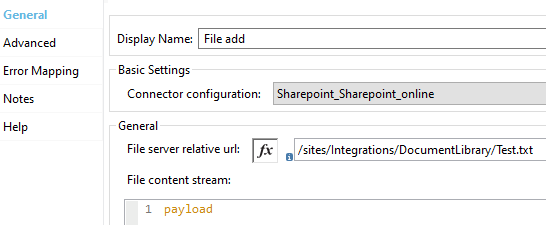
The File Content Stream is content to be written in the file.
The configurations given here can be used with almost all the SharePoint operations in Mule 4.
Further Reading
Opinions expressed by DZone contributors are their own.

Comments