Set Up Jenkins CI in 30 Minutes
Set up the new Jenkins CI so that you can start testing the new Jenkins plugins.
Join the DZone community and get the full member experience.
Join For FreeDo you want to experiment with Jenkins CI in a local setup? In this post, we will set up a local Jenkins CI server, create a build job for a simple Spring Boot Maven project, and push the created Docker image to DockerHub. It will be a setup for local experimenting only, but it can be really handy if you want to try out a Jenkins plugin for example.
1. Prerequisites
In order to get started, we need the following prerequisites:
- We have used Ubuntu 18.04;
- Docker must be installed, for the installation instructions, see here;
- We will need a Docker registry in order to push our Docker image. The easiest way is to create an account at DockerHub. You can create the account for free. You won’t be spammed with advertising;
- A Spring Boot application for our build job. We will use a Spring Boot MVC application from a previous post. The source code can be found at GitHub and the corresponding Docker images at DockerHub. The application contains 1 HTTP endpoint at
http://localhost:8080/helloand just returns aHello Kuberneteswelcome message.
2. Run Jenkins CI
We will make use of the official Jenkins CI Docker image for running our Jenkins server. The complete documentation can be found here. Start the container with the command:
$ docker run -p 8080:8080 --name myjenkins -v jenkins_home:/var/jenkins_home -v jenkins_downloads:/var/jenkins_home/downloads jenkins/jenkins:ltsLet’s take a closer look at what we are doing here:
-p 8080:8080: We map the internal Jenkins port (after the colon) to the external port, which will be accessible from our Docker host;--name myjenkins: We provide a name for our container; otherwise, Docker will generate a name for you. It is better to provide a name for it; this way, you can easily start and stop the container;-v jenkins_home:/var/jenkins_home: We want the internal Jenkins home directory (after the colon) to be mapped to a directory on our Docker host machine. This way, the Jenkins data will be persisted on our host machine, and it gives us the opportunity to backup the data;-v jenkins_downloads:/var/jenkins_home/downloads: We will need to install extra tooling in Jenkins; therefore, we create a directory to copy the*.tar.gzfiles to. Later on in this post, it will become clear what we will be doing with directory;jenkins/jenkins:lts: The Docker image to use. We will use the LTS release, but it is also possible to use less stable releases if you want to. At the time of writing, v2.150.1 is the LTS version.
After this, you can stop and start the container by means of its name:
$ docker stop myjenkins
$ docker start myjenkins
3. Configure Jenkins for First Use
Once the container has started, we are able to access the Jenkins web console. Of course, we need to know the IP address of our Jenkins instance. Therefore, execute the following command:
$ docker inspect myjenkinsThis will display some JSON output. Go to the Networks section and the parameter IPAddress shows us our Jenkins IP address (172.17.0.3 in our case):
"Networks": {
  "bridge": {
    "IPAMConfig": null,
    ...
    "IPAddress": "172.17.0.3",
    ...
    "DriverOpts": null
  }
}
The Jenkins web console is accessible via the browser at http://172.17.0.3:8080/.
This will show us the following page:

We use the temporary password, which was displayed in the console output after starting the container:
*************************************************************
*************************************************************
*************************************************************

Jenkins initial setup is required. An admin user has been created and a password generated.
Please use the following password to proceed to installation:

f586346583e04fa78e2cc8edbf7566e1

This may also be found at: /var/jenkins_home/secrets/initialAdminPassword

*************************************************************
*************************************************************
*************************************************************
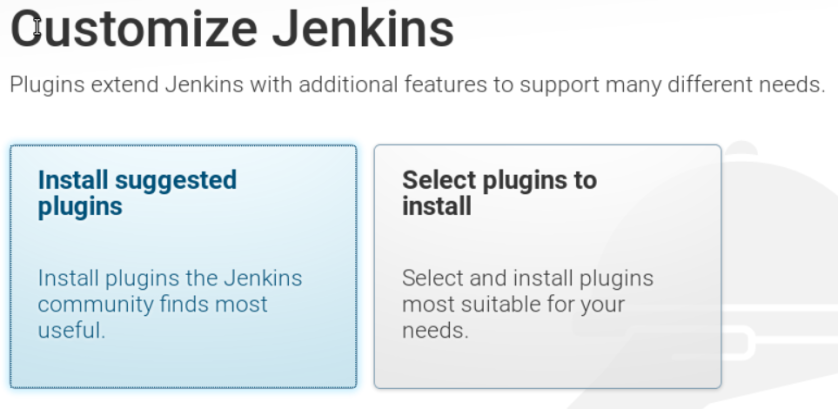
After entering the temporary password, a page is shown where we can choose between a default set of plugins to be installed or to customize it. We will choose the default set.
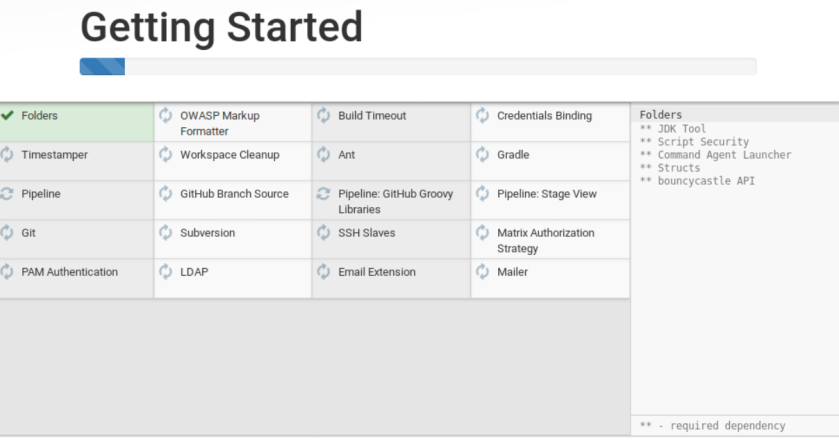
Now, sit and wait until the plugins are installed:
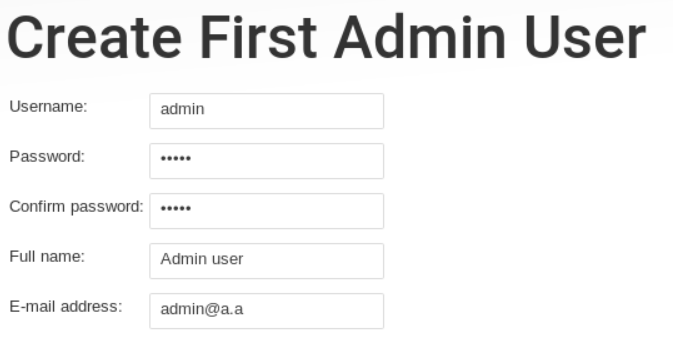
Next, create the first admin user:
And, at last, configure the Jenkins instance:

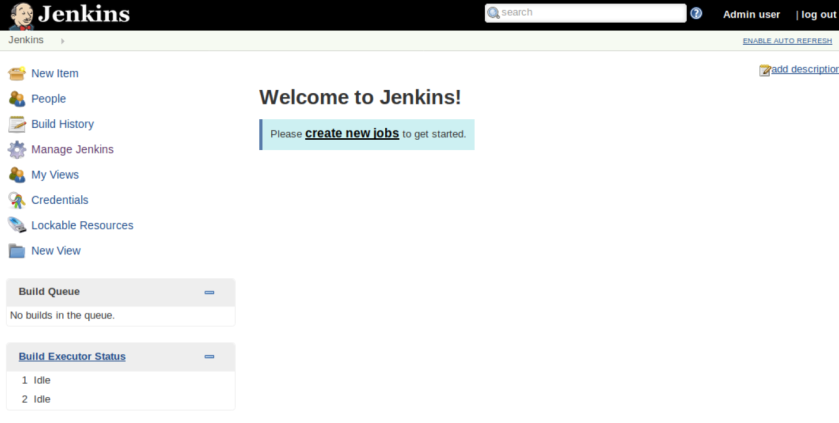
Great! Jenkins is now up and running and ready for use:
4. Install Required Tooling
Our build requires some tooling to be available in Jenkins. We need JDK11, Maven, and Docker. In the next sections, we will show how to make these available in our container.
During start-up of the container, we created a mount volume to /var/jenkins_home/downloads in our container. First, we will verify whether this path is accessible from within the container. Execute the following command:
$ docker exec -it myjenkins ls -l /var/jenkins_home/downloads
total 0
When this returns 0 results as above, then we can proceed. Otherwise, you have to check whether you did not make a typo during starting the container.
4.1 Install JDK 11
We will use the Adopt OpenJDK 11, which can be downloaded here. We have to copy the downloaded *.tar.gz file to the mounted volume jenkins_home/downloads on our host machine. In order to retrieve the path on our machine, we again execute the docker inspect command as we did before to retrieve the Jenkins IP address. This time, go to the section Mounts:
"Mounts": [
  ...
  {
    "Type": "volume",
    "Name": "jenkins_downloads",
    "Source": "/var/lib/docker/volumes/jenkins_downloads/_data",
    "Destination": "/var/jenkins_home/downloads",
    ...
  }
],
In our case, the volume is available on /var/lib/docker/volumes/jenkins_downloads/_data. Copy the *.tar.gz file to this location.
Go to Manage Jenkins – Global Tool Configuration and the JDK Installationssection. Click the Add JDK button. By default, the java.sun.com installer is added. We won’t use this one, so delete it and add a Extract *.zip/*.tar.gzinstaller. Fill in the fields according to the screenshot below. The path to the binary archive is file:/var/jenkins_home/downloads/OpenJDK11U-jdk_x64_linux_hotspot_11.0.1_13.tar.gz. It is important to leave the Labelempty; otherwise, the installation of the JDK will fail.

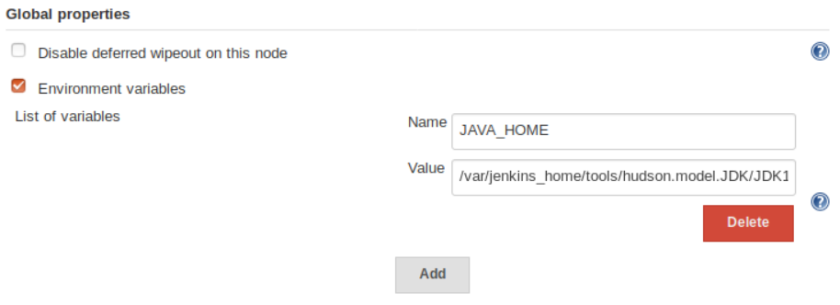
Go to Manage Jenkins – Configure System, to the Global properties section and enable Environment variables. Add an environment variable for JAVA_HOMEand fill the path with /var/jenkins_home/tools/hudson.model.JDK/JDK11/jdk-11.0.1+13.
4.2 Install Maven
We will use Maven 3.6.0, which can be downloaded here. The installation procedure is identical to the JDK installation: download the *.tar.gz file and copy it to jenkins_home/downloads.
Go to Manage Jenkins – Global Tool Configuration and the Maven Installationssection. Click the Add Maven button. By default, the Apache installer is added. We won’t use this one, so delete it and add a Extract *.zip/*.tar.gzinstaller. Fill in the fields according to the screenshot below. The path to the binary archive is file:/var/jenkins_home/downloads/apache-maven-3.6.0-bin.tar.gz. It is important to leave the Label empty; otherwise, the installation of Maven will fail. It is also important to set the Subdirectory to apache-maven-3.6.0; otherwise, the Maven home directory is not set correctly and the mvn executable will not be found.

4.3 Configure Docker
Installation of Docker inside of Docker is not a good idea, see this post. Therefore, we will use the Docker installation of our host and mount the Docker socket of our host to our container. Actually, this is also not a good idea, but for our Jenkins playground, it will be ok, but you should never expose the Docker socket this way for security reasons.
We remove our existing container (this is not harmful because all of our data is persisted on our host machine, we won’t loose any data) and then restart our container with -v /var/run/docker.sock:/var/run/docker.sock.
$ docker rm myjenkins
$ docker run -p 8080:8080 --name myjenkins -v /var/run/docker.sock:/var/run/docker.sock -v jenkins_home:/var/jenkins_home -v jenkins_downloads:/var/jenkins_home/downloads jenkins/jenkins:lts
In order to make it work, we also had to set the permissions of docker.sockto the jenkins user. By default, it was mounted as root, and therefore, our build would fail because of a Permission Denied error.
Login as root user in the Docker container:
$ docker exec -it -u root myjenkinsCheck the permissions of docker.sock, which shows us that it is owned by root:
$ ls -l /var/run/docker.sock
srw-rw---- 1 root 999 0 Jan 6 11:45 /var/run/docker.sock
Make jenkins the new owner and list the permissions again:
$ chown jenkins: /var/run/docker.sock
$ ls -l /var/run/docker.sock
srw-rw---- 1 jenkins jenkins 0 Jan 6 11:45 /var/run/docker.sock
Now, jenkins is the owner and we won’t get a Permission Denied error again.
In order to push our Docker image to the Docker registry, we need to make the credentials available to Maven via the settings.xml. We can easily provide a settings.xml by means of the Config File Provider Plugin. Go to Manage Jenkins – Manage plugins and install the plugin (Install without restart).
Go to Manage Jenkins – Managed files and click Add a new Config. Create a Global Maven settings.xml and add the following section with your DockerHub account credentials:
<servers>
  <server>
    <id>docker.io</id>
    <username>docker_username</username>
    <password>docker_password</password>
  </server>
</servers>
5. Create the Build Job
Last thing to do is to create our build job. Go to the Jenkins CI homepage and click New Item. We will name our build job MyKubernetesPlanet and choose a Freestyle Project.
In the Configure section of our build job, we go to the Source Code Management section and fill in the Git URL https://github.com/mydeveloperplanet/mykubernetesplanet.git and branch */feature/jenkinsci.

In the Build section, we add a build step Invoke top-level Maven targets. We will invoke the following Maven targets to build our application and to push the Docker image to our Docker registry:
$ clean install dockerfile:pushWe also need to set the Maven Version and Global Settings file we created before.

Manually, start the build for our job which will create our jar file, create our Docker image, and push it to the Docker registry.
6. Conclusion
In this post, we provided a quick way for having a running instance of Jenkins, including a build job that executes the Maven build, creates a Docker image, and pushes it to a Docker registry. Beware that this is not a secure way, but for experimenting cases, there is no much harm to it. We now have a fully up and running Jenkins instance, which we can use for testing new Jenkins plugins.
Published at DZone with permission of Gunter Rotsaert, DZone MVB. See the original article here.
Opinions expressed by DZone contributors are their own.

Comments