Securing Spring Boot Microservices with JSON Web Tokens (JWT)
This article demonstrates how JWTs can be used for securing access to Java microservices built with Spring Boot.
Join the DZone community and get the full member experience.
Join For FreeAbstract
I have become a fan of JSON web tokens (JWTs) ever since I have found out that these can offer nifty solutions for complex distributed access control requirements.
Over the past five years, I used JWTs, either independently or in association with other security solutions like SAML, or OpenID Connect to secure many distributed web applications.
In this article, I would like to demonstrate how JWTs can be used for securing access to Java microservices built with Spring Boot.
Table of Contents
- Real-world analogy of token-based authorization
- Technical overview of JWT based authorization
- Workshop: Single Sign-On for Spring Boot Microservices with JWT
- Study of source code
- Conclusion
- References
Real-World Analogy of Token-Based Authorization
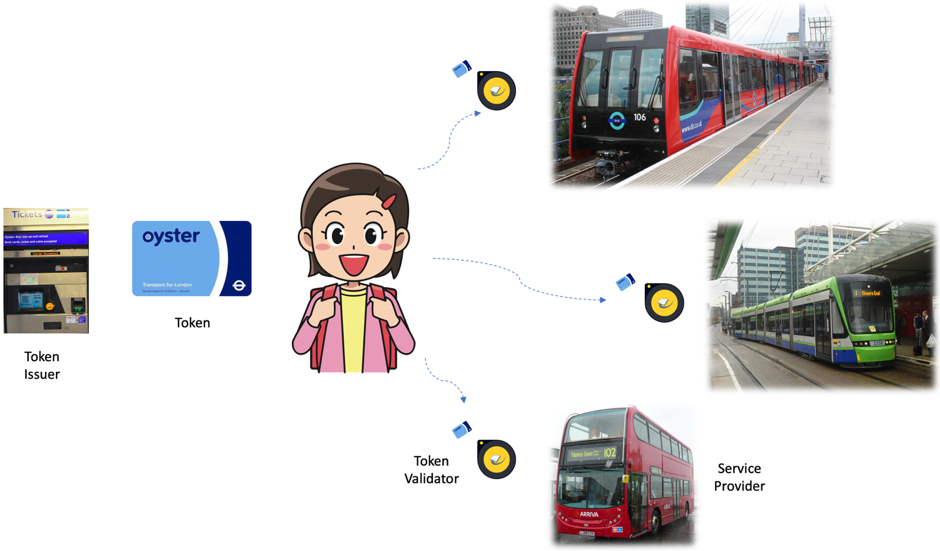
I would like to cite my favorite public transport system, London's, to describe JSON Web Tokens! The system provides a simple, seamless, and user-friendly journey authorization experience for millions of people who use multiple modes of transport – train, tram, bus, ferry (not shown in the picture, to avoid overflowing)!
Customers can use all these modes with just one travel card. A travel card is purchased or recharged at the vending machine. The card is always carried by the customer, who just taps the card at the entry gate to use the ride.
JWT-based authorization for digital applications works similarly. A JWT is like a travel card. Applications (service providers) are like the different modes of transport. The vending machine that sells travel cards is like the JWT Token Issuer.
You may also enjoy: JWT Token: Lightweight, Token-Based Authentication
Technical Overview of JWT-Based Authorization
Like the real-world analogy explained above, JWT authorization involves three entities and four steps, as described in the sequence diagram below:
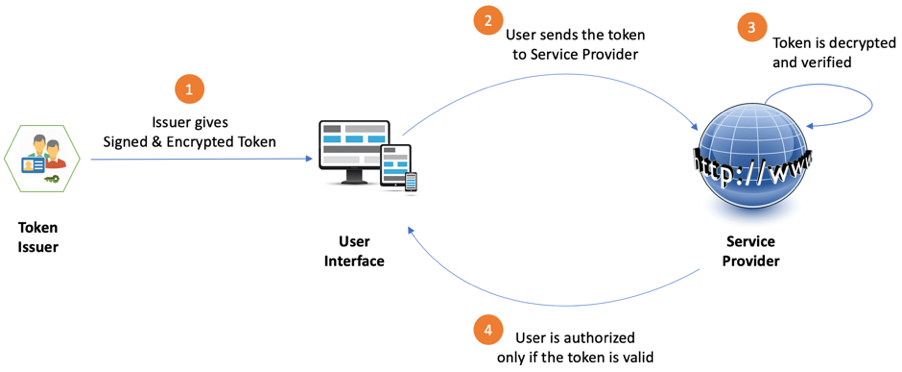
Entities in JWT Authorization Flow
- Token Issuer – The issuer of the token (Identity and Access management system)
- User Interface – The user’s browser or mobile app
- Service Provider – The web site or app that the user wants to access
Steps in JWT Authorization
Step 1: Token Issuer Gives a Signed & Encrypted Token to User Interface
The user authenticates to Token Issuer using some login method and asks the Token Issuer to grant a token. Upon success authentication, the Token Issuer creates a JSON Web token (JWT) which has the following structure:
Header.Payload. Signature
More information on JWT structure can be found at https://jwt.io/
The payload part of the token contains key-value pairs called claims that provide information on who the user is and what the user is allowed to access. The Token Issuer creates a token with some claims and sends the token to user. Once the token is created and given to the user, the responsibility of using the token to gain access to service lies entirely with the user. The user is required to submit the token to the service provider, in order to obtain access.
As the responsibility of carrying the token is being given to the user, the following security concerns must be addressed:
- Concern #1: What if the sensitive data in the token gets tapped by an eavesdropper?
- Concern #2: What if the token is tampered to request services meant for other users?
The well-known RSA public key cryptography comes in handy to tackle these issues. The Token Issuer applies signature and encryption as follows:
- Token Issuer signs the token with its private key and creates JWS (JWT – Signed).
- Token Issuer then encrypts the JWS with the public key of the Service Provider. The ncrypted JWS is called JWE (JWT – encrypted).
Only the signed and encrypted token (JWE) is passed over to the user interface.
The user can only carry the JWE but cannot decrypt it. Only the Service Provider can decrypt the token and see the claims contained in it. Any tampering of token will also be detected by the Service Provider, as the token is signed by Token Issuer.
JWE is embedded as an Authorization header in the HTTP response sent to the client.
The authorization header appears as follows:
xxxxxxxxxx
Authorization: Bearer encrypted-json-web-token-text
Step 2: User Interface Sends Token Along With Request to Service Provider
The user interface attaches the JWE as an Authorization Header to the HTTP request that it submits to the Service Provider.
Step 3: Service Provider Validates the Token
On receiving a request from user, the Service provider performs the following sequence of validations:
- Does the request have a token?
- Can the token be decrypted?
- Was the token content tampered with?
- Is the token valid?
- What are the claims inside the token?
At the end of validation, the Service Provider extracts the payload from the JWT and finds out the claims.
Here is an example of a JWT payload that the Service provider extracts from the JWE.
xxxxxxxxxx
{
"iss": "token-provider-name",
"aud": "service-provider-name",
"iat": 1516227022,
"exp": 1516239022,
"jti": "unique-id-or-nonce",
"username": "John Doe",
"account": "123-456-789"
}
Claims found in the above payload:
Claim |
Description |
iss |
The issuer of token (Token Issuer) |
aud |
Audience (The Service Provider that the token is meant for) |
iat |
Issued-at (Time at which the token was issued) |
exp |
Expiry (Time at which the token expires) |
jti |
JWT Token ID (A unique ID or randomly generated nonce) |
username |
User name |
account |
Account number of the user |
Step 4: Service Provider Responds to User Interface
Service Provider gives the appropriate response to the user interface, based on the token and the claims.
Workshop: Single Sign-on for Spring Boot Microservices With JWT
Let us now use JSON web tokens to implement single sign-on for Spring Boot microservices. The full source code for this workshop is at https://github.com/deargopinath/jwt-spring-boot
Technologies used: Java, Spring Boot, JWT, Nimbus JOSE, JavaScript, CSS, HTML
The single sign-on solution has two parts:
- token-issuer – Code for creating signed and encrypted JWT
- service-provider – Code for decrypting token and authorizing user with valid token
Steps to Run the code
Step 1: Compile and Run service-provider
xxxxxxxxxx
$ cd service-provider
$ mvn clean install
$ java -jar target/service-provider-1.0.0.jar
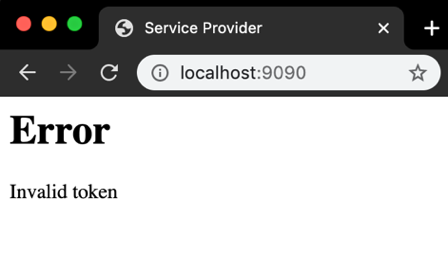
Step 2: Open Service Provider and verify that an error message (Invalid token) is displayed
Step 3: Compile & Run token-issuer in A New Command Window
xxxxxxxxxx
$ cd token-issuer
$ mvn clean install
$ java -jar target/token-issuer-1.0.0.jar
Step 4: Open the Token Issuer and get a token to access the Service Provider
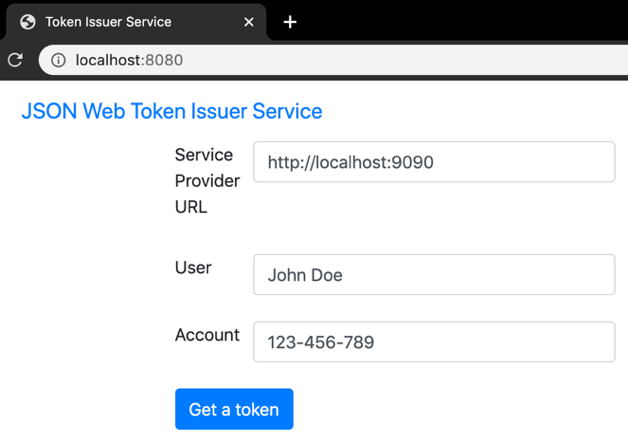
Fill in the token form with relevant details (Service provider URL, User name, Account number) and click "Get a token" button to get a signed and encrypted token.
Step 5: Login to Service Provider using the token. Verify that the Service Provider allows the user with a valid token

Clicking on "Service Provider Login with Token" button sends token to the Service Provider.
The token will be embedded in the "Authorization Header" of the HTTP request.
Response from Service Provider appears in a new Tab.
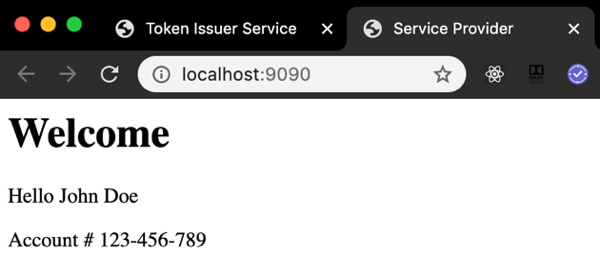
Service Provider decrypts the token, verifies the signature and then shows the welcome page for the user with valid token. Name and Account number shown by Service Provider are extracted from the encrypted token.
Study of The Source Code
Now. Let us study the source code to see what is happening under the hood.
Token Issuer
Project is structured as shown in the picture below:

Let us study the code from these two files to understand the functionality of the application.
1. TokenService.java
This program creates the JSON Web Token, signs it with the Private key of the Token Issuer and then encrypts it with the Public Key of Service Provider.
Signing with Issuer’s Private key protects Data Integrity.
Encrypting with Service Provider’s Public key protects confidentiality.
xxxxxxxxxx
public String getToken(RequestData requestData) {
String token = "unknown";
try {
String subject = requestData.getSubject();
String user = requestData.getUser();
String account = requestData.getAccount();
LOG.info("user = " + user + ", account = " + account + ", subject = " + subject);
RSAKey serverJWK = getJSONWebKey(serverPKCS);
// Set the token header
JWSHeader jwtHeader = new JWSHeader.Builder(JWSAlgorithm.RS256).jwk(serverJWK).build();
Calendar now = Calendar.getInstance();
Date issueTime = now.getTime();
now.add(Calendar.MINUTE, 10);
Date expiryTime = now.getTime();
String jti = String.valueOf(issueTime.getTime());
// Set the token payload
JWTClaimsSet jwtClaims = new JWTClaimsSet.Builder()
.issuer(issuer)
.subject(subject)
.issueTime(issueTime)
.expirationTime(expiryTime)
.claim("user", user)
.claim("account", account)
.jwtID(jti)
.build();
LOG.info("JWT claims = " + jwtClaims.toString());
// Sign the token with Issuer’s Private Key
SignedJWT jws = new SignedJWT(jwtHeader, jwtClaims);
RSASSASigner signer = new RSASSASigner(serverJWK);
jws.sign(signer);
JWEHeader jweHeader = new JWEHeader.Builder(JWEAlgorithm.RSA_OAEP_256,
EncryptionMethod.A256GCM).contentType("JWT").build();
JWEObject jwe = new JWEObject(jweHeader, new Payload(jws));
// Encrypt signed token with Service Provider’s public key
RSAKey clientPublicKey = getPublicKey(clientCertificate);
jwe.encrypt(new RSAEncrypter(clientPublicKey));
token = jwe.serialize();
LOG.info("Token = " + token);
} catch (final JOSEException e) {
LOG.error(e.toString());
}
return token;
}
}
2. TokenController.java
This program sends the signed and encrypted token to User.
The token is embedded as the "Authorization Header" of the HTTP response sent to the user. The user will then pick the token from the Authorization Header and send it to Service Provider.
("/api/jwe")
public ResponseEntity<?> getToken( final RequestData requestData, final Errors errors) {
if (errors.hasErrors()) {
String errorMessage = errors
.getAllErrors()
.stream()
.map(x -> x.getDefaultMessage())
.collect(Collectors.joining(","));
LOG.error("Error = " + errorMessage);
return ResponseEntity.badRequest().body(errorMessage);
}
String subject = requestData.getSubject();
String jwe = tokenService.getToken(requestData);
String json = ("{\"subject\":\"" + subject
+ "\",\"token\":\"" + jwe + "\"}");
LOG.info("Token generated for " + subject);
final HttpHeaders headers = new HttpHeaders();
headers.add("Authorization", "Bearer " + jwe);
LOG.info("Authorization Header set with token");
return (new ResponseEntity<>(json, headers, HttpStatus.OK));
}
Service Provider
The project is structured as shown in the picture below:
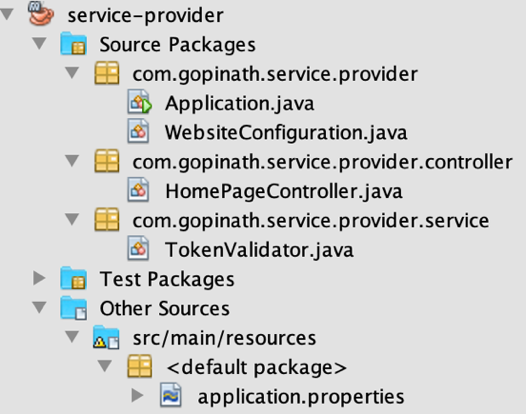
Let us study these two files to understand the functionality of the application.
1. WebsiteConfiguration.java
This program configures cross-origin access control to allow users from Token Issuer’s domain to submit requests to Service Provider domain.
xxxxxxxxxx
public class WebsiteConfiguration implements WebMvcConfigurer {
("${token.issuer.url}")
private String tokenIssuer;
public void addCorsMappings(CorsRegistry registry) {
registry.addMapping("/**").allowedOrigins(tokenIssuer);
}
}
2. TokenValidator.java
This program extracts the token from the Authorization Header, decrypts it and validates it.
xxxxxxxxxx
public boolean isValid(HttpServletRequest request) {
Enumeration<String> headers = request.getHeaderNames();
// Extract the encrypted token (JWE) form the Authorization Header
while(headers.hasMoreElements()) {
String key = headers.nextElement();
if(key.trim().equalsIgnoreCase("Authorization")) {
String authorizationHeader = request.getHeader(key);
if(!authorizationHeader.isBlank()) {
String[] tokenData = authorizationHeader.split(" ");
if(tokenData.length == 2 &&
tokenData[0].trim().equalsIgnoreCase("Bearer")) {
token = tokenData[1];
LOG.info("Received token: " + token);
break;
}
}
}
}
try {
JWT jwt = JWTParser.parse(token);
// Decrypt JWE into Signed JWT (JWS)
if(jwt instanceof EncryptedJWT) {
EncryptedJWT jwe = (EncryptedJWT) jwt;
RSAKey clientJWK = getJSONWebKey(clientPKCS);
JWEDecrypter decrypter = new RSADecrypter(clientJWK);
jwe.decrypt(decrypter);
SignedJWT jws = jwe.getPayload().toSignedJWT();
// Verify the signature of JWS
RSAKey serverJWK = getPublicKey(serverCertificate);
RSASSAVerifier signVerifier = new RSASSAVerifier(serverJWK);
if(jws.verify(signVerifier)) {
// Extract the payload (claims) of JWT
JWTClaimsSet claims = jws.getJWTClaimsSet();
Date expiryTime = claims.getExpirationTime();
LOG.info("Expiry time = " + expiryTime.toString());
if(expiryTime.after(new Date())) {
user = claims.getStringClaim("user");
account = claims.getStringClaim("account");
LOG.info("Token validated for user = " + user
+ ", account = " + account);
return true;
}
}
}
} catch(ParseException | JOSEException ex) {
LOG.error(ex.toString());
}
return false;
}
Conclusion
JSON Web Token (JWT) is used in modern Internet-scale authentication solutions like OpenID Connect and several commercial Identity and access management tools. This article explains a simple, scalable and secure method for authorizing microservices with JSON Web Tokens.
References
- JSON Web Token (JWT)
- Nimbus JOSE for secure JWTs
- Spring Boot
- NetBeans IDE for developing Java Microservices
Further Reading
Opinions expressed by DZone contributors are their own.

Comments