Securing REST APIs With Nest.js: A Step-by-Step Guide
Learn to set up and secure a REST API with Nest.js. This guide covers user authentication, JWT management, and API security best practices.
Join the DZone community and get the full member experience.
Join For FreeThis guide walks you through setting up a secure REST API using Nest.js in Node.js. We'll create a login system with JWTs and implement best practices for token management and API security.
Setting Up Nest.js
Prerequisites: Node.js installed.
- Installation:
npm i -g @nestjs/cli- Creating a New Project:
nest new nestjs-secure-apiBuilding a Login API
Creating a User Module: Generate the module, controller, and service:
cd nestjs-secure-api
nest generate module users
nest generate controller users
nest generate service users- User Authentication with Passport.js: Install necessary packages:
npm install @nestjs/passport passport passport-local
npm install @nestjs/jwt passport-jwt
npm install @types/passport-local @types/passport-jwt --save-dev
npm install class-validator bcrypt express-rate-limit
In users.service.ts, implement the JWT strategy and authentication logic. (For brevity, this example assumes you have user retrieval and verification logic):
import { Injectable } from '@nestjs/common';
import * as bcrypt from 'bcrypt';

export type User = any;

@Injectable()
export class UsersService {
  private readonly users: User[];

  constructor() {
    this.users = [];
  }

  async findOne(username: string): Promise<User | undefined> {
    return this.users.find(user => user.username === username);
  }

  async create(username: string, pass: string): Promise<void> {
    const hashedPassword = await bcrypt.hash(pass, 10);
    this.users.push({ username, password: hashedPassword });
    console.log(`User is created with usernam ${username} and encrypted password ${hashedPassword}`)
  }
}
- Creating Login and Registration Endpoints:
Inusers.controller.ts:
import { Controller, Post, Body, BadRequestException } from '@nestjs/common';
import { UsersService } from './users.service';
import { AuthService } from './auth.service';
import * as bcrypt from 'bcrypt';
import { CreateUserDto } from './create-user.dto';

@Controller('users')
export class UsersController {
  constructor(
    private usersService: UsersService,
    private authService: AuthService
  ) {}

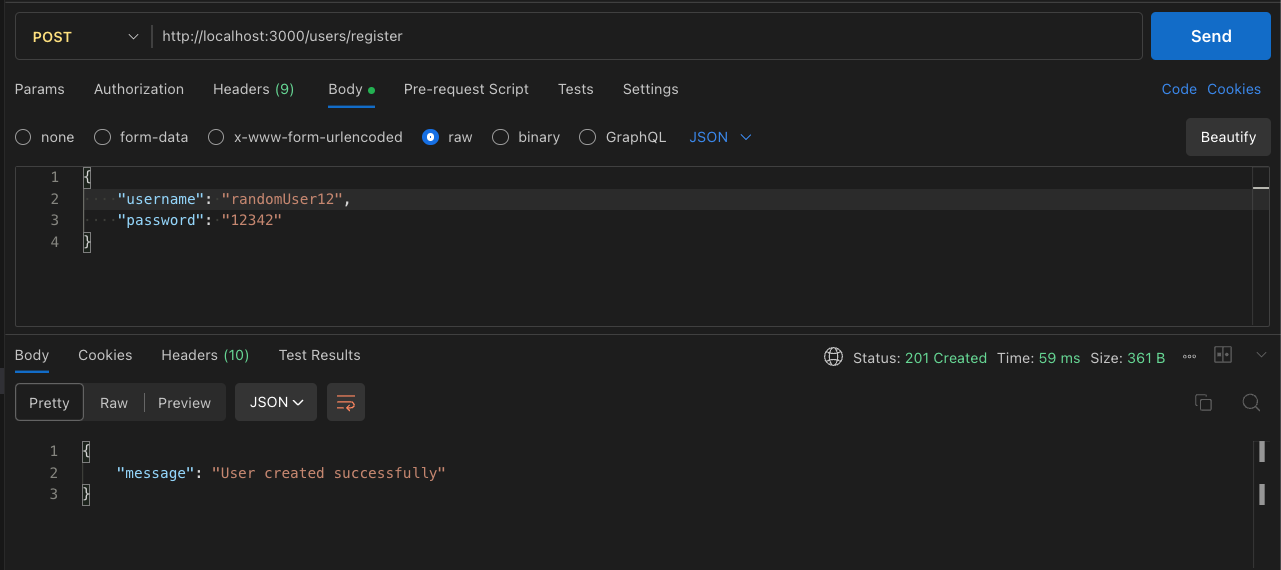
  @Post('register')
  async register(@Body() body: CreateUserDto) {
    const { username, password } = body;
    const userExists = await this.usersService.findOne(username);
    if (userExists) {
      throw new BadRequestException('Username already exists');
    }
    await this.usersService.create(username, password);
    return { message: 'User created successfully' };
  }

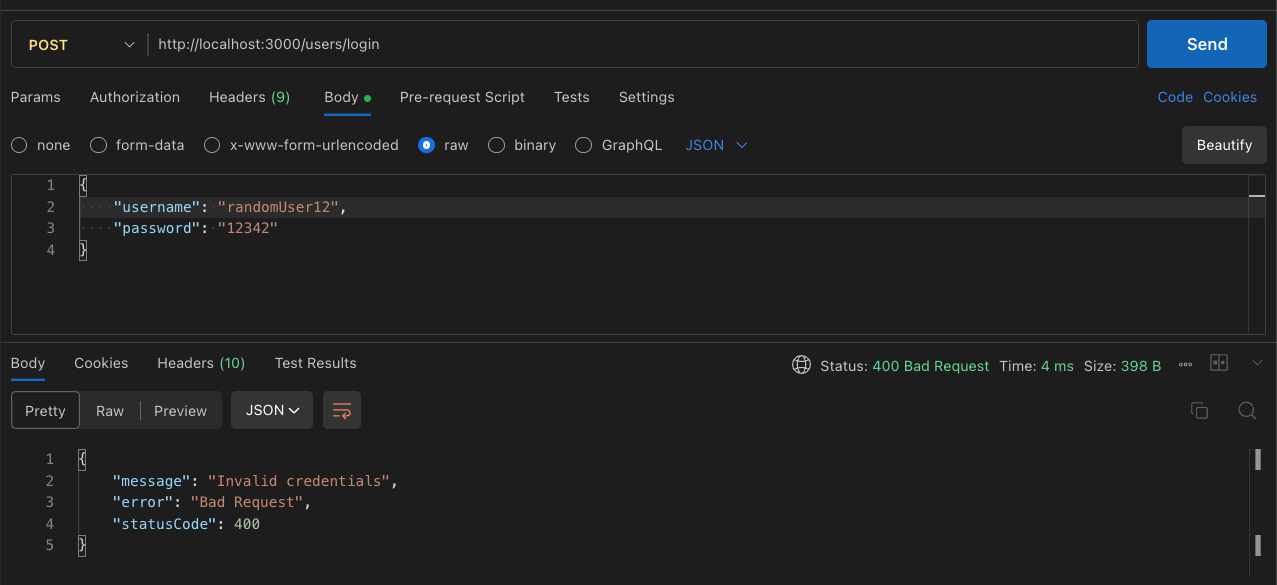
  @Post('login')
  async login(@Body()  body: CreateUserDto) {
    const { username, password } = body;
    const user = await this.usersService.findOne(username);
    if (!user) {
      throw new BadRequestException('Invalid credentials');
    }
    const isMatch = await bcrypt.compare(password, user.password);
    if (!isMatch) {
      throw new BadRequestException('Invalid credentials');
    }
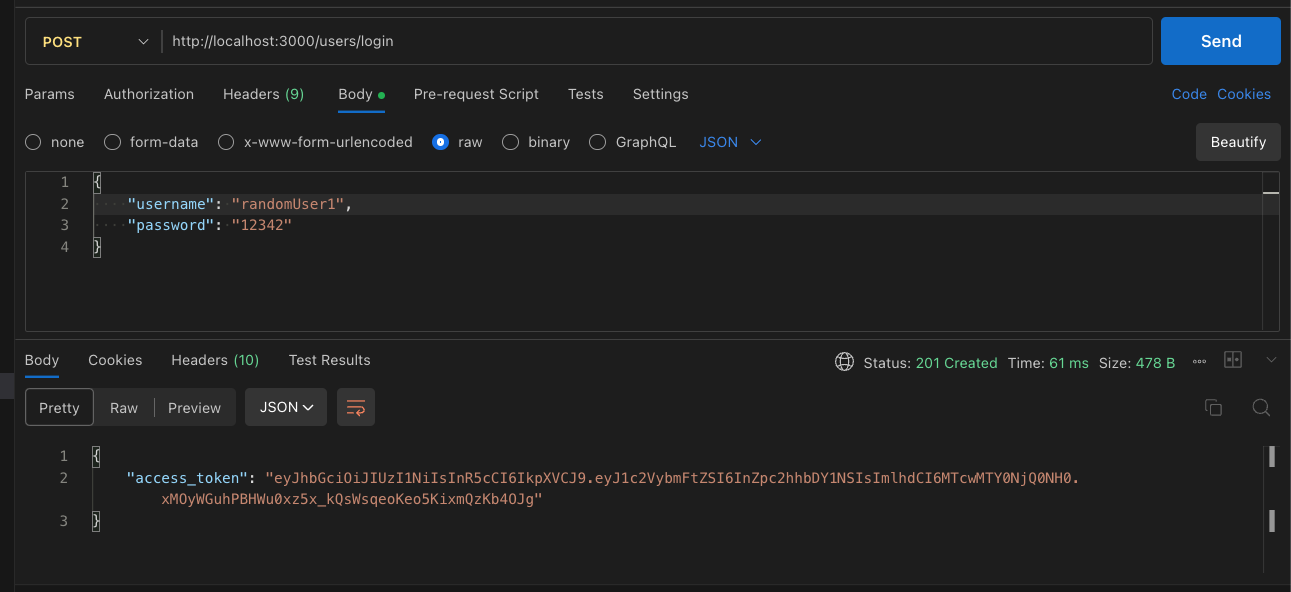
    const jwtToken = this.authService.login(user);
    console.log(`User ${username} is succesfully loggedIn.`)
    return jwtToken;
  }
}
- Token Storage and Encryption:
In auth.service.ts, add token hashing:
import { Injectable } from '@nestjs/common';
import { JwtService } from '@nestjs/jwt';

@Injectable()
export class AuthService {
  constructor(
    private jwtService: JwtService
  ) {}

  async login(user: any) {
    const payload = { username: user.username, sub: user.userId };
    return {
      // for now secret is set as 'secret' it should be env variable but to make things simple I'm adding a string here.
      access_token: this.jwtService.sign(payload, { secret: `${process.env.JWT_SECRET}` || 'secret' }),
    };
  }
}
- Token Security Best Practices: Ensure you use HTTPS. Implement token expiration and refresh tokens.
Securing the API
- LoggerMiddleware: In
logger.middleware.tsimplement the logging middleware:
import { Injectable, NestMiddleware } from '@nestjs/common';
import { Request, Response, NextFunction } from 'express';

@Injectable()
export class LoggerMiddleware implements NestMiddleware {
  use(req: Request, res: Response, next: NextFunction) {
    console.log(`[${new Date().toISOString()}] ${req.method} ${req.originalUrl}`);
    next();
  }
}
- Middleware and Guards: In
app.module.ts, implement middleware for request logging:
import { MiddlewareConsumer, Module } from '@nestjs/common';
import { AppController } from './app.controller';
import { AppService } from './app.service';
import { UsersModule } from './users/users.module';
import { LoggerMiddleware } from './logger.middleware';

@Module({
  imports: [UsersModule],
  controllers: [AppController],
  providers: [AppService],
})
export class AppModule {
  configure(consumer: MiddlewareConsumer) {
    consumer
      .apply(LoggerMiddleware) // assuming you want to add some some loggerMiddleware then you can add it here
      .forRoutes('*');
  }
}
- Input Validation and Rate Limiting: Use DTOs for input validation. In
create-user.dto.ts:
import { IsNotEmpty, IsString } from 'class-validator';
export class CreateUserDto {
    @IsNotEmpty()
    @IsString()
    username: string;

    @IsNotEmpty()
    @IsString()
    password: string;
  }
- Set up rate limits in
main.ts:
import * as rateLimit from 'express-rate-limit';
import { NestFactory } from '@nestjs/core';
import { AppModule } from './app.module';

async function bootstrap() {
  const app = await NestFactory.create(AppModule);
  app.use(rateLimit({
    windowMs: 15 * 60 * 1000, // 15 minutes
    max: 100, // limit each IP to 100 requests per windowMs
  }));
  await app.listen(3000);
}
bootstrap();
Conclusion
This guide has covered the essentials of setting up a secure REST API with Nest.js, from user authentication to token management and rate limiting. Following these steps will give you a robust foundation for building secure, scalable web applications.
Running the Application
To run the application, execute:
npm run startAccess the API at http://localhost:3000/
Example of API validation:


The complete code is available in the GitHub repository.
Note: This article provides a starting framework. Additional security measures and functionalities may be necessary depending on your application's specific needs. Keep your dependencies updated and regularly review your security practices.
Opinions expressed by DZone contributors are their own.

Comments