Running Spring Boot Application With Embedded Camunda Engine
In this article, see how to set up a Spring Boot application with embedded Camunda engine and Camunda BPM Initializr.
Join the DZone community and get the full member experience.
Join For FreeThis article was originally published in May 2020.
I'm sure you're familiar with Camunda BPM or any other BPMN tools. In this article, we are going to have a quick look at how to set up a Spring Boot application with Embedded Camunda Engine. To achieve this, I am going to get help from Camunda BPM Initializr, which is a web-based tool to generate Spring Boot applications integrated with Camunda engine capabilities.
Prerequisites
- Eclipse (any version) with Maven capabilities
- Java 8+
Creating a Simple Spring Boot Project With Camunda Engine
1. Click on the link: Camunda BPM Initializr
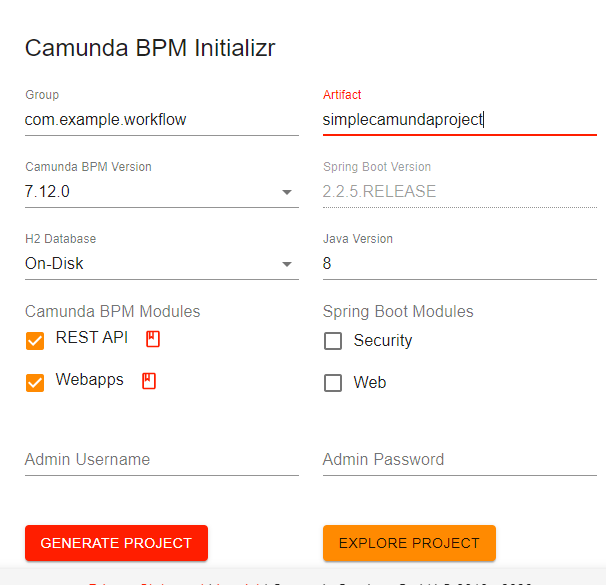
Explanation:
- Group: Fill a groupId for the project of your choice.
- Artifact: Fill artifactId for the project of your choice.
- Camunda BPM Version: Next, need to choose Camunda BPM Version from drop-down where multiple Camunda BPM versions are listed. For more details click Camunda BPM Versions.
- H2 Database: For the supported H2 Database, there are two different options given. Know more about H2 Database and Spring Boot by clicking here.
- Java Version: Choose Java version from the drop-down. For now, choose Java 8.
- Camunda BPM Modules: Camunda BPM Modules can be added if there is a need to add Camunda REST APIs or Camunda Webapps support in the application.
- Spring Boot Modules: Additional Spring modules can be added.
- Further, username and password can be set, which is required for example using a Camunda cockpit application login.
- After filling the details, you can explore the project using "Explore Project" Option.
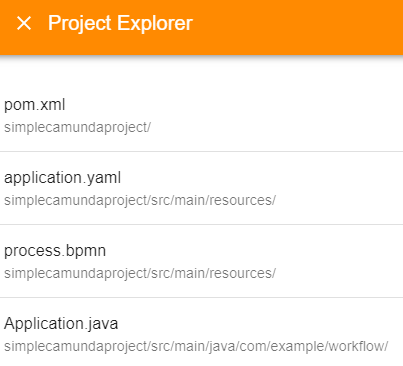
- Finally, click on "Generate Project" and download the {{artifactname}}.zip and extract it in your local workspace.
2. Use Eclipse IDE to run the project.
- Import the extracted project in Eclipse IDE as "Existing Maven Project"
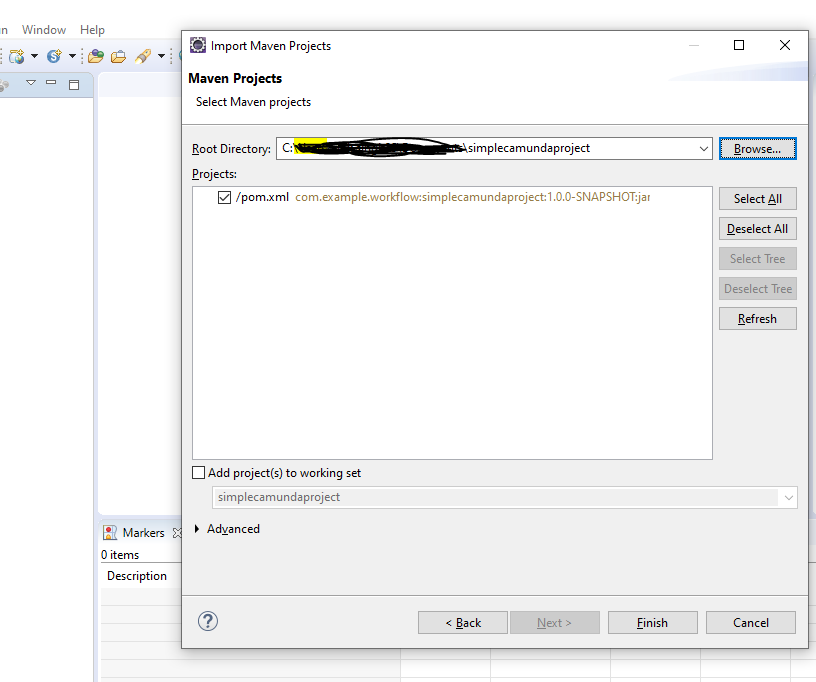
Click on Finish. The project directory can be found below.
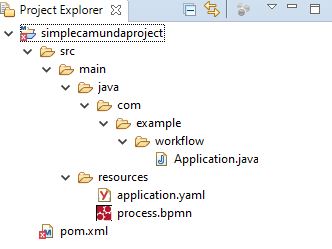
- The project consists of files such as:
- Application.java: To run the Spring Boot application
- process.bpmn: Simple workflow diagram which will run later in the section
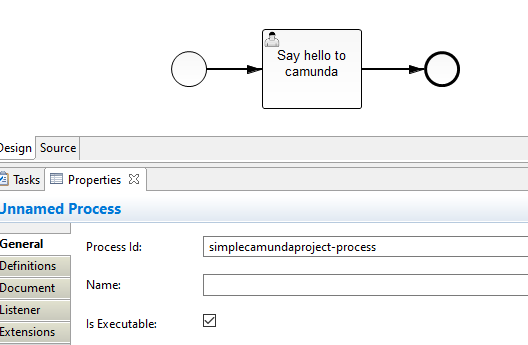
- application.yaml: Configuration file. Here, add the below additional properties, which will be later useful to see the schema generated by Camunda Engine.
- spring.datasource.url: jdbc:h2:file:./camunda-h2-database
- spring.h2.console.enabled: true
- pom.xml: Consists of all the dependencies required to run the application. Add one additional dependency, which will be useful later to see the Camunda schema as below.
xxxxxxxxxx
<dependency>
<groupId>org.springframework.boot</groupId>
<artifactId>spring-boot-starter-data-jpa</artifactId>
</dependency>
- Select project and right-click -> Run As -> Maven Install.

- After a successful build, open Application.java and right-click -> Run As -> Java Application.

3. Starting process.bpmn using Camunda cockpit and tasklist web-apps.
- Open browser and enter URL http://localhost:8080/.

- Enter username/password and welcome to access the Camunda web apps. W are going to use Cockpit and Tasklist mainly for this tutorial.

- Click on Cockpit to see the number of processes deployed automatically when Spring Boot app is started.


- Click on the deployed process to see the deployed process diagram.

- Click on tasklist webapp (ref Section 3.b).

- Click on "start process" and start the process.
- You can see that one task is appearing in the task list.

- Refresh the Cockpit app to see the running process instance. Note that the process started and is waiting at the user task.
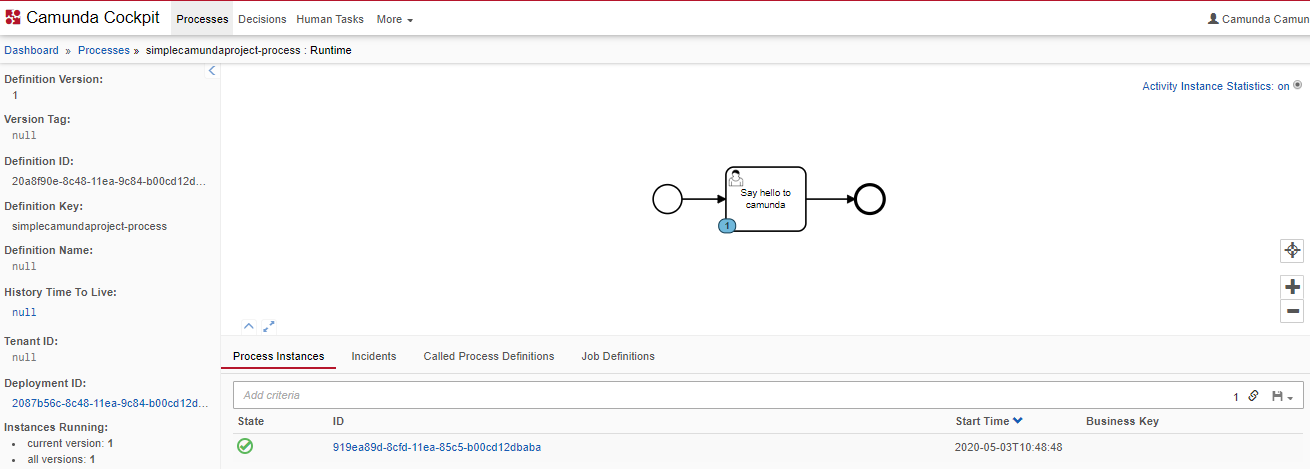
4. Before completing this process, have a look at the database schema and related entries.
- Enter URL http://localhost:8080/h2-console in the browser.
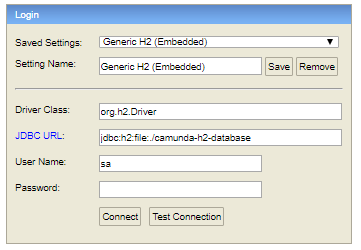
- Enter the JDBC URL and connect to see the Camunda Database where all the tables can be seen.
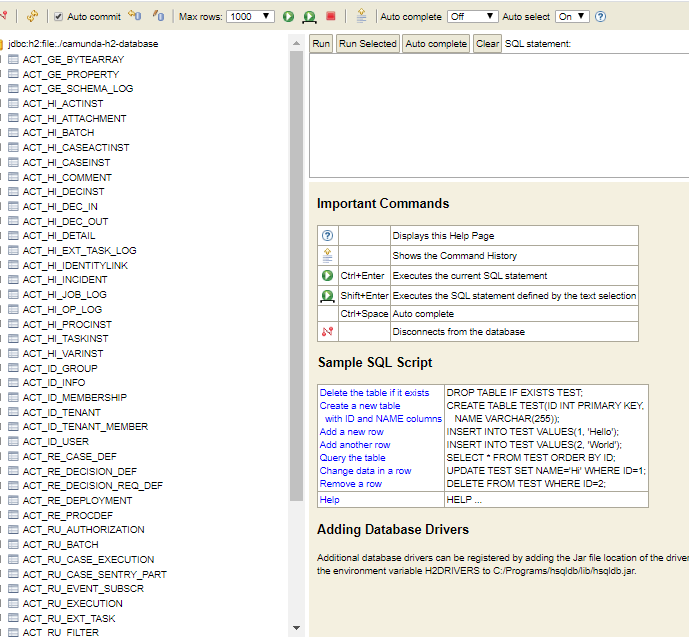
- Have a quick look at a few important tables.
- To check deployment: select * from ACT_RE_DEPLOYMENT
- To check running process: select * from ACT_RE_PROCDEF
- To check running task: select * from ACT_RU_TASK
5. Go to Tasklist and click on the claim and complete the task. Refresh the Cockpit and you can see the running process is completed.
6. Further, check out the below tables to see the history of the executed process and task where all the running tasks and processes are completed and having updated END_TIME_.
- To check the completed process: SELECT * FROM ACT_HI_PROCINST
- To check the completed task: select * from ACT_HI_TASKINST
So, we are able to run the Camunda process using Spring Boot. Further, all Spring Framework lovers can modify the process as per your needs.
Feel free to ask questions.
Opinions expressed by DZone contributors are their own.

Comments