Run Ansible Playbook From Azure DevOps Release Pipeline
Learn how to run the Ansible Playbook from the Azure DevOps tool. This tutorial assumes that the Ansible utility is installed and enabled.
Join the DZone community and get the full member experience.
Join For FreeIn this article, you will learn how to run Ansible Playbook from the Azure DevOps tool. By incorporating Ansible Playbooks into the Azure release pipeline, organizations can achieve streamlined and automated workflows, reducing manual intervention and minimizing the risk of errors. This enhances the efficiency of the release process, accelerates time-to-market, and ensures a standardized and reliable deployment of applications and infrastructure on the Azure platform.
What Is an Ansible Playbook?
An Ansible Playbook is a configuration management and automation tool to define and execute a series of tasks. It is particularly valuable in managing infrastructure as code, ensuring consistency and repeatability in the deployment and configuration of systems. In the context of Azure release pipelines, Ansible Playbooks play a crucial role in automating the deployment and configuration of resources within the Azure environment. They allow for the definition of tasks such as provisioning virtual machines, configuring networking, and installing software components.
This tutorial assumes that the Ansible utility is installed and enabled for your Project in Azure DevOps.
You can download and install the utility from this link, and get it enabled from your Azure DevOps Administrator.
Related: Learn how to schedule pipelines in Azure DevOps.
How to Run Ansible Playbook From Azure DevOps
Step 1: Create New Release Pipeline
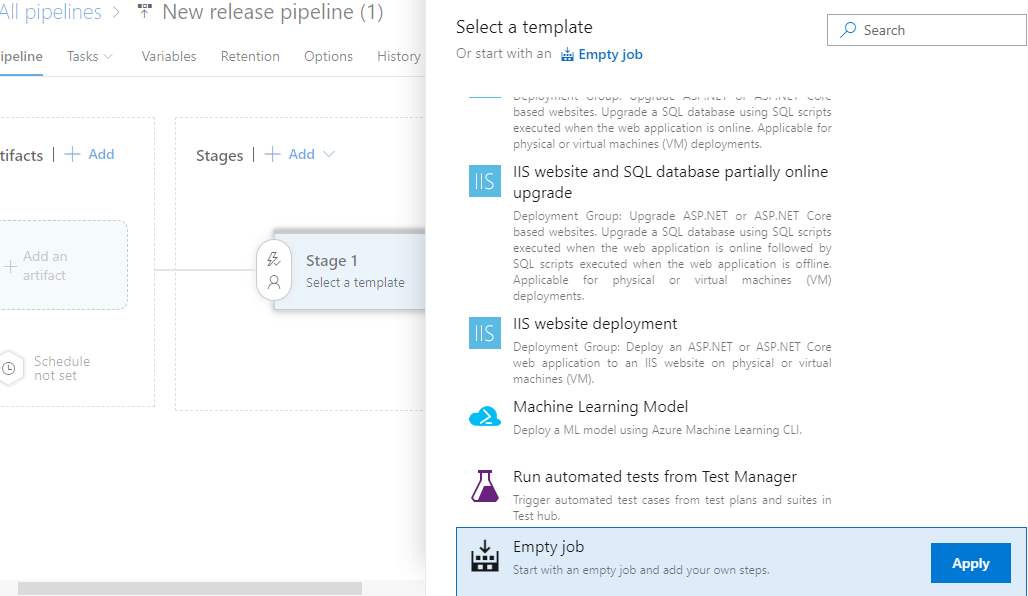
Create a new release pipeline with an empty job.

Step 2: Add Artifacts in Release Pipeline Job
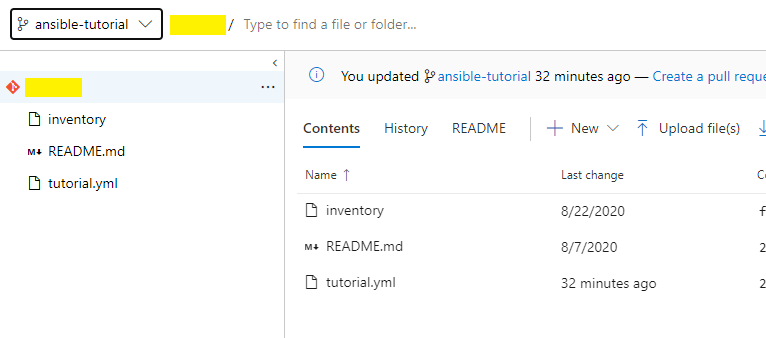
Next, add Azure DevOps in artifacts, as I am using the Azure repository to store our playbook and inventory file. I have already pushed the inventory file and tutorial.yml playbook in my Azure repo branch, ansible-tutorial.
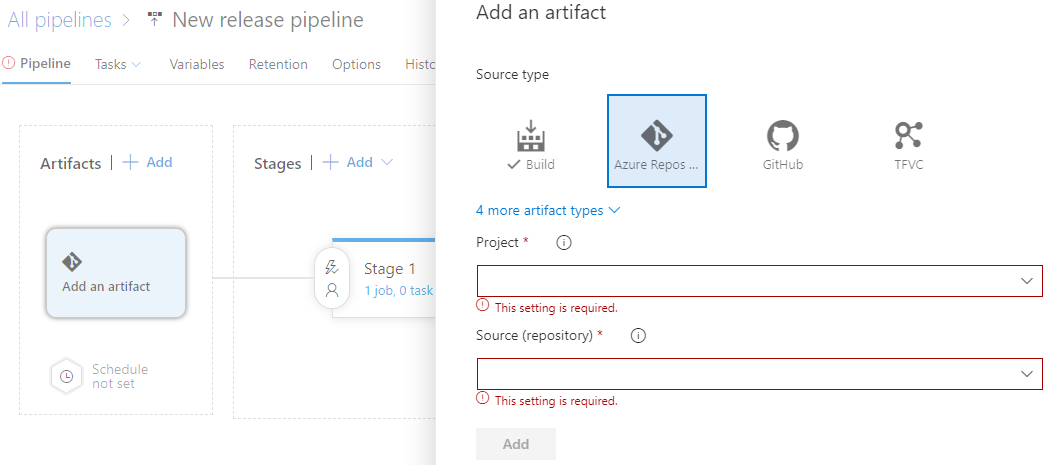
Select your project, repo, and branch to add artifacts in your release pipeline.
xxxxxxxxxx
#tutorial.yml
hosts"{{ host }}"
tasks
namecreate a test file for ansible
shelltouch /tmp/tutorail.yml
Step 3: Upload and Configure Secure Key in Stage 1 for Ansible-Playbook Authentication
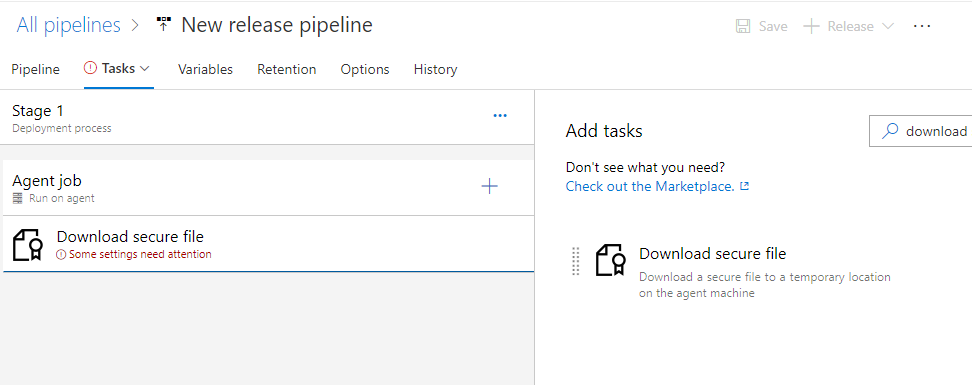
Use the SSH key for authentication on my target machine. To pass the SSH key, I will upload it using the Download Secure file utility available.
Download Secure Utility
This is used for storing secure files in your release pipeline like SSH key, SSL certs, and CA certs. During execution, files are downloaded in a temp folder and their path can be accessed by calling the reference variable (shown below). These files are deleted as the release job is completed.
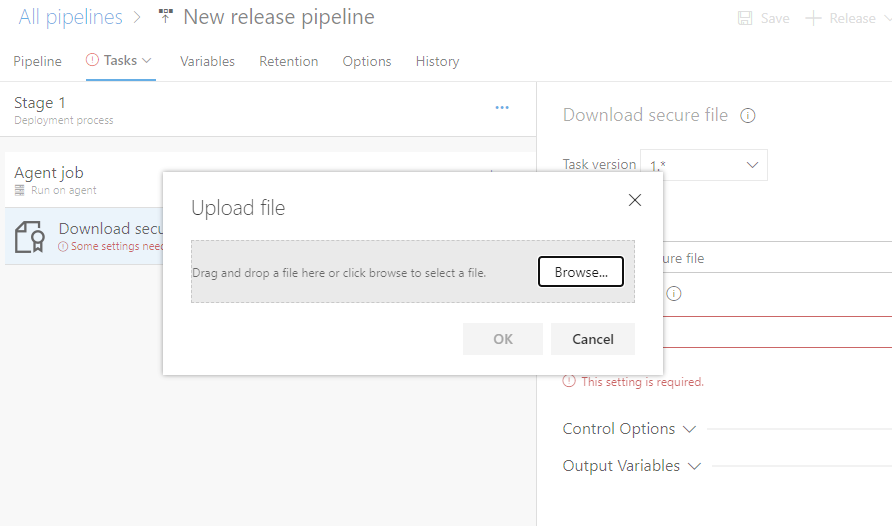
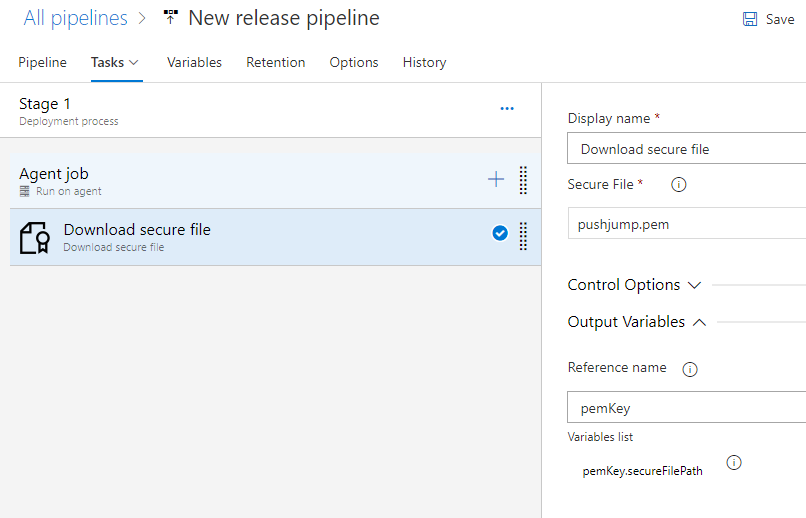
Enter the reference name as shown below. To access the file, use the variable $(<reference name>.secureFilePath).
- Ex:
$(pemKey.SecureFilePath)
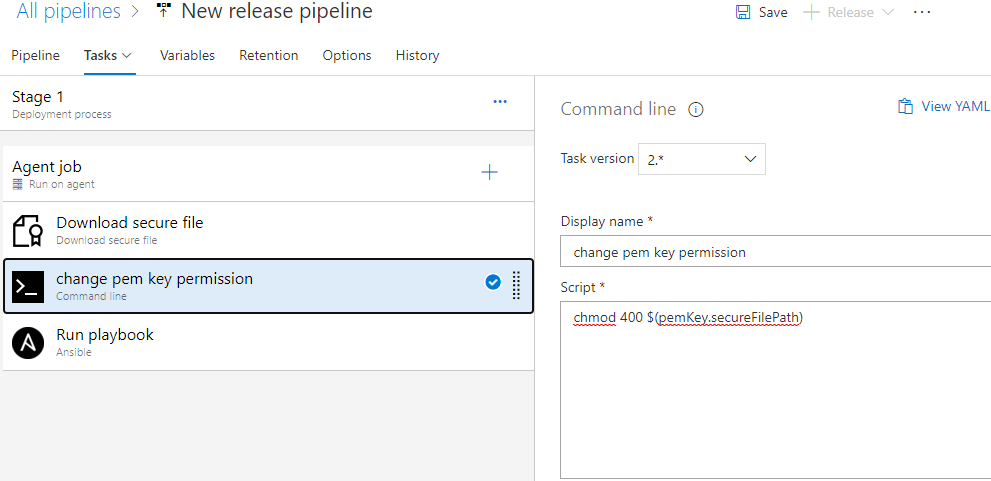
Step 4: Change File Permission
We will add a shell command-line utility to change the file permission to 400 before using it in the playbook.
I have used $(pemKey.secureFilePath) to access the SSH key.
Step 5: Add and Configure the Ansible Task
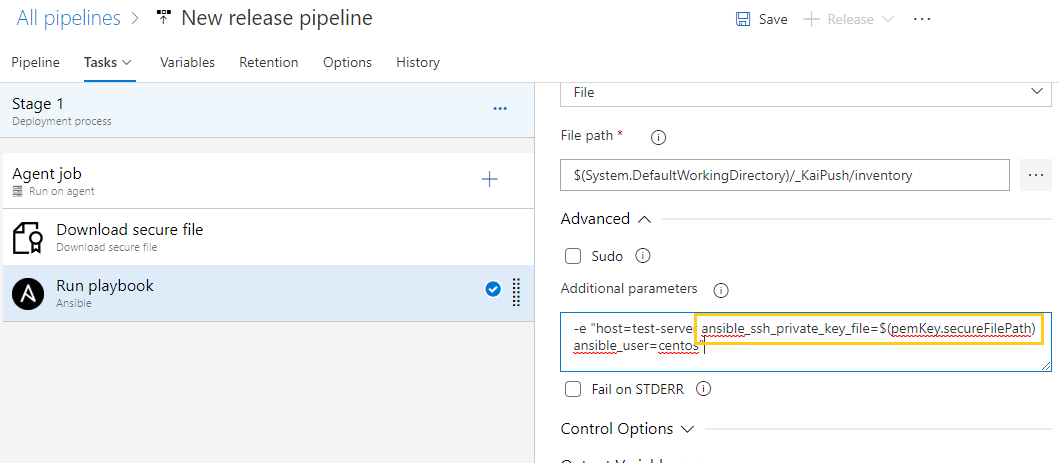
Add the Ansible task and enter the playbook path as shown below. For an inventory, the location selects the file and the file path as shown below.
Use additional parameters to pass a variable to the Ansible playbook.
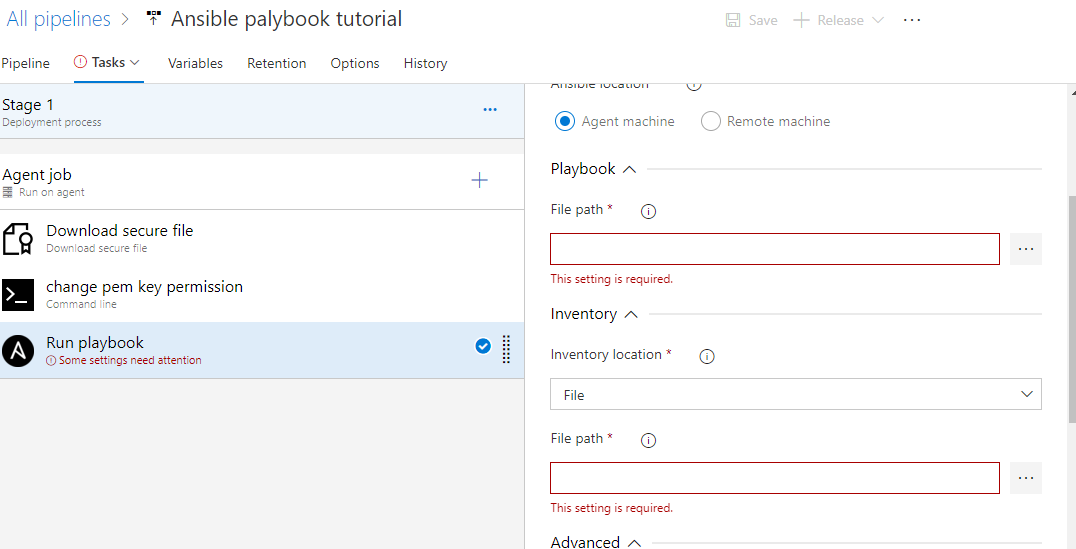
Use additional parameters to pass variables and other command line parameters to the playbook at run time.
To pass the path of the SSH key, I have used ansible_ssh_private_key_file=$(pemKey.secureFilePath).
Also, you can use the variable ansible_ssh_common_args='-o StrictHostKeyChecking=no' to disable the host key checking in your Ansible playbook, if it's failing due to a host key verification error.
Step 6: Save the Release Pipeline and Create a Release To Run the Playbook
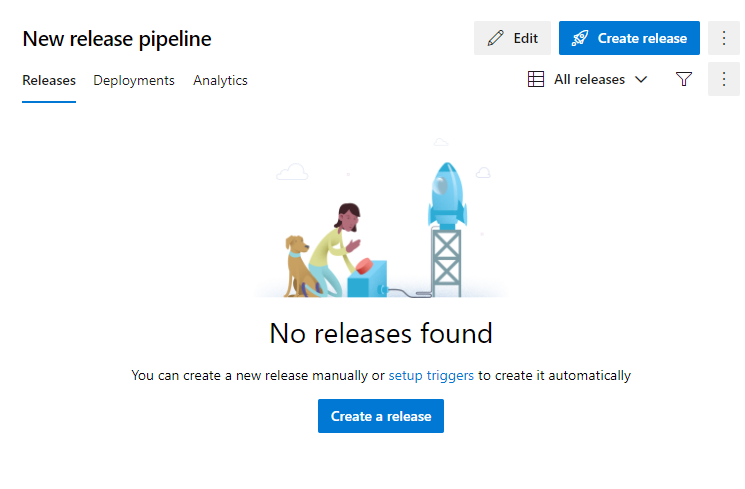
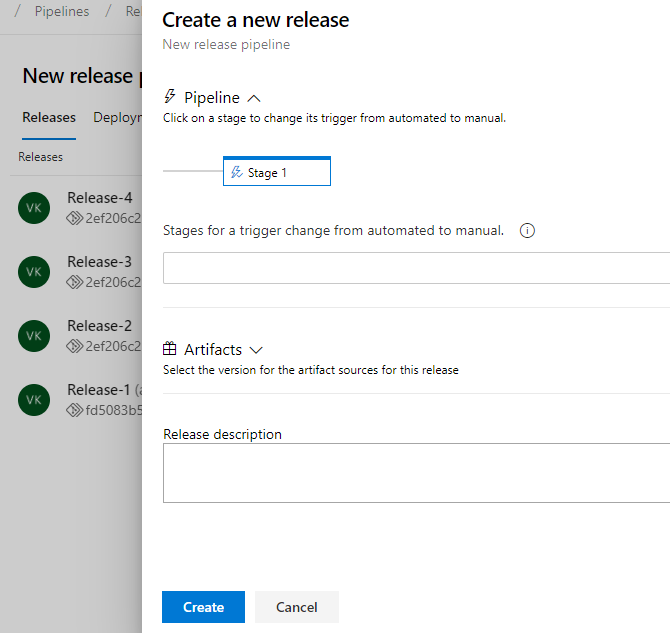
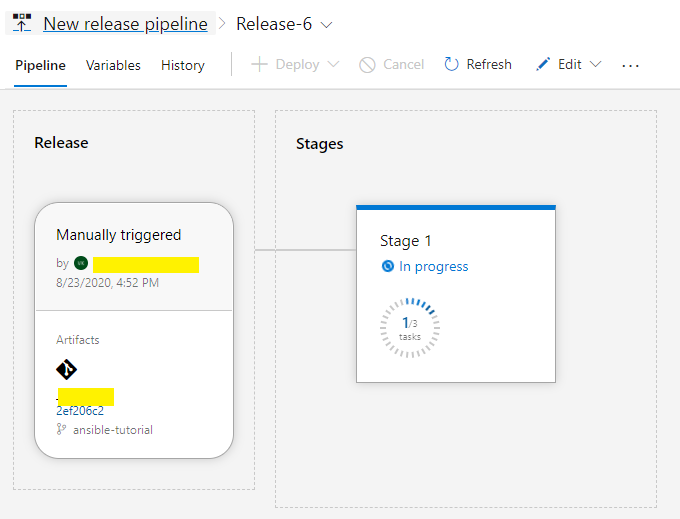
We can see our release completed successfully.

Summary
Ansible playbook ran successfully from Azure DevOps. If you want to use a username and password instead of an SSH key, you can pass the Linux creds using additional parameters using secrets variables so that the creds will be masked, or you can also use a shell command-line utility to set creds in an environment variable and Ansible will read from there.
Opinions expressed by DZone contributors are their own.

Comments