Quick Walk-Through to Develop Micro-Services Using .Net Core 2.X
Time for an upgrade!
Join the DZone community and get the full member experience.
Join For Free
Microservices are getting increasingly popular for the development of new applications or modernizing existing legacy applications. Here, I would focus on how easy it is to develop microservice using Visual Studio IDE in .NET Core 2.2 framework.
I will also show you how to package microservice into a docker container, perform unit tests and test service using a client like Postman.
“AtRisk” is an imaginary microservice that fetches employee risk history details from the Cloud SQL Postgre database.
You may also like: .NET 5 Is the Future of .NET: What Every .Net Developer Must Know
Microservices Boilerplate and More
Visual Studio reduces efforts for Microservices development by generating skeleton code and Dockerfile. Open the Visual Studio IDE and create a new web application project. Select “ASP.NET Core Web Application” as the project framework template. Select the “API” option and in the Advance section select “Enable Docker Support”, “Configure for HTTPS” with no Authentication which will create respective files and Dockerfile into the project.
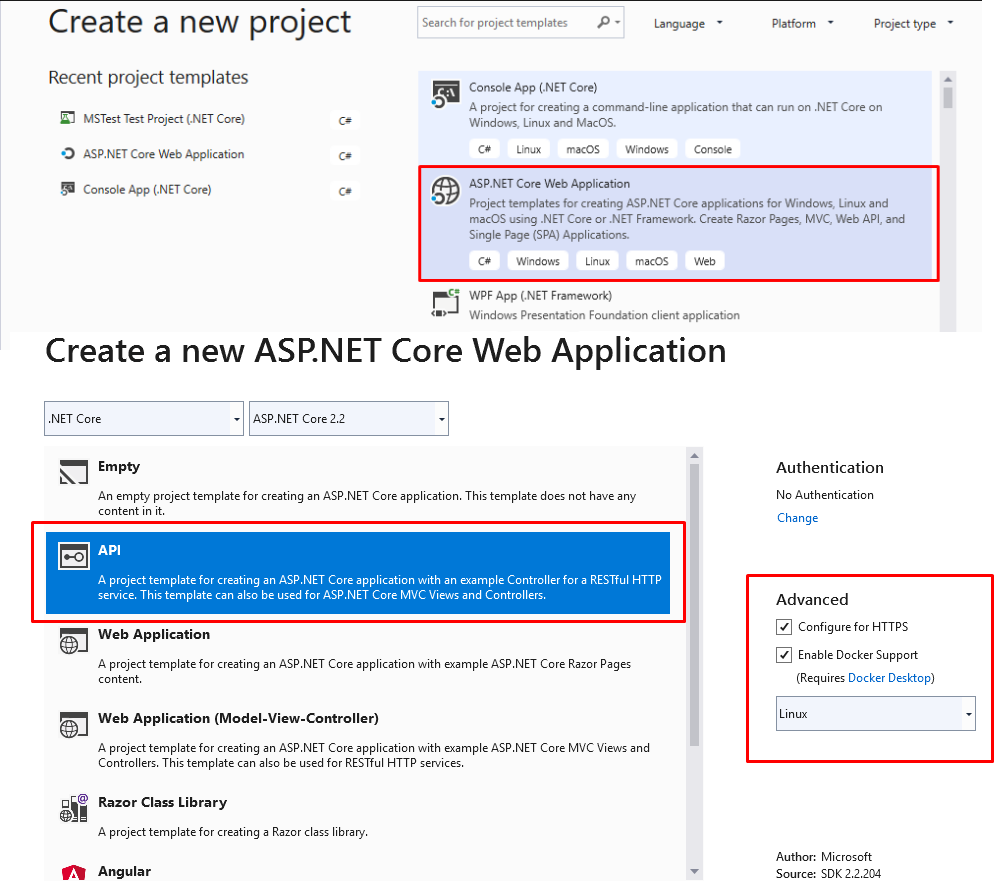
Respective folders will get created by the help of templates chosen, create a couple of additional folders Models and Repository for database interaction using objects (ORM).

Create AtRiskHistory model class that maps to a database table.

Create the context class, which will be a middleware component for the communication with the database.
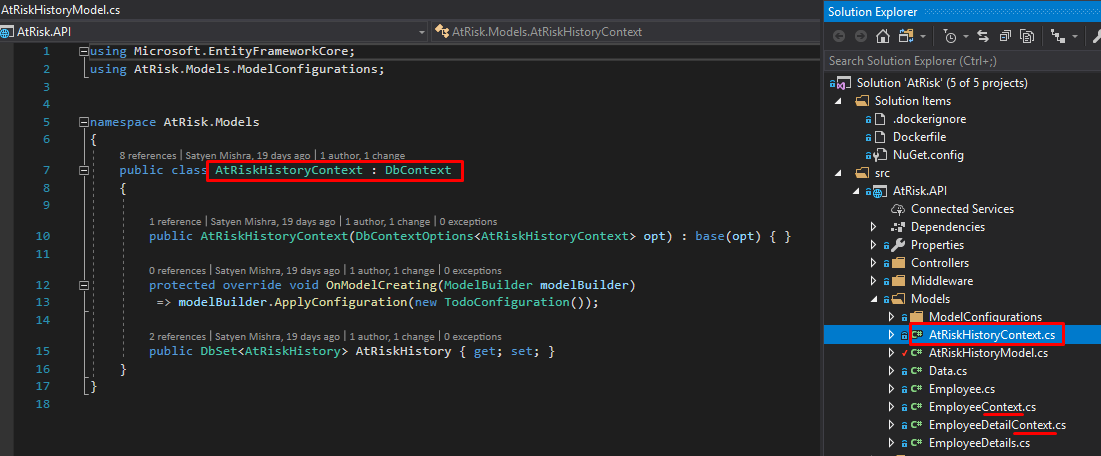
Install a NuGet library through NuGet package Console Manager “Npgsql.EntityFrameworkCore.PostgreSQL” (Latest version) to enable communication between the .NET core and the PostgreSQL database.
Open the appsettings.<Environment>.json file and add DB connection settings.
"ConnectionStrings": {"APIConnectionString": "UserID;Password;Server:xxx.xxx.xxx;Database;"}
Repository Design Pattern
Create the generic repository that will serve us all crud and Save operations.
To build the business logic first, let’s create an “Interface” for the repository inside the Repository folder. We write our business logic into the Repository class. Create a new Interface IAtRiskHistoryRepo and define a method GetAtRiskEmployeeDetailsAsync.
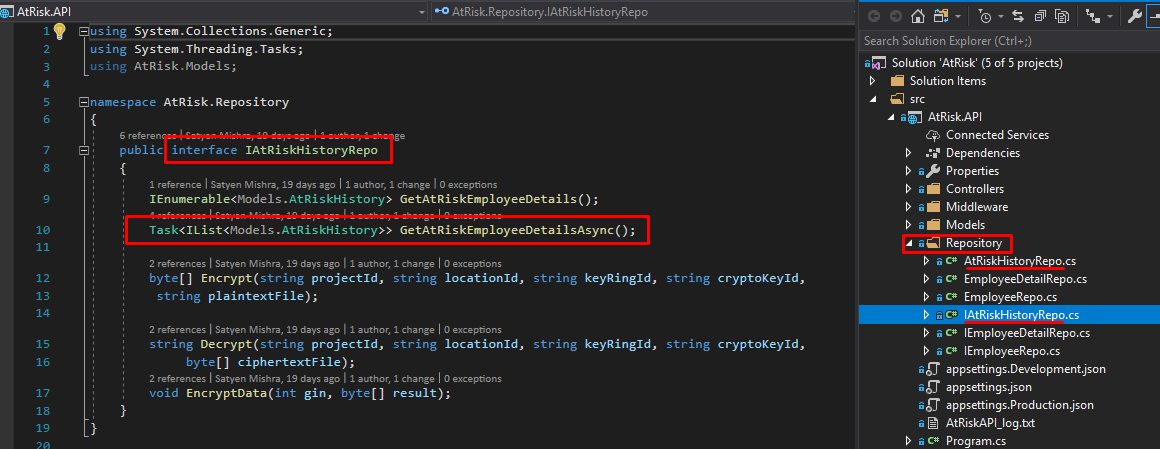
Create a new class AtRiskHistoryRepo into the Repository folder which will implement IAtRiskHistoryRepo Interface. Then write business logic for GetAtRiskEmployeeDetailsAsync method.
Dependency Injection
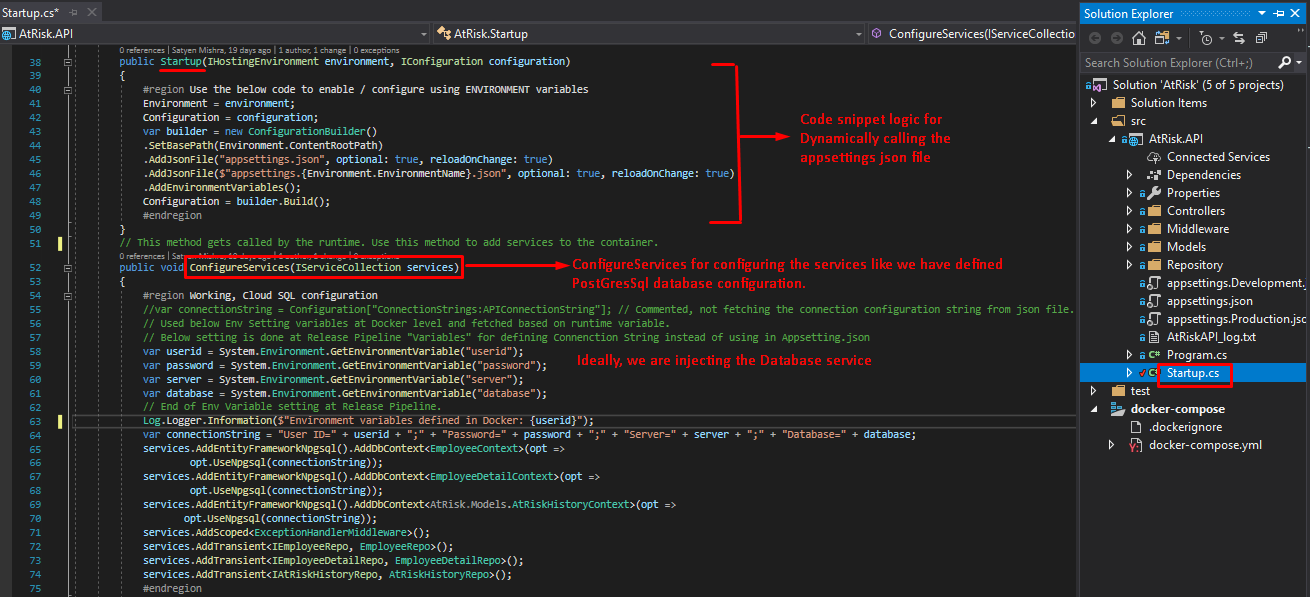
Open the StartUp.cs file and add the code snippet inside the ConfigureService method so that the repository’s dependency is resolved at run time when needed and establish PostgreSQL DB Connection.
Controller
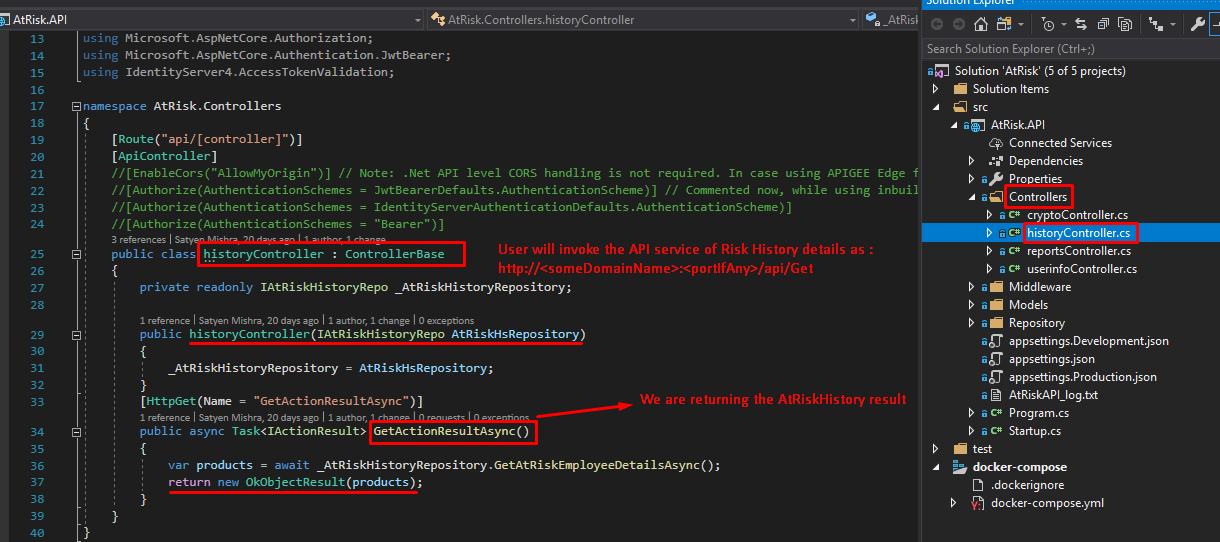
The controller serves as an entrypoint for Microservice. It Exposes the HTTP methods to the client as endpoints of the service methods. Implement the IRepository interface into the controller class.
Right-click on the Controllers folder and add a new Controller Select “API Controller with read/write actions”, name it as “history” to get the At-Risk history details.
Add below code to call the GetAtRiskEmployeeDetailsAsync method. The basic implementation is shown here for the sake of understanding the concept. The methods could be attribute routed and could be decorated with more annotations as needed.
Microservice Deployment Using Docker Containers
The microservice could be run in multiple ways
- IIS Express, Visual Studio default.
- Docker container (through commands).
We will use a command to build docker image from application binaries and Dockerfile
docker build -t api
And run this image as a container using the following command
docker run —name api -d -p 6000:80
Microservice Testing
Service can be tested via any API testing client. Here Postman is used to testing the service endpoints. Through Postman, perform a GET request now and two records are shown as a JSON result response.

Further Reading
Opinions expressed by DZone contributors are their own.

Comments