OSIsoft PI Historian Connector for MuleSoft
In this short tutorial, I will quickly walk you through our brand new OSIsoft PI Historian connector for Mule 4. This connector is developed on the top of PI Web API SDK.
Join the DZone community and get the full member experience.
Join For FreeHi there,
In this short tutorial, I will quickly walk you through our brand new OSIsoft PI Historian connector for Mule 4. This connector is developed by IntegrationWorks Australia and you can reach out to us if you want to know more about this connection.
So basically, this connector is developed on the top of PI Web API SDK provided by OSIsoft and you can refer to the following link to learn more about it:
https://github.com/IntegrationWorksAus/mule-pi-historian-connector/tree/1.0.0
Usecase
In this use case, I will demonstrate a step-by-step process to connect with the Pi Historian system and retrieve the stream value of a Pi Point.
- Install the OSIsoft Pi Historian connector from the MuleSoft exchange in your Anypoint studio. you can follow this link to check it out in Anypoint exchange: https://www.mulesoft.com/exchange/works.integration/mule-pi-historian-connector/
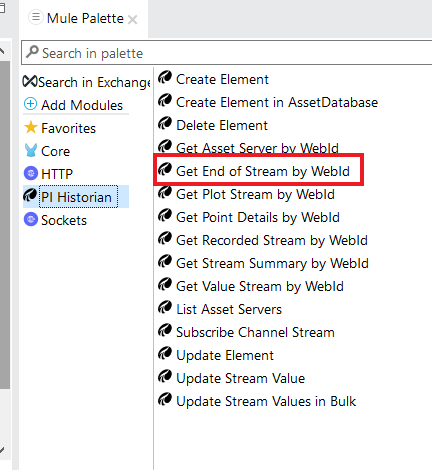
- Once installed, create a simple Mule App and drag-drop 'Get End Stream' for the palette into a flow:
![Mule Palette UI]() Create a global configuration for the connector and set the server details:
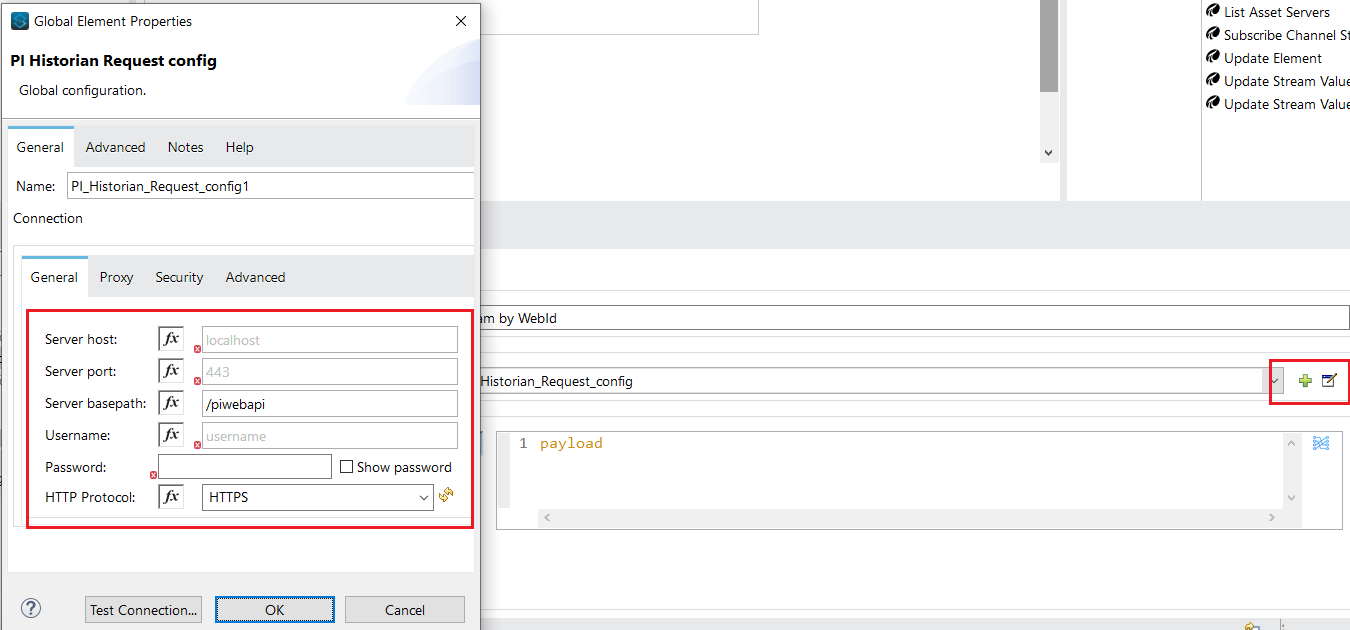
Create a global configuration for the connector and set the server details:![Global Element Properties UI]()
Optionally, click on the 'Test Connection' button to test the connectivity.- Once you successfully complete step 2, now is the time to set the input for this operation. To do that, drag-drop the 'Transform message' component before the connector.
![Transform message component]() This connector also provides the datasense feature, which makes it simple to understand the input/output data structure during the development.
This connector also provides the datasense feature, which makes it simple to understand the input/output data structure during the development.
In the above snapshot, you can see We have mapped a query parameter named 'webId' to the input webId field of the operation. - We are almost done with the connector side of the configuration. To trigger this flow by an HTTP request, place and configure an HTTP listener at the source of this flow.
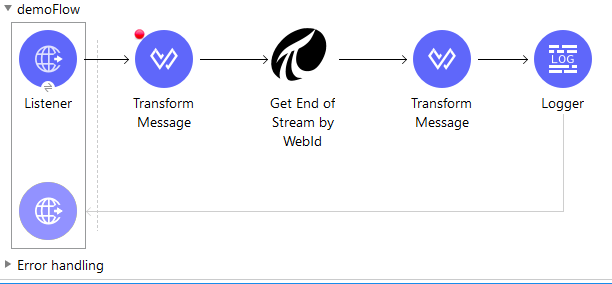
Below is the snapshot of the final flow:![demoFlow]()
- To trigger this flow, prepare and send an HTTP request with the webId query parameter. Since I have used the default parameters provided with the HTTP Listener, my endpoint URL is:
http://localhost:8081/pi?webId=<PI Point's webId> - If you have correctly followed the above steps, you will see a JSON response from the PI server with end stream value:
x
{
"Timestamp": "2021-01-22T14:00:00Z",
"UnitsAbbreviation": "m",
"Good": true,
"Questionable": false,
"Substituted": false,
"Annotated": false,
"Value": 12.3
}
Thanks for reading this article. If you need any help with this tutorial or you want to discuss your specific use-case, please contact us here:
Email: contact.au@integration.works
Also, check out our video tutorial for PI Historian connector on YouTube: https://youtu.be/YURZRpow68s
Opinions expressed by DZone contributors are their own.

 Create a global configuration for the connector and set the server details:
 This connector also provides the datasense feature, which makes it simple to understand the input/output data structure during the development.
Comments