Mule OAuth 2.0 Provider in Mule 4
In this tutorial, learn how to apply the Mule OAuth 2.0 Provider in Mule 4.
Join the DZone community and get the full member experience.
Join For Free
First of all, thanks to MuleSoft for reducing and simplifying the steps to configure the Mule OAuth 2.0 policy by using Mule 4 components.
To apply the OAuth 2.0 policy, the below configuration needs to be done.
MuleSoft OAuth provider application needs to be configured and deployed
OAuth 2.0 policy needs to be applied on the API, the OAuth provider authorized, and the access-token URL needs to be configured in the API specification along with scope.
You may also be interested in: Guide to Integrating OKTA OAuth 2.0 OIDC With Mulesoft API Anypoint Platform (Mule 4)
Let's start with point #1:
MuleOAuth provider application was developed as images shown below:
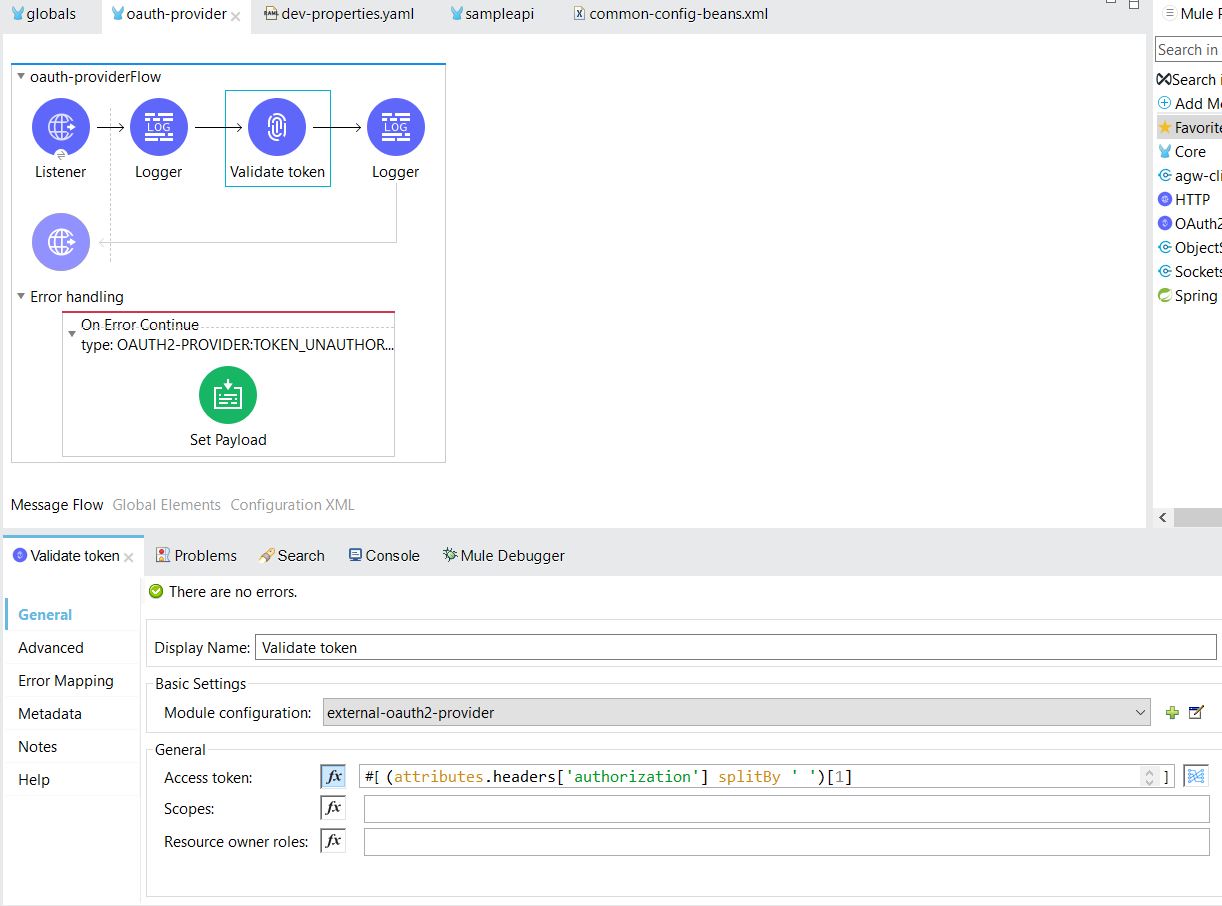
Step 1
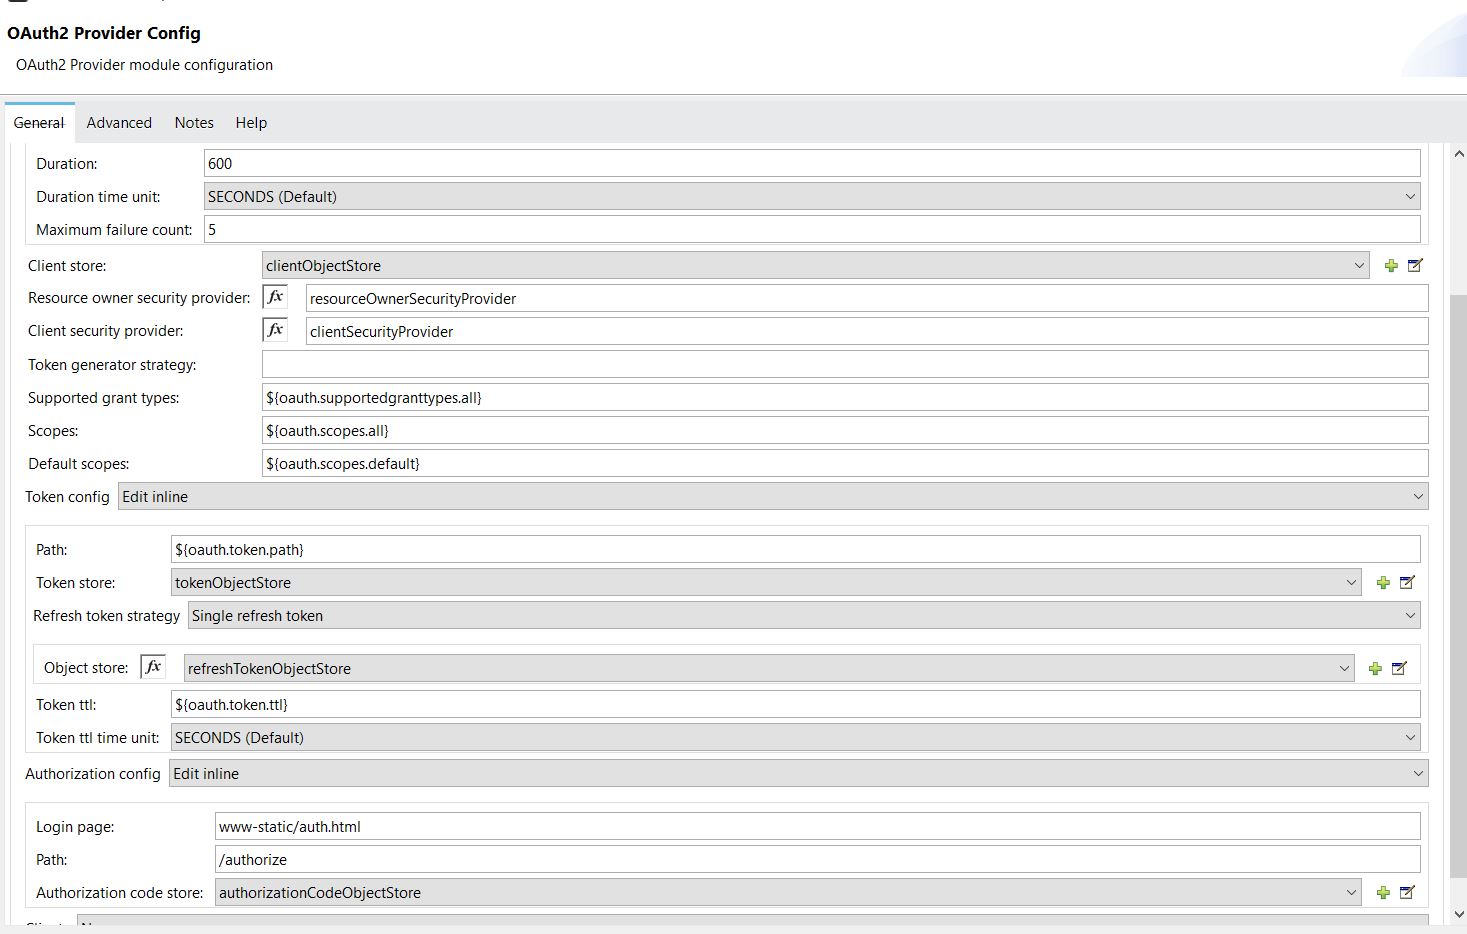
The below OAuth provider configuration needs to be done in global configuration:
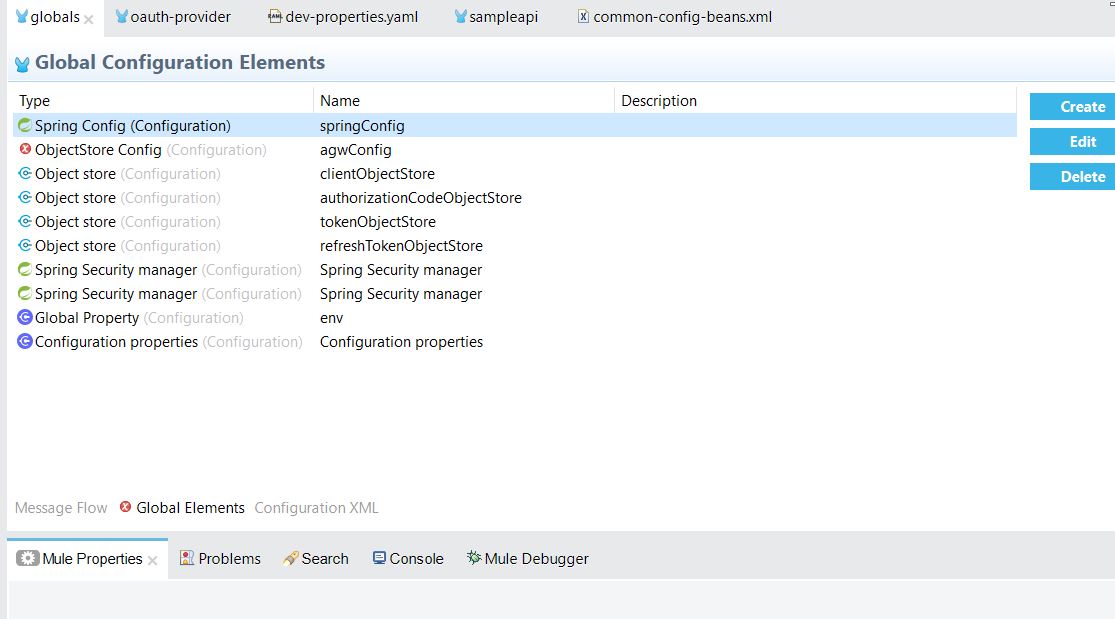
OAuth provider component configuration:
       <?xml version="1.0" encoding="UTF-8"?>
<mule xmlns:doc="http://www.mulesoft.org/schema/mule/documentation" xmlns="http://www.mulesoft.org/schema/mule/core"
xmlns:xsi="http://www.w3.org/2001/XMLSchema-instance"
xmlns:spring="http://www.mulesoft.org/schema/mule/spring"
xmlns:agw-client-store="http://www.mulesoft.org/schema/mule/agw-client-store"
xmlns:os="http://www.mulesoft.org/schema/mule/os" xsi:schemaLocation="
http://www.mulesoft.org/schema/mule/core http://www.mulesoft.org/schema/mule/core/current/mule.xsd
http://www.mulesoft.org/schema/mule/spring http://www.mulesoft.org/schema/mule/spring/current/mule-spring.xsd
http://www.mulesoft.org/schema/mule/os http://www.mulesoft.org/schema/mule/os/current/mule-os.xsd
http://www.mulesoft.org/schema/mule/agw-client-store http://www.mulesoft.org/schema/mule/agw-client-store/current/mule-agw-client-store.xsd">
<spring:config name="springConfig" files="common-config-beans.xml"/>
<os:config name="agwConfig" doc:name="ObjectStore Config" doc:id="03e6fb8a-946c-44b6-b4e5-b3acc26b4433">
<agw-client-store:connection doc:name="agw-client-store:connection" />
</os:config>
<os:object-store name="clientObjectStore" persistent="true" config-ref="agwConfig"/>
<os:object-store name="authorizationCodeObjectStore"
entryTtl="600"
entryTtlUnit="SECONDS"
persistent="true"/>
<os:object-store name="tokenObjectStore"
entryTtl="86400"
entryTtlUnit="SECONDS"
persistent="true"/>
<os:object-store name="refreshTokenObjectStore" persistent="true"/>
<spring:security-manager>
<spring:delegate-security-provider name="clientSecurityProvider" delegate-ref="clientAuthenticationManager"/>
</spring:security-manager>
<spring:security-manager doc:name="Spring Security manager" doc:id="c8919b4b-6f60-4d21-a02c-ef634454b113" >
<spring:delegate-security-provider name="resourceOwnerSecurityProvider" delegate-ref="resourceOwnerAuthenticationManager" />
</spring:security-manager>
</mule>
        <oauth2-provider:config name="external-oauth2-provider"
resourceOwnerSecurityProvider="resourceOwnerSecurityProvider"
clientSecurityProvider="clientSecurityProvider"
supportedGrantTypes="${oauth.supportedgranttypes.all}"
listenerConfig="HTTP_Listener_config"
clientStore="clientObjectStore" scopes="${oauth.scopes.all}" defaultScopes="${oauth.scopes.default}">
<oauth2-provider:token-config path="${oauth.token.path}" tokenTtl="${oauth.token.ttl}" tokenStore="tokenObjectStore">
<oauth2-provider:refresh-token-strategy>
<oauth2-provider:single-refresh-token objectStore="refreshTokenObjectStore"/>
</oauth2-provider:refresh-token-strategy>
</oauth2-provider:token-config>
<oauth2-provider:authorization-config authorizationCodeStore="authorizationCodeObjectStore"/>
</oauth2-provider:config>
Step 2
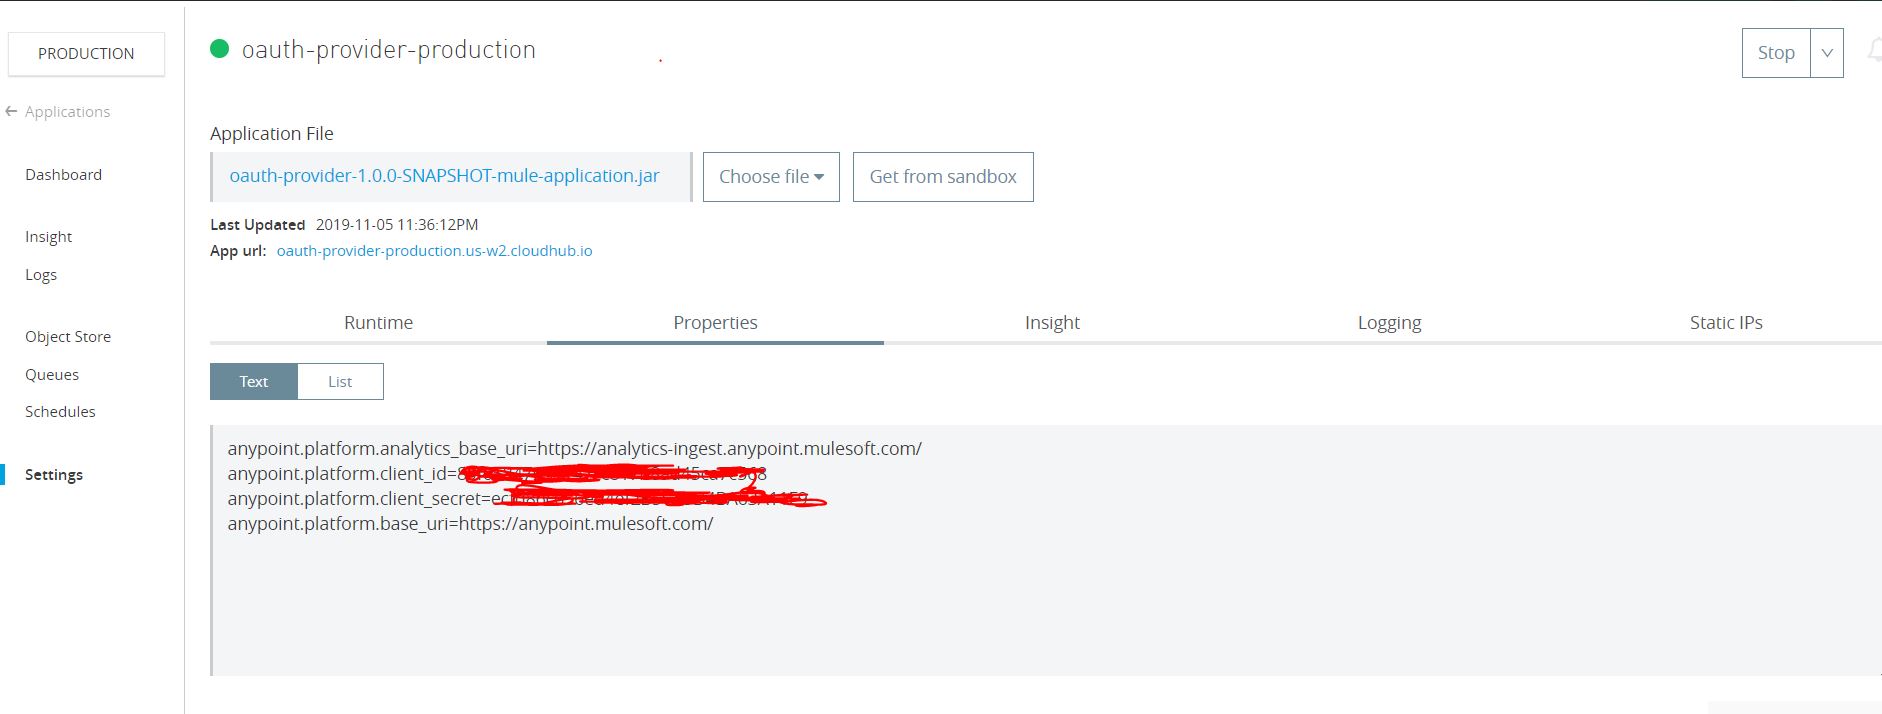
Deploy Mule OAuth provider application on CloudHub and configure property configuration client_id and client_secret in the runtime of the owner organization...

...with the below configuration in property file.
Once the application is deployed on CloudHub, validate the below URL. It should respond as below:
 With the above response, this confirms that the application is deployed.
Now, let's look at point #2:
1: Design API (like below screenshot)
2: Configure API with securitySchema.
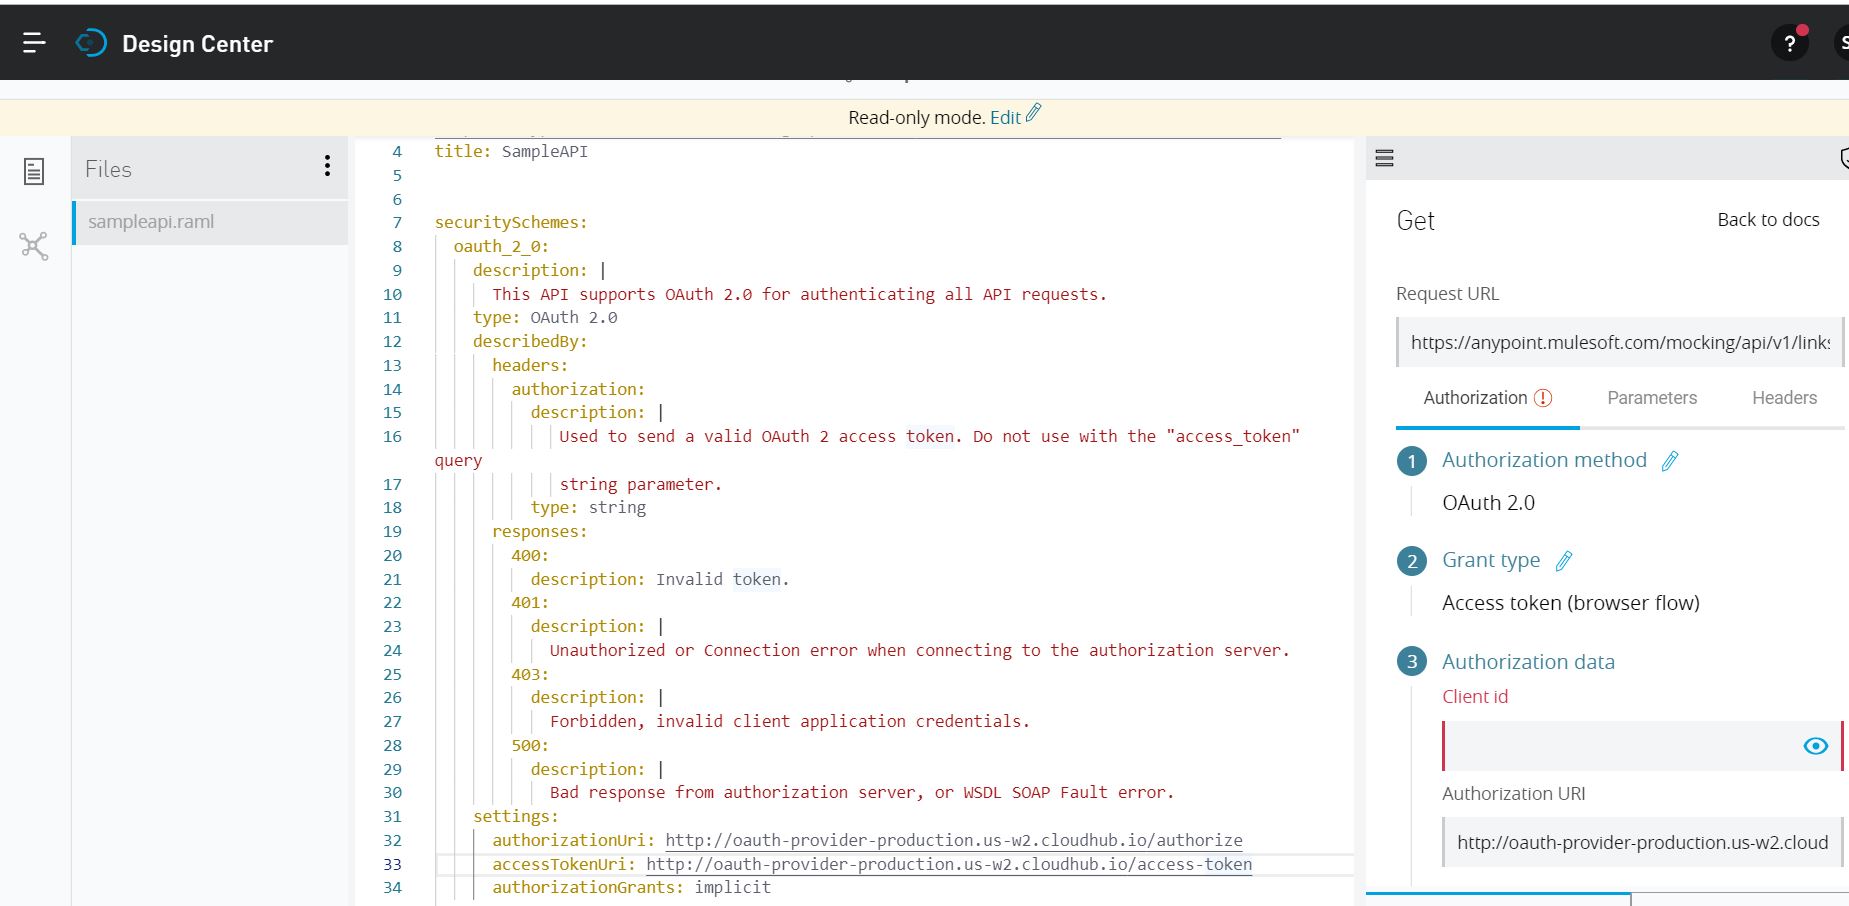
3: Publish API in exchange
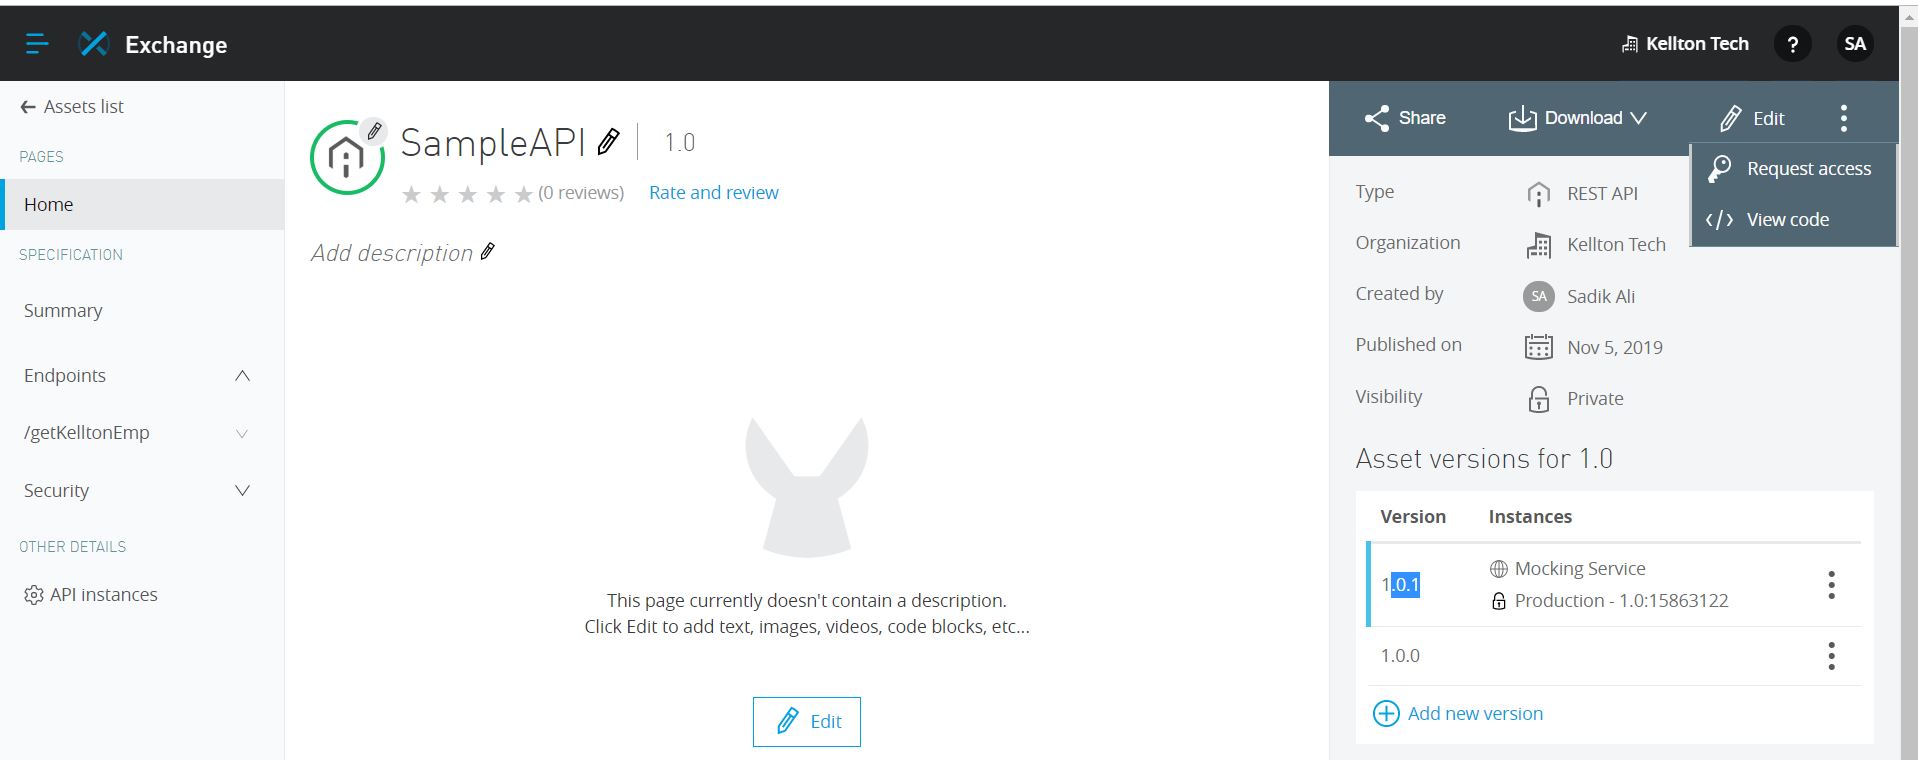
4: Manage API in API manager
5: Apply OAuth 2.0 policy
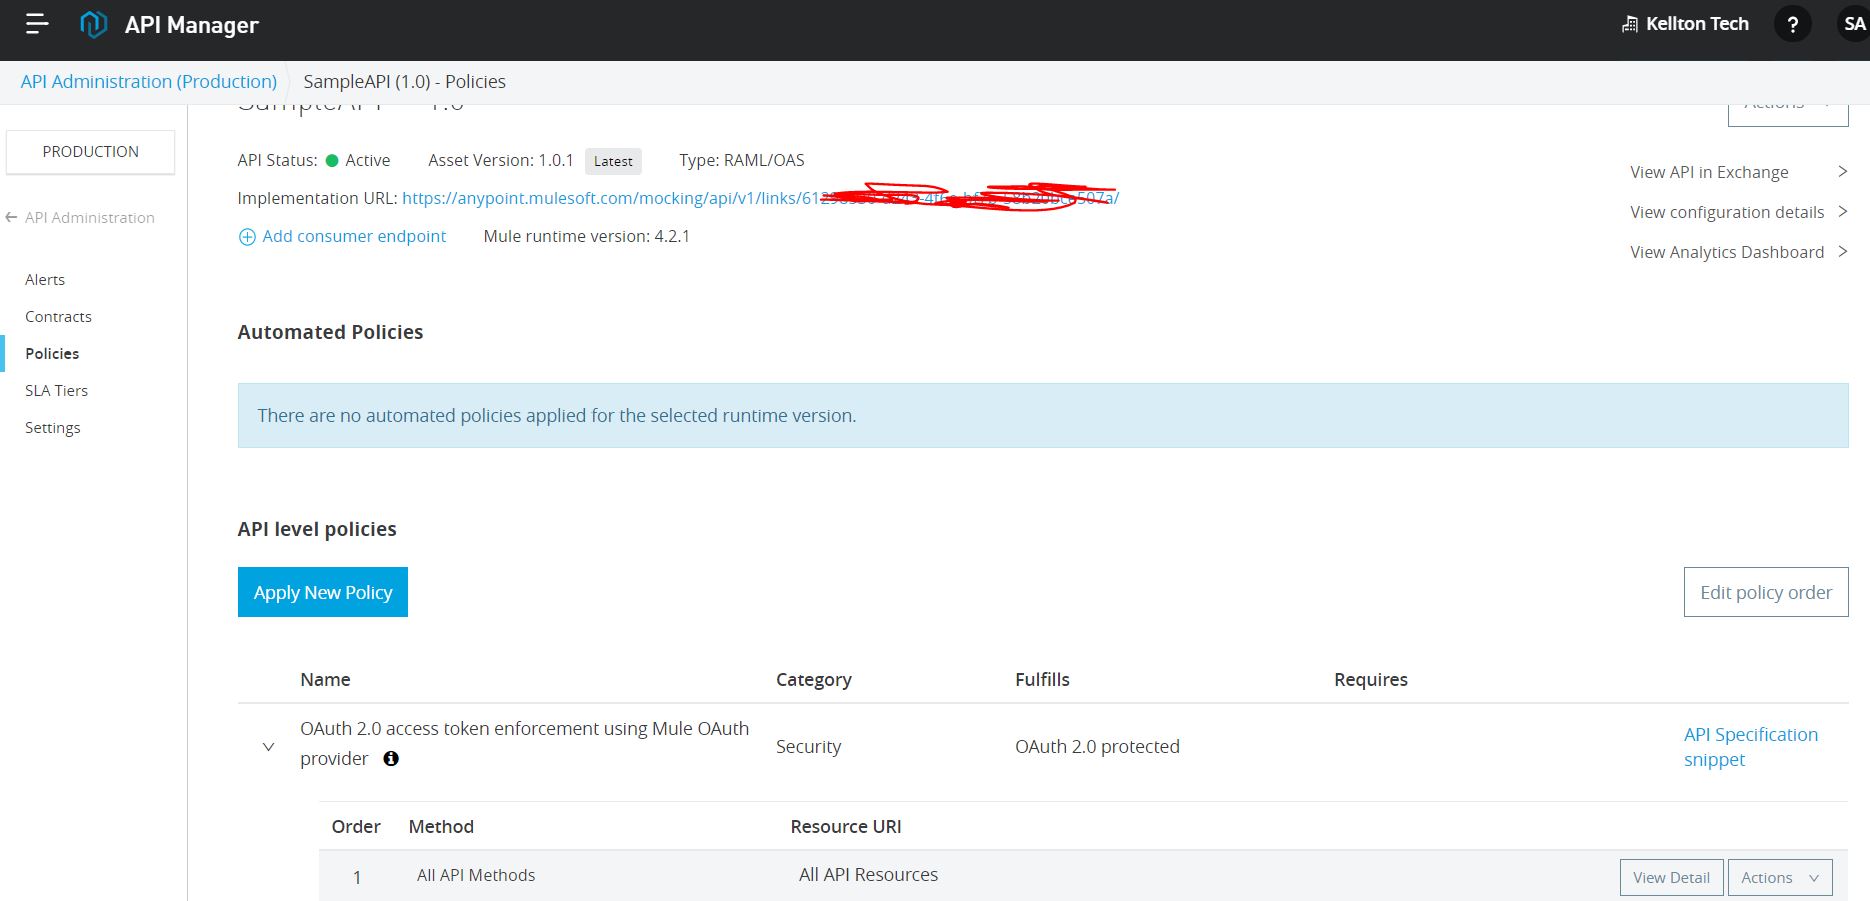
6: Request access of API from exchange application.

7: Import application in studio and configure auto-discovery and deploy the application

Final testing and validation:
Step 1
Get token using Mule OAuth provider application:
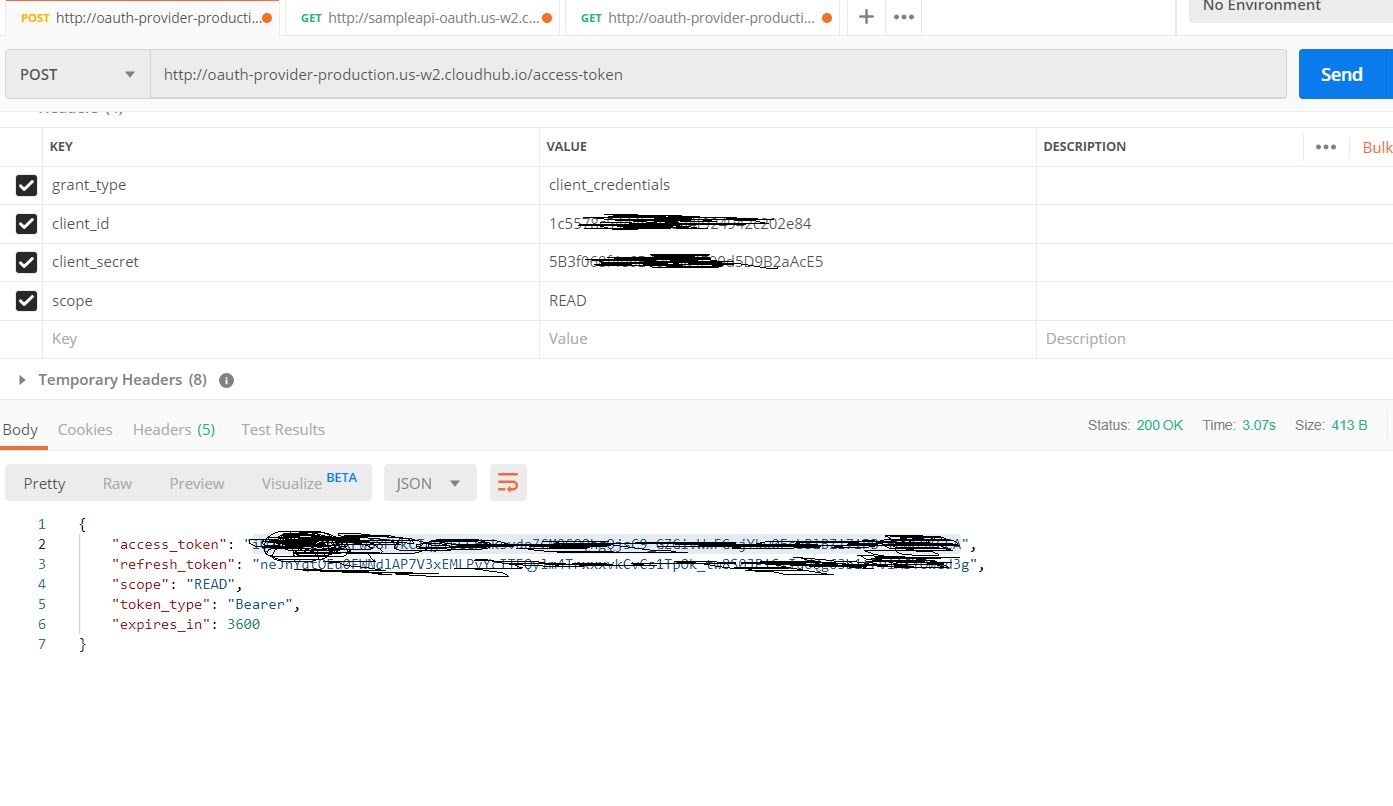
Step 2
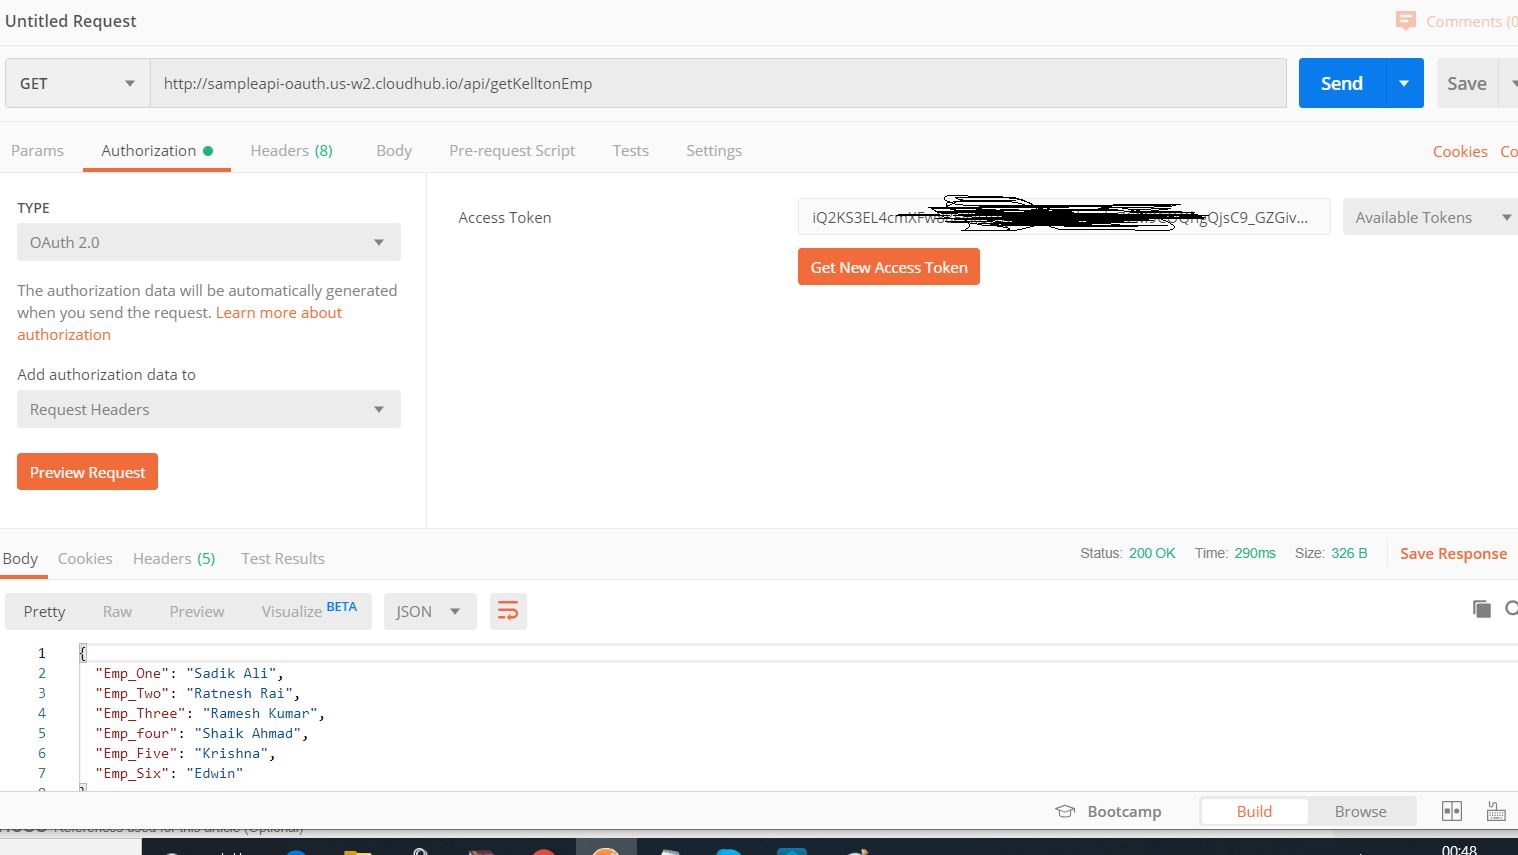
Test application using issues token:
That's it!
Mule 4 is awesome; thanks MuleSoft.
Related Links
MuleSoft OAuth provider configuration application
Good luck!
Further Reading
Steps to Implement OAuth 2.0 in Mule Applications
OAuth in Mule and Mule Secure Token Service
Opinions expressed by DZone contributors are their own.

Comments