Mule Credential Vault
You can encrypt your property files in your Mule projects using the Mule Credential Vault feature, which you can learn to use in this tutorial.
Join the DZone community and get the full member experience.
Join For Free1.0 Overview
Mule Credential Vault is a feature where users can encrypt the values of a property file. For instance, if Credential Vault is implemented in your Mule project, then you have a property file that looks like the following (Figure 1.0).

There are two ways to implement Mule Credential Vault. You can either use the out of the box method or you could implement a customized method.
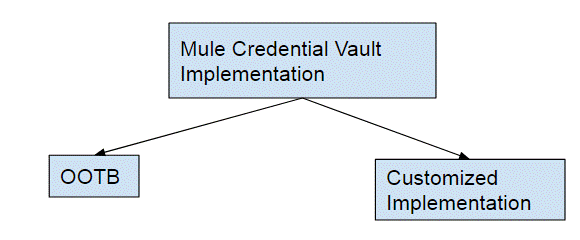
The results of the implementation would be the same- that is, you will have an encrypted property file. The only difference is how the encrypted key is supplied for decryption of the property file during runtime.
Before you can use the mentioned feature, you need to install the Anypoint Enterprise Security Module.
If you are building Maven Mule projects, you will also need to include the following code snipped into your POM.xml file:
…
                       <plugin>
<groupId>org.mule.tools.maven</groupId>
<artifactId>mule-app-maven-plugin</artifactId>

<extensions>true</extensions>
<configuration>
<copyToAppsDirectory>true</copyToAppsDirectory>
<inclusions>
<inclusion>
<groupId>org.mule.modules</groupId>
<artifactId>mule-module-apikit-odata</artifactId>
</inclusion>
<inclusion>
<groupId>com.mulesoft.security</groupId>
<artifactId>mule-module-security-property-placeholder</artifactId>
</inclusion>
</inclusions>
</configuration>
</plugin>

…

               <dependency>
<groupId>com.mulesoft.security</groupId>
<artifactId>mule-module-security-property-placeholder</artifactId>
<version>1.3.2</version>
</dependency>
…
The Concept
The Mule Credential Vault consists of three things, as illustrated in Figure 1.1.
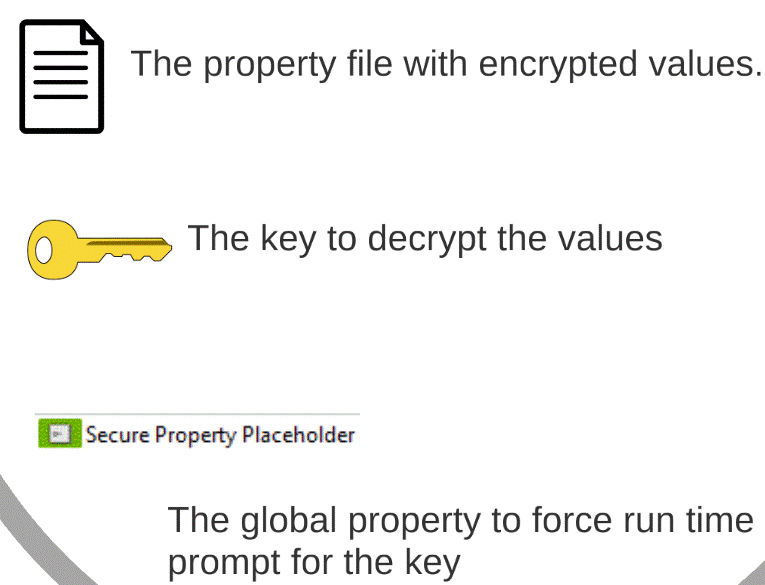
Figure 1.1.
There are three possible ways to implement the mentioned constituent components, and they are as illustrated in figure 1.2 (the diagrams are a reference from MuleSoft’s documentation of the Credential Vault).
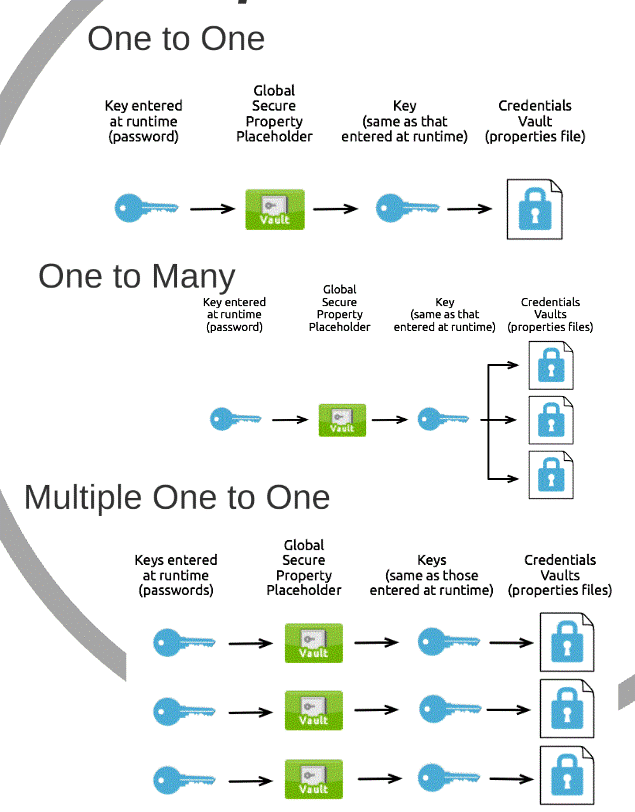
Figure 1.2.
2.0 Use Case of OOTB Credential Vault
Here in this article I will be talking about the OOTB way to encrypt your property files; as with all the articles I write, it is easier for me to illustrate the use case of a particular design/feature by enacting a hypothetical scenario.
Let’s say that you are tasked with developing a façade/proxy web API, where you relay requests to the underlying real API. The underlying API that you have been asked to façade requires a “client id” and a “client secret” in order to authorize its usage. The following picture shows a high-level summary of this requirement.

Figure 2.0.
2.1 The Actual API
For the sake of illustrating the usage of the Credential Vault, we will be storing the client id and client secret required by the actual API illustrated in Figure 2.0.
This section will illustrate briefly how this back end API works. I have reused the MuleSoft Cloudhub tutorial API that allows users to query for fictitious flight schedules. Here is the link to the API.
In order to test the availability of this API, you need to launch Postman and key in the following parameters, select GET as the HTTP operation, and click send. This API will give you a JSON array of flight schedules.
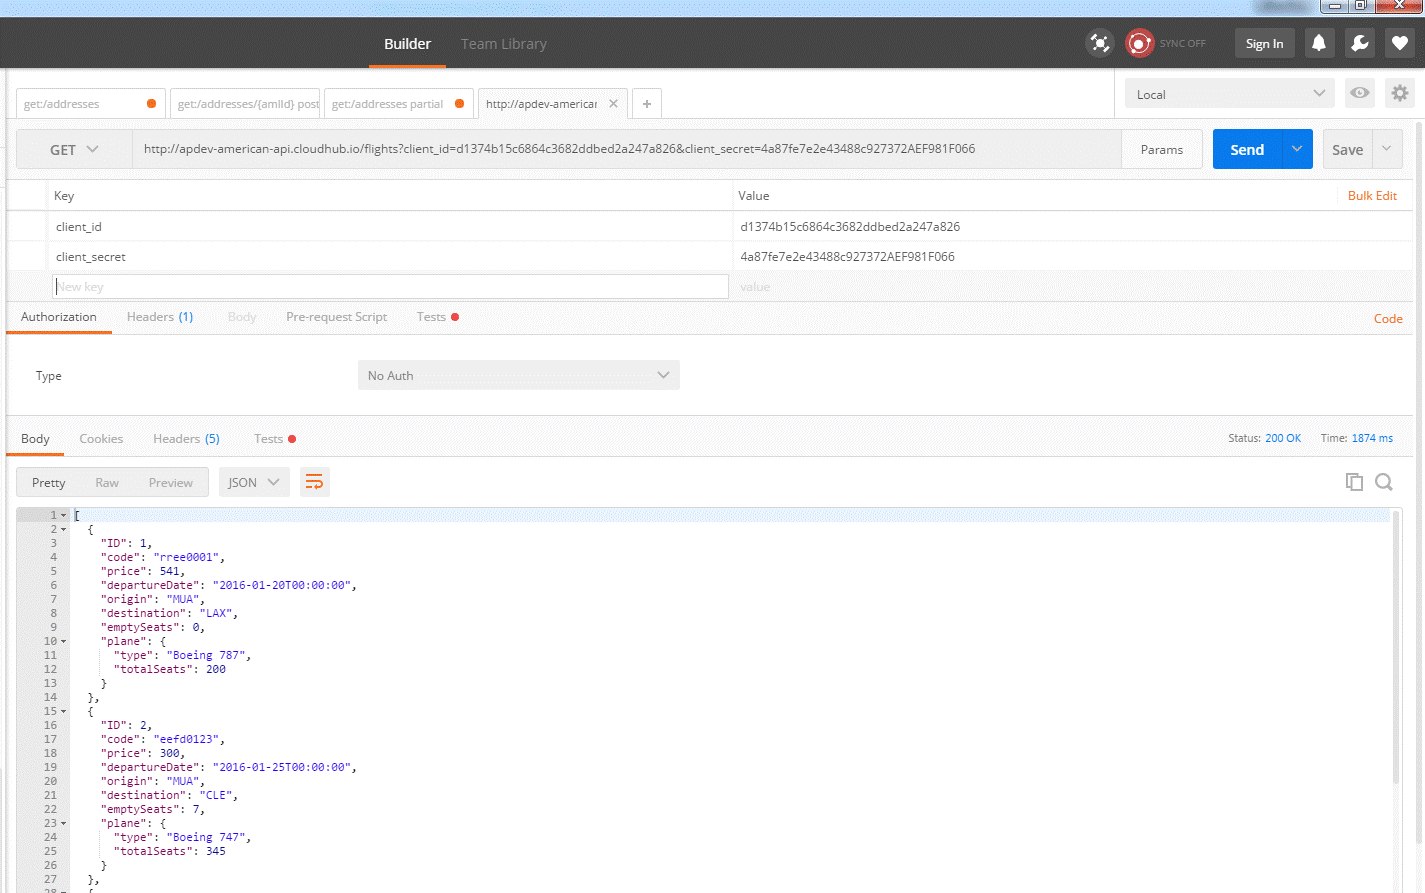
The following are the HTTP parameters to be keyed into the parameter fields:
"client_id":"d1374b15c6864c3682ddbed2a247a826"
"client_secret":"4a87fe7e2e43488c927372AEF981F066"
3.0 Locking Your Property Files in the Credential Vault
The following Figure 3.0 depicts how your final solution will look. The Mule flow looks exactly like the requirements illustration at Figure 2.0.
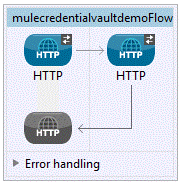
Figure 3.0.
3.1 Creating the Global Security Placeholder
You will also need to create the following global Mule configuration element, as per the following diagram, Figure 3.0.a.
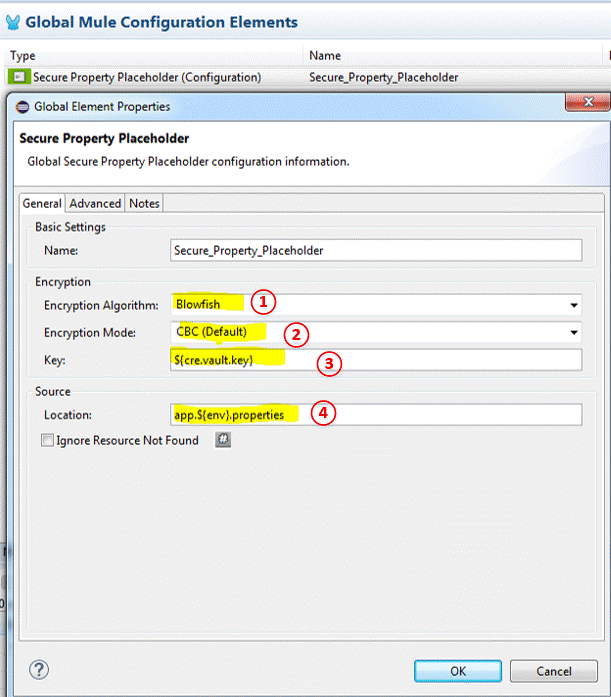
Figure 3.0.a.
I have set a global secure placeholder to decrypt my encrypted property file. The first field (1) is the encryption algorithm that you will use to encrypt your property file. The second field (2) is the additional encryption parameter that you have used to encrypt your file.
Parameter number (3) is the actual key that you are using to encrypt the values of your property, and lastly, number (4) is the file that you are encrypting, notice the ${env} is configured so that it gives me the flexibility of switching configurations between environments.
3.2 Encrypting the Property Files
The following illustration depicts the different keys I have used to encrypt different environment files (Figure 3.0.b).
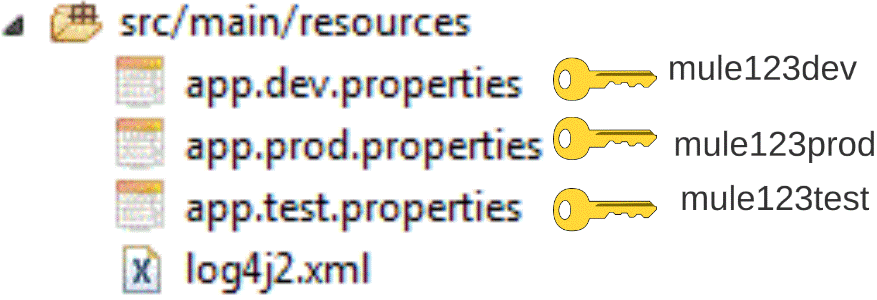
Figure 3.0.b.
The following steps will walk you through encrypting the property values.
1) Navigate to the property file that you want to encrypt, then right click, select open with > Mule Properties Editor.
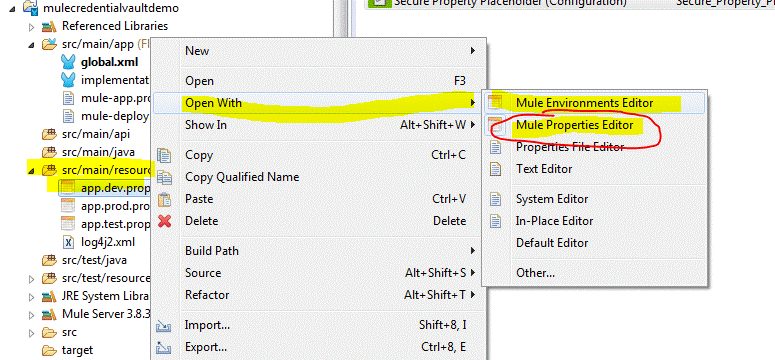
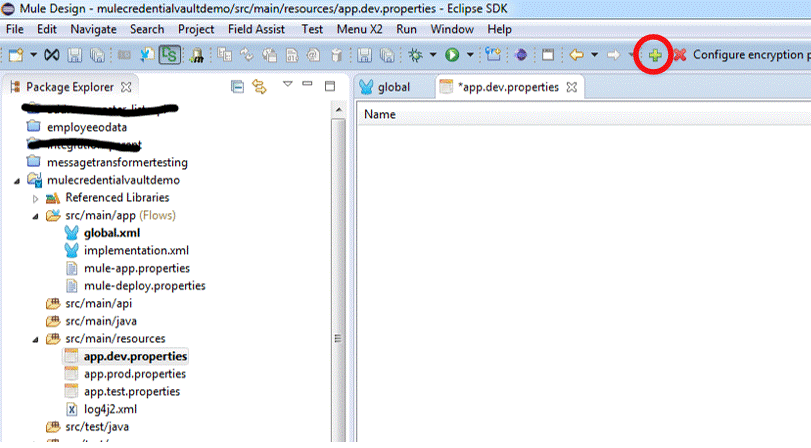
2) Click on the green cross as per the following depiction:
3) When prompted with the “Add a new property” dialog, key in the client_id.
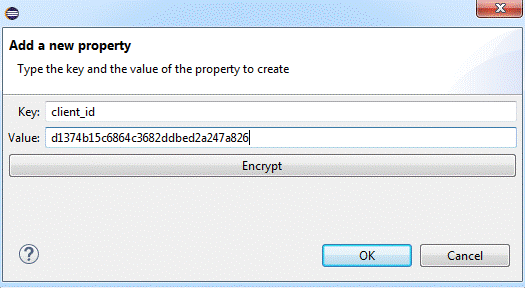
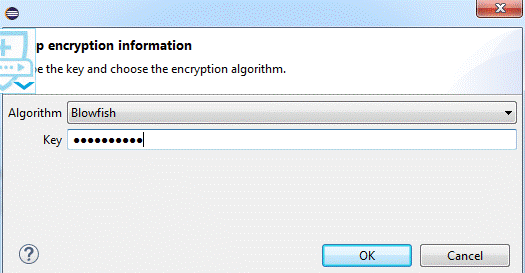
4) Now click on the encrypt button and you will be prompted with a “Setup encryption information” dialog; in the first Algorithm drop-down, select “Blowfish” and then key in “mule123dev,” this value from now on will be your encryption and decryption key.
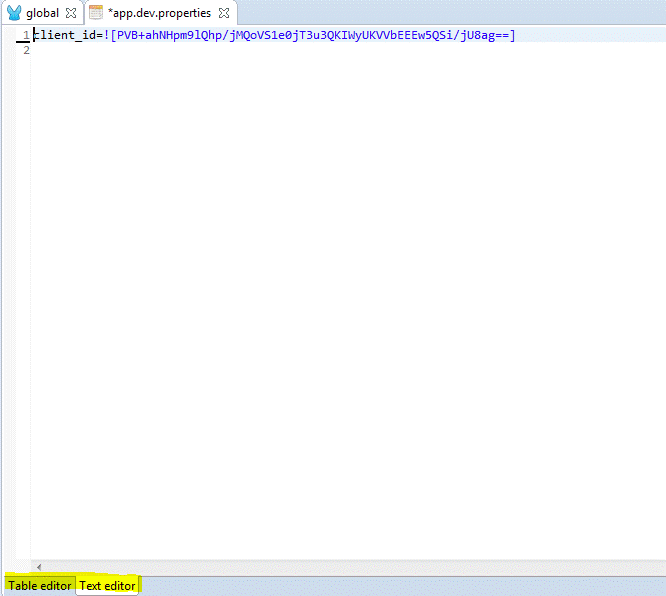
5) Right after you click on the OK button, you will see that your property value is encrypted.
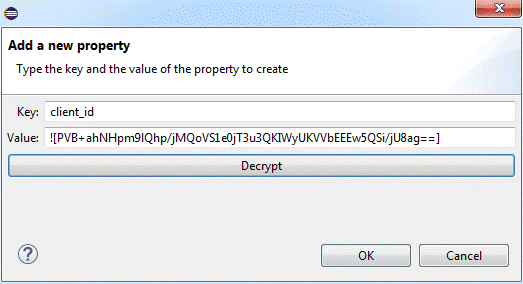
6) When you click OK again, you will see that you value is populated in the property editor window.

7) At the bottom of the property editor console, you will be able to see two tabs, the “Table editor” tab and the “Text editor” tab. You can click on the text editor tab to get a plain text view of your property file, but you must only use the table editor to encrypt your values.
3.3 Testing Your Encrypted Property Files
Now that you have successfully configured your application to have encrypted property files, it is time to test it. In an actual production scenario, you would need to configure the following to the “mule-app.properties” file.

Figure 3.3.a.
This is so that your Mule application will ask for the following parameters during runtime.
“env” – specifies the environment that you want to run your Mule application in; this is really handy as the property place holder (Figure 3.0.a parameter number 4) that you have specified previously will select the correct property file based on what you have entered into this parameter
“cre.vault.key” – this is to specify the key that you have used to encrypt your property values, so that your mule application’s secure property place holder (Figure 3.0.a parameter number 3) would use it to decrypt the key values during run time.
Figure 3.3.a depicts the values you will set to force your Mule application to request a command line parameter when you try to start it; if the key value is not specified, your application will fail to run, but if you want to test run your application in Anypoint Studio, then your “mule-app.properties” file would need to look like the following:
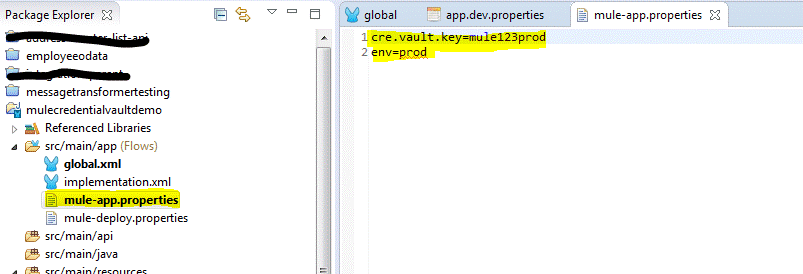
Figure 3.3.b.
Once you start your application via Anypoint Studio, head over to Postman.
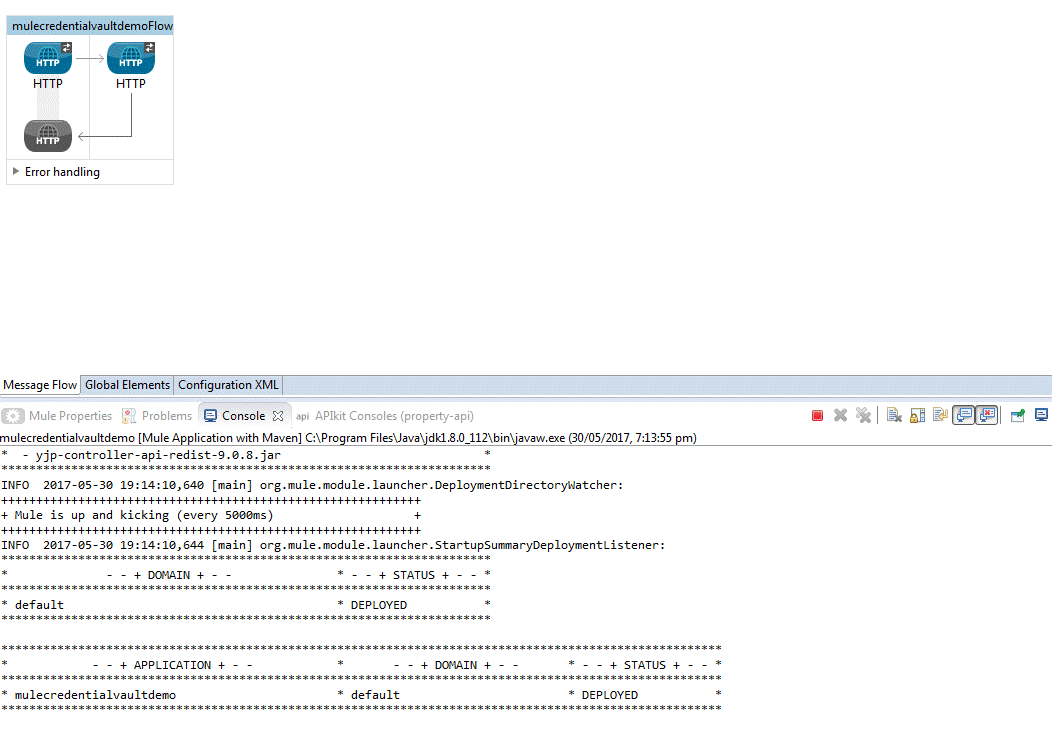
Figure 3.3.c.
In Postman, browse to local host port 8081, as depicted by figure 3.3.d. Without the need to key in any client_id and client_secret parameter, you have successfully queried for flight schedules; you have successfully façade the back end API.
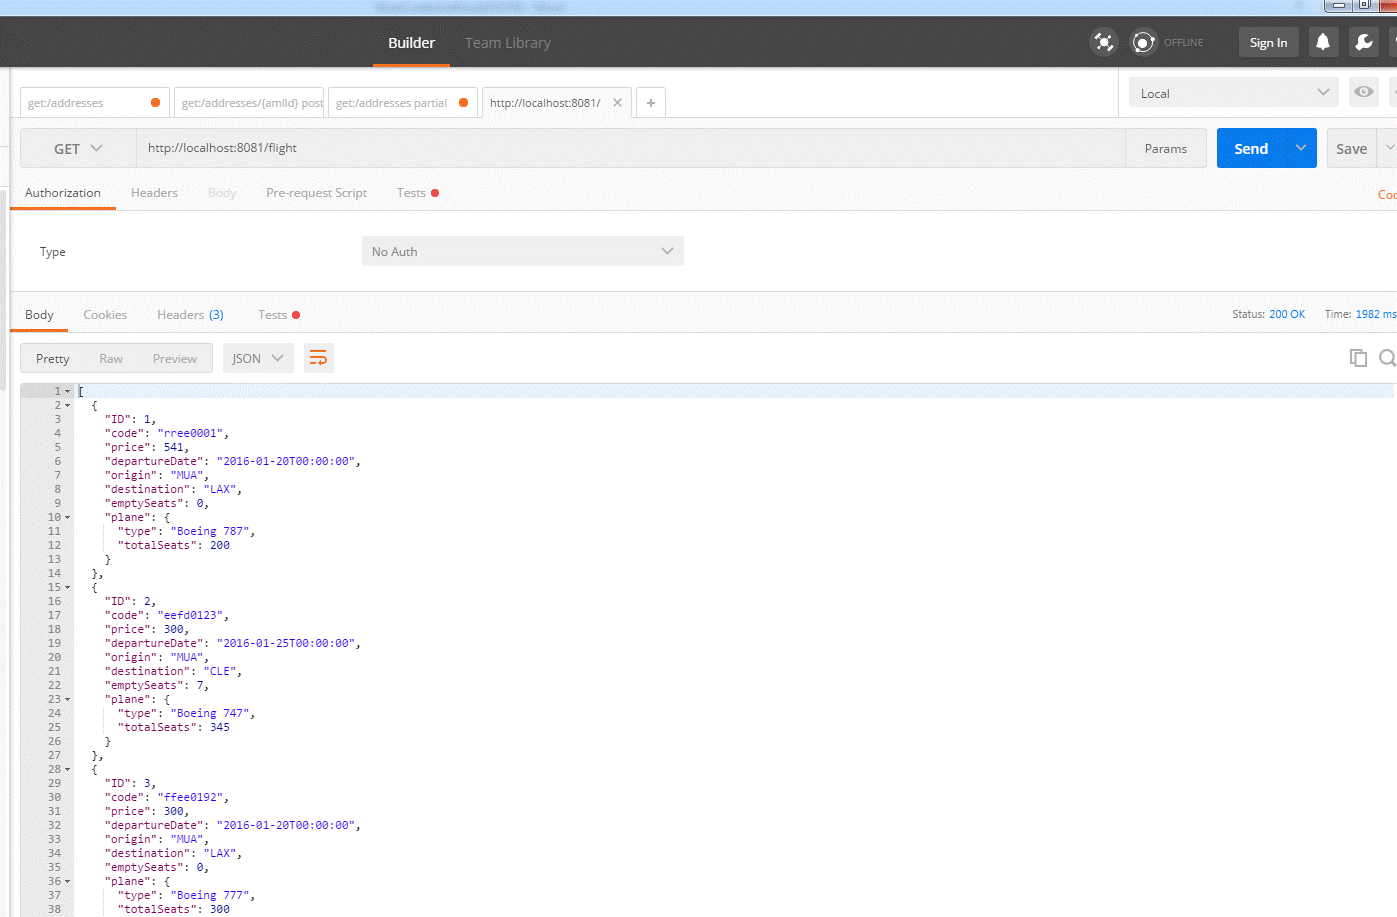
Figure 3.3.d.
4.0 Things to Look Out for When Implementing Credential Vault
If you are reading this article and you also happen to be developing Mule applications for a while, you would already have a pre-existing property place holder, as depicted in Figure 4.0.a below.
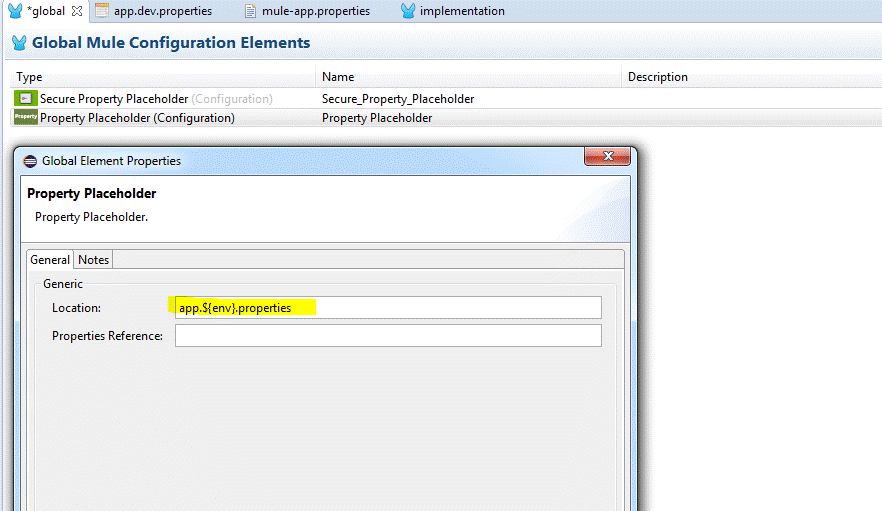
Figure 4.0.a.
Configurations like this will trip you up. Let’s see what happens when you have both the normal property place holder and the security place holder pointing to the same file- let’s test it. In order to demonstrate what I mean, you have to add the normal property place holder, save the Mule configuration file, and restart the Mule application.
If you test it with Postman, you will get a 403 error.
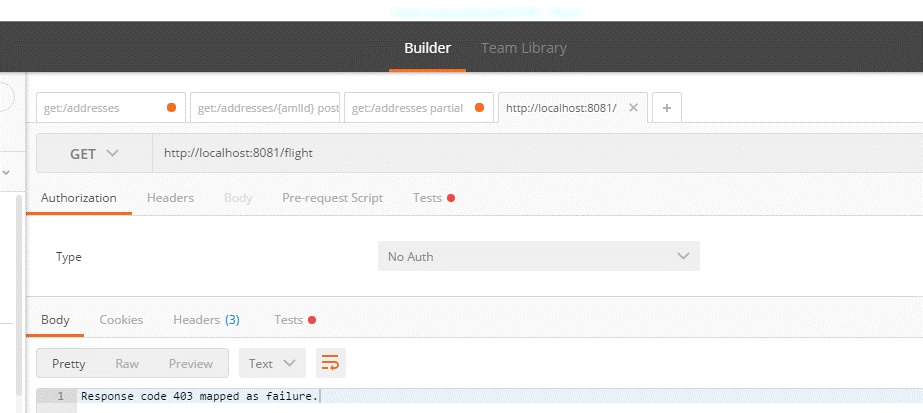
Figure 4.0.b.
If you look under the hood of the Anypoint Studio console log, you will see the following log.

Figure 4.0.c.
Figure 4.0.c shows that your Mule application does not know how to decrypt the client_id and client_secret value. The normal property place holder has higher precedence compared to the secure property place holder. This issue really did trip me up- it took me half a day to sort this out.
If you have a few property files and need a property place holder for them, you could use the created secure property place holder; you just need to add all the property file names as comma separated list (as per depicted in Figure 4.0.d).
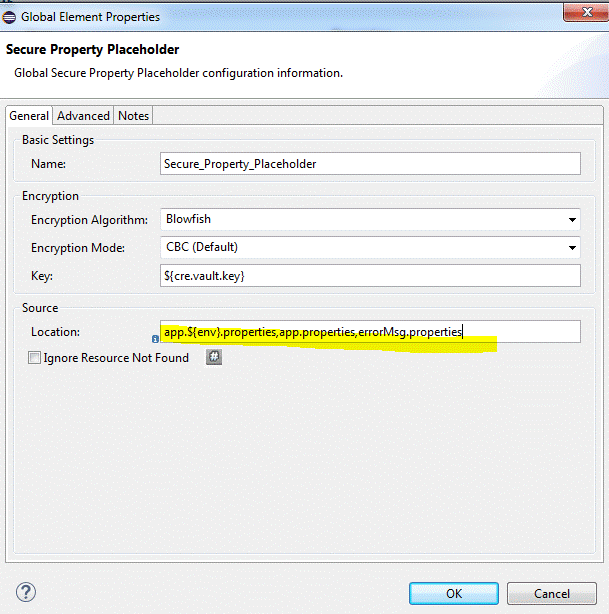
Figure 4.0.d.
5.0 Conclusion
There can only be one – In section 4.0, I have demonstrated the issue if you use both the secure property place holder and the normal property place holder in your Mule application. It is best to use just one, and it doesn’t really matter if you have values that do not need to be encrypted- the secure property place holder is capable of reading unencrypted value during run time as well.
“mule-app.properties” settings – This file would need to be set up differently if you are testing/running your mule application in Anypoint Studio versus testing/running your mule application in an actual mule EE runtime.
The source code is available in this Github repository. Clone it and play with it, the only way to learn and internalize something is to play with it.
Published at DZone with permission of Kian Ting, DZone MVB. See the original article here.
Opinions expressed by DZone contributors are their own.

Comments