Managing iOS Build Configurations and Schemes for XCTest
This tutorial will help you learn how to create a separate build configuration for XCTest to make tests more independent and reliable.
Join the DZone community and get the full member experience.
Join For FreeBefore releasing an iOS app to the Apple App Store, it’s very common to have a build that has been targeted to an internal audience, i.e. QA engineers and product owners who will run it only on specific provisioned devices. During that process, you might have heard words like DEBUG or RELEASE configuration. When we create a new iOS project in Xcode, Apple gives us two project level build configurations: debug and release. The debug configuration is usually used for the development and internal project settings, like pointing the app to the test environment, and release is used to submit an app to the App Store. However, there are many situations that might trigger the need for more internal settings or another build configuration(s). As a good iOS developer, you must be writing unit and UI tests using the XCTest framework. Usually, developers use the debug build configuration to run unit and UI tests, but creating a separate build configuration for XCTest makes tests more independent, reliable, and deterministic. In this post, we will see how to create a separate build configuration for XCTest.
Build Configuration
Before jumping into the creation of a new build configuration, let’s see what build configuration in iOS is and why it’s important to build an app with the right configuration. Imagine we have created a brand new iOS app in Xcode. It will have two build configurations, debug and release, spread all over the Build Settings of an iOS project.
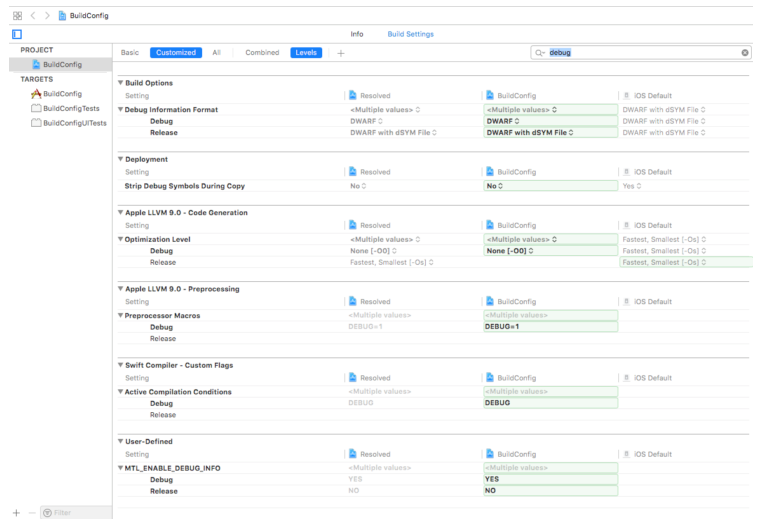
While compiling and building an iOS app, there are so many things happening under the hood, e.g. compiling, linking, copy bundle resource, run build scripts, etc. We can always see these things in the xcodebuild logs. The build configuration defines how we want the app to be built under certain settings, for example, the Debug Information Format build setting doesn’t need to generate dSYM files when we develop applications using simulators, so we can use DWARF for debug builds. However, we need that information for the release builds so that we can use the DWARF with dSYM files setting. You can see this all over the build settings in Xcode, as shown in the image above. In short, build configuration defines the mechanism how the app should be built using different conditions or settings. While running our unit or UI tests written using XCTest, we can still use the debug configuration, however, adding another configuration gives us a lot of control over our testing process.
Build Configuration for XCTest
Now we will add another build configuration that can be used just for XCTest either unit or UITests. Generally, unit tests need less configuration as we can have access to the data and APIs directly inside the app. However, UITests or XCUITests are completely black box, so we need more configurations there in order to pass the specific setup for UI tests. Let’s start by adding another build configuration for the sample iOS app from Xcode. In Xcode project level settings, select the Info tab and we will see the list of available configurations and options to add more configurations.
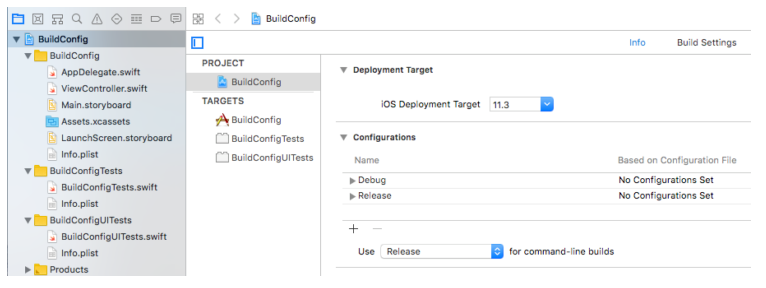
Note that we need project level configuration to get this option, not the target level configuration. Once Clicked on the + button in the configuration. We can add another configuration with duplicating either debug or release configuration. Generally, we need to duplicate the debug configuration for testing purposes, so let’s call it xctest. Under the Configurations section, press the + button. Select Duplicate Debug Configuration. Name your new configuration xctest.
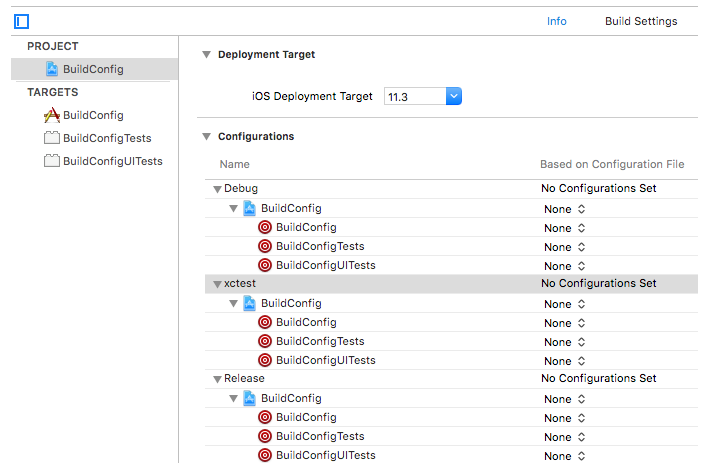
Now we have brand new build configuration that we can use for either unit testing or UI testing. We can assign user-defined settings to the new configuration so that we can set test-specific configuration. In the project build settings, scroll down to the very bottom of the build settings, there is a section called User-Defined. This is where your configuration variables will be added and set.
Pre-Processor Macro
Now that we have added new build configuration, its time to change the pre-processor macro so that we can set our source code to conditionally execute some code.
Now we can wake up this configuration using the code in the main app that invokes test code.
#if XCTEST
// Test only code version code
#else
// App only code
#endif
Similarly, we can use the same approach to change the different environments (stages) test but its covered in some articles already. Some of the popular articles are
- Multiple Build Configurations in Xcode project here
- Organizing
xcconfigfiles here - Managing different environments for iOS projects here
We can use those techniques to configure an app to point it to the test environments. We can also pass these pre-processor macros to the xcodebuild as mentioned here.
Using With CocoaPods
If you are already using CocoaPods then there need to be some CocoaPods-specific changes. As mentioned earlier, Xcode has duplicated the build configuration from the debug configuration. However, CocoaPods has created xcconfig files just for the debug and release configuration. We have to explicitly tell CocoaPods to create config files for another build configuration in the Podfile using the current Xcode project.
xcodeproj `your_project.xcodeproj`, 'xctest' => :debugThe snippet above tells CocoaPods that we have duplicated xctest from the debug build configuration. We also need to add a COCOAPODS=1 flag to the pre-processor macro.
Schemes for XCTest
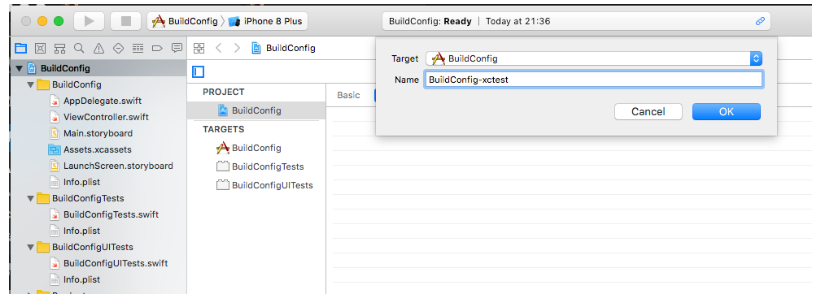
Now we have a separate build configuration dedicated to executing our unit and UI tests written with the XCTest framework. It’s time to prepare environments to run this configuration. Xcode has the mechanism of creating schemes to select the configuration that we want to run. We can create new schemes to run a specific configuration in Xcode. Let’s create the new scheme which builds, runs, and tests using the XCtest configuration from Xcode. From Xcode, we create a new scheme on top of the specific target. You can read more about working with schemes and test targets here.
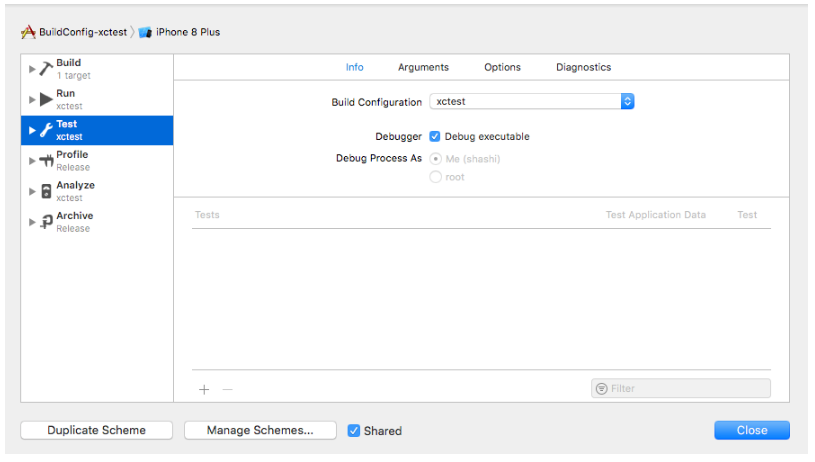
We can edit the newly added scheme BuildConfig-xctest to use the xctest build configuration using the Edit Scheme button.
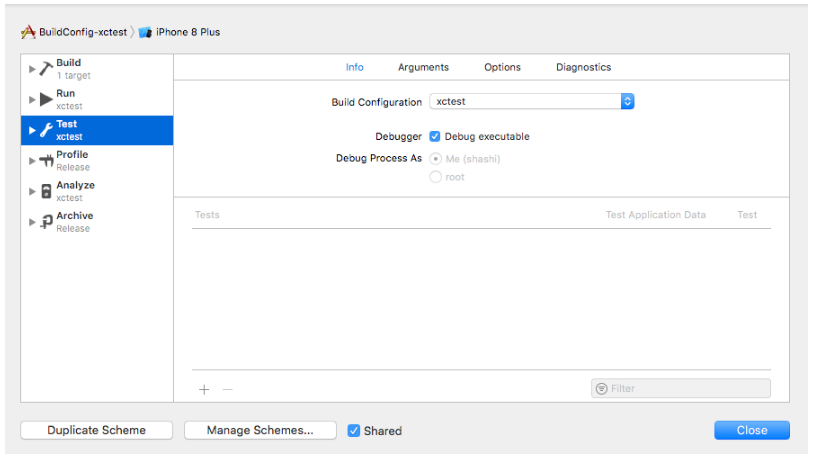
We can see from the left sidebar that we have modified all the actions to use the XCtest build configuration apart from profile and release. With xcodebuild, if we use this scheme for building and testing, then it will use the xctest build configuration.
Conclusion
Using separate build configurations for test purposes, we can make our app more testable as well as reduce the risk of leaking the test code to production. There are a lot of things that can be configured in the app to cover the app with unit, integration, and UI tests. Are you using different build configurations for the unit or UI testing? What are your experiences? Let me know in the comments below.
Published at DZone with permission of Shashikant Jagtap, DZone MVB. See the original article here.
Opinions expressed by DZone contributors are their own.

Comments