Build Your Own AI Avatar App From Scratch in Less Than 8 Hours
Create Your Own AI Avatar in Record Time: A Step-by-Step Guide to Building an App from Scratch
Join the DZone community and get the full member experience.
Join For FreeHave you ever wanted to create your own AI avatar? With the latest technologies, you can build your very own AI app in less than eight hours! This guide will provide an overview of the steps and techniques needed to create an AI avatar app from scratch. Let's dive in!
Like everyone in the Machine Learning field, I was obsessed with following the tons of AI Avatar apps that were taking over the news cycles in December 2022. The notable ones were Lensa.ai, Profilepicture.ai, and Avatarai.me.
Let's look at how easy it is to create an AI Avatar app with no code. A year back, this would've been pretty difficult to pull this off without a single line of code. Before back, you would need to train your own model. You would need to host your model to a cloud provider like AWS and also should've written your Web application that interfaces with the model in HTML from scratch.
In 2022, a lot of the components have been simplified, for some are third-party startups like Huggingface, Replicate, and Stable Diffusion that provide API to trained models for a nominal cost of a few cents per prediction. There are also no-code tools like bubble.io, which have made web development super easy. In this article, I will walk you through the steps to deploy your first AI App using Replicate and Bubble.io. Here's the demo of the app I built in less than eight hours. Here is a short video snippet of how the flow looks :
Here is a simple system diagram for an AI avatar app that looks like this:
- On the home page, you start with a text prompt like "Evil Walter White as a movie villain" and click "Generate Avatars."
- The next page generates the avatar and displays the image on the page.
Quite simple. This tutorial is intentionally kept simple. You can extend your app to add an img2img AI Avatar or extend it to play around with Replicate's API to return more than one avatar. The opportunities are endless.
Step 1: Setting up Replicate
- Sign up with Replicate and choose your model. For the AI Avatar app that just uses a text prompt, the Stable Diffusion txt2img model would suffice. Explore the model here.
- You must set up Replicate API in your local data. Open up the Terminal and run the following code. Python 3.7 or above should already have been installed.
Install the replicate Python client from PyPI:
pip install replicate Next, grab an API token and authenticate by setting it as an environment variable:
export REPLICATE_API_TOKEN=[token] [Optional] You don't need to run this code. But this illustrates how Replicate processes a request and returns an output.
import replicate
model = replicate.models.get("stability-ai/stable-diffusion")
version = model.versions.get("f178fa7a1ae43a9a9af01b833b9d2ecf97b1bcb0acfd2dc5dd04895e042863f1")
output = version.predict(prompt="a photo of an astronaut riding a horse on mars")
So now we've set up a replicate to receive API requests with a specific prompt. You can play around in your python app with different prompts. But how do we hook this up into a web-app?
Step 2: Set up Bubble.io
Bubble.io is an up-and-coming no-code web app builder. This means that with a visual editor, you can build your web pages by dragging and dropping elements, and with a simple UI, you can configure your web components to call the python API at the back end. In our example, we will configure Bubble.io to directly call Replicate.
- Go to the Bubble.io website and click on the "Sign Up" button in the top right corner.
- Create an account by entering your email address and creating a password.
- After verifying your email, log in to your account and click on the "Create a New App" button.
- Choose a name for your app and select a design template.
- You will be taken to the Bubble.io editor, which is where you can begin building your app.
- From plugins, Search and install the Stable Diffusion(Replicate) plugin who provides the API connector to connect our Front end app to Replicate.
Step 3: Building Front-End UI
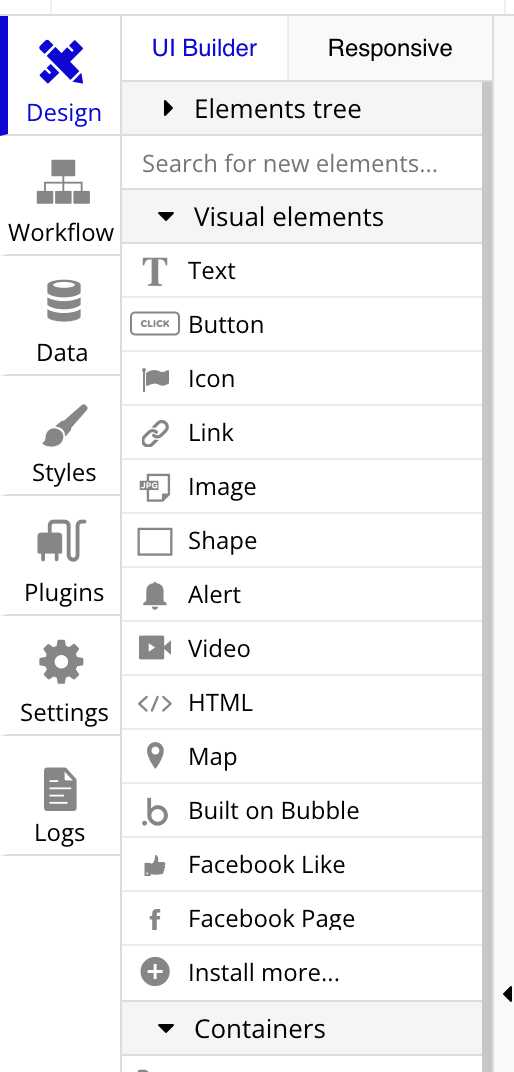
- Bubble.io's UI Builder is pretty intuitive. For our use case, we just need a textbox and a button, and an image to show the generated avatar. Click on Design -> Visual elements to drag and drop visual elements.
- When "Generate Avatar" is clicked, We need to instruct bubble.io to read the text box and send an API request to Replicate.
![UI Builder]()

Step 4: Build Backend Logic
Step 4.1 - Double click "Generate Avatar" button in the Web Editor. You should see a popup black box like the one in image 1. Click on "Start/Edit Workflow."
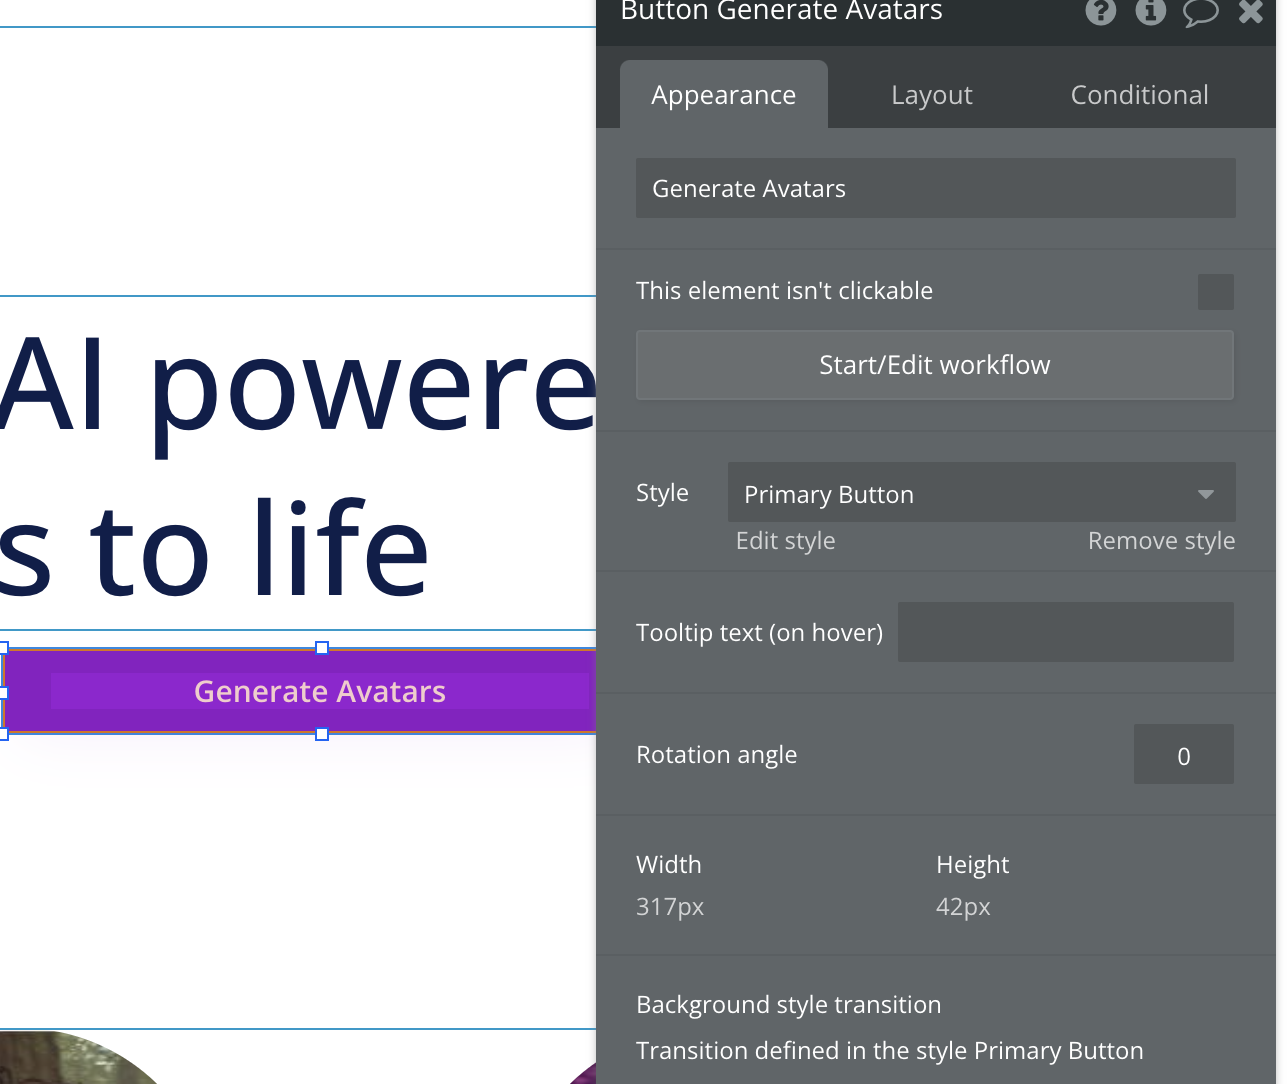
Step 4.2 - We are going to now instruct bubble on what should happen when the button is clicked. The set of instructions is called a workflow. And there are just three simple steps to creating the workflow.
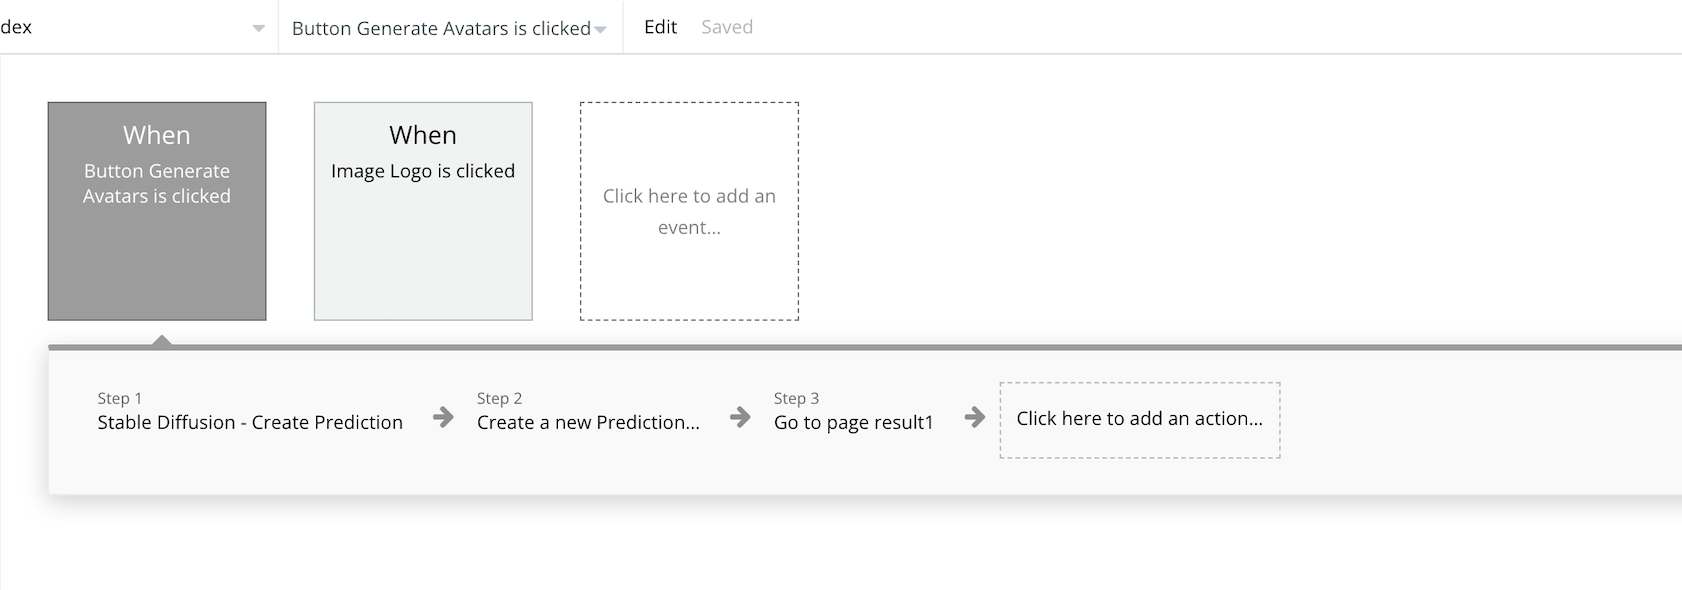
Click on "Click here to add an action." Choose Stable Diff.usion Create a prediction and point the prompt to the text input field's value. This creates a request object and sets the parameter of the request(prompt).
![Click on “Click here to add an action”.]() Now that you have created the request object, the next step is to create the response object.
Now that you have created the request object, the next step is to create the response object.Create a Prediction data object Object: Under Data/ Click on Data types and "Create new field." We will create a new object called Prediction which will hold metadata that saves the response from Replicate.
We need three fields id, prompt, and image.
Once your data object type is created, creating the object should be available as a possible set of actions you can take in the workflow.
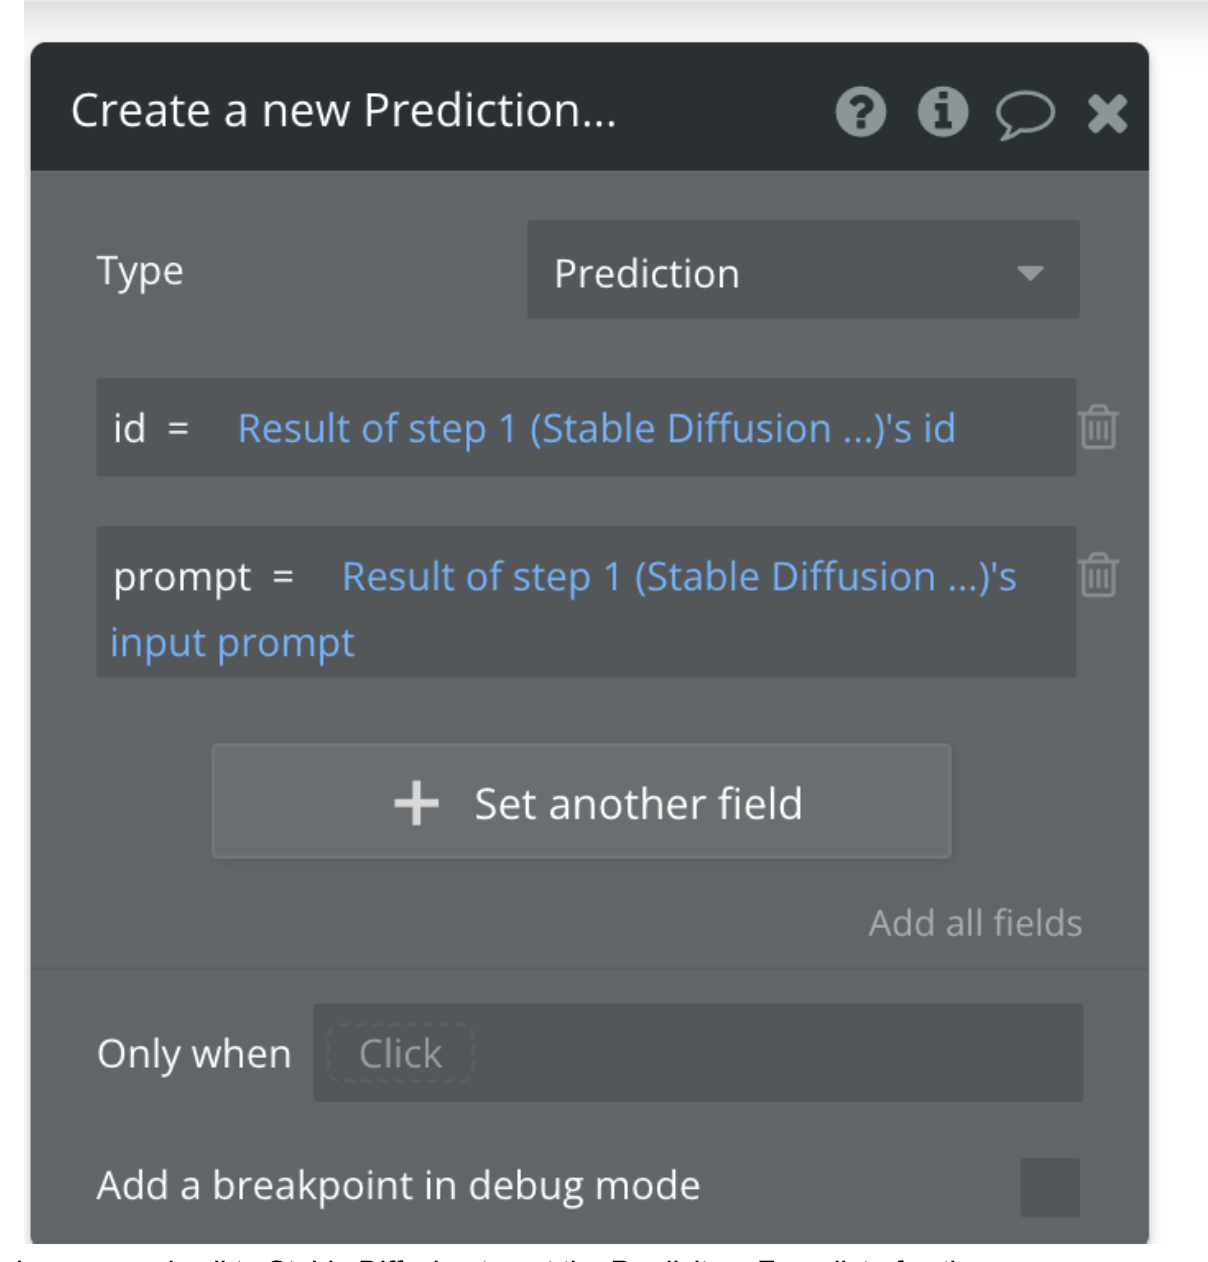
Create a new action called "Create a new Prediction object." Set the data object's id and prompt to point to the result from Step 1.
![Create a new prediction.]()
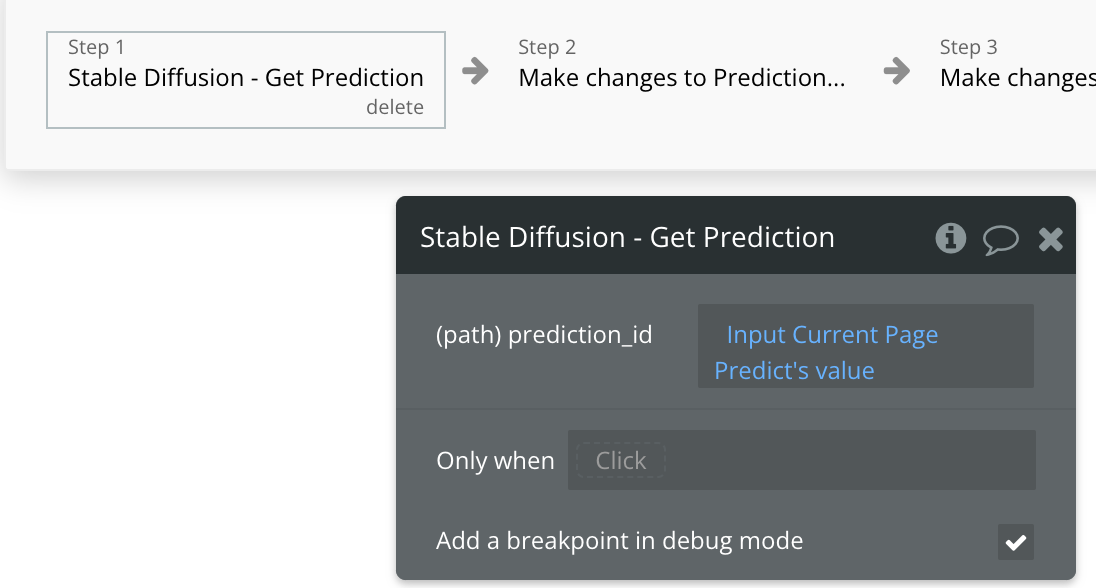
We make a second call to Stable Diffusion to get the Prediction. From the list of actions, click on "Stable Diffusion - Get Prediction." This API call takes the result from Step 1 (Prediction id) and sends another request to replicate to say, "Hey, fetch me the results from Prediction id."
![click on “Stable Diffusion - Get Prediction”.]()
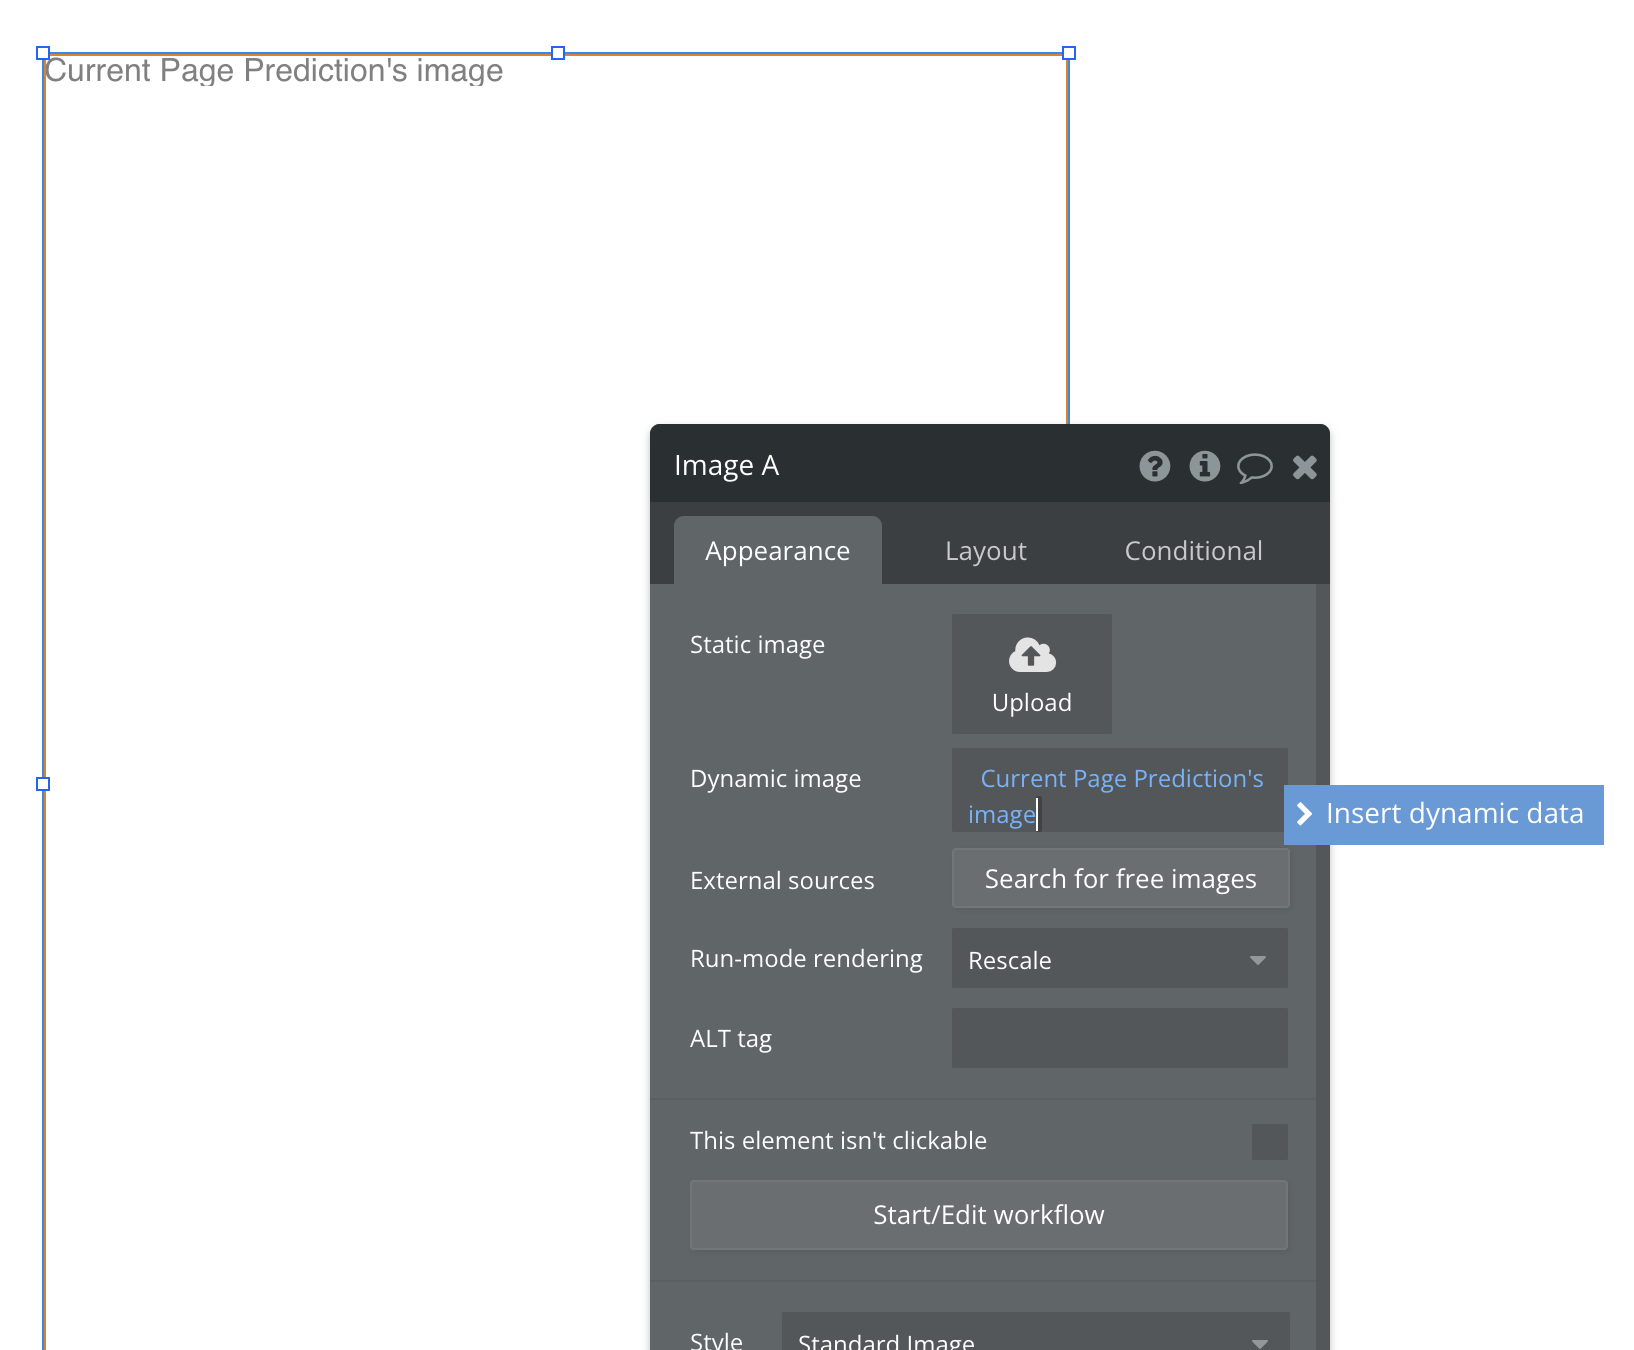
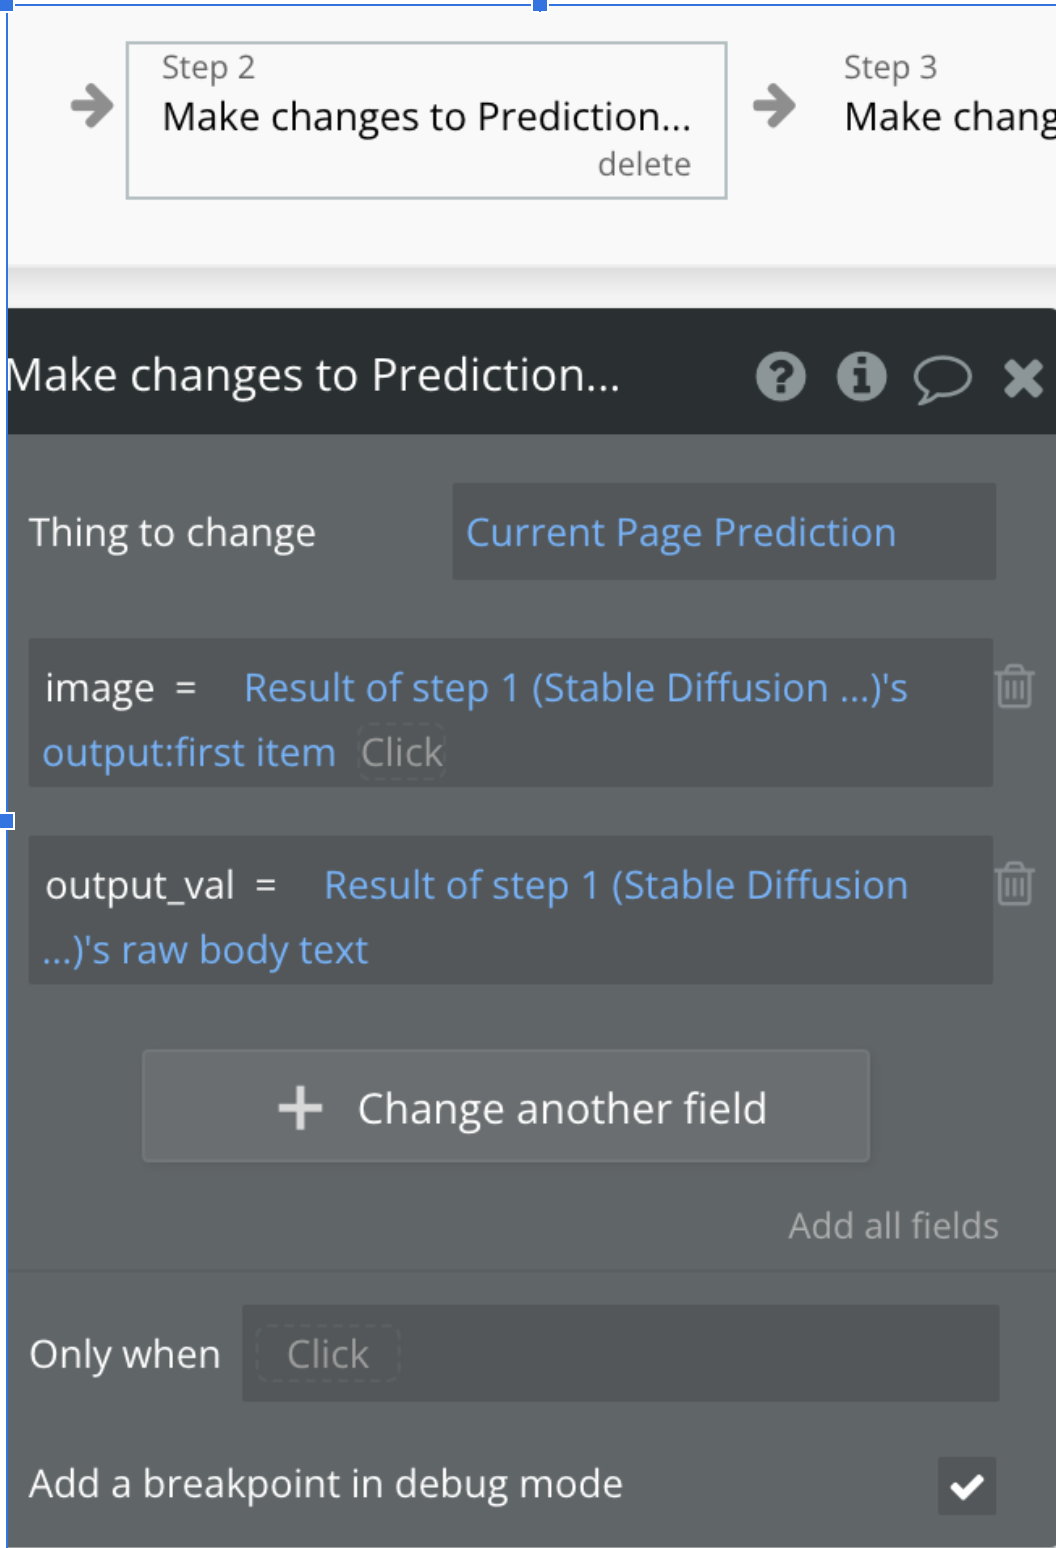
Create a new action to process the Step 1 results and amend the Prediction object. Remember, Prediction is a data object that stores the Prediction id, prompt, and also the output image from Replicate. d show it in the web app. Remember, we have created an Image UI element as part of Step 1. We just need to set the source of Image 1 to point to the Prediction object's result. From the below screenshot, you can see how we set the Prediction object's result object as modified.
![you can see how we set the Prediction object’s result object as modified.]()
The last step is quite simple; we have received the image back from Replicate. Now we need to set the image back in the Web App. Remember you created an Image UI as part of Step 1. Click on that image. Set "dynamic image" to point to "Prediction.image," which would be the current Prediction Object's set image.
Voila!
We have now created the backend workflow with literally zero code. Click on "Preview" on the top right to visualize the app.
Some parting thoughts. This is a fun exercise to just get your hands dirty in building an AI Avatar app. If you are like me and want to build a weekend project for your portfolio simply for gratification, go for it. This can also be extended to include an image upload instead of a prompt.
If you are serious about building an AI Avatar app for distribution purposes, then I'd recommend checking out other alternatives to bubble.io and Replicate (Hugging face model, Lambda). I plan to write up a follow-up article on building a full-fledged AI app from scratch.
Opinions expressed by DZone contributors are their own.

 Now that you have created the request object, the next step is to create the response object.
Comments