Magic Around Spring Boot Auto-Configuration
Spring, work your magic!
Join the DZone community and get the full member experience.
Join For Free
Auto-configuration is probably one of the most important reasons why you would decide to use frameworks like Spring Boot. Thanks to that feature, it is usually enough just to include an additional library and override some configuration properties to successfully use it in your application.
Spring provides an easy way to define auto-configuration using standard @Configuration classes.
Auto-configuration is one of the aspects related to Spring Boot configuration. I have already described the most interesting features of externalized configuration in my article A Magic Around Spring Boot Externalized Configuration.
You may also like: How Spring Auto-Configuration Works
Example
The source code with example application is as usual available on GitHub. Here is the address of example repository: https://github.com/piomin/springboot-configuration-playground.git.
Testing Auto-Configuration
Let us begin in an unusual way — from testing. Spring Boot provides a very comfortable mechanism for auto-configuration testing. We just need to create an instance of ApplicationContextRunner in our JUnit test. With ApplicationContextRunner, we can easily manipulate the classpath, include some property files into Spring context and finally declare a list of input configuration classes. Thanks to that, we don't even have to annotate our configuration class with @Configuration in order to be able to test it.
public class MyConfiguration {
(MyBean2.class)
public MyBean1 myBean1() {
return new MyBean1();
}
}
The myBean1 is dependent from MyBean2 class since it is annotated with @ConditionalOnClass. Let's take a look at the list of all classes defined for our current demo.

As you see in the picture above, MyBean2 class is available on classpath. Therefore, we need to remove it during the test to check the condition and get expected NoSuchBeanDefinitionException exception during test. We may use FilteredClassLoader class for it.
xxxxxxxxxx
(expected = NoSuchBeanDefinitionException.class)
public void testMyBean1() {
final ApplicationContextRunner contextRunner = new ApplicationContextRunner();
contextRunner.withUserConfiguration(MyConfiguration.class)
withClassLoader(new FilteredClassLoader(MyBean2.class))
.run(context -> {
MyBean1 myBean1 = context.getBean(MyBean1.class);
Assert.assertEquals("I'm MyBean1", myBean1.me());
});
}
@ConditionalOnProperty
The @ConditionalOnProperty is a quite interesting annotation. It allows configuration to be included only if an environment property exists, not exists or has a specific value. Let's assume we have another bean myBean2 defined inside our configuration class.
xxxxxxxxxx
("myBean2.enabled")
public MyBean2 myBean2() {
return new MyBean2();
}
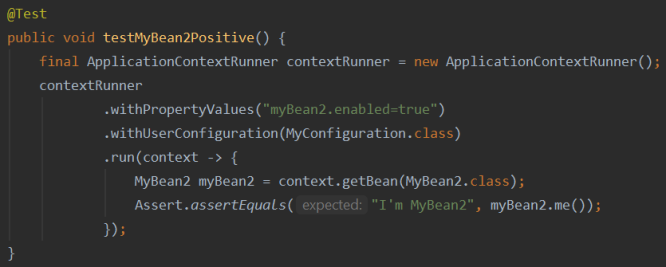
We will add property myBean2.enabled to ApplicationContextRunner during JUnit test. The result may be slightly surprising. The myBean2 bean is not available in the context (exception NoSuchBeanDefinitionException occurs). Why? Spring Boot documentation comes with the answer: By default, any property that exists and is not equal to false is matched. Since we set value false to our property ( withPropertyValues("myBean2.enabled=false")), the result of test becomes clear.
xxxxxxxxxx
(expected = NoSuchBeanDefinitionException.class)
public void testMyBean2Negative() {
final ApplicationContextRunner contextRunner = new ApplicationContextRunner();
contextRunner
.withPropertyValues("myBean2.enabled=false")
.withUserConfiguration(MyConfiguration.class)
.run(context -> {
MyBean2 myBean2 = context.getBean(MyBean2.class);
Assert.assertEquals("I'm MyBean2", myBean2.me());
});
}
Any value different than false, including empty value, is ok. Here's the example of a positive test.

To create conditional bean dependent on a property value, we need to use field havingValue. Assuming we have following definition of bean, which is dependent on property myBean5.disabled, we need to override the rule that value false results in inaccessibility of the myBean5 bean.
xxxxxxxxxx
(value = "myBean5.disabled", havingValue = "false")
public MyBean5 myBean5() {
return new MyBean5();
}

Multiple Conditions
We may mix different conditional annotations on a single bean definition. We cannot duplicate the same annotation, but it is possible to add multiple classes, beans, or properties inside single conditional annotation. Each of those conditions is logically combined using AND. The following bean myBean4 is dependent from multipleBeans.enabled property, and myBean1, myBean2 beans.
xxxxxxxxxx
("multipleBeans.enabled")
({MyBean1.class, MyBean2.class})
public MyBean4 myBean4() {
return new MyBean4();
}
The following test verifies the case where only myBean2 is not available. It results in NoSuchBeanDefinitionException exception.
xxxxxxxxxx
(expected = NoSuchBeanDefinitionException.class)
public void testMyBean4Negative() {
final ApplicationContextRunner contextRunner = new ApplicationContextRunner();
contextRunner
.withUserConfiguration(MyConfiguration.class)
.withPropertyValues("multipleBeans.enabled")
.run(context -> {
MyBean4 myBean4 = context.getBean(MyBean4.class);
Assert.assertEquals("I'm MyBean4", myBean4.me());
});
}
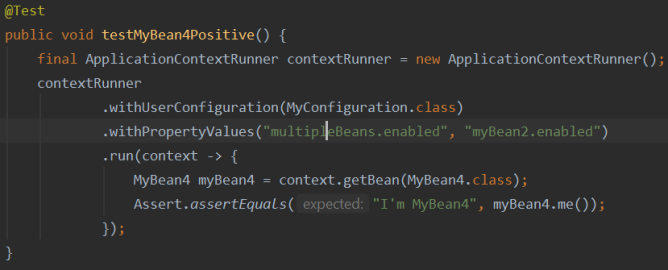
Since myBean2 is dependent from myBean2.enabled property, we need to include it to the context during the test to verify a positive scenario. In the following JUnit test, all three conditions for myBean4 are satisfied, which results in the availability of the bean.

Now, let's consider the situation we would like to have the same conditions defined for our bean, but logically combined using OR. We don't have any predefined annotations for such cases. So, we need to create class that extends the Spring AnyNestedCondition class, and defines all three conditions as shown below.
xxxxxxxxxx
public class MyBeansOrPropertyCondition extends AnyNestedCondition {
public MyBeansOrPropertyCondition() {
super(ConfigurationPhase.REGISTER_BEAN);
}
(MyBean1.class)
static class MyBean1ExistsCondition {
}
(MyBean2.class)
static class MyBean2ExistsCondition {
}
("multipleBeans.enabled")
static class MultipleBeansPropertyExists {
}
}
The class defined above needs to be used as a condition for our new bean. Here's myBean6 definition:
xxxxxxxxxx
(MyBeansOrPropertyCondition.class)
public MyBean6 myBean6() {
return new MyBean6();
}
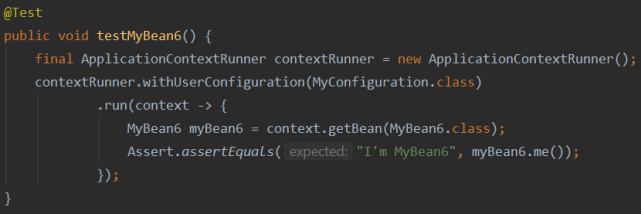
In the following test, only the condition with myBean1 is satisfied. Since all our three conditions are logically connected using OR, myBean6 is available in the context. It is also worth mention that Spring Boot provides class NoneNestedCondition for building negative conditions.

Load Order of Auto-Configuration
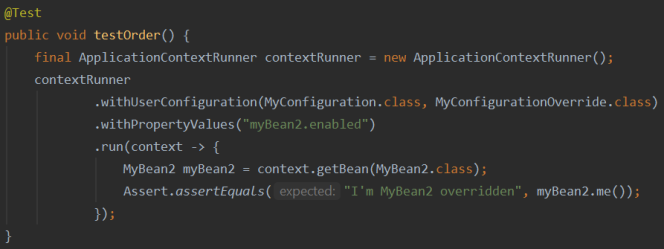
We may define multiple @Configuration in our application. When having multiple configuration beans, we may easily control a load order by using annotations @AutoConfigureAfter, @AutoConfigureBefore, or @AutoConfigureOrder. In the test with ApplicationContextRunner, the load order is just represented by the order arguments used in withUserConfiguration method.
xxxxxxxxxx
public void testOrder() {
final ApplicationContextRunner contextRunner = new ApplicationContextRunner();
contextRunner
.withUserConfiguration(MyConfiguration.class, MyConfigurationOverride.class)
.withPropertyValues("myBean2.enabled")
.run(context -> {
MyBean2 myBean2 = context.getBean(MyBean2.class);
Assert.assertEquals("I'm MyBean2 overridden", myBean2.me());
});
}
Let's consider the situation we have two declarations of the same bean in two configuration classes. Here's our bean:
xxxxxxxxxx
public class MyBean2 {
private String me = "I'm MyBean2";
public String me() {
return me;
}
void setMe(String me) {
this.me = me;
}
}
We are defining the second Spring configuration class that overrides the myBean2 declaration.
xxxxxxxxxx
public class MyConfigurationOverride {
public MyBean2 myBean2() {
MyBean2 b = new MyBean2();
b.setMe("I'm MyBean2 overridden");
return b;
}
}
What would be the result of the operation visible above? It overrides the existing bean definition, as shown below.

Additional Conditional Annotations
There are some additional conditional annotations like @ConditionalOnExpression, @ConditionalOnSingleCandidate, or @ConditionalOnWebApplication. For more details, you may want to check out the Spring Boot documentation. There is also @ConditionalOnJava, which allows you to define the version of Java under which a defined bean should be available. Here's the definition where MyBean3 is registered only if Java version is newer than 8.
xxxxxxxxxx
(range = ConditionalOnJava.Range.EQUAL_OR_NEWER, value = JavaVersion.NINE)
public MyBean3 myBean3() {
return new MyBean3();
}
Here's a test run under Java 8.

Summary
In this article, I demonstrated the most interesting features of Spring Boot auto-configuration. Building auto-configuration in Spring Boot is a rather simple thing to do, and maybe even fun? Here's the result of running our tests.

Further Reading
How Spring Auto-Configuration Works
7 Things to Know Before Getting Started With Spring Boot
Tutorial: Reactive Spring Boot, Part 5 — Auto-Configuration for Shared Beans
Published at DZone with permission of Piotr Mińkowski, DZone MVB. See the original article here.
Opinions expressed by DZone contributors are their own.

Comments