How to Integrate Google Workspace With Oracle APEX and Oracle Database: Part 1
Have you ever wondered about integrating your company's Google Workspace with Oracle APEX? We have good news: This is the ultimate guide to such integration.
Join the DZone community and get the full member experience.
Join For FreeMany organizations base their functioning on tools from the Google Workspace package, formerly known as Google Suite. The wide range of useful tools encourages utilizing Google Workspace in every area of the company’s operations. So a key question arises — can Oracle APEX be integrated with Google Workspace in my company? Yes, of course! Recently, I have faced a challenge of this kind. The project was dedicated to pharmacy and one of the functionalities assumed fetching data from Google Sheets and downloading files from Google Drive.
In this extensive step-by-step tutorial, I will show you how to integrate Google Workspace with your Oracle Database and Oracle APEX applications. The tutorial consists of two parts, and each of them is divided into several sections.
What Is Google Workspace
Google Workspace includes office applications and other productivity tools. It is a set of services provided by Google as a cloud solution. It allows the commercial use of Google applications, such as Google Docs, Google Sheets, Google Drive, etc. After purchasing access to Google Workspace, the company receives a personalized space with its domain and access to services included in the selected subscription. Working with Google Workspace tools can be done on a computer, phone, or tablet.
Google Workspace has become an alternative solution to standard office applications, especially in cases where organizations have decided to stop using office suites installed locally on computers. It is really worth integrating with Google Workspace. Otherwise, the organization exposes itself to low application performance and forces end users to switch between the business application and their resources from the Google account. For many companies, Google Workspace has become one of the critical elements of the internal system infrastructure.
How Google APIs Work and How to Access Them
Google Workspace provides an extensive REST API, thanks to which it is possible to use the API methods from the custom application level. For example, the API allows you to add events to Google Calendar, download files from Google Drive, or read data saved in Google Sheets. The application we create may look like a Google Workspace tool due to the high level of integration.
Access to Google API is available on two primary levels. The choice of access method depends on the specific API functionality and is defined in the documentation. Both Google API access methods can be configured in the Google API Console.
- If the API call does not refer to the user’s private data, we will use the API key. This is a string that does not change over time and does not require a periodic update. The API key is used for the identification of transactions between our application and the Google Auth server.
- Otherwise, when we use the API to perform CRUD operations on users’ data, we will use the OAuth 2.0 protocol.
- In this case, we use the access token to authorize API access, which is valid for one hour. After this time, your application should obtain a new access token to communicate with Google API.
- You have to keep in mind that the OAuth 2.0 protocol implemented on the browser level is designed for applications that access APIs only while the user is present at the application.
- The alternative is to use a service account and call Google API without confirmation of its identity. This approach will be described in the coming chapters.
What is important is that Google API refers to the file’s access rights of the calling user, so if you have access to the file (you are an owner of the file or it is shared with you), then you can access it using Google API. Otherwise, you can not.
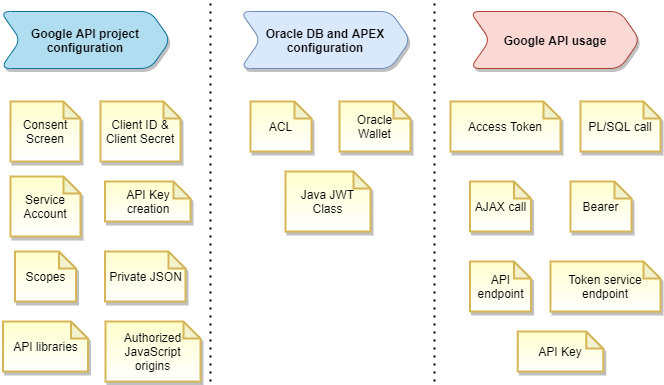
When creating an application in Oracle APEX, it would be great to have native support in integration with the Google ecosystem. Still, it is not fully implemented by the built-in functionalities of the framework. We need to extend the existing mechanisms to make the integration with Google API effective. It can be implemented on two levels: JavaScript and PL/SQL. Each of these levels has its specificity and will be explained in the coming sections.
Configuring a Project in Google API Console
Okay, it’s time to configure a project in Google API Console to use the vast possibilities offered by Google API. One of the necessary elements will be implementing the OAuth 2.0 protocol, through which we can call APIs accessing users’ private data. To implement OAuth 2.0, we will use the "Google API Client Library for JavaScript" provided by Google.
This JavaScript library will be responsible for authenticating the user with their Google account. It will allow you to get the access token needed to call the API. You can use this token in calls from JavaScript and PL/SQL. We will also create an API key required for API calls that do not access the user’s private data.
Go to https://console.developers.google.com/start. At this point, you can use the Google account in your organization’s domain to log in.
From the "APIs & Services" menu, select "Dashboard," and then select the available option "Create Project."
If you already have any other project created in your account, its name will be visible instead.

Click on this, and in the pop-up window that opens, select the "New project" option in the top right corner.

On the new project configuration screen, enter its name and click the "Create" button.
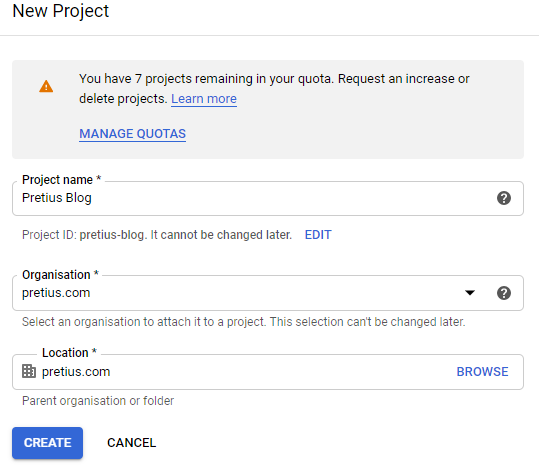
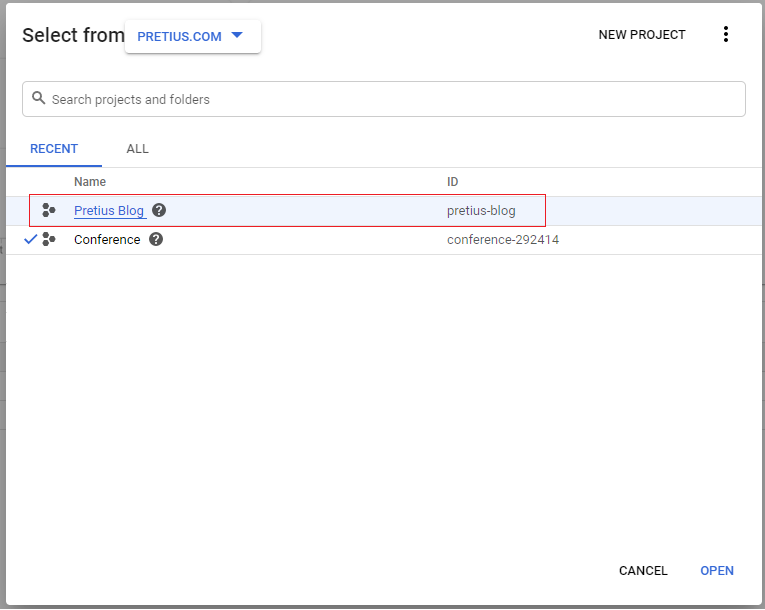
After creating the project, you will be automatically redirected to it. However, if this has not happened, select the newly created project from the project selector.
From the menu on the left side, go to the "Library" tab. The entire library of available Google APIs appears. For our example, let’s say that we will need the "Google Drive API" library. Find it and then choose it. On the summary screen, click the "Enable" button.
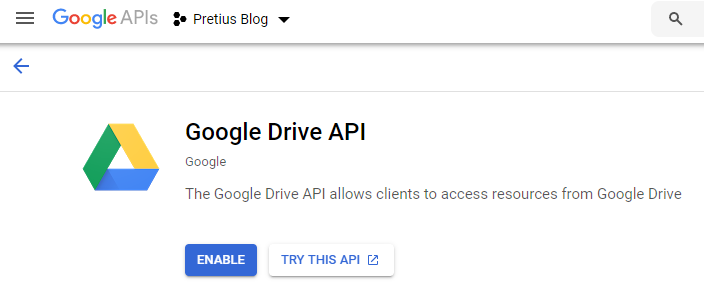
After activating the API, you will be taken to the "Overview" section where there is more information about it. You will find information about the usage statistics of this API over various periods and links to documentation and tutorials.
Select the "Credentials" option from the menu available on the left, and then select the "+ Create Credentials" option from the top bar. From the available menu, select the ‘OAuth client ID’ option.
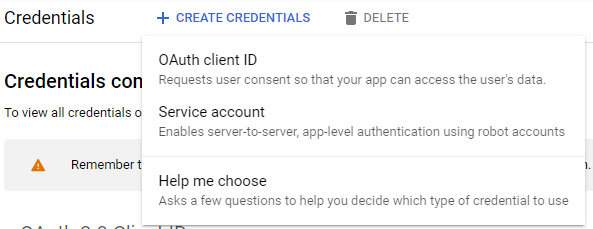
In the first step of the wizard, you will be asked to configure the "consent screen." This screen will appear every time you try to authenticate with Google, and it will contain a list of saved Google accounts with the option of selecting one to continue user activities. Select the "Configure consent screen" button.
The wizard will ask you to select the type of user. We will focus on the internal type, limiting the possibility of integration to your organization. Click the "Create" button.
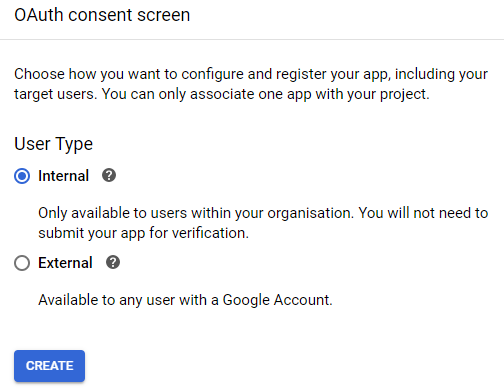
On the "OAuth consent screen," we have several attributes that you can adapt to your application’s needs. The mandatory fields are:
- Application name
- User support email
- Email address in "Developer contact information" section
Additionally, you can pick an image with the application logo or a link to the privacy policy. Click the "Save and Continue" button.
In step 2, "Scopes," you can select the scope of permissions for user data in Google Workspace that are applicable in your project. Using the “Add or remove scopes” option, select all relevant items from the list and click "Update." Then click "Save and Continue." You can learn about the scopes of permissions needed for your integration from the documentation for a specific Google API method.
In step number 3, "Summary," you can see a summary of our consent screen. After verification, click the "Back to Dashboard" button.
Let’s generate all necessary credentials to use Google API. Go to https://console.developers.google.com/start. At this point, you can use the Google account in your organization’s domain to log in. Pick the project that you created previously. Select the "Credentials" option from the menu on the left. Select the "+ Create Credentials" option from the top bar. Select "OAuth client ID" from the available menu.
From the available "Application type" list, select the "Web application" option. Enter the name of your client and go to the "Authorized JavaScript origins" option. In this option, select the main address to your application, in which you will use the integration with Google. In our example, if the APEX application is located in the public apex.oracle.com environment, enter this address: https://apex.oracle.com. For your local environment, enter http://localhost:8080. Click the "Create" button.
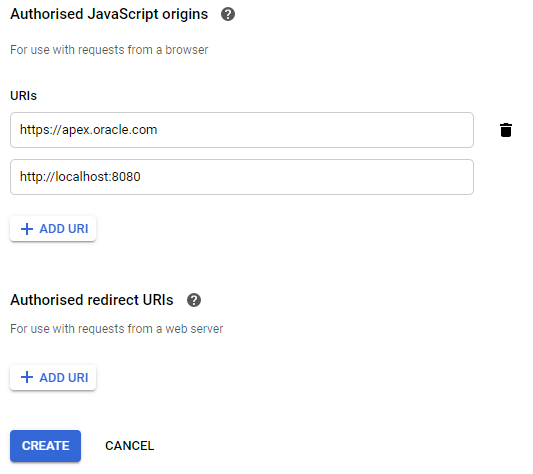
Warning: If you decide to add a new environment to the "Authorized JavaScript origins" address list sometime after your OAuth 2.0 client has been created, this environment will likely not be supported correctly by the Google API. It will cause an error visible in the browser console, which means no new environment in the list of authorized JavaScript domains. In this case, create a new OAuth 2.0 client for all environments, including the new one.
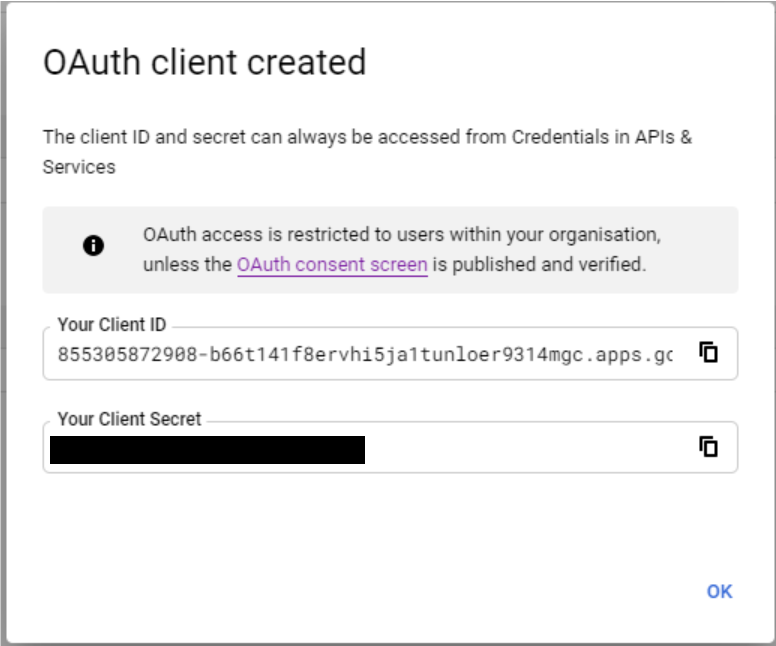
After creating a new OAuth 2.0 client, you will receive information that your client has received two essential elements: "Client ID" and "Client Secret." These two attributes are the login and password equivalents and will be used in the JavaScript library.
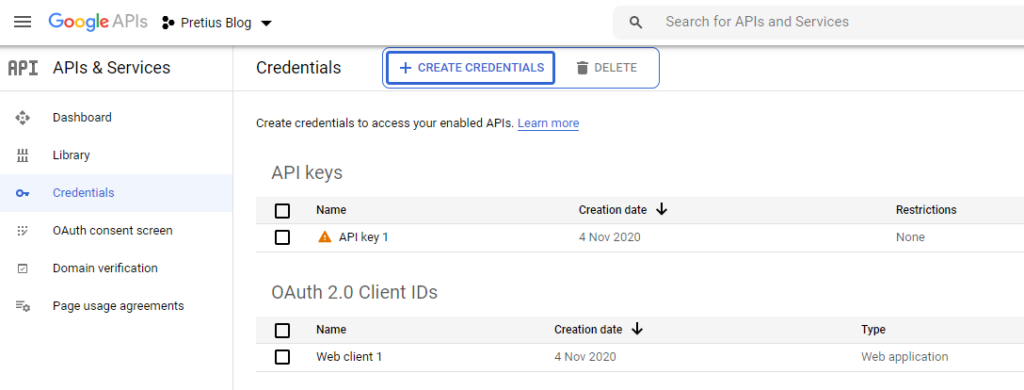
The "Credentials" screen shows the created client. We can view its details, rename it, reset "Client ID" and "Client Secret," and add addresses in the "Authorized JavaScript origins" section.
Additionally, for integrations that do not require the OAuth 2.0 protocol, generate an API key. In the Credentials tab, select "+ Create Credentials" and select the API Key option. The key will be generated. You can choose restrictions on the API keys’ use due to the allowed application types that can use an API key. You can also select which of the activated Google API libraries in our project will be authorized to use the key. We use the generated key in Google API calls by adding the key=YOUR_API_KEY parameter to the request.
Conclusion
We got it! We have finished configuring Google Workspace. The API needed to manage Google Drive is now ready for use in our APEX application. The next step is to prepare the database for communication with Google API and configure the JavaScript library in the APEX application itself.
Important: Besides implementing the OAuth 2.0 protocol based on the JavaScript library, there is also a second method based on a special account called service account. This type of account is not associated with any Google Workspace human user in your company. This type of account is useful when you integrate with Google API in systematic processes, e.g. database jobs responsible for data synchronization running at night. In these cases, you can implement the integration without any user action required, as with the consent screen. From the Oracle database perspective, the service account can be used thanks to the implementation of a JSON Web Token (JWT) and the appropriate cryptographic algorithm, which will allow proper communication with the Google token service. This approach will be described in the second part of this article.
And that's it for part one. In part two, I'll cover integration using JavaScript library and the service account. I'll also write about social sign-in.
Published at DZone with permission of Wojciech Sowa. See the original article here.
Opinions expressed by DZone contributors are their own.

Comments