How to Use Postman to Manage and Execute Your APIs
Postman is convenient for executing APIs because once you’ve entered and saved them, you can use them over and over again without having to remember exact information.
Join the DZone community and get the full member experience.
Join For FreeIn today’s development world, the importance of APIs is known to almost all.
APIs make it possible for any two separate applications to transfer and share data between themselves and makes it easier for an application user to execute actions without having to use the application’s GUI. From the developer's POV, it's an easy way to execute certain functionalities of their app and test it, as well.
Using APIs on a daily basis might become cumbersome, as one might have dozens or even hundreds of APIs that need to be tested. That makes it difficult to keep up with their exact request’s address, headers, authorization credentials, etc., and that makes it harder to test the API for functionality, security, and exception handling.
Postman is a popular API client that makes it easy for developers to create, share, test, and document APIs. This is done by allowing users to create and save simple and complex HTTP/s requests, as well as read their responses. The result is more efficient and less tedious work.
In this post, we will go over how to use Postman to execute APIs for your daily work, an ability that is available in their free version. We will also show you how to use Postman when using CA BlazeMeter.
In case you don’t have Postman installed, you’ll need Google Chrome browser and to install the Postman chrome extension on Chrome Web Store.
How to Use Postman to Execute APIs
Postman is very convenient when it comes to executing APIs, since once you’ve entered and saved them, you can simply use them over and over again without having to remember the exact endpoint, headers, API key, etc.
Starting with Postman is pretty straightforward. Go to your and select the Postman logo. You will see Postman’s GUI, and in the upper section, you should see the relevant field to enter your API request as well as the Methods menu (GET, POST, etc.) and tabs to add headers, body, authorization credentials, and pre-request scripts. On the right side, you will see the Save button to save your API for future use.
Here is a detailed example explaining how to enter a new API request using CA BlazeMeter’s test create API, but you can do this for the product you are developing.
1. Enter the API endpoint where it says Enter request URL and select the method (the action type) on the left of that field. The default method is GET but we will use POST in the example below.

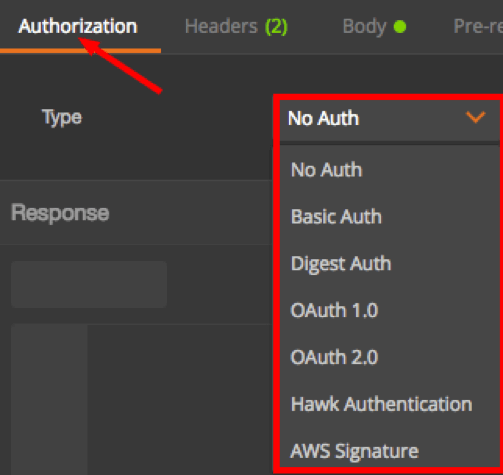
2. Add authorization tokens and credentials according to the server side requirements. The different methods and protocols that Postman supports are No Authentication, Basic Authentication (provide username and password only), Digest Authentication, OAuth 1.0, OAuth 2.0, Hawk Authentication, and AWS Signature.
3. Enter headers in case they are required.

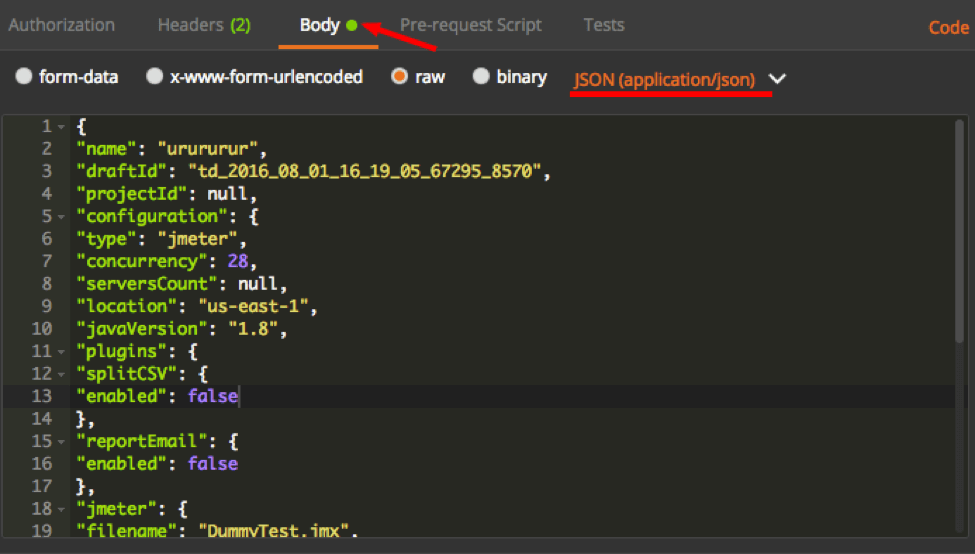
4. Enter a post body in case it is required. In this example, we are creating a CA BlazeMeter test that requires a JSON payload with relevant details.
5. If you wish to execute this API now, hit the Send button, which is located to the right of the API request field. You can also click on the Save button beside it to save that API request to your library.

That’s it! Now, you know how to enter your API request to Postman and save it to your library.
One of Postman’s fantastic features is Collections. Collections allow you to group together several APIs that might be related or perhaps should be executed in a certain sequence.
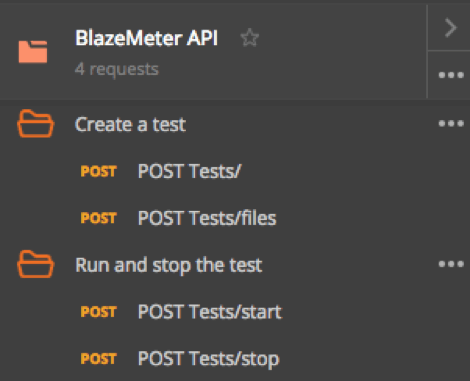
For example, in the screenshot below, you can see a collection that includes four APIs that are all required to create and run a CA BlazeMeter test. The first two APIs create the test object — the first of the two applies the necessary configuration, and the following API uploads the script file needed to run it. The last two APIs start and stop the test we created previously. Obviously, they should be executed in that sequence, hence the collection will be sorted accordingly.
Running a Postman Collection
In order to run a Postman Collection, you will need to use a feature called Collection Runner.
1. In Postman GUI, in the top left corner of the screen, click the Runner button.

2. Select the relevant Collection. In our case, it will be the one called BlazeMeter API.

3. There are additional configuration parameters which you may define but it’s not mandatory. For example, you can specify the number of iterations you wish to run the collection for, as well as add delays between each API request.
Also, there is an option to choose your environment. Environments allow you customize requests using variables that might include environment specific values. This is extremely helpful in case you are testing against several environments such as development environment, production environment, etc. In order to set up a new environment, click on the gear icon on the top right side of the Postman GUI. Select Manage environments. You will be able to add a new one as well as its respective variables.

How Postman Helps You Use APIs Within Your Own App or Script
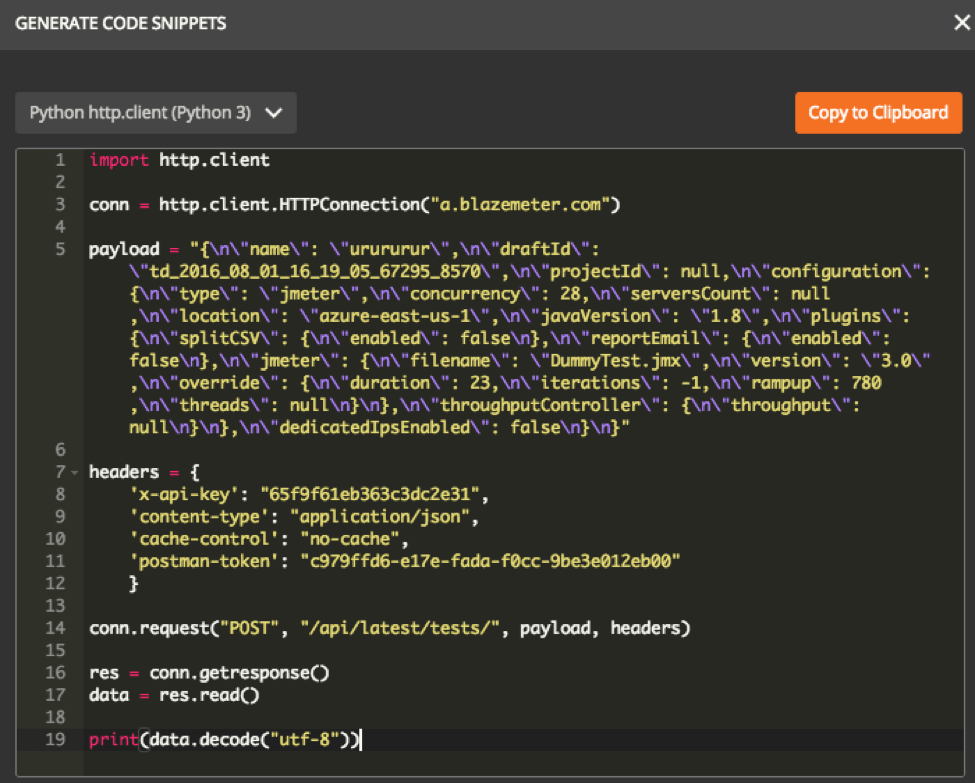
Postman also has a feature called Snippets. By using it, you can generate code snippets in a variety of languages and frameworks such as Java, Python, C, cURL, and many others. This is a huge tim- saver since a developer can easily integrate APIs with his or her own code without too much hassle. To use it, click on the Code link below the Save button on the top right section of Postman’s GUI.
Below is an example for our Create Test API in a python snippet.
Congratulations — now you can now start running and testing your API using Postman!
Published at DZone with permission of Jacob Sharir. See the original article here.
Opinions expressed by DZone contributors are their own.

Comments