How to Use Moq to Ease Unit Testing
Learn to use the Moq framework to easily set, test, and verify methods when mocking for easier unit testing.
Join the DZone community and get the full member experience.
Join For FreeIn the process of web development, applications usually consist of different classes which interact to obtain the desired functionality. Consequently, when we consider an object-oriented process for unit testing, it can be troublesome for different classes and methods. Unit testing is one of the essential parts of creating clean and working code. It tests the smallest parts of code, like classes or methods, including other methods and classes of the application.
In unit testing, we generally need to write code to access the external resource, like a file or database system. But what about when the resource is not available? One way to solve this issue is by using mock objects. Creating fake objects for these underlying dependencies can help you to test the interaction between the method and its dependencies. Among the popular mocking frameworks, Moq is the top framework. The Moq framework helps us to easily set, test, and verify the methods.
However, if you are still confused let us understand what mock is:
What Is a Mock?
The fake mock objects enable you to copy the exact behavior of classes and interfaces, allowing the code to interact as if they are real objects. This differentiates the code you are testing, while letting you know that it functions on its own and no other code can harm it. Moreover, the mocks can be customized on a basis of parameters and return values for different settings on method calls. Along with this, you can ensure that the methods you have included can be called in the tested code. The whole process will ensure the correct flow of the program.
So, how you can use mocks for unit testing?
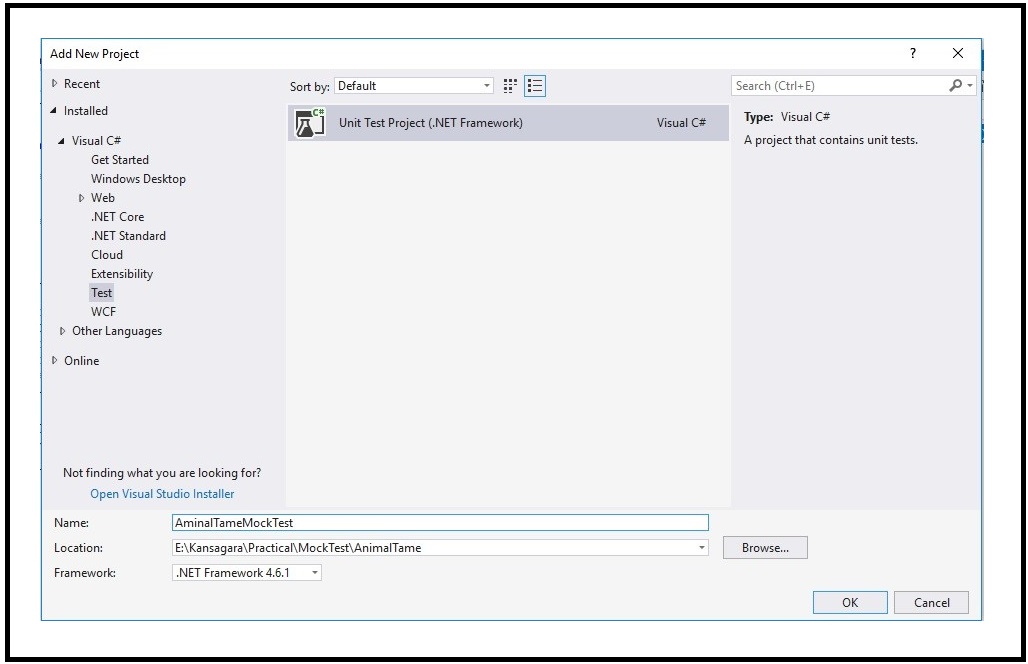
- The first step is to create a separate project for unit tests, where you need to add a name, location, and version as shown in the following picture.
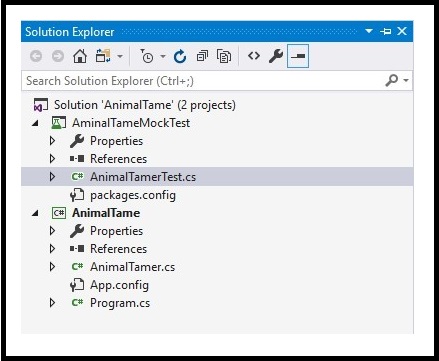
 Once you have created the project, you will land on the following page, as shown in this picture.
- Once you find your project, you need to install the Moq NuGet package from Visual Studio as shown in this picture:

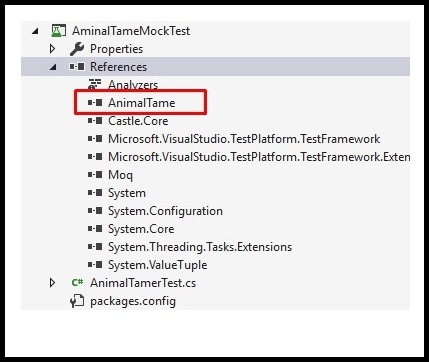
- After installing the NuGet, you need to add an existing project reference into the unit test project, as shown below.
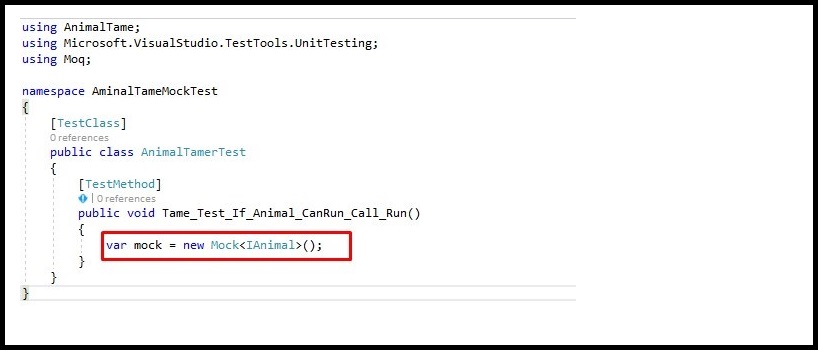
- Later, create a mock builder for the IAnimal interface. The builder will help you to set up the behaviors of the mock, as shown below.
- Once the builder is developed, you need to set up the ideal expectations for your mock. For that, you can expect that the mock will always return true for the CanRun() method as shown in this attachment:

- Then you can create an object of the AnimalTimer class to call the "Tame" method as shown in below attachment. Once done, you can call the "Tame" method by passing the mock (i.e. mock.Object) to tamer.Tame() as shown in the below attachment.


- Finally, we can clearly see that our expectations have met. In order to verify that, Run() has been called as shown in "MoqVerify.jpg" attachment.

- Now the whole unit test method code will look as shown in the below picture.
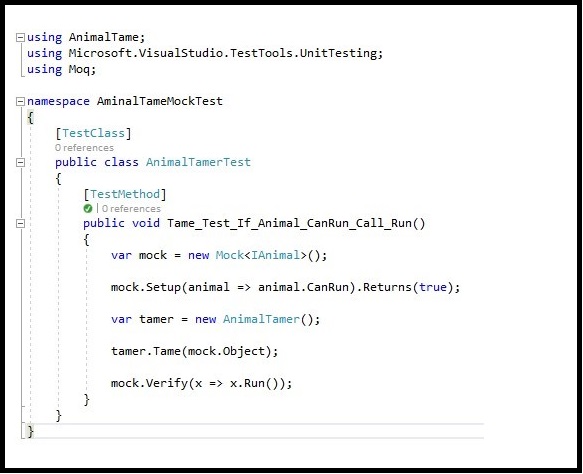
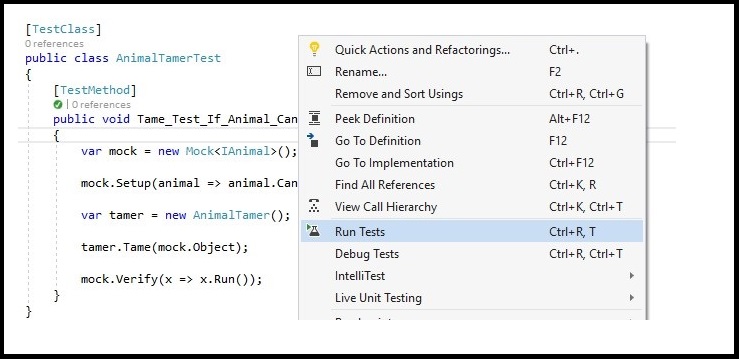
- Once you verify this, you can right-click on the method body and "Run Tests" as shown in the below picture.
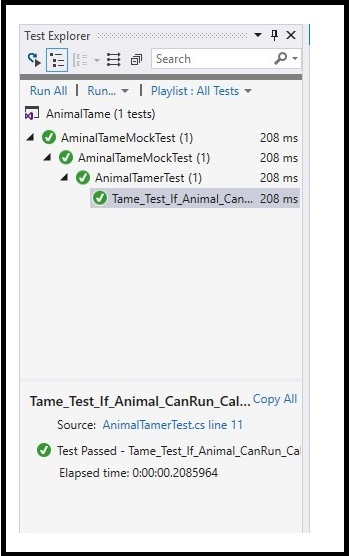
- The test result will look like:
Mocking with the help of the Moq framework, it turned out to be flexible and simple. The TDD process can be easily carried out with Moq.
Opinions expressed by DZone contributors are their own.

Comments