How To Add Audio Animations to Android Apps
The text discusses the implementation of audio animations in Android apps, particularly in the context of Android Automotive OS.
Join the DZone community and get the full member experience.
Join For FreeThe Task at Hand
Our development team is focused on mobility and automotive and continuously engages in internal R&D. One such initiative is In-Vehicle Onboarding (IVO), based on Android Automotive OS. It enables users to access information regarding car functionalities and controls in an intuitive manner.
A pivotal element of this project is the voice assistant functionality, which lets users interact with the system through voice commands. This eliminates the need for physical interaction with the device and allows them to keep their attention on the road.
Our initial plan involved an animated component that would accompany the voice commands. The objective was to create an exceptionally responsive and precise voice-driven animation that could seamlessly integrate into both Android and Android Automotive OS. Given the complexity of this task, we opted to treat it as a discrete sub-project.
The Tools Available
There are many alternatives for implementing frame-by-frame or tween animations into Android applications. The emergence of new animation libraries, e.g., Lottie, and the accessibility of resources like PaintCode grant developers a new level of versatility and ingenuity when it comes to fashioning and executing animations in their code.
We’ll do a comparative analysis of modern animation libraries and tools, plus juxtapose them with existing GitHub libraries and custom views in the Android Canvas framework.
Lottie Animation
The Lottie library is used to craft vector animations that can scale to any resolution. The animations are built in Adobe After Effects, after which they are exported as JSON files and implemented into Android applications.
Lottie is a favorite among developers since it provides all the necessary tools for creating high-quality animation. However, in our particular scenario, Lottie wasn’t the best choice. Our Android audio animations had to closely synchronize with sound cues so that the user immediately understood their meaning. However, Lottie's inherent functionality did not align well with these requirements.
Parameterized View
PaintCode is another alternative. It’s a resourceful tool that enables developers to craft vector graphics and convert them into functional code. PaintCode is often used to produce custom views with animations that are then implemented into Android apps.
But it’s worth noting that PaintCode has certain limitations in terms of customization, particularly with regard to the scope of adjustable parameters. It's also a paid tool, which may influence the considerations of developers seeking cost-effective solutions for their animation needs.
Existing GitHub Library
GitHub stands as an invaluable resource for developers who wish to incorporate animations into their Android app. Its vast ecosystem gives access to a plethora of libraries, code snippets, and templates. This allows developers to harness these pre-existing animations and quickly enhance their apps. Developers can also utilize these repositories as valuable educational tools.
But despite our dedicated research, we couldn’t find a third-party animation library that would fit our criteria on the site.
Custom View on Android Canvas
Developers have the option to create custom views using Android Canvas, which grants complete freedom in terms of both animation design and execution. Custom views are particularly great for animations that demand an extensive degree of personalization and interactivity. Therefore, we decided to adopt this approach for our project.
Implementation
Now, we’ll talk about the two animation types we used: wave and line animations. These are a very popular choice, being able to convey information in a simple and appealing way with the help of Bezier curves and Fibonacci sequences. Here’s how we brought them to life.
Firstly, we need audio data to use as the basis for our animation.
Android Visualizer and AudioTrack are perfect for that:
- Visualizer uses the `Record Audio` feature and can notify you whenever a sound session is updated with ID.
- AudioTrack splits audio into playable chunks — you can configure the size of those individually.
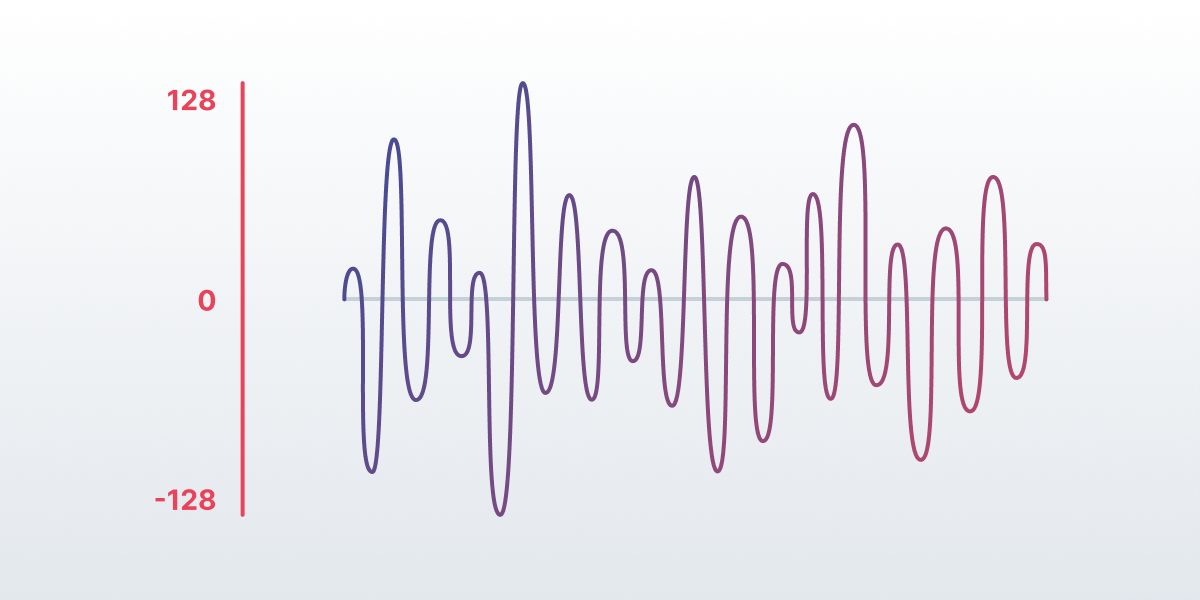
Using both gave us a byte array [-128..127] that showed vertices values along the y-axis in the equalizer.

If you want to learn more about these tools, official Android documentation has pages on both the Visualizer and AudioTrack. We’ll go on about how we employed them in our project.
Our second step was turning these values into an actual animation. There were 2 Android audio animation algorithms to consider: line and wave animation.
Line Animation
Here’s what a line audio animation looks like.
It uses the Fibonacci sequence as the basis for its algorithm. The Y-axis is segmented according to the Fibonacci values: 1, 2, 3, 5, 8, 13, 21, 34. The number of these segments determines the number of lines animated. For example, three lines will look like this:

Once those are determined, we can calculate the number of the highest points in each segment with the help of the chart.
There are both negative and positive values on the chart, meaning the animation can be asymmetrical. You can achieve this by calculating the left and right parts separately.
Then, you can use an .xml file to configure a custom view:
<eu.bamboo.speech_waves_animation.line.SpeechLineView
   android:layout_width="match_parent"
   android:layout_height="8dp"
   app:baseColor="#1D4A76"
   app:color1="#4493E2"
   app:color2="#1A5B9C"
   app:lineCount="2"
   app:lineSpeed="slow"
   app:symmetry="true" />
Where:
- baseColor represents the background color.
- [color1…color8] represents the colors of each line from the center to the edges.
- symmetry is true – meaning the animation is symmetrical.
- lineCount is the number of lines displayed (can be 1-8).
The exact same animation can be done via Android code, but you’ll mostly need to declare the XML version. You’ll simply update the sound data from the code.
Wave Animation
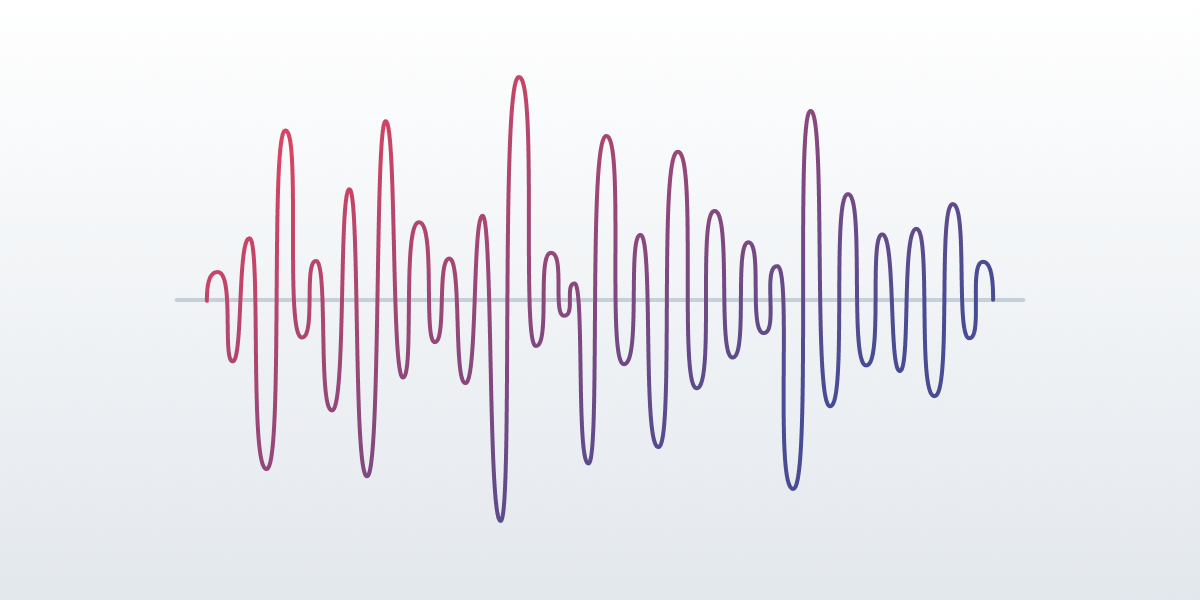
Now, here’s an example of wave audio animation.
This one is based on the Bezier curve, which is commonly used in vector graphics and animations. So, to create a smooth wave animation, we’ll need to understand the Bezier curve algorithm and how it can be used for audio animations.
Bezier Curve Algorithm
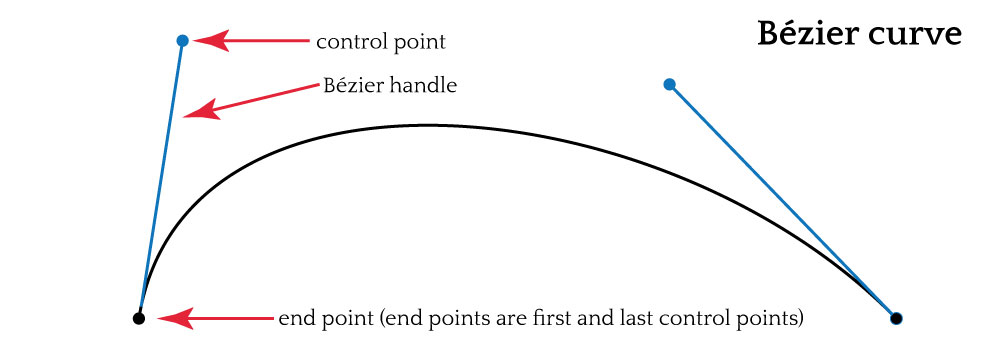
The Bezier algorithm is a formula to draw a smooth curve using control points. The position and tension of the latter determine the shape of the curve. It’s a very popular algorithm for creating smooth, dynamic movements and transitions.

Wave Animation
Wave animations are created with the help of the Bezier curve algorithm with existing extremums. First, the shape of the wave is defined with control points — the x-axis represents length, and the y-axis represents amplitude.
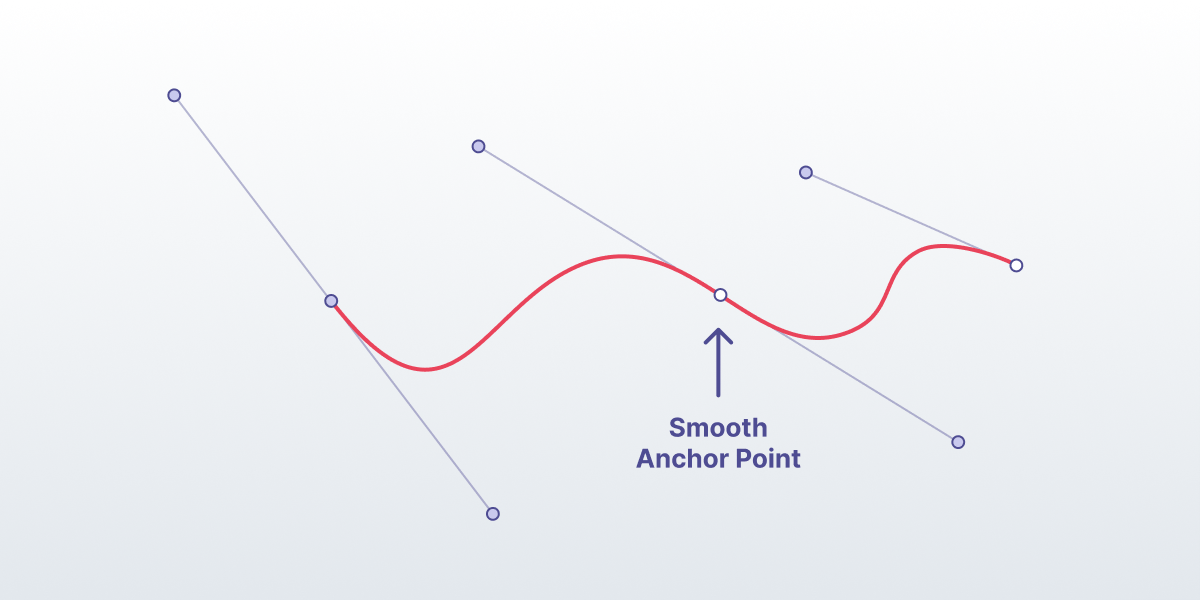
Once that is done, the algorithm will construct a smooth curve passing through the control points you have set up. You can adjust the tension of each to make sure the shape is just right.
We then need to add existing extremums to the animation to create a quick transition between the extremum anchors and the rest of the wave shape. As a result, you’ll get a natural-looking and accurate soundwave animation.

Android Canvas Implementation
Android Canvas supports all of the stuff we’ve mentioned above, including cubic Bezier functions.


You just need to calculate the data for a single line — others will use the same information but change the y-axis accordingly.
This custom view is a little more complicated and can be set up with the following parameters:
<eu.bamboo.speech_waves_animation.wave.SpeechWavesView
   android:layout_width="match_parent"
   android:layout_height="70dp"
   app:waveSpeed="normal"
   app:endColor="#a9c6f4"
   app:gradientOffset="0.1"
   app:lineCount="4"
   app:lineThickness="6"
   app:middleColor="#151764"
   app:middleLineThickness="3"
   app:startColor="#656ED1"
   app:density="0.2"
   app:windowPadding="0.24" />
Where:
- startColor represents the main wave color.
- endColor represents the color of the wave when it’s at _y = 0_.
- middleColor represents the color of the lines inside the wave.
- lineCount is the number of lines displayed (can be 1-8).
- lineThickness and middleLineThickness modify the thickness of the main and middle lines.
- density defines the number of waves on a line.
- windowPadding defines the size of the animation border, which isn’t affected by the wave.
Kotlin
Both animations use the same code in Kotlin. Just add your byte array to the animation view like that:
animationView.update(bytes)
Where bytes is the array you got from Visualiser, AudioTrack, or any other similar tool.
Conclusion
All in all, this animation solution has helped our Android Automotive OS project a lot. Our team wanted to share it and make it easier for others to create simple audio animations; hence the code going open-source.
You can find all the code from this article on GitHub. If you’re interested, please give it a try, and feel free to customize it however you want. Any feedback would be much appreciated!
Opinions expressed by DZone contributors are their own.

Comments