How SAML Authentication Works
This comprehensive guide to SAML covers how the authentication protocol works, how requests are generated and read, and what tools can help you keep projects secure.
Join the DZone community and get the full member experience.
Join For FreeWhat Is SAML?
Security Assertion Markup Language (SAML) is an XML-based framework for authentication and authorization between two entities: a Service Provider and an Identity Provider. The Service Provider agrees to trust the Identity Provider to authenticate users. In return, the Identity provider generates an authentication assertion, which indicates that a user has been authenticated.
SAML is a standard single sign-on (SSO) format. Authentication information is exchanged through digitally signed XML documents. It's a complex single sign-on (SSO) implementation that enables seamless authentication, mostly between businesses and enterprises.
With SAML, you don't have to worry about typing in authentication credentials or remembering and resetting passwords.
Benefits of SAML Authentication
Without much ado, the benefits of SAML authentication include:
- Standardization: SAML is a standard format that allows seamless interoperability between systems, independent of implementation. It takes away the common problems associated with vendor and platform-specific architecture and implementation.
- Improved User Experience: Users can access multiple service providers by signing in just once, without additional authentication, allowing for a faster and better experience at each service provider. This eliminates password issues such as reset and recovery.
- Increased Security: Security is a key aspect of software development, and when it comes to enterprise applications, it is extremely important. SAML provides a single point of authentication, which happens at a secure identity provider. Then, SAML transfers the identity to service providers. This form of authentication ensures that credentials don't leave the firewall boundary.
- Loose Coupling of Directories: SAML doesn't require user information to be maintained and synchronized between directories.
- Reduced Costs for Service Providers: With SAML, you don't have to maintain account information accross multiple services. The identity provider bears this burden.
How Does SAML Authentication Really Work?
Let's take an in-depth look at the process flow of SAML authentication in an application. SAML single sign-on authentication typically involves a service provider and an identity provider. The process flow usually involves the trust establishment and authentication flow stages.
Consider this example:
- Our identity provider is Auth0
- Our service provider is an enterprise HR portal called Zagadat
Note: The identity provider could be any identity management platform.
Now, a user is trying to gain access to Zagadat using SAML authentication.
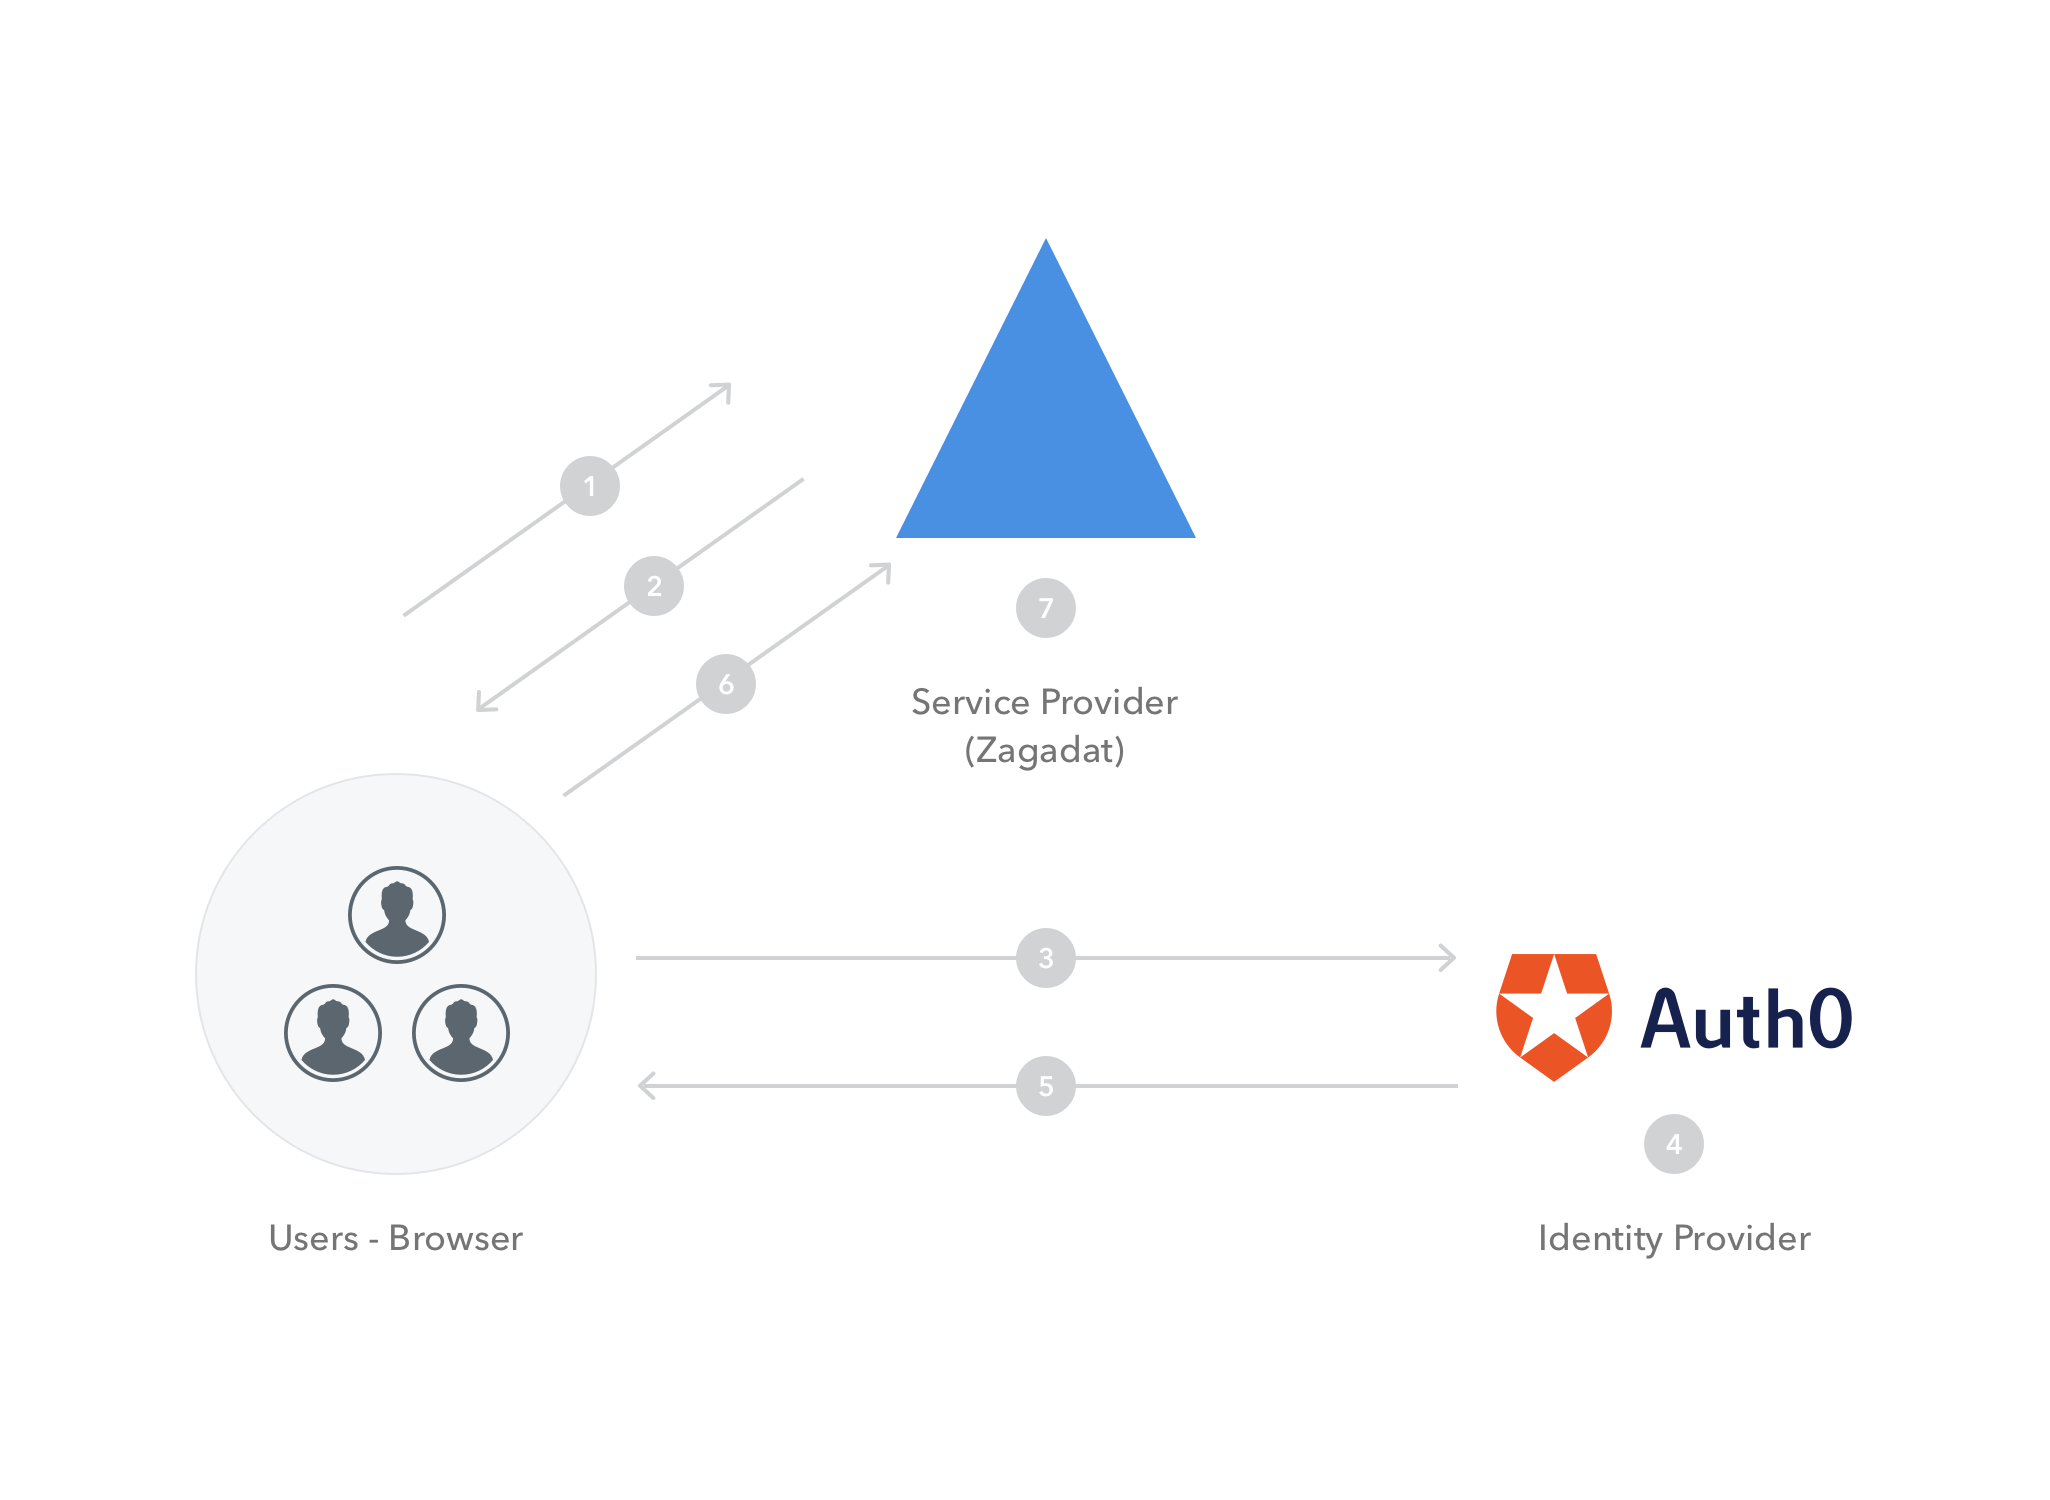
This is the process flow:
- The user tries to log in to Zagadat from a browser
- Zagadat responds by generating a SAML request:

- The browser redirects the user to an SSO URL, Auth0.
- Auth0 parses the SAML request, authenticates the user (this could be via username and password or even a two-factor authentication; if the user is already authenticated on auth0, this step will be skipped) and generates a SAML response
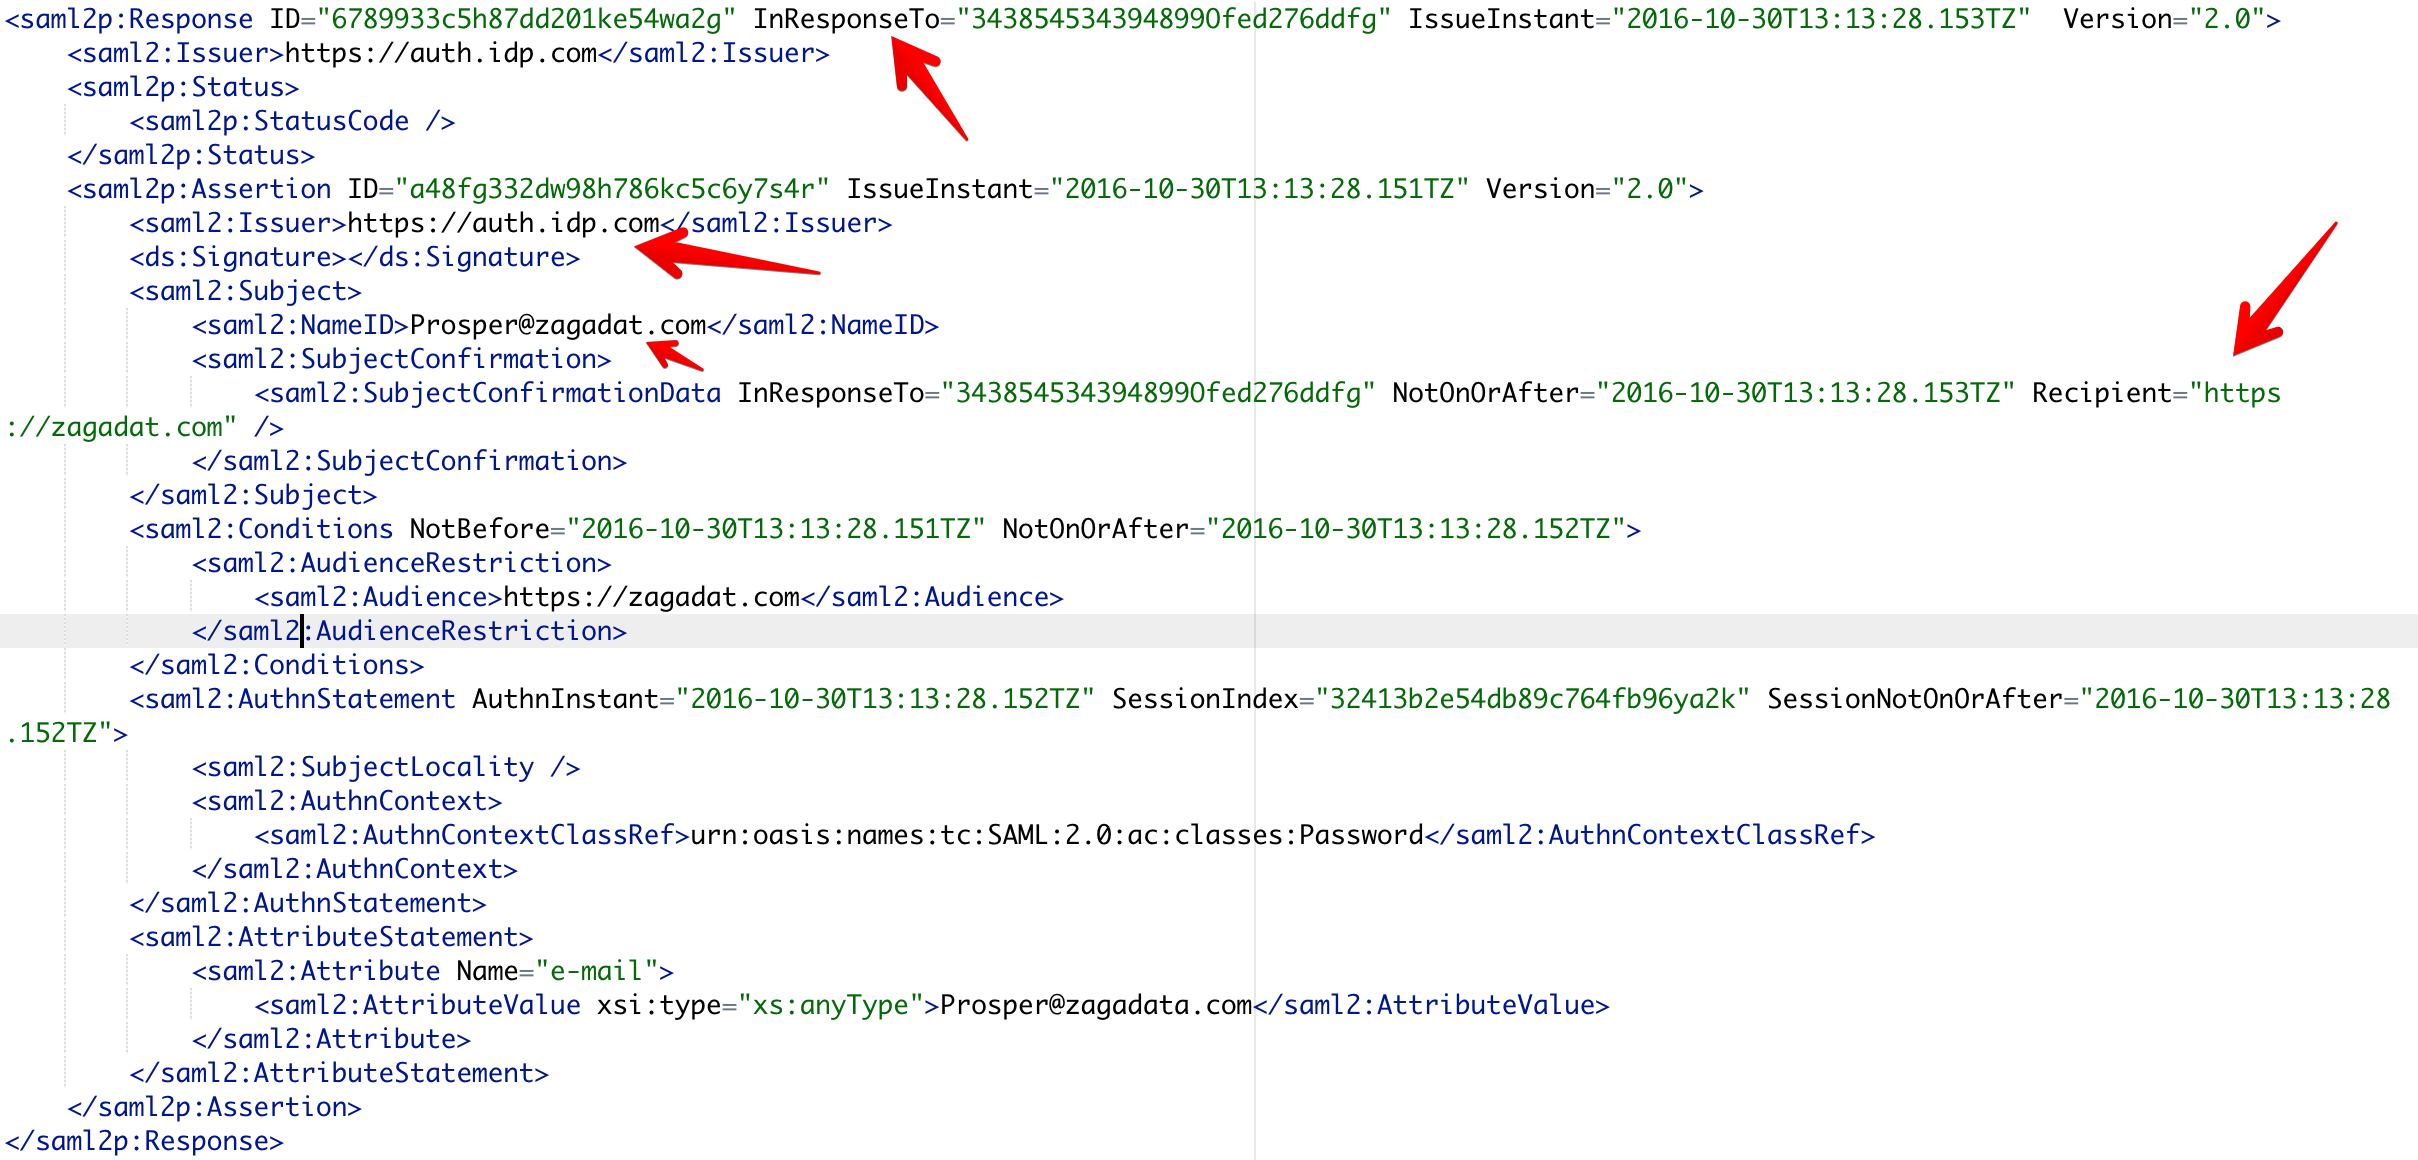
Above is a sample SAML response. - Auth0 returns the encoded SAML response to the browser.
- The browser sends the SAML response to Zagadat for verification.
- If the verification is successful, the user will be logged into Zagadat and granted access to all the various resources
Note the attributes that are highlighted in the SAML request and response. Here's a little glossary of these parameters:
- ID: Newly generated number for identification
- IssueInstant: Timestamp to indicate the time it was generated
- AssertionConsumerServiceURL: The SAML URL interface of the service provider, where the Identity provider sends the authentication token.
- Issuer: The name (identity) of the service provider
- InResponseTo: The ID of the SAML request that this response belongs to
- Recipient: The name (identity) of the service provider
Aside: SAML Authentication With Auth0
With Auth0, SAML authentication is dead simple to implement. We can easily configure our applications to use Auth0 Lock for SAML authentication.
In the example below, we will use an Auth0 account(account 1) as a Service Provider and authenticate users against a second Auth0 account(account 2) which will serve as our Identity Provider. Follow the steps below:
1. Establish Two Auth0 Accounts
If you do not already have two Auth0 accounts, you will need to create them. If you do already have two accounts, you can skip to step #2.
In the Auth0 Dashboard
In the upper right corner, click on the name of your account and in the popup menu which appears, select "New Account."
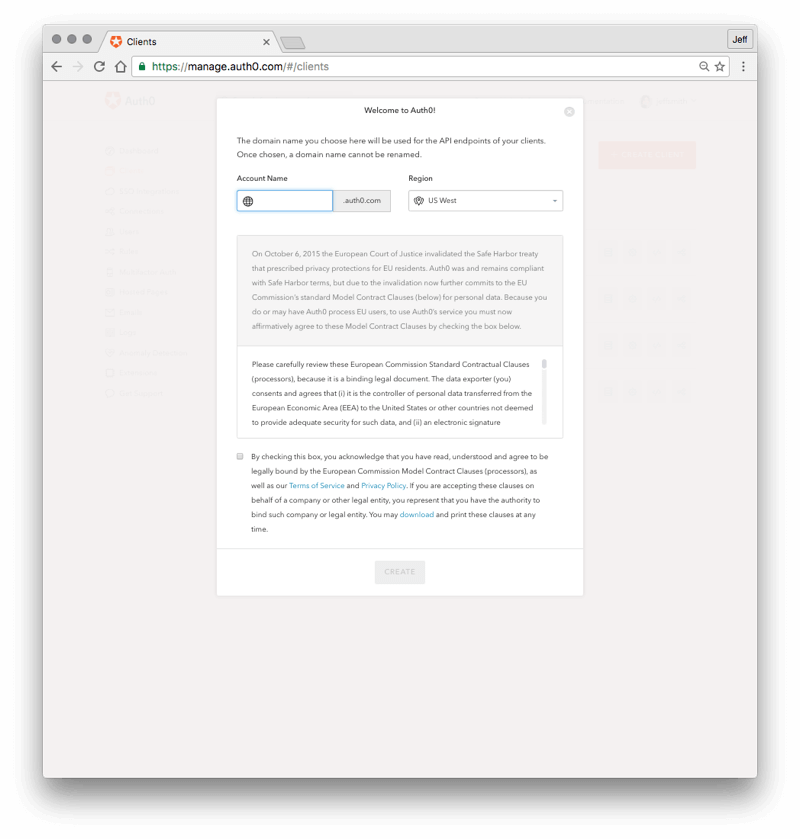
In the window which appears, enter a name for your second account in the "Your Auth0 domain" field and press the "SAVE" button.
You can switch back and forth between the accounts by going to the upper right corner of the dashboard, clicking on the name of the current account, and using the popup menu which appears to switch between your accounts.
2. Set Up the Auth0 IDP (account 2)
In this section you will configure one Auth0 account (account 2) to serve as an Identity Provider. You will do this by registering a client, but in this case, the 'client' you register is really a representation of account 1, the SAML Service Provider.
Log into Account 2
In the Auth0 dashboard:
- Click on "Clients" link at left.
- Click on the red "+ CREATE CLIENT" button on the right.
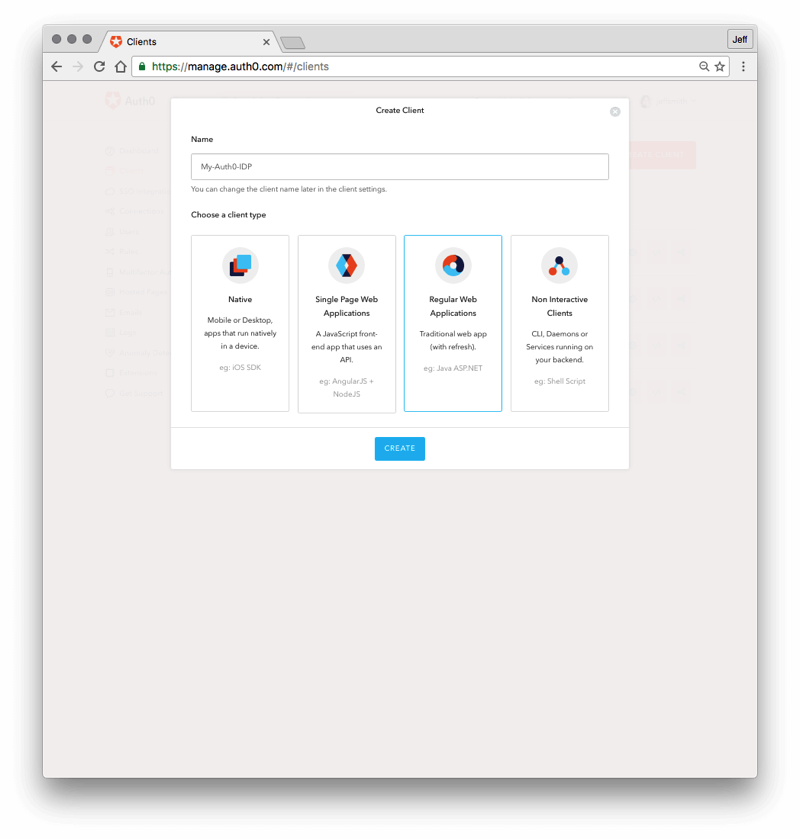
- In the Name field, enter a name like "My-Auth0-IDP."
- Press the blue "SAVE" button.
- Click on the "Settings" tab.
- Scroll down and click on the "Show Advanced Settings" link.
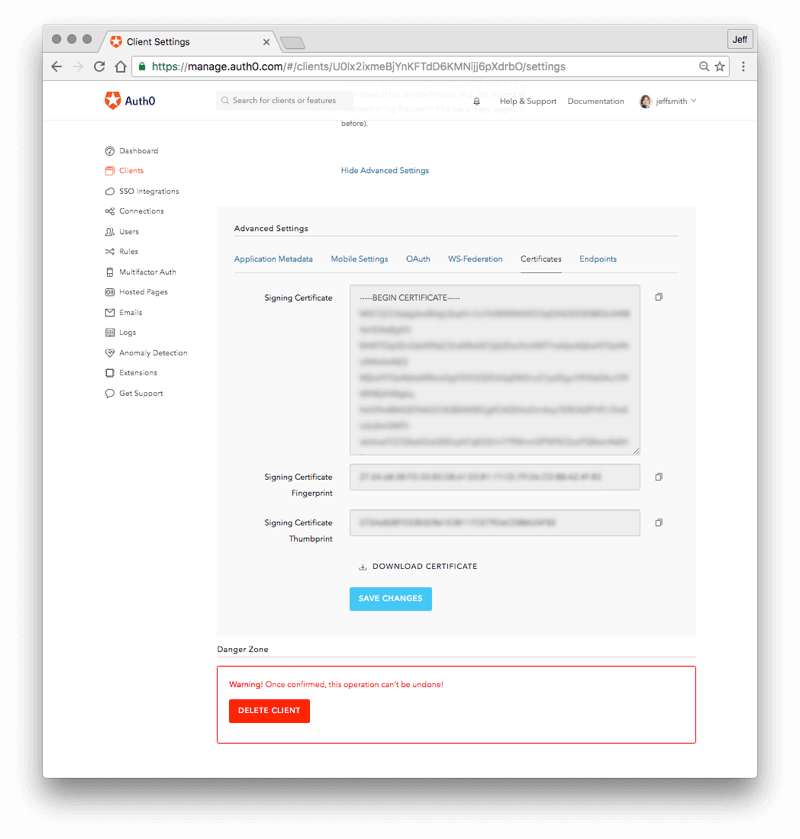
- In the expanded window, scroll down to the "Certificates" section and click on the "DOWNLOAD CERTIFICATE" link and select PEM from the dropdown, to download a PEM-formatted certificate. The certificate will be downloaded to a file called "YOUR_TENANT.pem". Save this file as you will need to upload this file when configuring the other Auth0 account, account 1.
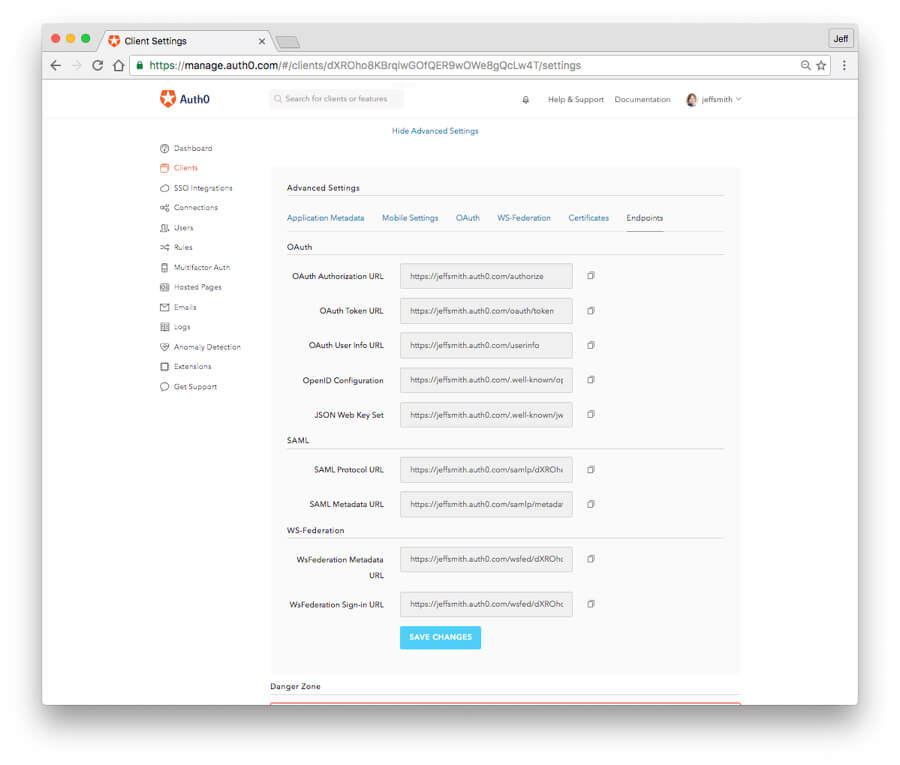
- Click on the "Endpoints" tab and go to the "SAML" section. Copy the entire contents of the "SAML Protocol URL" field and save it as in the next step you will need to paste it into the other Auth0 account, account 1.
Next, create a user to use in testing the SAML SSO sequence. In the Auth0 dashboard:
- Click on the "+ CREATE YOUR FIRST USER" button.
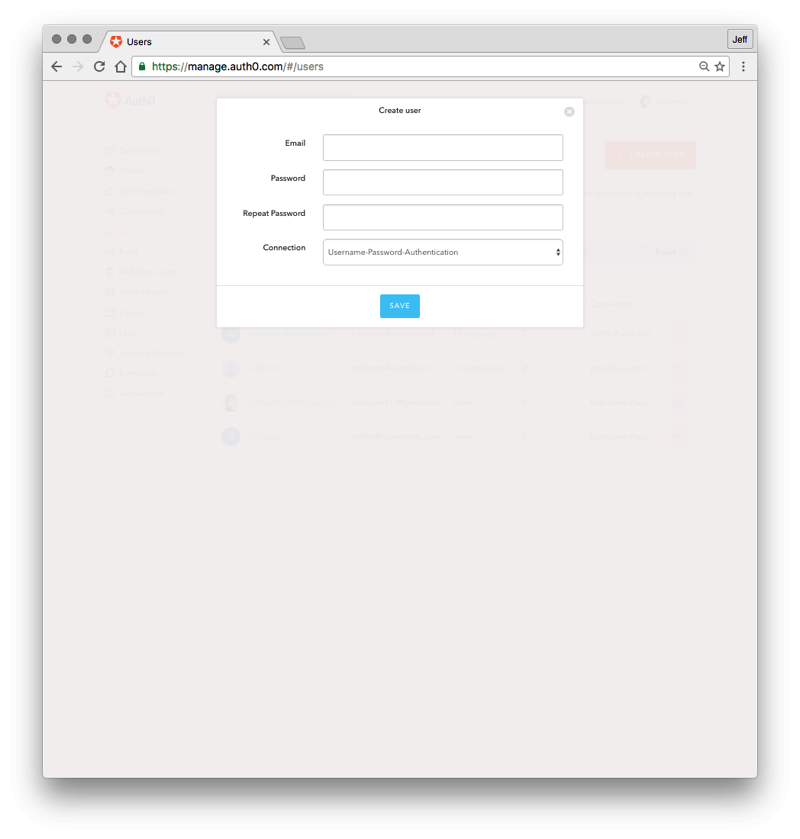
- In the Email field, enter an email for your test user. The domain name for the email should match what you enter in section 3 below. For example, if your user is john.doe@abc-example.com, you would enter that here, and then enter "abc-example.com" in step 3 below for the Email domain.
- Enter a password for the user
- For the Connection, leave it at the default value. (Username-Password-Authentication)
- Press the blue "SAVE" button.
3. Set up the Auth0 service provider (account 1)
In this section you will configure another Auth0 account (account 1) so it knows how to communicate with the second Auth0 account (account 2) for single sign-on via the SAML protocol.
Log out of Account 2 and log into Account 1.
In the Auth0 dashboard:
- Click on "Connections" link at left.
- In the list of options below "Connections", click on "Enterprise"
- In the middle of the screen, click on "SAMLP Identity Provider"
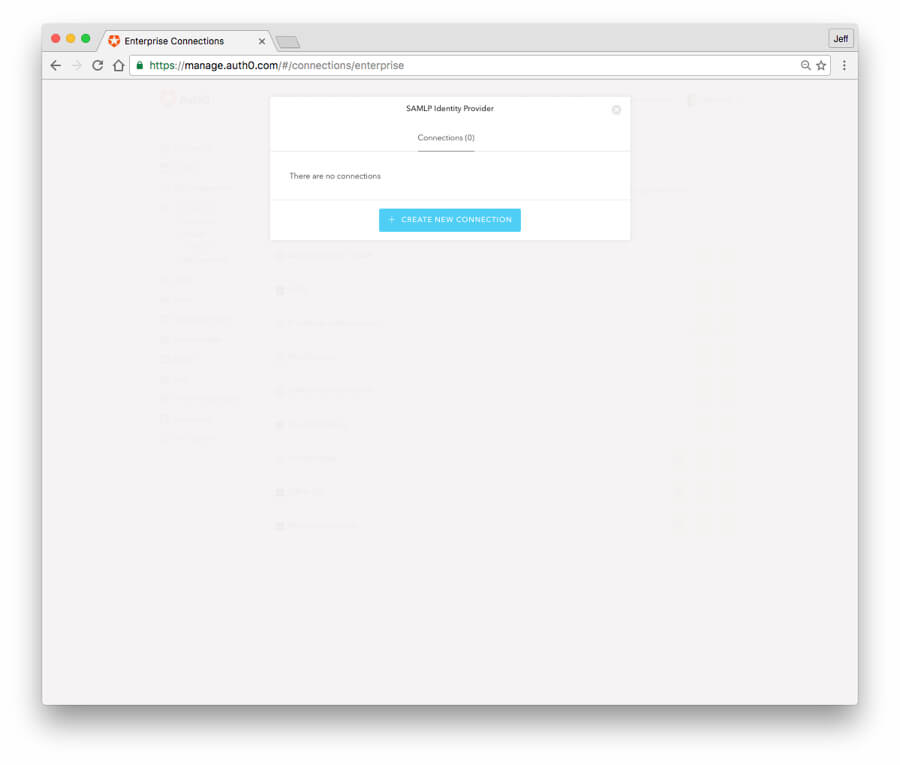
- Click on the blue "Create New Connection" button.
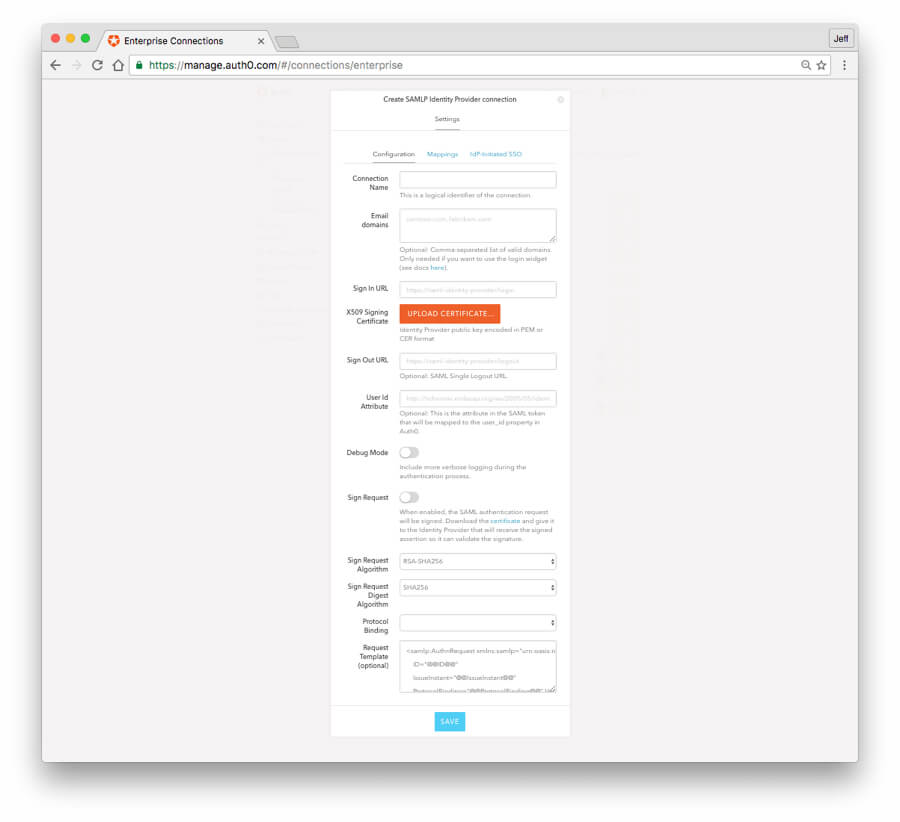
In the "Create SAMLP Identity Provider" connection window, enter the following information into the "Configuration" tab.
Connection Name: You can enter any name, such as "SAML-Auth0-IDP"
Email Domains: In this example, we will use the Lock Widget, so in the Email Domains field enter the email domain name for the users that will log in via this connection. For example, if your users have an email domain of 'abc-example.com', you would enter that into this field. You can enter multiple email domains if needed. Make sure the test user you created in section 2 has an email address with email domain that matches what you enter here.
Sign In URL: enter the "SAML Protocol URL" field that you copied in section 2 above. (From account 2 dashboard, Apps/APIs link, Settings tab, Advanced Settings, ENDPOINTS section, SAML tab, "SAML Protocol URL" field.)
Sign Out URL: enter the same URL as for the Sign In URL above.
X509 Signing Certificate: Click on the red "UPLOAD CERTIFICATE..." button and select the .pem file you downloaded from account 2 in section 2 above.
You can ignore the rest of the fields for now.
Save: Click on the blue "SAVE" button at the bottom.
After pressing the "SAVE" button, A window will appear with a red "CONTINUE" button. (You might have to scroll up to see it)
Click on the "CONTINUE" button.
In the window that appears, metadata about this SAML provider (account 1) is displayed. You will need to collect two pieces of information about this Auth0 account (the service provider) that you will then paste into the other Auth0 account you set up (the identity provider).
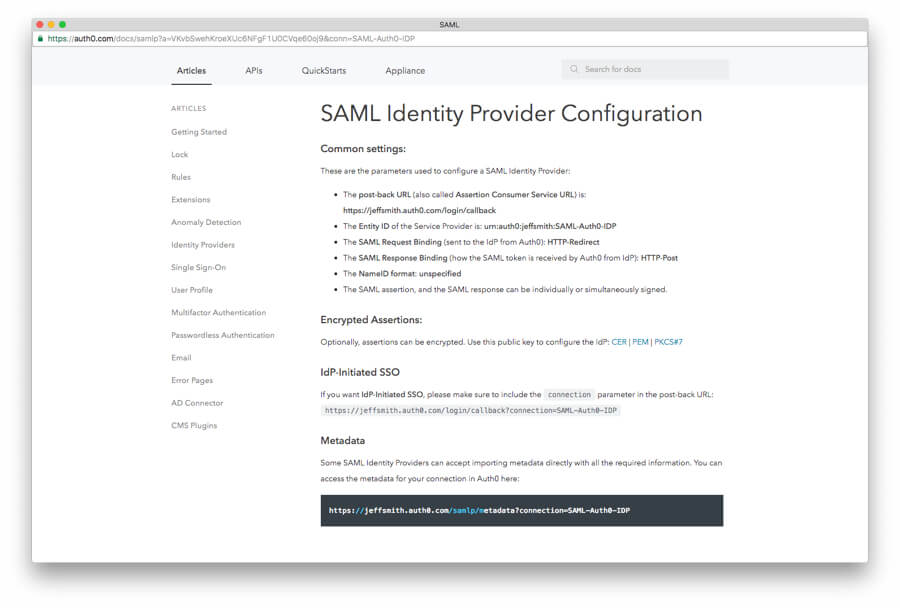
First, look for the second bullet in the list of information that tells you the "Entity ID". It will be of the form urn:auth0:YOUR_TENANT:YOUR_CONNECTION_NAME.
Copy and save this entire Entity ID field from "urn" all the way to the end of the connection name.
In that same window, near the bottom, there is a line that says, "You can access the metadata for your connection in Auth0 here:".
Copy the URL below that line into your browser address bar.
In general, you can access the metadata for a SAML connection in Auth0 here: https://YOUR_AUTH0_DOMAIN/samlp/metadata?connection=YOUR_CONNECTION_NAME.
Once you go to that metadata URL, it will display the metadata for the Auth0 account 1 (service provider side of the federation. It will look something like the following with your account name in place of the 'xxxxx':
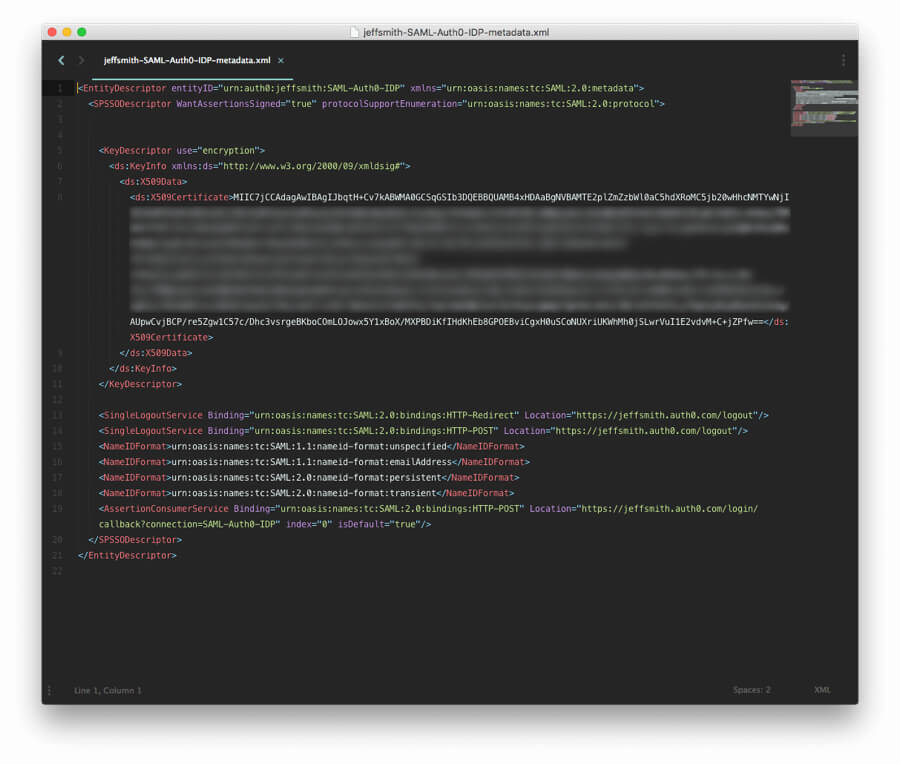
You need to locate the row that starts with "AssertionConsumerService" and copy the value of the "Location" field. It will be a URL of the form https://YOUR_AUTH0_DOMAIN.auth0.com/login/callback?connection=YOUR_CONNECTION_NAME.
Copy and save this URL. This is the URL on account 1 that will receive the SAML assertion from the IDP. In the next section you will give this URL to the IDP so it knows where to send the SAML assertion.
4. Add your Service Provider Metadata to the Identity Provider
In this section, you will go back and add some information about the Service Provider (account 1) to the Identity Provider (account 2) so the Identity Provider Auth0 account knows how to receive and respond to SAML-based authentication requests from the Service Provider Auth0 account.
- Log out of Account 1 and log back into Account 2.
In the Auth0 dashboard: for Account 2
- Click on "Clients" link at left.
- Find the row for the client you created earlier, and click on the "Add Ons" icon to the right of the client name. (the angle bracket and slash icon)
- Locate the box with the "SAML2 WEB APP" label and click on the circle toggle to turn it green.
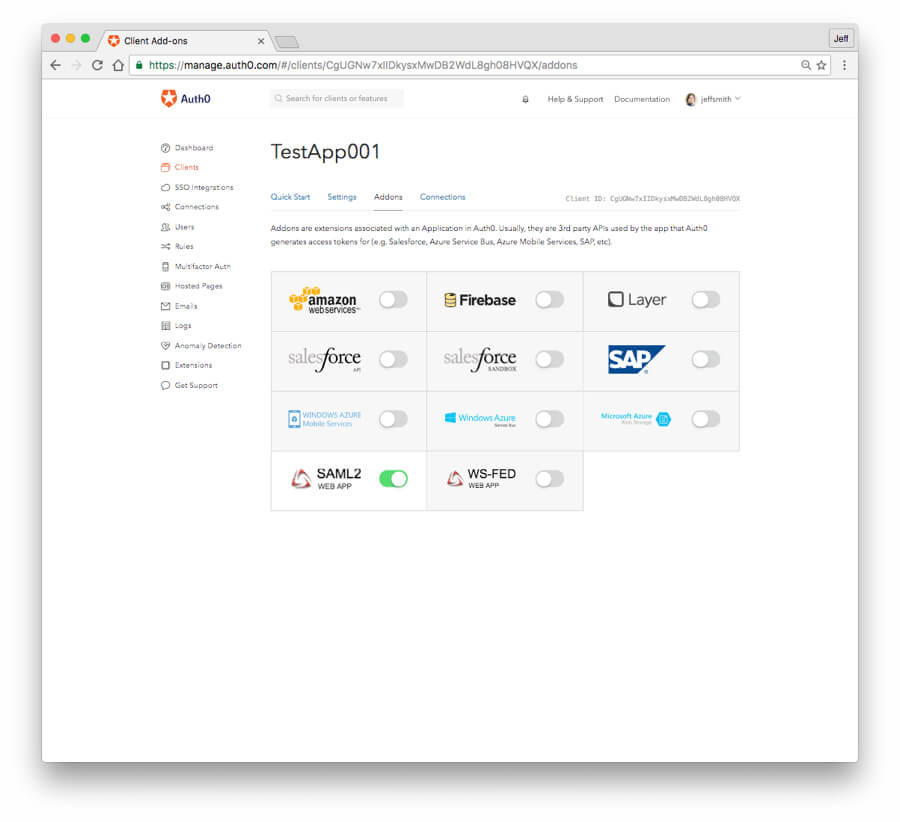
- Next, a configuration window will pop up for the "Addon: SAML2 Web App". Make sure you are in the "Settings" tab.
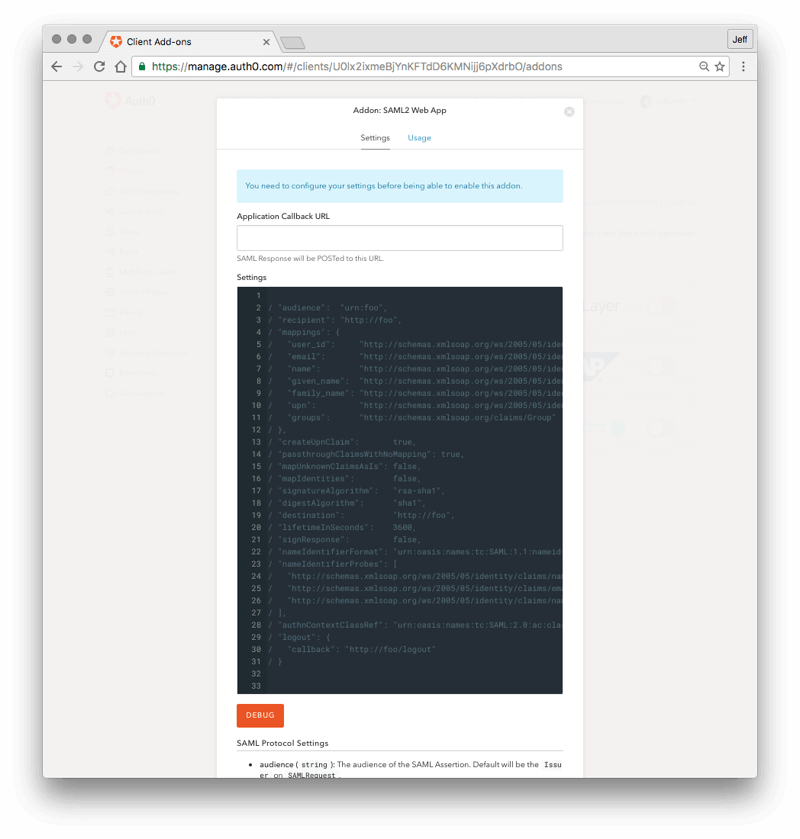
- In the "Application Callback URL" field, paste in the Assertion Consumer Service URL that you copied and saved in section 3 above (the last step).
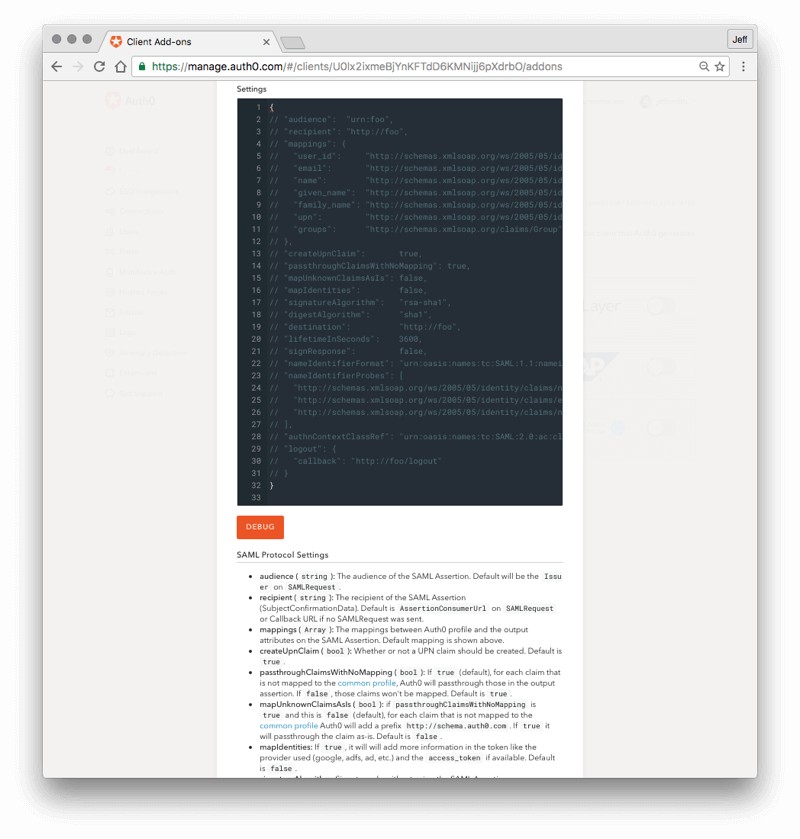
- In the Settings field below, go to line 2 that has the "audience" attribute.
First, remove the "//" at the beginning of the line to uncomment it. Next, replace the original value (urn:foo) with the Entity ID value you saved and copied in step 3 above. The new line 2 should look something like:
"audience":"urn:auth0:YOUR_TENANT:YOUR_CONNECTION_NAME"
- Click on the blue "SAVE" button at the bottom of the screen
5. Test Identity Provider
In the same screen, click on the red "DEBUG" button. That will trigger a login screen from account 2, the Identity Provider. Now, log in with the credentials for account 2.
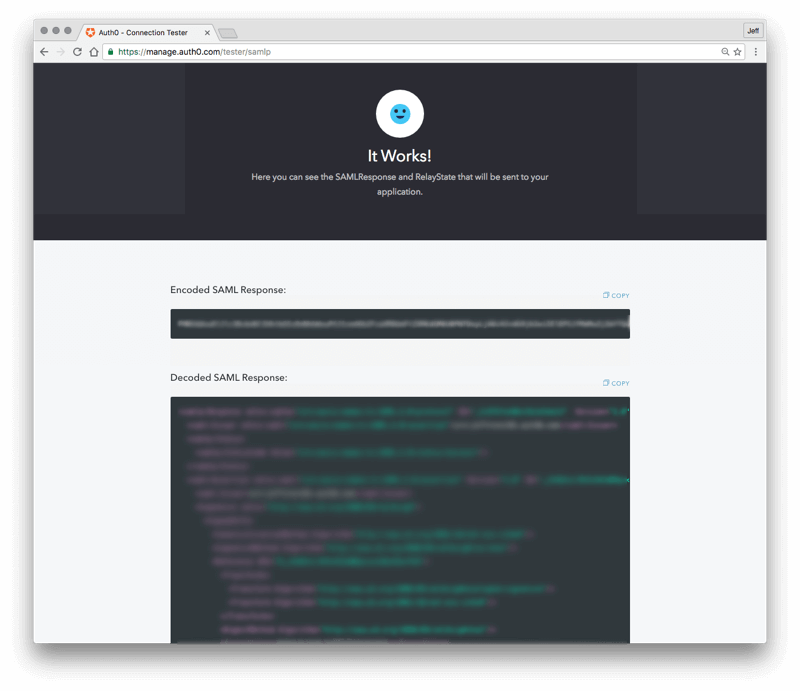
If your configuration is correct, you will see a screen titled "It works!"
This screen will show you the encoded and decoded SAML response that would be sent by the Identity Provider.
Check the decoded SAML response and locate (about half-way down) the "<saml:Audience>" tag and make sure it matches the Entity ID you entered in the previous screen (obtained during step 3).
Click on "Close this window" at the bottom of the screen.
6. Register a Simple HTML Application With Which to Test the End-to-End Connection.
In this section, you will register an application in Auth0 that will use the SAML connection you set up in the above steps.
Make sure you are logged into the Account 1 Auth0 dashboard.
- In the Auth0 dashboard, click on the "Clients" link at left.
- Click on the red "+ CREATE APP" button on the right.
- In the Name field, enter a name like "My-HTML-SAML-App".
- Press the blue "SAVE" button.
- Click on the "Settings" tab.
- In the "Allowed Callback URLs" field, enter http://jwt.io.
- The list of allowed callback URLs is a list of URL(s) to which users will be redirected after authentication. The URL(s) entered here must match the "callback URL" in the HTML code created in the next step. Normally you would enter a URL for your application, but to keep this example simple, users will simply be sent to the Auth0 JWT online tool which will provide some information about the JASON Web Token returned at the end of the authentication sequence.
- Press the blue "SAVE CHANGES" button at the bottom of the screen.
- In the same screen, click on the blue "Connections" tab (In the row that says Quick Start, Settings etc.
- Scroll down to the section near the bottom where it says "ENTERPRISE".
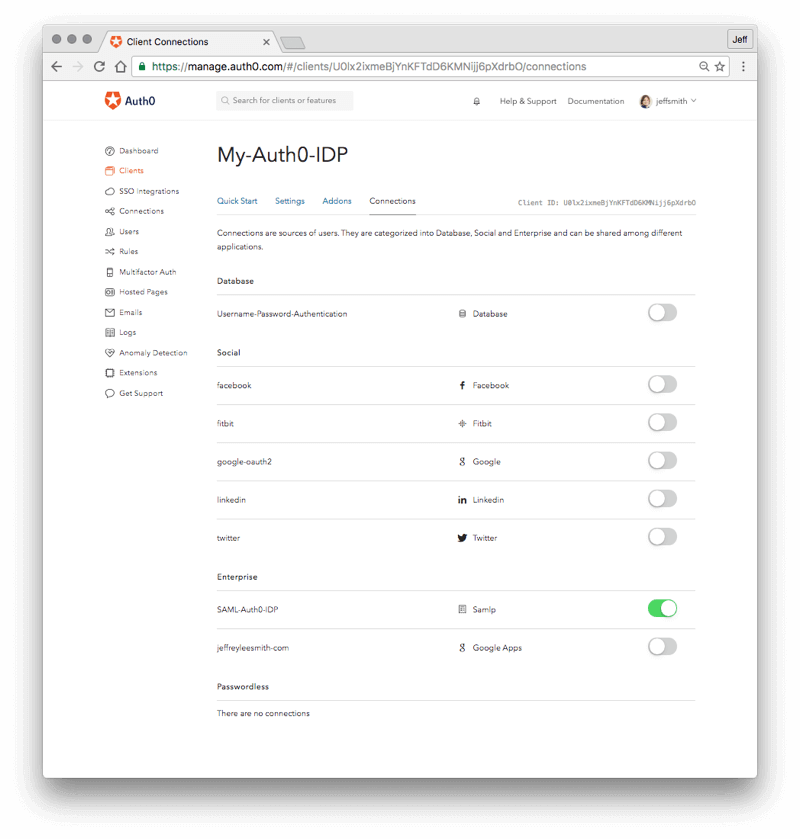
- Find the row for the SAML connection you created above and click on the on/off toggle at right so that it is green, for "on". That enables the SAML connection for this application.
7. Test the Connection From Service Provider to Identity Provider
In this section, you will test to make sure the SAML configuration between Auth0 account 1 (Service Provider) and Auth0 account 2 (Identity Provider) is working.
- In the Auth0 dashboard, navigate to: Connections -> Enterprise -> SAMLP Identity Provider.
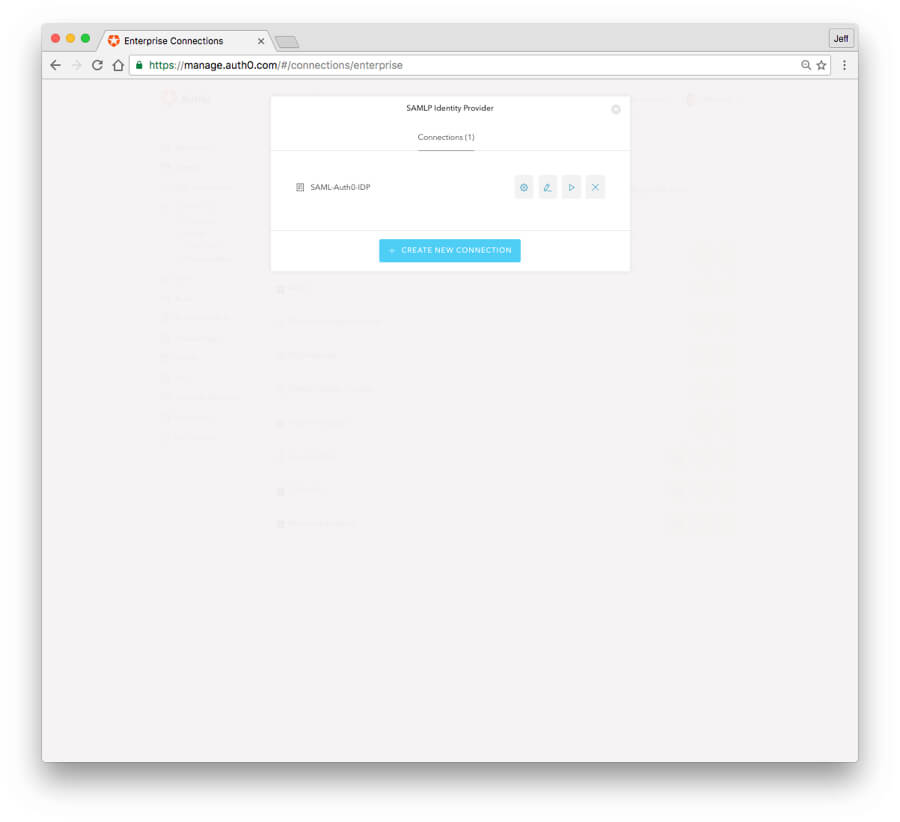
- Click on the triangular "Try" button for the SAML connection you created earlier. This button is to the right of the name of the connection. You can hover your mouse over the button to have the text label appear.
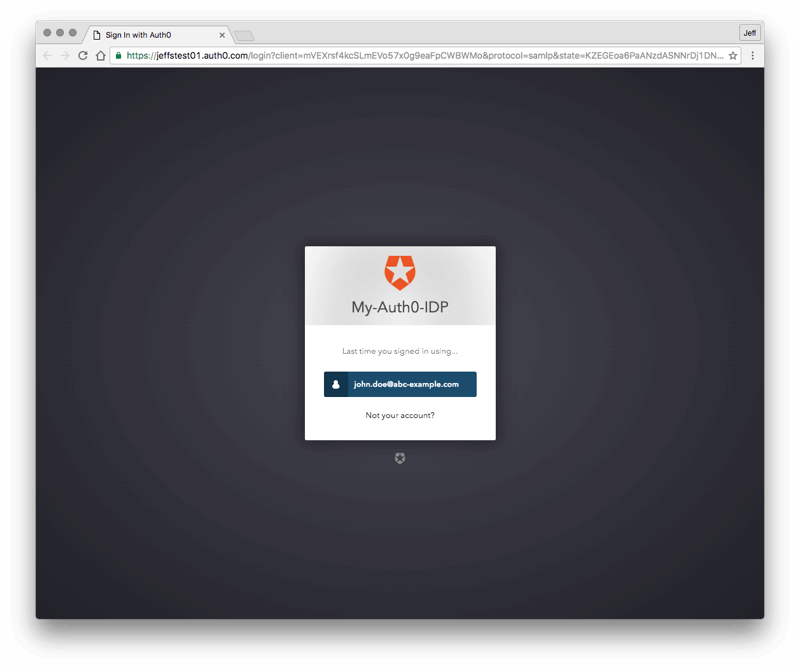
- You will first see a Lock login widget appear that is triggered by the Service Provider. Enter the username of the test account you created earlier.
You will then be redirected to the Lock login widget of the Identity Provider. Login with the credentials for the test user you created.
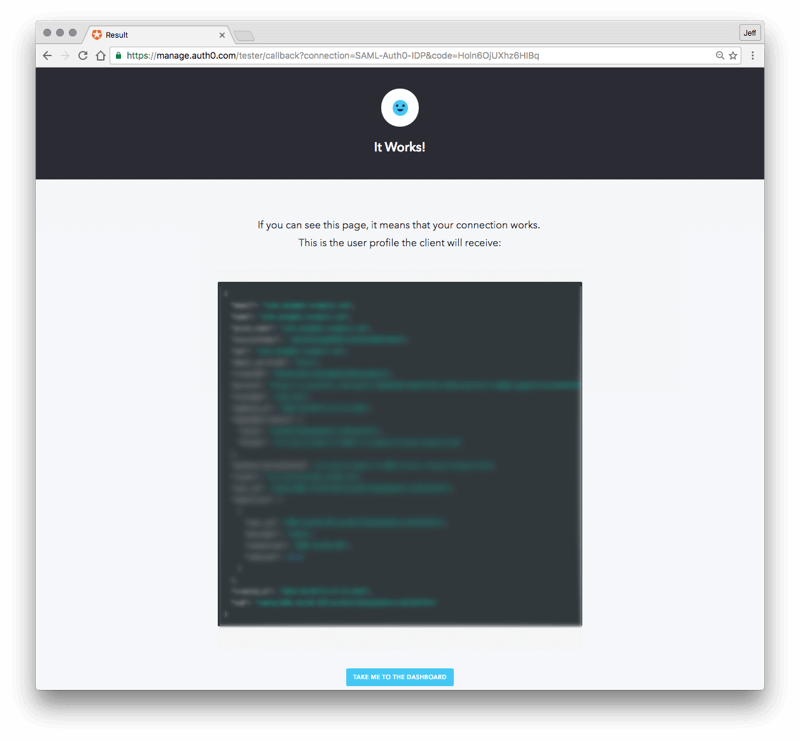
If the SAML configuration works, your browser will be redirected back to an Auth0 page that says, "It works!!!" This page will display the contents of the SAML authentication assertion sent by the Auth0 Identity Provider to Auth0 Service Provider. This means the SAML connection from Auth0 Service Provider to Auth0 Identity Provider is working.
NOTE: the Try button only works for users logged in to the Auth0 dashboard. You cannot send this to an anonymous user to have them try it.
8. Create the HTML Page for a Test Application
In this section, you will create a very simple HTML page that invokes the Auth0 Lock Widget which will trigger the SAML login sequence. This will enable an end-to-end test of the SAML SSO.
Create an HTML page and insert the following:
<!DOCTYPE html PUBLIC "-//IETF//DTD HTML 2.0//EN">
<HTML>
<BODY>
<p> Click on the button to log in </p>

    <script src="http://cdn.auth0.com/js/lock/10.2/lock.min.js"></script>
    <script type="text/javascript">
      var lock = new Auth0Lock('YOUR_CLIENT_ID', 'YOUR_AUTH0_DOMAIN',{
            redirectUrl: 'http://jwt.io',
            responseType: 'token',
            auth: {
              params: {scope: 'openid'}
            }
        });

      function signin() {
        lock.show();
      }
    </script>

<button onclick="signin()">Login</button>
</BODY>
</HTML>
Make sure you replace YOUR-APP-CLIENT-ID with the actual value of the app you registered in step 7 above. The client ID for your client can be found in the Auth0 dashboard for Account 1 by going to "Clients" link and clicking on the "Settings" (gear) icon to the right of your client's name.
Save this file in a place where you can access it via a browser. For this example, we'll call it *"hello-saml.html".
9. Test Your Sample Application
In this step, you will test your sample HTML application that uses the Auth0 SAML connection you set up in Account 1 to perform SSO via SAML against Account 2, serving as the SAML Identity Provider.
- Open the HTML file created above with a browser. You should first see a white page with a login button on it.
- Click on the login button.
The Auth0 Lock widget should appear with one login option.
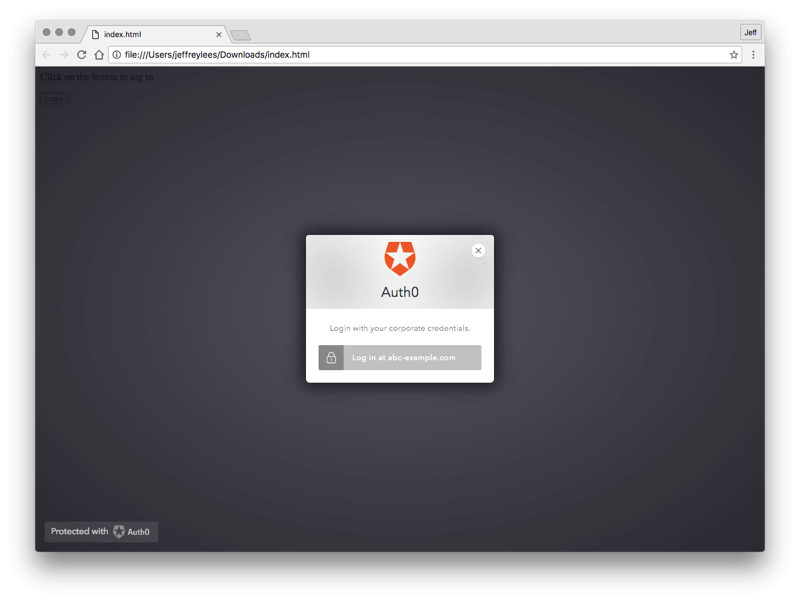
If you have other connections turned on for your client, your Auth0 Lock Widget may look slightly different. If you are prompted to enter an email address, make sure the email address you enter has the same domain name as the domain(s) you entered in the Settings tab for the client in the Account 1 Auth0 dashboard. (Apps/APIs -> Settings)
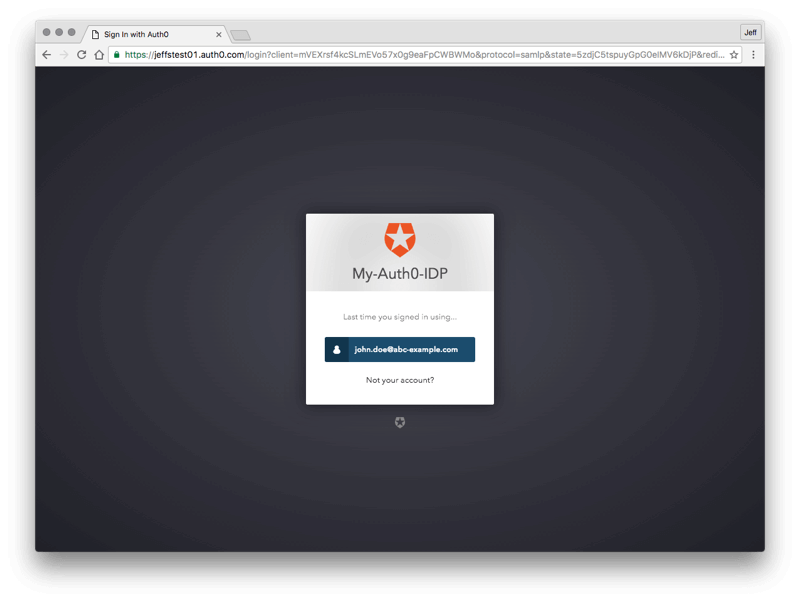
After entering your email address, the blue button on the Lock widget may have a new label. Click on the button which may be labeled "saml" or ACCESS or with the email domain of the email address you are logging in with, to initiate the SAML sso sequence with the Auth0 Identity Provider.
- You will be redirected to the Identity Provider to log in.
Note that whether you are prompted for credentials at this point depends on whether you still have an active session at the Identity Provider. From the "try me" test you did earlier, you may still have an active session at the Identity Provider. If this is the case, you will not be prompted to log in again and will simply be redirected to the callback URL specified in the HTML file. (Remember that this callback URL must also be in the Allowed Callback URLs in the client's Settings tab in the Auth0 dashboard.)
If sufficient time has passed, or if you delete your browser cookies before initiating the test, then you will be prompted to login when redirected to the Identity Provider. Log in to the Identity Provider using the credentials for the test user you created in Auth0 Account 2.
Upon successful authentication, you will be redirected to the callback URL specified in the HTML file (jwt.io).
10. Troubleshooting
This section has a few ideas for things to check if your sample doesn't work.
Note that if your application doesn't work the first time, you should clear your browser history and ideally cookies each time before you test again. Otherwise, the browser may not be picking up the latest version of your html page or it may have stale cookies that impact execution.
When troubleshooting SSO, it is often helpful to capture an HTTP trace of the interaction. There are many tools that will capture the HTTP traffic from your browser for analysis. Search for "HTTP Trace" to find some. Once you have an http trace tool, capture the login sequence from start to finish and analyze the trace to see the sequence of GETs to see how far in the expected sequence you get. You should see a redirect from your original site to the Service Provider, and then to the Identity Provider, a post of credentials if you had to log in, and then a redirect back to the callback URL or the Service Provider and then finally a redirect to the callback URL specified in your client.
Be sure to check to make sure cookies and javascript are enabled for your browser.
Check to make sure that the callback URL specified in the HTML file is also listed in the Allowed Callback URLs field in the "Settings" tab of the client registered in the Auth0 Dashboard. (In dashboard, Click on Clients link, then on the "Settings" icon to the right of the client's name.)
The http://samltool.io tool can decode a SAML assertion and is a useful debugging tool.
Auth0 also provides several options:
- How to configure Auth0 to serve as an Identity Provider in a SAML federation.
- How to configure Auth0 to serve as a Service Provider in a SAML federation.
- SAML Configurations for SSO Integrations such as Google Apps, Hosted Graphite, Litmos, Cisco Webex, Sprout Video, FreshDesk, Tableau Server, Datadog, Egencia, Workday, and Pluralsight
- How to configure Auth0 to use other identity Providers such as Okta, OneLogin, PingFederate 7, SalesForce, SiteMinder, and SSOCircle
Conclusion
We have covered how SAML authentication works and also went through some steps to implement it in an application. You want to implement SAML authentication in your app? and implement SAML authentication seamlessly today!
Published at DZone with permission of Prosper Otemuyiwa, DZone MVB. See the original article here.
Opinions expressed by DZone contributors are their own.

Comments