From IBM Integration Bus to IBM App Connect Enterprise in Containers (Part 4b)
Deploying a Queue Manager from the OpenShift Web Console
Join the DZone community and get the full member experience.
Join For FreeIn Scenario 4a, we showed you how to deploy an IBM MQ queue manager in a container using the Kubernetes (OpenShift) command-line interface (CLI). That showed that it’s really just a couple of commands and all the detail is really in the definition files. That’s certainly the approach you’ll want to move to for production so you can automate the deployment through pipelines. However, sometimes it’s useful to just be able to perform actions through a user interface without having to know the detail eg. command lines, and file formats, and that’s what we’re going to look at in this scenario.
Installing the IBM MQ Operator
IBM MQ Operator that we discussed in Scenario 4a will once again be used under the covers to perform the deployment. The operator also provides us with the user interface which, as you will discover, is neatly integrated with the OpenShift web console.
If you did not perform Scenario 4a on your environment, you will not yet have the IBM MQ Operator in your catalogue. The instructions for installing the operator are here:
Installing and uninstalling the IBM MQ Operator on Red Hat OpenShift
Prepare the Queue and Channel Definitions in a ConfigMap
When we come to create the queue manager, it will need a set of definitions of the queues and channels it is to host, and any settings for the queue manager itself.
Our mqsc definition looks like this:
    DEFINE QLOCAL('BACKEND') REPLACE
    DEFINE CHANNEL('ACECLIENT') CHLTYPE (SVRCONN) SSLCAUTH(OPTIONAL)
    ALTER QMGR CHLAUTH(DISABLED)
    REFRESH SECURITY
The appropriate way for a container to pick up settings such as these is via a Kubernetes ConfigMap. This configuration and Kubernetes ConfigMaps are described in a little more detail in Scenario 4a.
We will create this via the user interface using the following screen.
Log into the OpenShift web console, and switch to the namespace in which you want to create the queue manager. In our example, we will use a namespace called 'mq'.
You can create a new namespace (called a Project in OpenShift) in the OpenShift console as shown below

Once you have created the required Project/Namespace, we can then proceed to the creation of ConfigMap. The ConfigMap option is available in the left-hand menu as shown below.
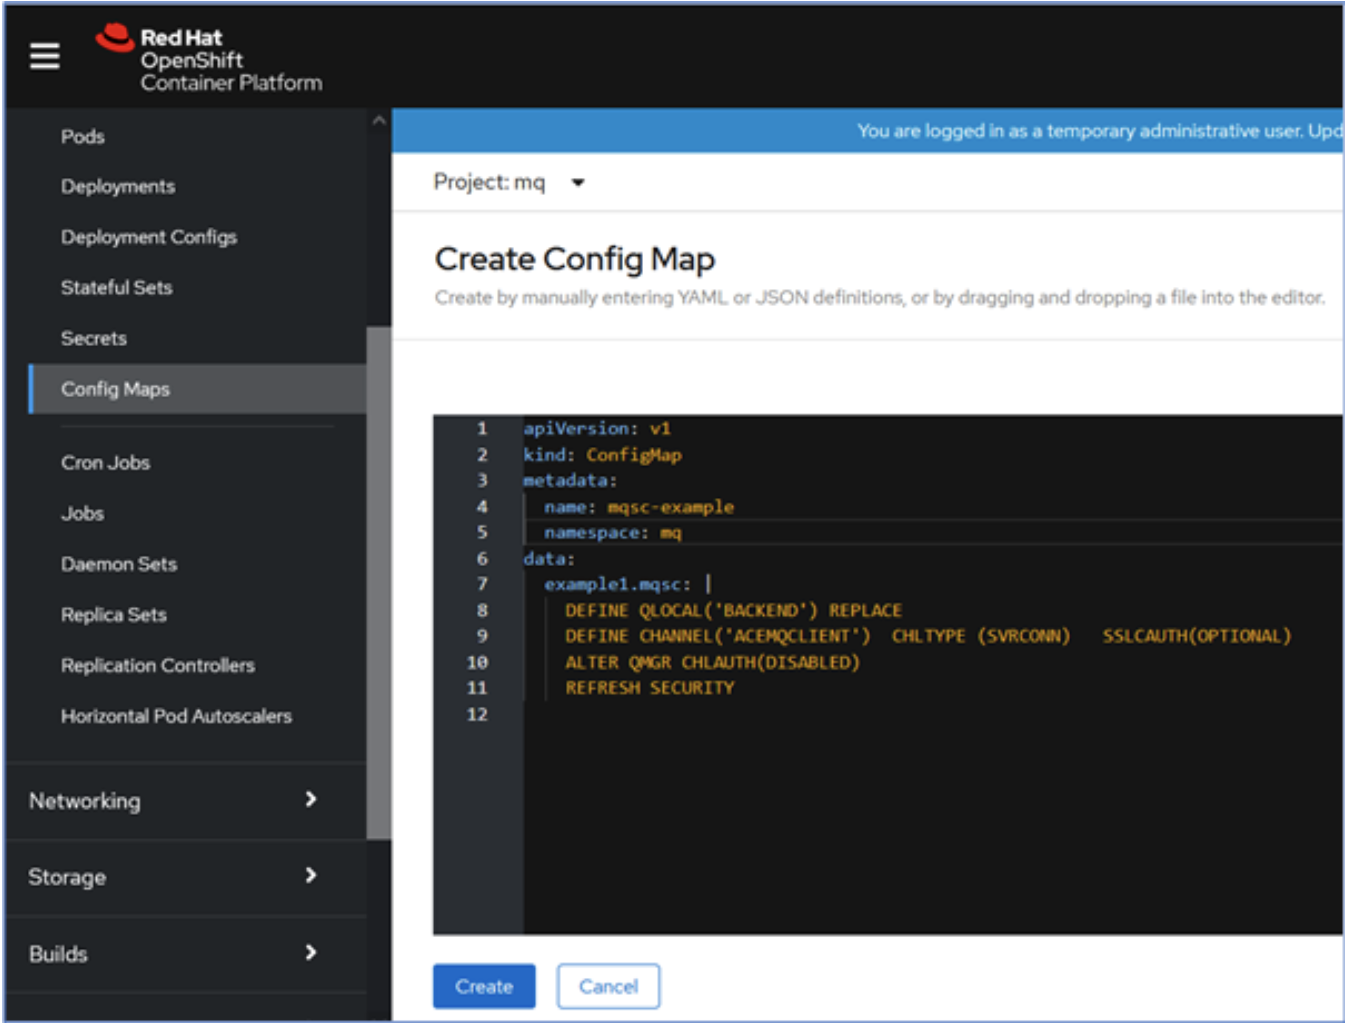
Enter the required YAML definition in the text box as shown above and click Create.
A sample YAML definition is provided below;
apiVersion: v1
kind: ConfigMap
metadata:
  name: mqsc-example
namespace: mq
data:
  example1.mqsc: |
    DEFINE QLOCAL('BACKEND') REPLACE
    DEFINE CHANNEL('ACEMQCLIENT')  CHLTYPE (SVRCONN)   SSLCAUTH(OPTIONAL)
    ALTER QMGR CHLAUTH(DISABLED)
    REFRESH SECURITY
Create a QueueManager Instance
Note that the QueueManager and ConfigMap need to be in the same namespace, so ensure you are still in the mq namespace (Project in OpenShift).
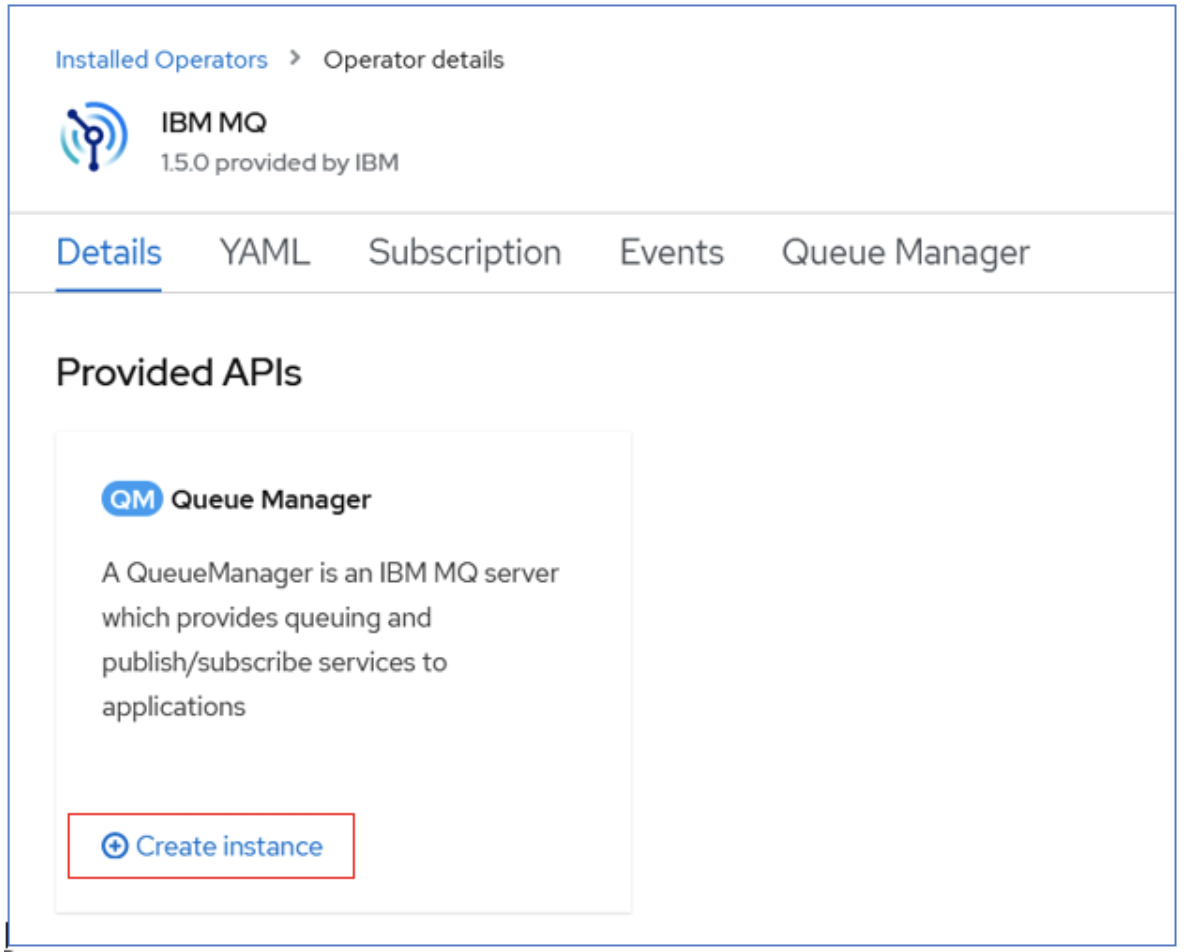
Go to the 'installed operators',
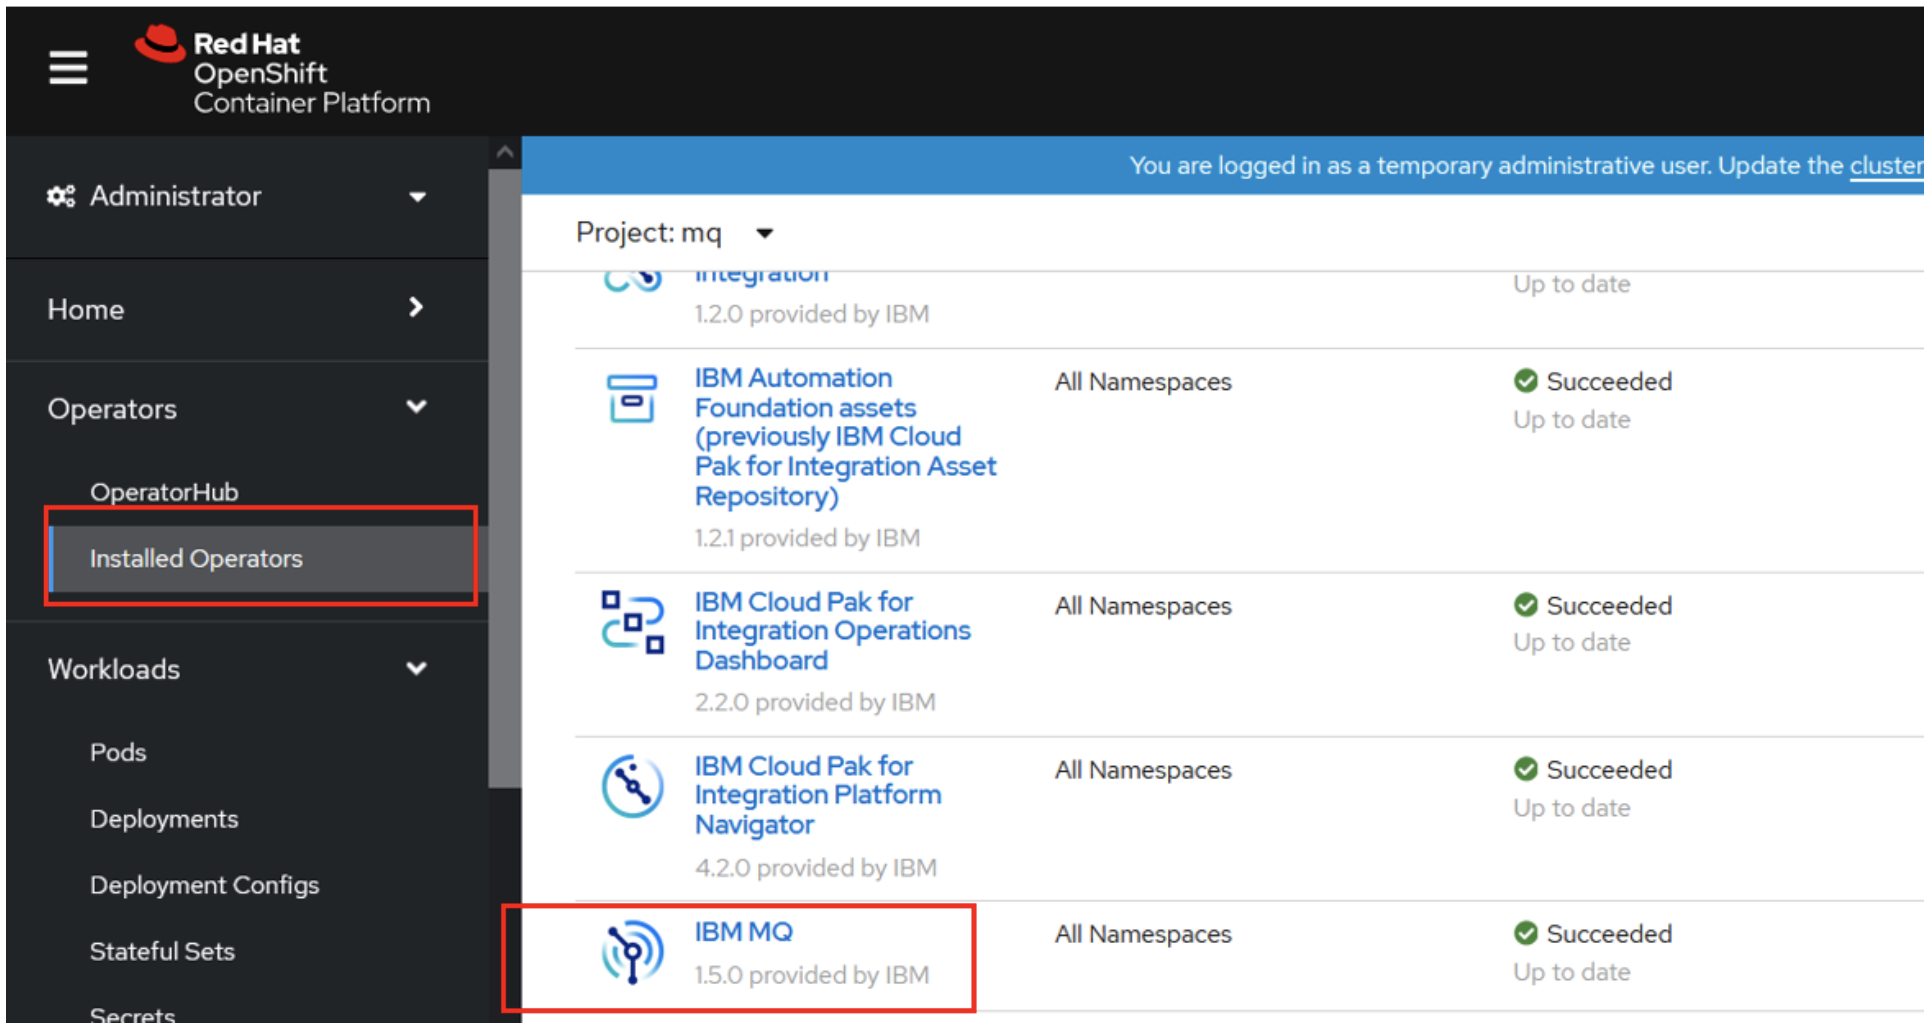
Search for 'IBM MQ' and then click on 'Create instance' as shown in the figure below.
This will take you through a guided user interface allowing you to fill in the details for your queue manager. You can accept all the defaults. The only fields you will need to edit:
- Queue Manager instance name: quickstart-cp4i
- Accept the License (switch License field to 'true')
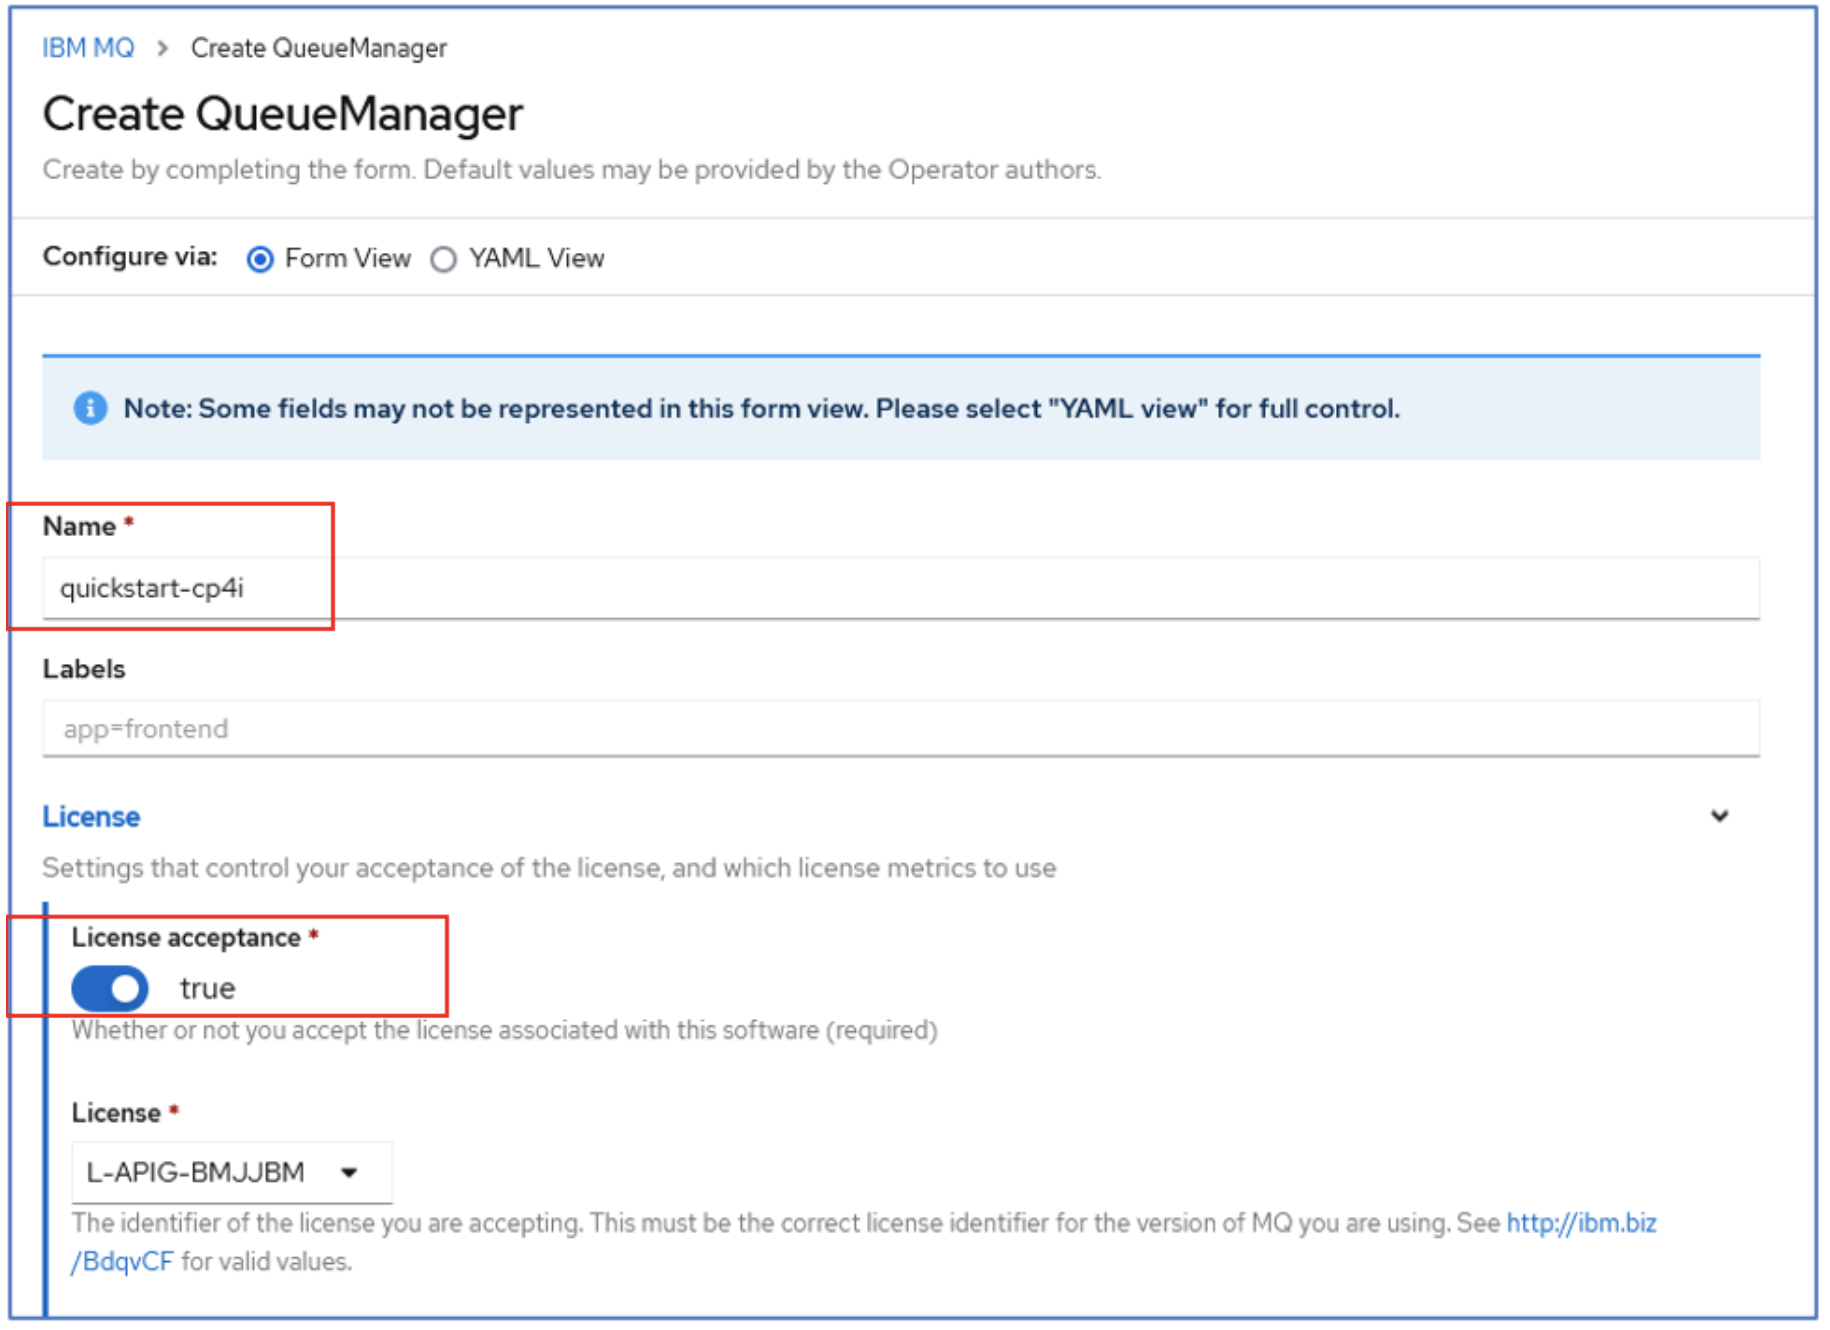
You will notice at the top of the form that you can switch to a YAML view, and you will see that the UI has built up a file much the same as the mq-quickstart.yaml we used in Scenario 4a. Indeed this is one of the easiest ways to create a correctly formatted file that you can then use on the command line.
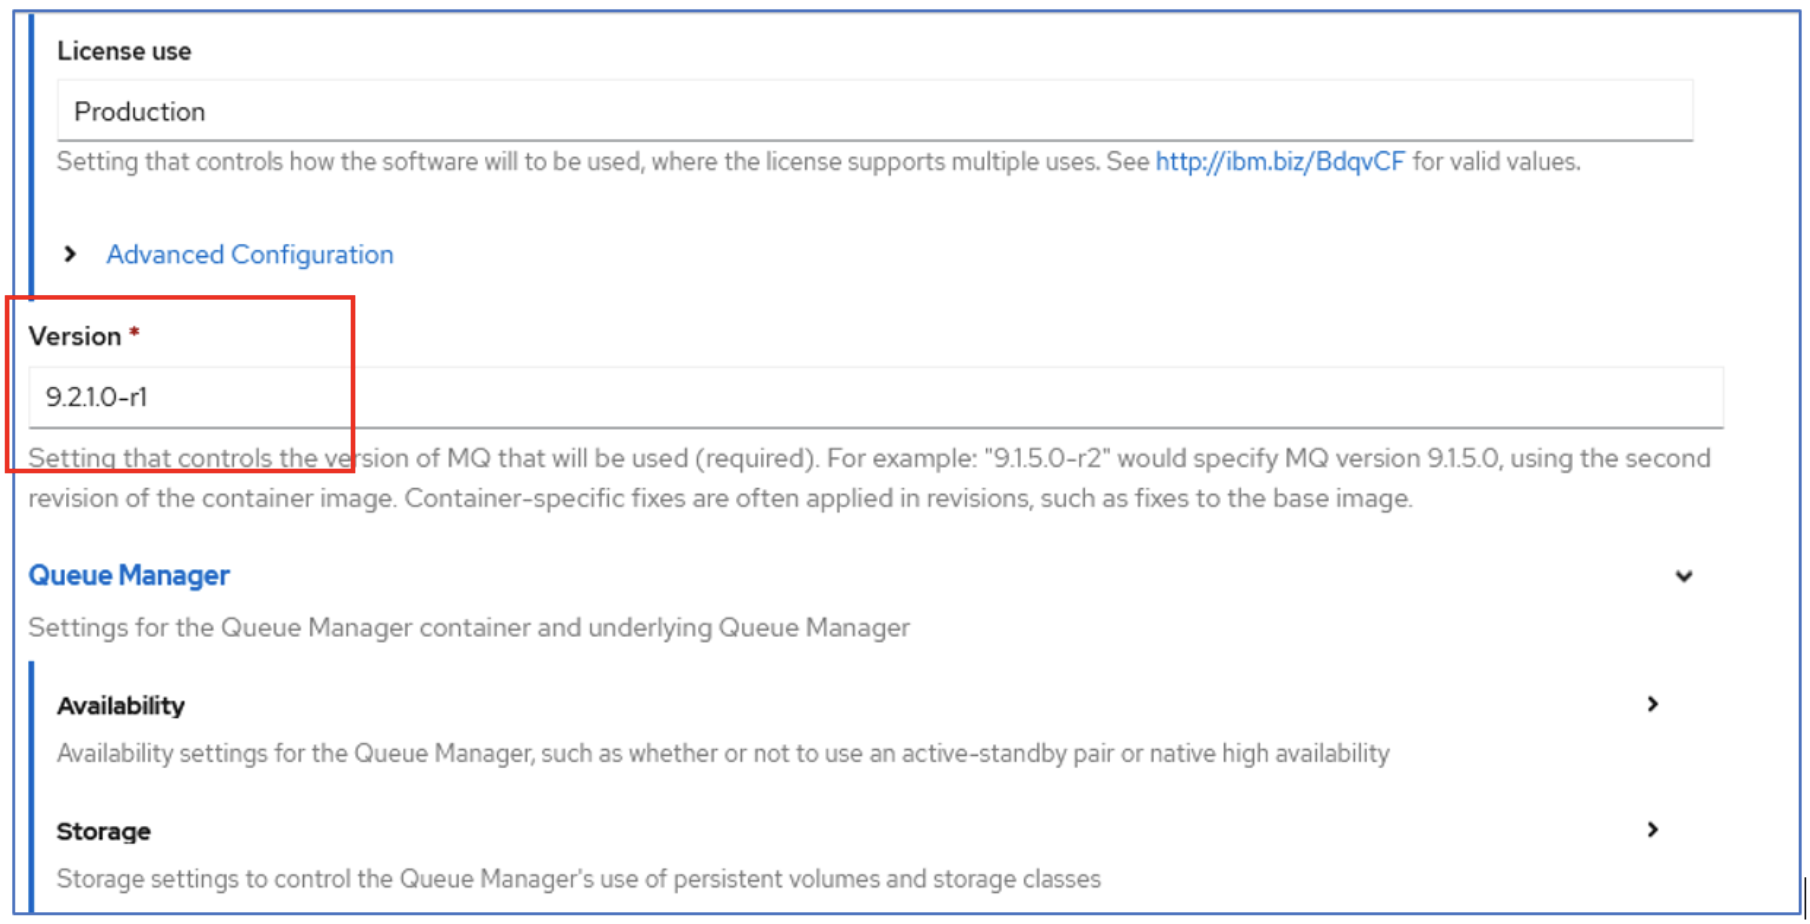
Paging down the form we can choose the version of the MQ product to use.
For simplicity, leave the storage choice as ephemeral since we are not concerned with persistent storage of our messages for our current examples.
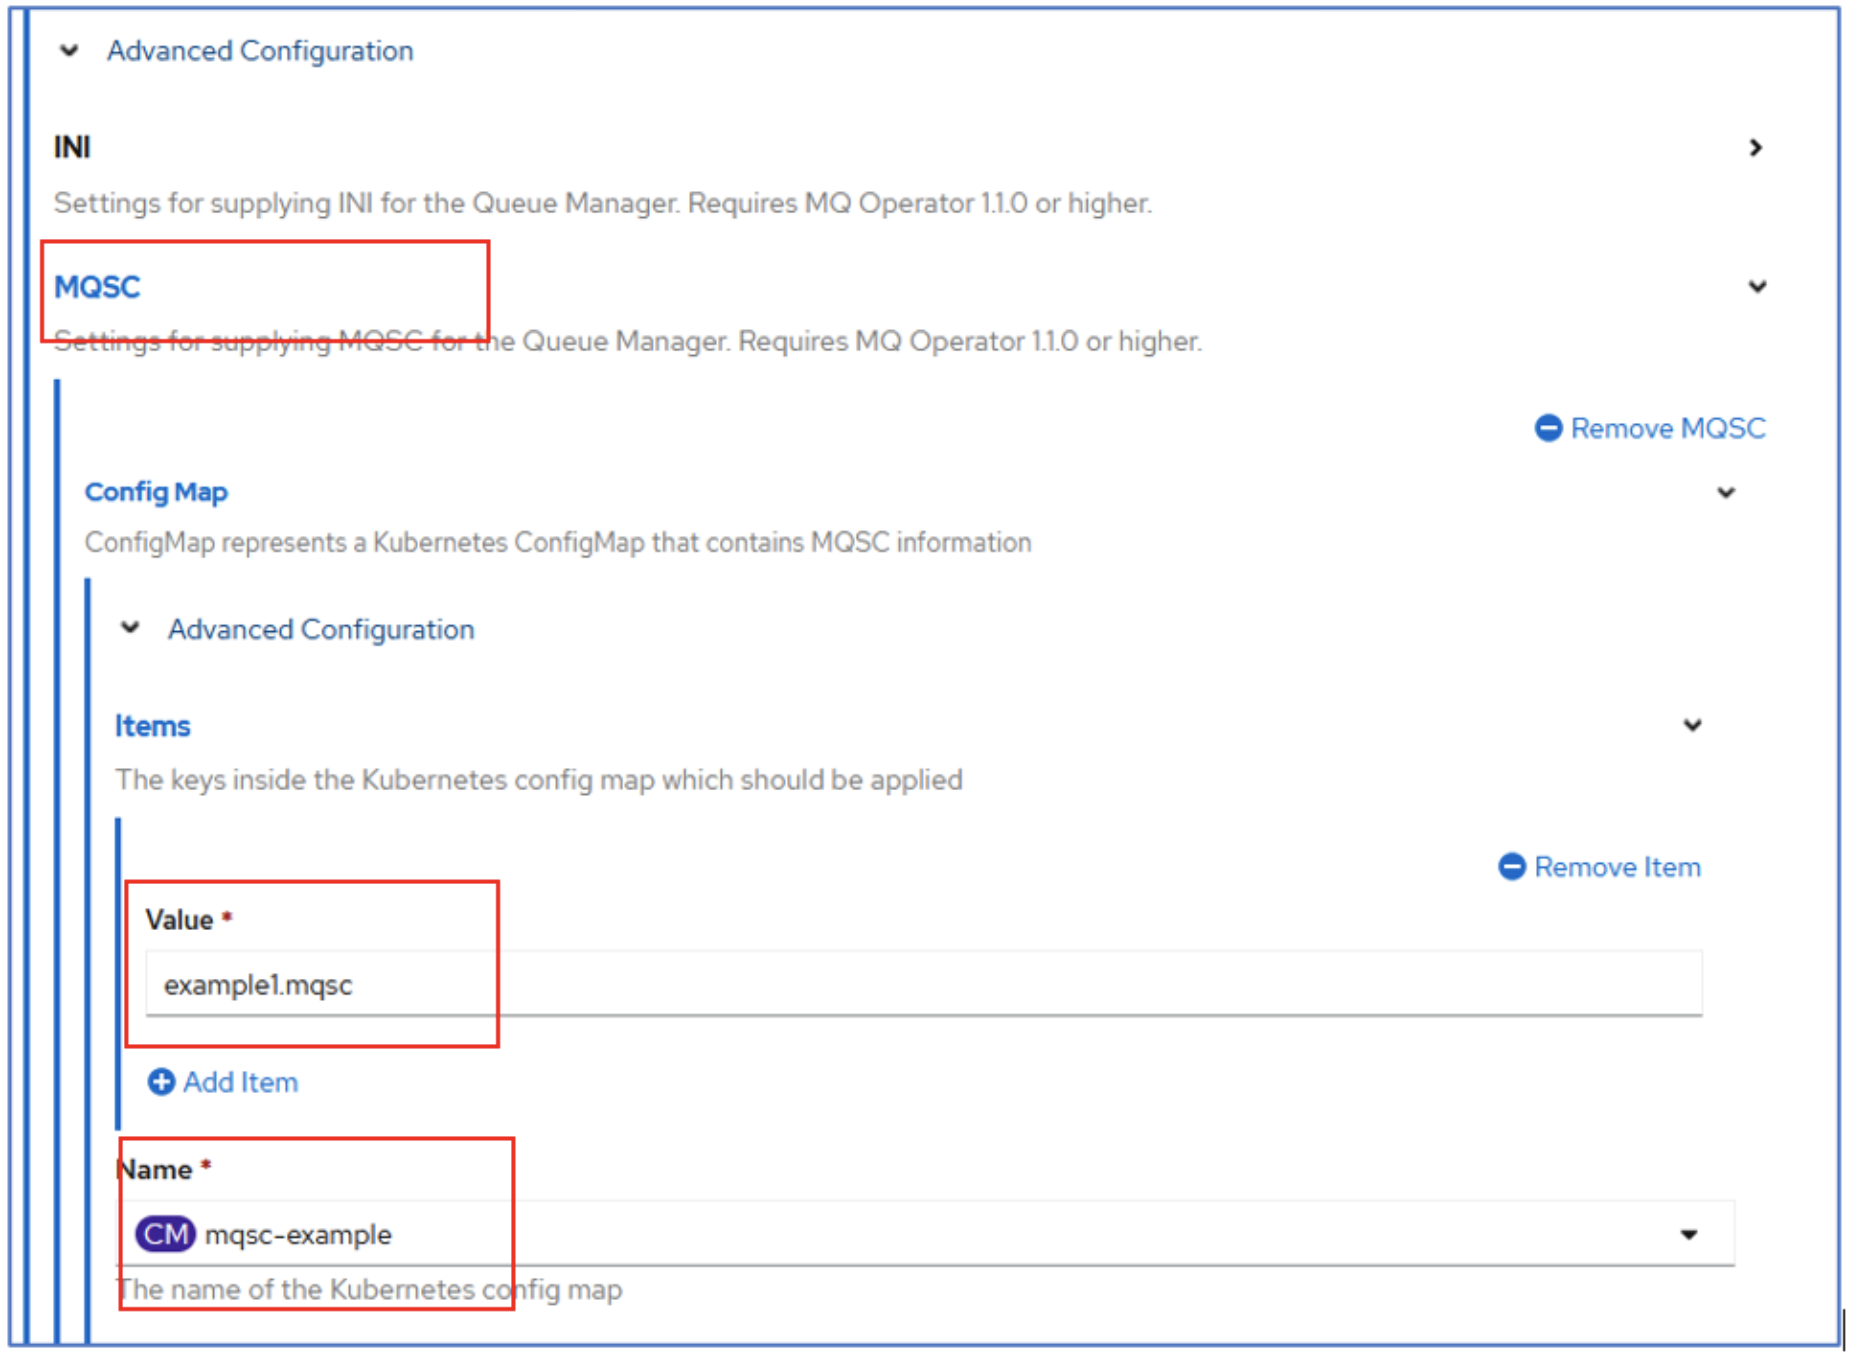
In the Advanced Configuration section, we will provide links to the ConfigMap we created earlier from the drop-down list. We also need to specify the specific key within the ConfigMap to use.
Check the Status of Queue Manager
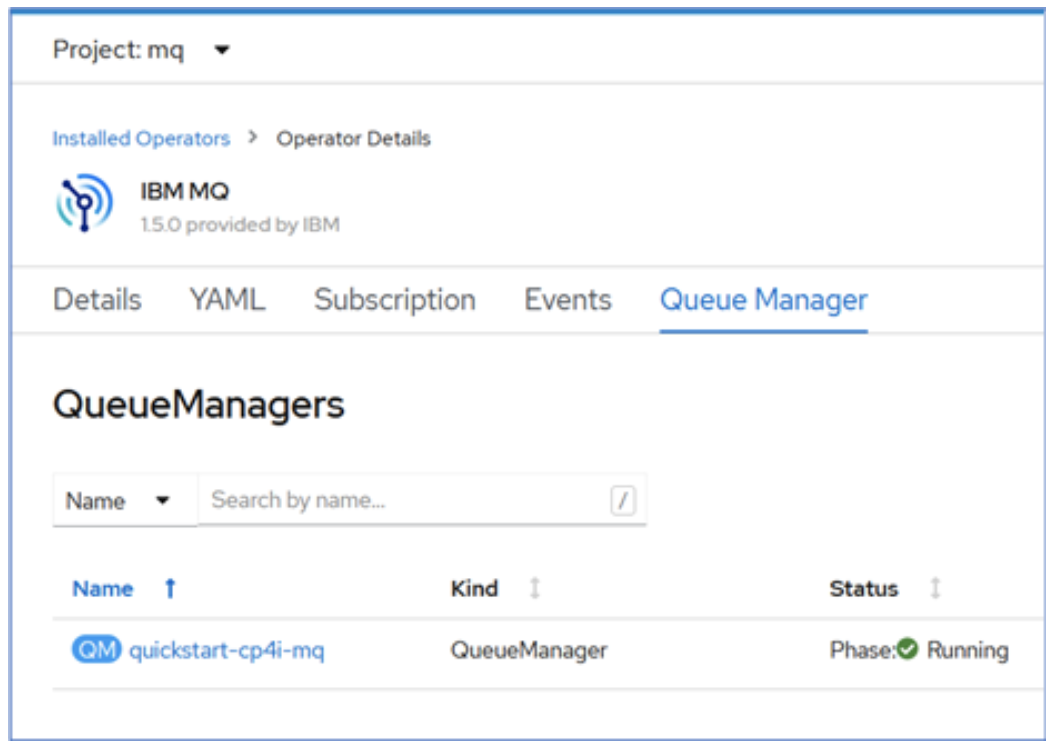
You can check the current status of all the queue managers from the Queue Manager tab.
Log into MQ Admin UI
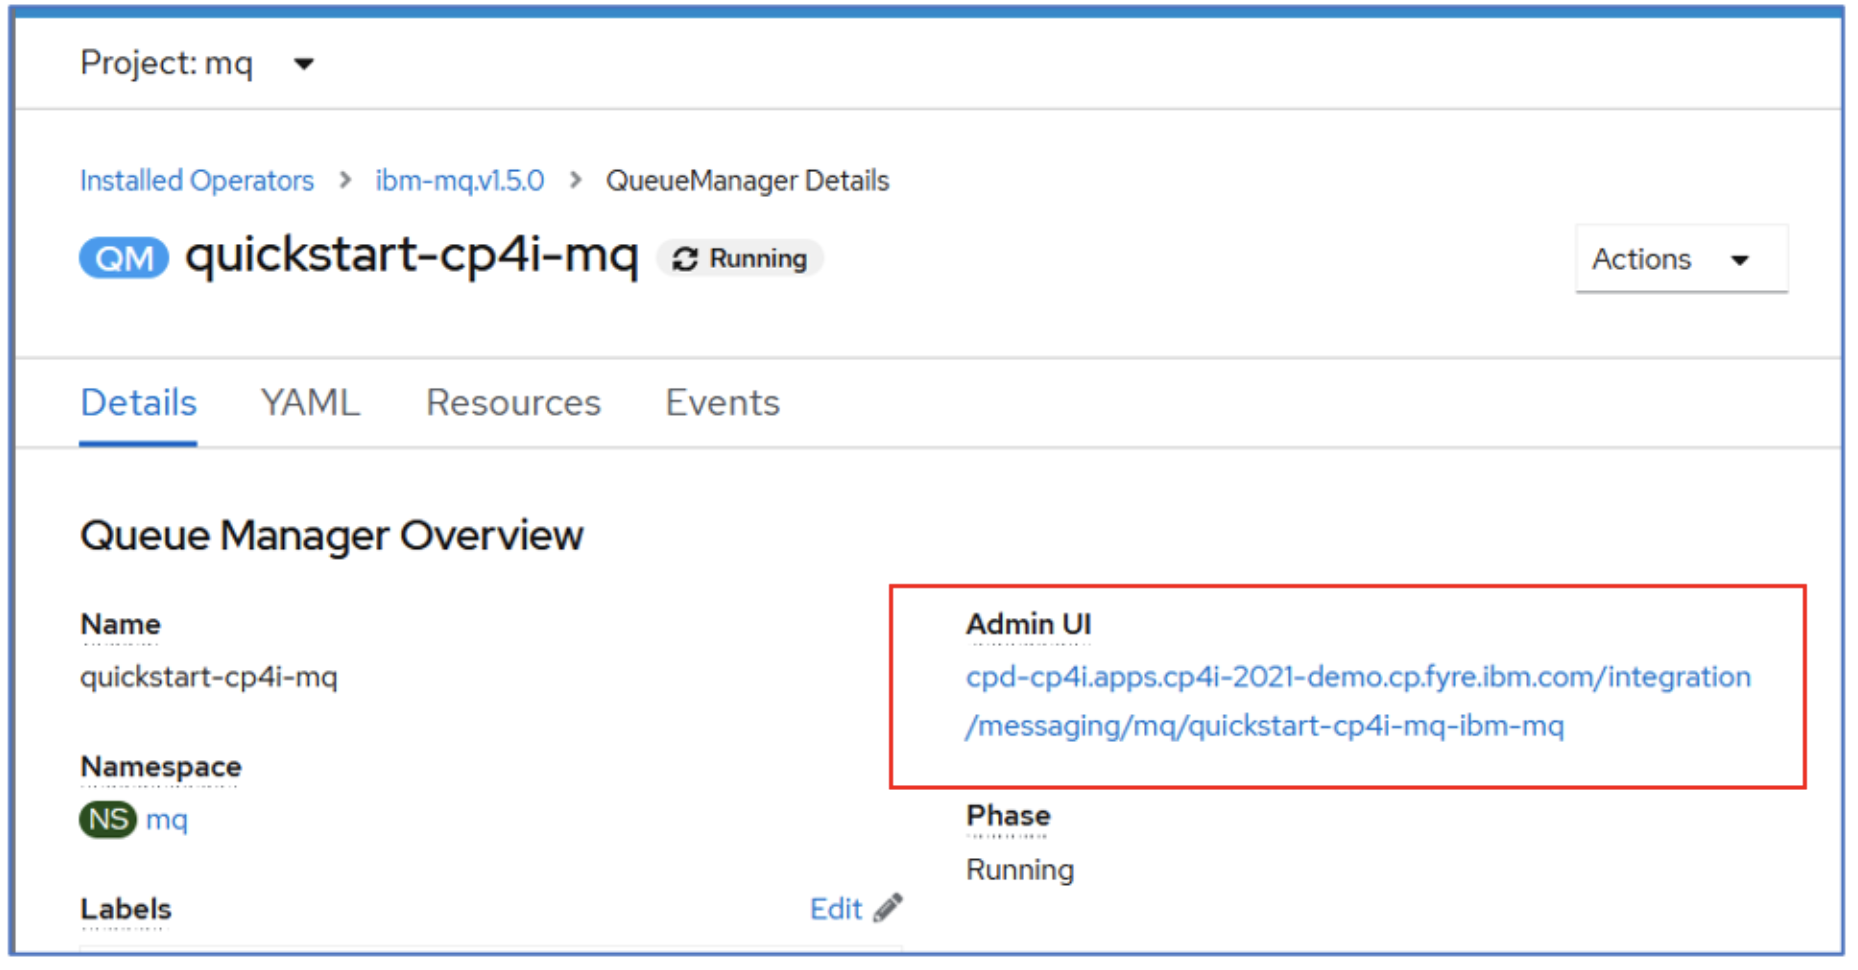
It is possible to log directly into the MQ Admin using the URL listed under the Admin UI section as seen below. However, by now you should not be surprised to hear that this would be a discouraged practice, not least because it results in a user interface running on the queue manager’s container, but also because it provides access to make changes to the queue manager configuration. Ideally you will quickly move to creation of queue and channels via pipelines, with the definitions stored in a source code repository. Any changes made via the MQ Admin UI would then not be known to your definition file in the repository, and the next time you ran your pipeline those changes would be lost.
So, apart from some exceptional cases for diagnostics, all changes to the queue managers should be made via definition files, ideally stored in the source code repository, and enacted by automated pipelines.
QMGR Service Name and Listener Port Number
Since we are going to use a remote client connection to connect to the Queue manager from our ACE message flows, we will need to know the host and port where the queue manager is hosted and listening to for client requests. When we have installed ACE and MQ in the same Kubernetes cluster, we can interact with the MQ queue manager using the Service name (as hostname). You can obtain this and the port number using the OpenShift Console as shown below:
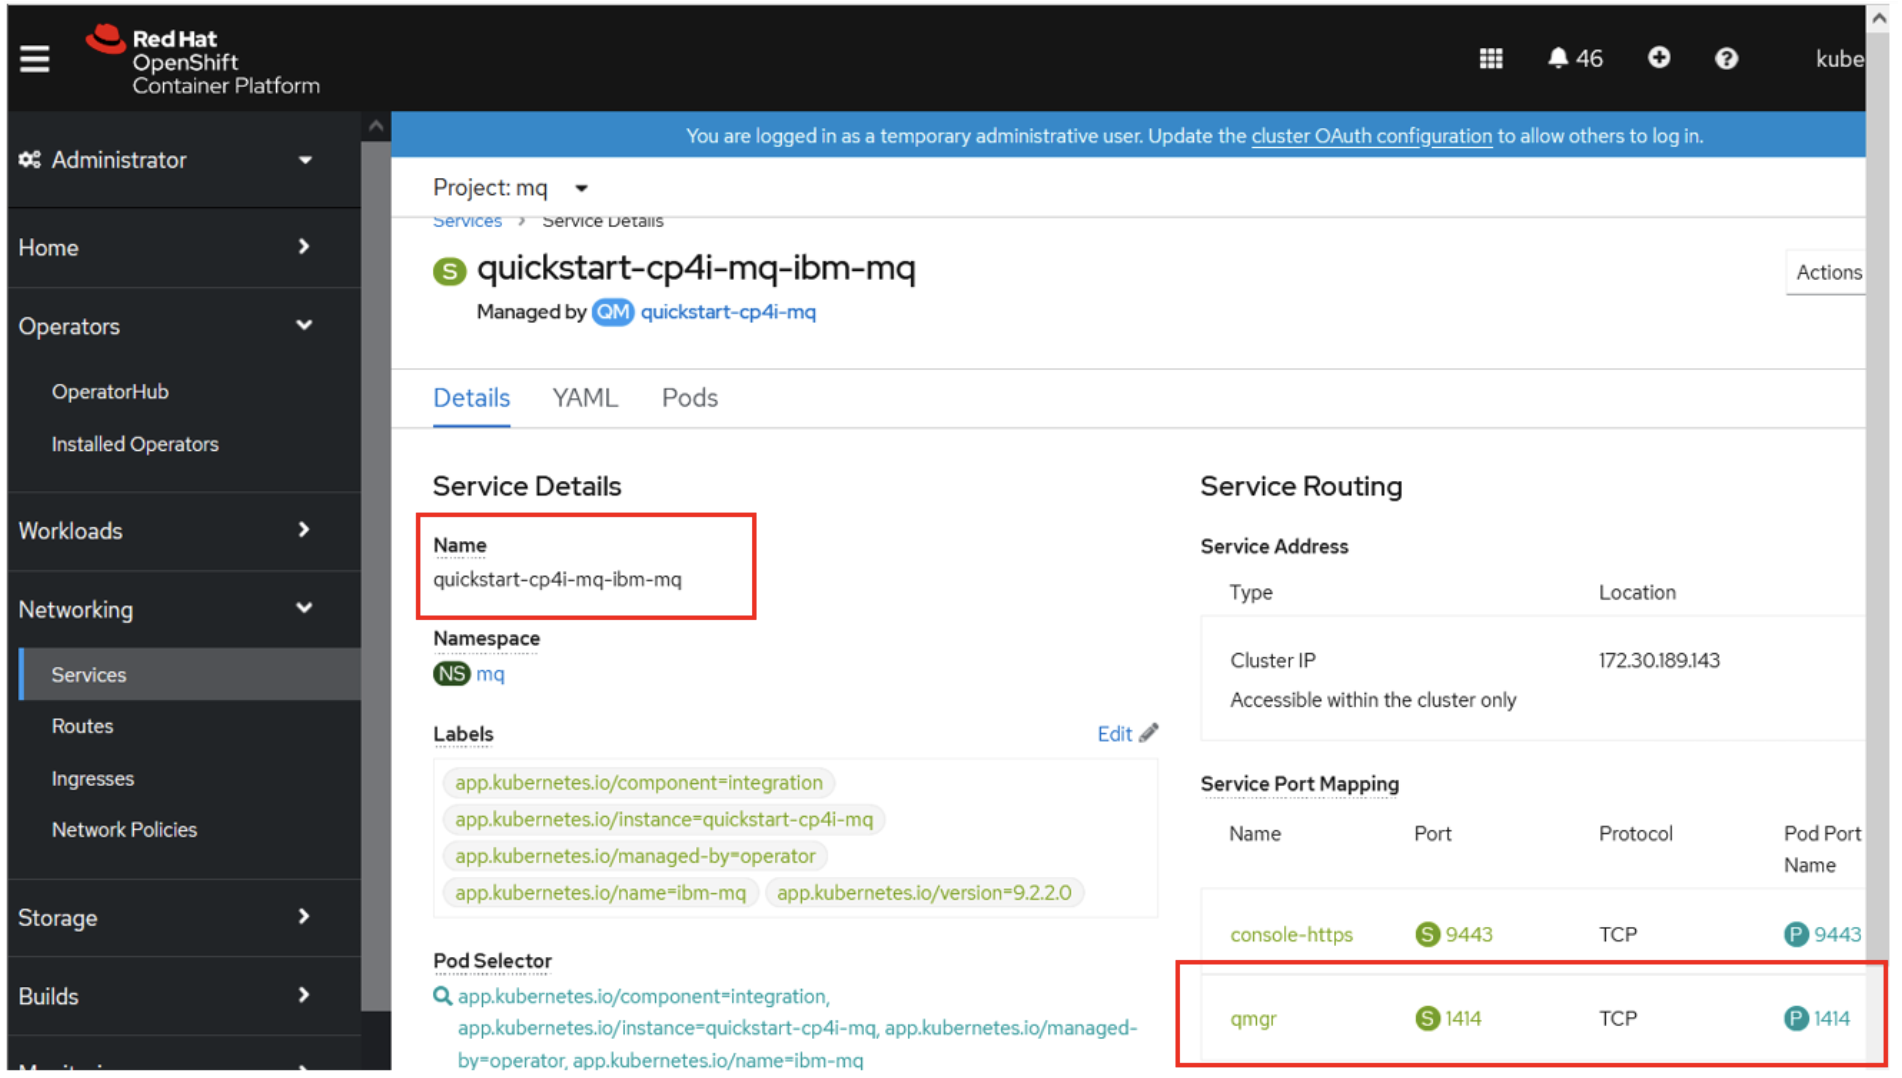
From this we can note that;
Service name : quickstart-cp4i-mq-ibm-mq
Port Number : 1414
Now, we have all the information on the queue manager side that we need to use with ACE flows.
- Queue Manager Name: QUICKSTART
- Queues for applications to PUT and GET messages: BACKEND
- Channel for Communication with the application: ACECLIENT
- MQService and Listener port: quickstart-cp4i-mq-ibm-mq/1414
User Interface Alternatives
We started this tutorial from the OpenShift web console, and similar more generic instructions are present here: Deploying a queue manager using the Red Hat OpenShift web console
It’s worth noting, however, that you can also get to the operator user interface through another route. If you have installed the Cloud Pak for Integration “platform navigator” (Automation Hub), you can also do it through that.
Deploying a queue manager using the IBM Cloud Pak for Integration Platform Navigator
Whichever route you choose, ultimately you end up at the same MQ web console provided by the IBM MQ Operator, providing a consistent way to graphically administer MQ on OpenShift.
It’s worth mentioning that you can of course use a mixture of both the user interface and the command line. For example, you could use the user interface as a simple way to prepare the definition YAML file for the Operator, then proceed to use that file on the command line. Or you might have a fully automated pipeline for deployment, but still choose to use the user interface for occasional status checking and diagnostics on the environment.
Acknowledgement and thanks to Kim Clark for providing valuable technical input to this article.
Published at DZone with permission of Amar Shah. See the original article here.
Opinions expressed by DZone contributors are their own.

Comments