Fast and Efficient Development With Payara Server and IntelliJ IDEA Ultimate
We’re going to look at how to use Payara Server with IntelliJ IDEA Ultimate. We’ll cover how to create a simple web application that runs on a Payara server.
Join the DZone community and get the full member experience.
Join For FreeIn this blog, we’re going to look at how to use Payara Server with IntelliJ IDEA Ultimate. We’ll cover how to create a simple web application that runs on a Payara server. We’ll also explore some of the features available to help you develop your enterprise applications.
Payara Server Support in IntelliJ IDEA
IntelliJ IDEA provides great tooling for developing with Payara servers. By default, IntelliJ IDEA Ultimate comes with the Glassfish plugin installed and enabled. You can use the Glassfish plugin to start, stop and debug Payara servers along with other server functionality.
The Payara Platform Tools plugin provides all the features available in the Glassfish plugin plus additional tooling features like the Hot Deploy functionality available in Payara. To install the Payara Platform Tools plugin, go to your IDE settings (File -> Settings for Windows/Linux or IntelliJ IDEA -> Preferences for macOS) and navigate to Plugins. Select the Marketplace tab and search for Payara. Click on the Install button. Once the plugin is finished installing, you can start using it without needing to restart the IDE.

Configuring Payara Server in IntelliJ IDEA
If you do not have Payara Server installed already, you can go to the Payara Platform Community Edition downloads page and download the latest version — for this blog I’m using Payara Server 5.2021.2 (Full). After you download the zip file, extract it.
In IntelliJ IDEA, go to Run -> Edit Configuration… then click the + button in the top left corner. If you’re using the Payara plugin, choose the Payara Server -> Local configuration option. If you’re using the Glassfish plugin, choose the Glassfish Server -> Local configuration option.
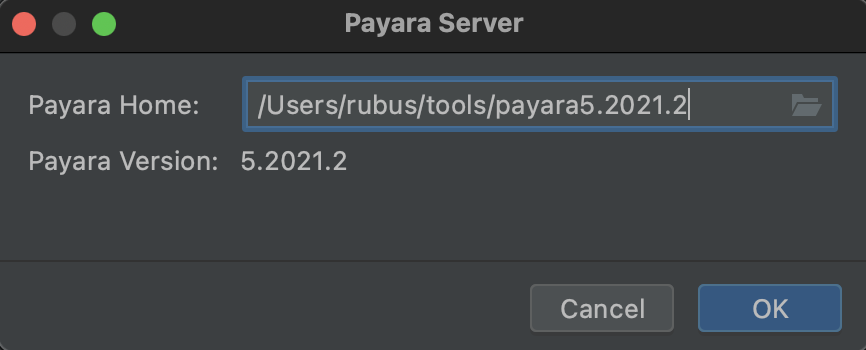
In the Server tab, click on the Configure… button and specify the directory where you have unzipped the Payara Server. You can tell if you have selected the correct directory if the dialog indicates the version of the Payara server that is installed there. Click OK.

Creating a new Web Application
In IntelliJ IDEA Ultimate, I’ll create a new project by clicking File -> New -> Project…. I’ll select the Java Enterprise option on the left menu. Then, I’ll choose the project’s SDK. If you have an existing configured SDK in IntelliJ IDEA, it will be listed in the top of the SDK list. Or you can use the Download a JDK… option. I will use this option to download Java 11 since it’s the latest Java version compatible with Payara. In the Download JDK Version field, I will select Java 11 as my Java version — which will give me a list of vendors to choose from. You can select any of the vendors. For this tutorial, I will select AdoptOpenJDK with Hotspot. Then click Download.
I will use the Web application project template which will provide me with some basic template files for my application.
For the Application Server field, I’ll click on the drop-down menu and select the Payara Server that we configured in the previous step. Then, I’ll click Next.

In the next window, I will leave Java EE 8 selected with the Servlet framework checked then click Next.
Then, I’ll give my project a name — I’ll call it PayaraHelloWorld. I’ll also specify the Group ID corresponding to my company name. Then, I’ll click Finish.

IntelliJ IDEA creates a simple web application and loads the project.
Note: the New Project window has changed slightly starting IntelliJ IDEA version 2021.1. You can perform similar steps to create your new project in 2021.1 and later versions.
Running the Web Application
In IntelliJ IDEA, I can use Shift+F10 for Windows/Linux or ^R for macOS to run my web application. The Services window will come up and I’ll see the server logs showing the server start.

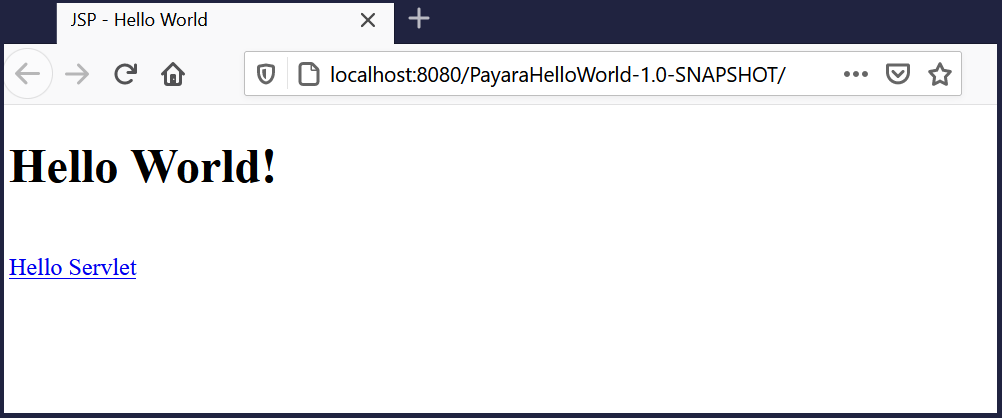
Once the application is deployed, IntelliJ IDEA will open up my default browser and navigate to my web application in the browser.

Our web application is up and running!
Features for Jakarta EE Developers
IntelliJ IDEA Ultimate has many advanced features that make development much easier for a Jakarta EE developer. Let us pick a few of them as covering them all will take too much space.
Code Completion and Refactoring
IntelliJ IDEA is aware of the context you are typing. A String is not just a series of characters when you are typing a JPA Query. The IDE detects that you are writing a query and offers you code completion as well as syntax checking.
For example, if you’re writing a JPA Query with an entity class called Customer, IntelliJ IDEA will provide you a list of the possible fields that you can use in the query.

The same goes for when you are writing JSF views. IntelliJ IDEA uses the information it finds in your CDI beans, for example, to suggest field values (although you still need to check if the values will be accepted since it also proposes Method Expressions when in this case only Value Expressions are allowed).

In addition, when you refactor your code, it replaces occurrences within Strings that describe your JPA Queries or JSF views. This way, you can write much more efficient and bug-free code.
Validation
Along with the validation we already mentioned in the previous section, validations happen in many cases so that you get informed of problems before you need to test your application. For example, in the following image, IntelliJ IDEA Ultimate informs you that a JAX-RS resource class needs methods that are annotated with HTTP methods like @GET and @POST.

Or that a placeholder for a path parameter doesn’t match the value in the annotation.

Tools
IntelliJ IDEA has many tools built-in so you don’t need to leave your IDE. For example, you can interact with your Docker or Kubernetes environment right within the IDE. You see what is available, running, and test your application immediately in a Docker Container.
Another useful tool is the Endpoints tool. You can have a look at all the JAX-RS endpoints that you have already defined in the application and view the OpenAPI document to see if they match the requirements you have.
You can test out these endpoints and see not only the response but also the headers that you receive from the Payara Server.

Summary
IntelliJ IDEA has powerful enterprise features that make developing your enterprise applications easier, reliable, and more efficient. Create your first web application on a Payara Server and try it out!
See Also
Published at DZone with permission of Rudy De Busscher, DZone MVB. See the original article here.
Opinions expressed by DZone contributors are their own.

Comments