Using Netflix OSS + Spring Cloud Netflix: Part 1
Learn how to use Netflix's open source components on its Spring Cloud to build a scalable distributed system of microservices.
Join the DZone community and get the full member experience.
Join For FreeNetflix OSS and Spring Cloud Netflix
Netflix was one of the first companies to adopt microservices architecture, and they have built very interesting blocks for managing and implementing a microservices platform. To repay the open source community for their help getting started, they open sourced all the components used to make Netflix a leader in Internet television.
Spring, as always and to keep up with the crowd, made Spring Cloud Netflix, to make it easy for Spring Boot projects to integrate the Netflix OSS. With a few simple annotations, you can integrate all the patterns used in Netflix OSS and build a scalable performant distributed system.
Example of a Microservices Product and Details
For this example, we will use a traditional example, managing products ordering and their details, in the functional diagram:
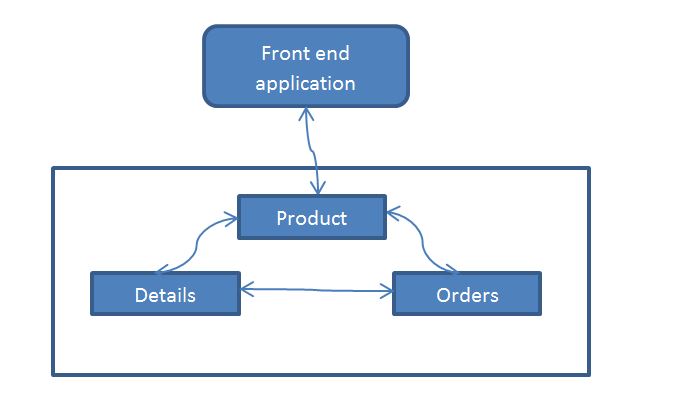
- Product: our entry point to the Rest APIs.
- Details: details about the product (stock, price, name).
- Orders: make an order about a product (need to verify the stock before making the order).
Architecture and Netflix OSS
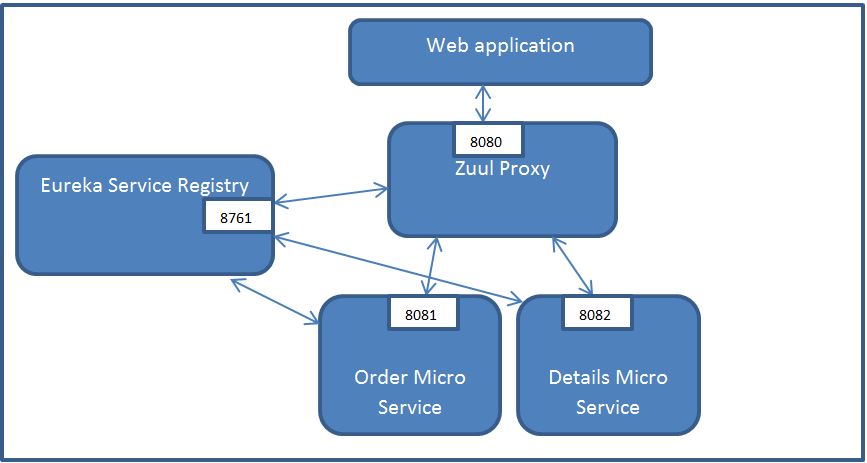
In this part, we will discuss the technical architecture that we will use in this example, and the Netflix OSS blocks that we will base our architecture on.
- Eureka Service Discovery: services registry.
- Zuul Intelligent routing (proxy for our micro services): the Product API that we see in the functional diagram.
- Feign: to make one service consume another, we will use the Feign java to Http Client, we will talk later about this client.
These are the components that we will use for this first article, to not submerge the reader with too much information.
Eureka Server
On https://start.spring.io/, create a Eureka server. For this article, we will be using Maven:
- Search for the Eureka Server dependency:
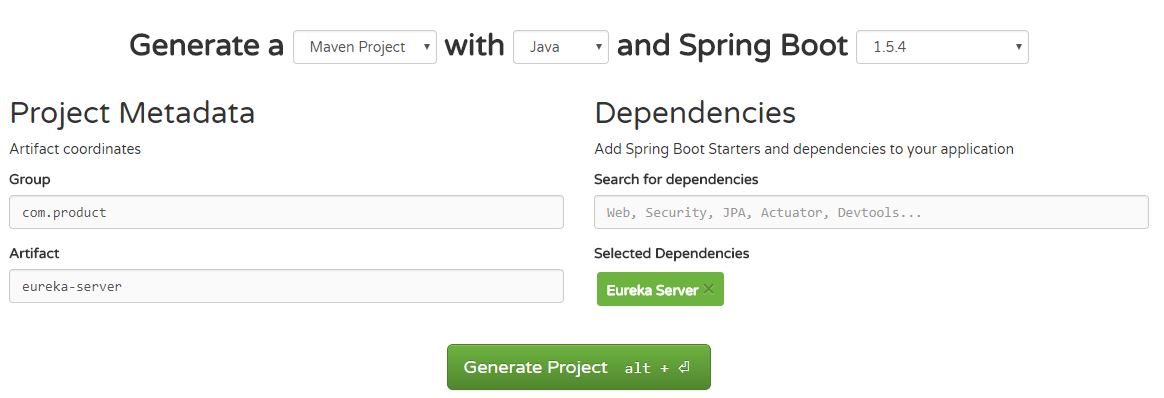
Click on Generate Project, and the Zip of the project will be downloaded. Extract the project and import it using your IDE (I am using Eclipse).
Usually, when starting an instance of a Eureka Service, it is launched as a server to register services, as well as a client to be registered in other Peers. For this example, we will use a Standalone Eureka Server.
For this reason, we will stop the client behavior on it, so it doesn’t keep looking for its peers and failing to reach them.
Communication Between Eureka's Client and Server
The Client that is, in our case, a microservice, is sending heartbeats to the server every 30 seconds to tell it that it's reachable.
The Client has a cache of all the other Clients, so if the server is down, the client can use its cache to retrieve another client.
Server Configuration
First of all, import your project in your IDE.
Modify the application.properties:
spring.application.name=EurekaServer

server.port=8761

# the hostname
eureka.instance.hostname=localhost

# Eureka server time to sync with other peers,
# usually it's 3 min and it will retry if it doesnt
# get any response but for developpement we will put it to 0
eureka.numberRegistrySyncRetries=0

#############################################
# EUREKA CLIENT CONFIGURATION#
#############################################
# the Eureka server has the same host as ours
# so we do this to stop the server from registring as it's own peer
eureka.client.service-url.default-zone=http://${eureka.instance.hostname}:${server.port}/eureka/

# To stop it from trying to register to an Eureka Server
eureka.client.register-with-eureka=false

# To stop fetching registry information about other services from other peers
eureka.client.fetch-registry=false
Modify the bootstrap class of your class by adding @EnableEurekaServer above @SpringBootApplication:
import org.springframework.boot.SpringApplication;
import org.springframework.boot.autoconfigure.SpringBootApplication;
import org.springframework.cloud.netflix.eureka.server.EnableEurekaServer;

@EnableEurekaServer
@SpringBootApplication
public class EurekaServiceApplication {

public static void main(String[] args) {
SpringApplication.run(EurekaServiceApplication.class, args);
}
}
Now you have just to launch your project :
# windows
mvnw spring-boot:run

# linux and mac
./mvnw spring-boot:run
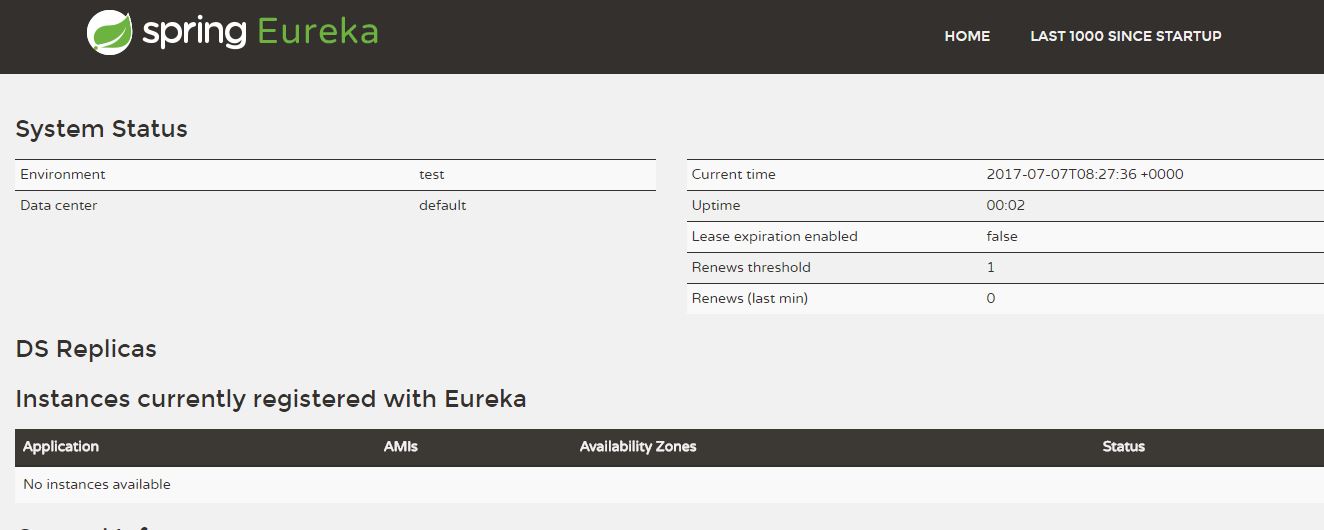
Your Eureka server will be available at http://localhost:8761/.
Order Service
Using start.spring.io, create an Order Service with the following dependencies :
- Eureka Discovery: to discover all the microservices in the hood (Eureka Client).
- JPA: to manage data.
- H2: an in-memory database.
- Feign: REST Client to call other REST services.
- Rest Repositories: to expose JPA repositories as REST Endpoints.
- Web: Spring MVC and embedded Tomcat.
- Lombok: to generate setters and getters, constructors, and other boilerplate code.
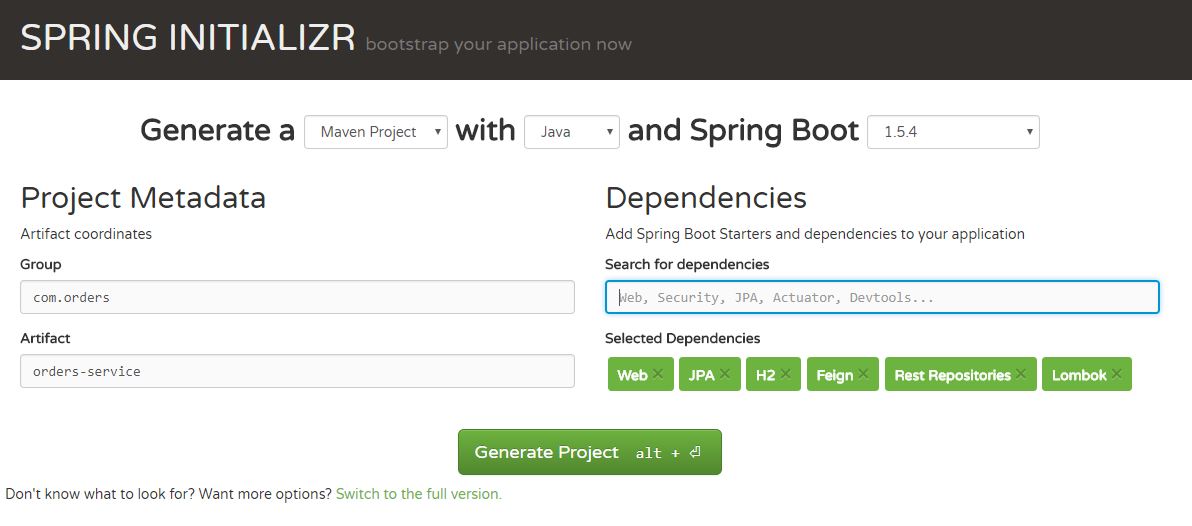
This is the code:
The model Order.java:
package com.orders.models;

import javax.persistence.Entity;
import javax.persistence.GeneratedValue;
import javax.persistence.Id;

import lombok.AllArgsConstructor;
import lombok.Data;
import lombok.NoArgsConstructor;
import lombok.ToString;

@Data
@AllArgsConstructor
@NoArgsConstructor
@ToString
@Entity
public class Order {
    @Id
    @GeneratedValue
    private Long id;

    private int quantity;

    private double price;
}
The Spring data Repository:
package com.orders.dao;

import org.springframework.data.jpa.repository.JpaRepository;
import org.springframework.data.rest.core.annotation.RepositoryRestResource;
import com.orders.models.Order;
@RepositoryRestResource
public interface OrderRepository  extends JpaRepository<Order , Long> {

}
The bootstrapping class of the application:
package com.orders.ordersservice;

import org.springframework.boot.SpringApplication;
import org.springframework.boot.autoconfigure.SpringBootApplication;
import org.springframework.cloud.netflix.eureka.EnableEurekaClient;

@EnableEurekaClient
@SpringBootApplication
public class OrdersServiceApplication {

public static void main(String[] args) {
SpringApplication.run(OrdersServiceApplication.class, args);
}
}
The @EnableEurekaClient is the Eureka client annotation that will add the client behavior to our microservice.
And last but not least, the application.properties file:
server.port=8081
spring.application.name=orders-service
#we tell the Eureka Client the sever url
eureka.client.serviceUrl.defaultZone: http://localhost:8761/eureka/
# the eureka client will send heart beats every 10 seconds, default is 30 seconds
eureka.instance.leaseRenewalIntervalInSeconds: 10
# An Eureka instance is indentified by eureka.instance.instanceId
# if not used eureka.instance.metadataMap.instanceId will be it should be unique
eureka.instance.metadataMap.instanceId: ${spring.application.name}:${spring.application.instance_id:${server.port}:${random.value}}
Now you should just start your microservice and it will be registered in the Eureka Server:
Start your microservice using
# windows
mvnw spring-boot:run

# linux and mac
./mvnw spring-boot:run
And this the final result:
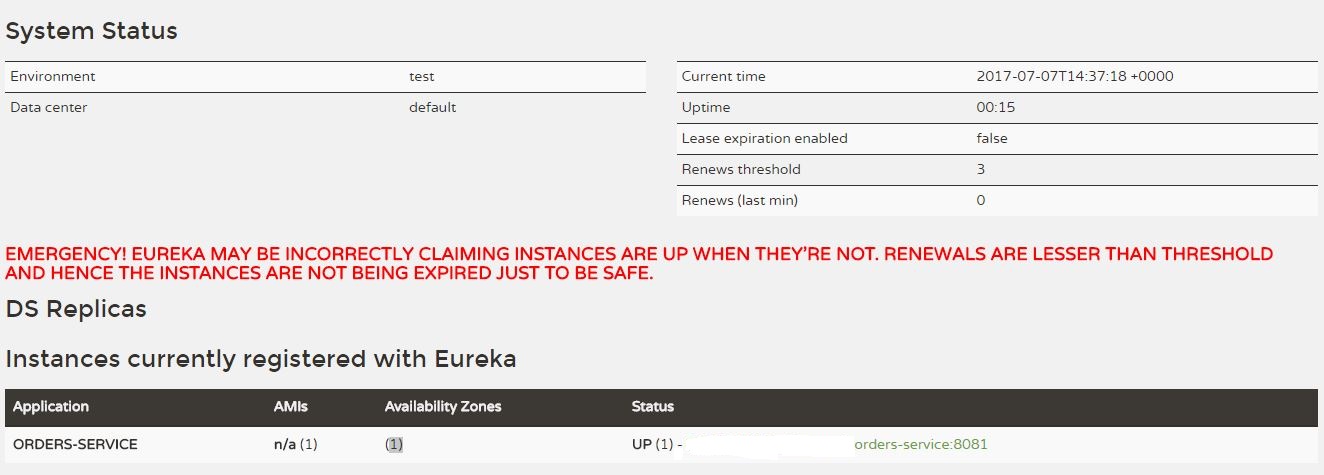
Our Orders-service is registered!
Conclusion
In this first article, we showed how to create our Eureka server and how to register a microservice to it. In the next article, we will show how to consume other microservices, how to make Zuul our entry point, and how to load some dynamic filters from Cassandra for our Zuul.
This repo will contain all the source code and configurations of this example.
Opinions expressed by DZone contributors are their own.

Comments