Performing ETL with AWS Glue Interactive Sessions
AWS Glue interactive session eradicates the complexity of setting up the infrastructure by providing serverless interactive access to AWS Glue Jobs through Jupyter Notebooks.
Join the DZone community and get the full member experience.
Join For FreeIf you have been using AWS Glue lately, you might have witnessed the complexity of setting up the infrastructure for building, testing and running a Glue job using Glue Dev endpoint. Setting up a Dev endpoint is no easy task as it takes a lot of effort to be done on your local machine. By using interactive sessions, you can not only author a job faster than ever but also make the whole process easier for you.
Drawbacks of Using Glue Dev Endpoint
- Cost: When you want to author a lot of jobs, the dev endpoint can be of great help but if you want to build and run only a few jobs it will turn out to be a costly investment. Since a dev endpoint is an EC2 machine backed with the Glue libraries, cost turns out to be a major factor in using the dev endpoint for just a handful of jobs. Moreover, the minimum billing duration for each provisioned dev endpoint is 10 minutes, which does not make it a great choice for running a single job that takes about 2-3 minutes to complete.
- Complexity: Setting up a dev endpoint is a complex task. It requires the stuff to be downloaded on your local machine which makes it difficult for the systems protected with a firewall or the systems without admin rights.
- Time: Timing is another drawback of using the Dev endpoint for a less number of jobs. Suppose you want to author 2 PySpark ETL jobs that take a minute each to run. Now, provisioning and establishing a dev endpoint and transferring files to the dev endpoint will take a lot more time to complete than completing the jobs themselves.
- Flexibility: Once a dev endpoint has been provisioned the billing continues until you manually delete the dev endpoint. Also note, that AWS continues to charge you till the dev endpoint is in a READY state.
Solution - Interactive Session
An interactive session allows you to leverage the simplicity of Jupyter notebooks while authoring the complex glue jobs interactively. So, let us deep dive into setting up our own interactive session.
In this tutorial we will use AWS Glue Studio Job Notebooks which provides a built-in interface for Interactive sessions.
Step 1: Open AWS Glue Studio
Once you have logged in to your AWS Account, search for AWS Glue and click to open or click here to open it straight away.
This will open the AWS Glue homepage with a plethora of services on the left menu. Click on the AWS Glue Studio to open it or click here to open AWS Glue Studio directly.

Step 2: Create a New Job
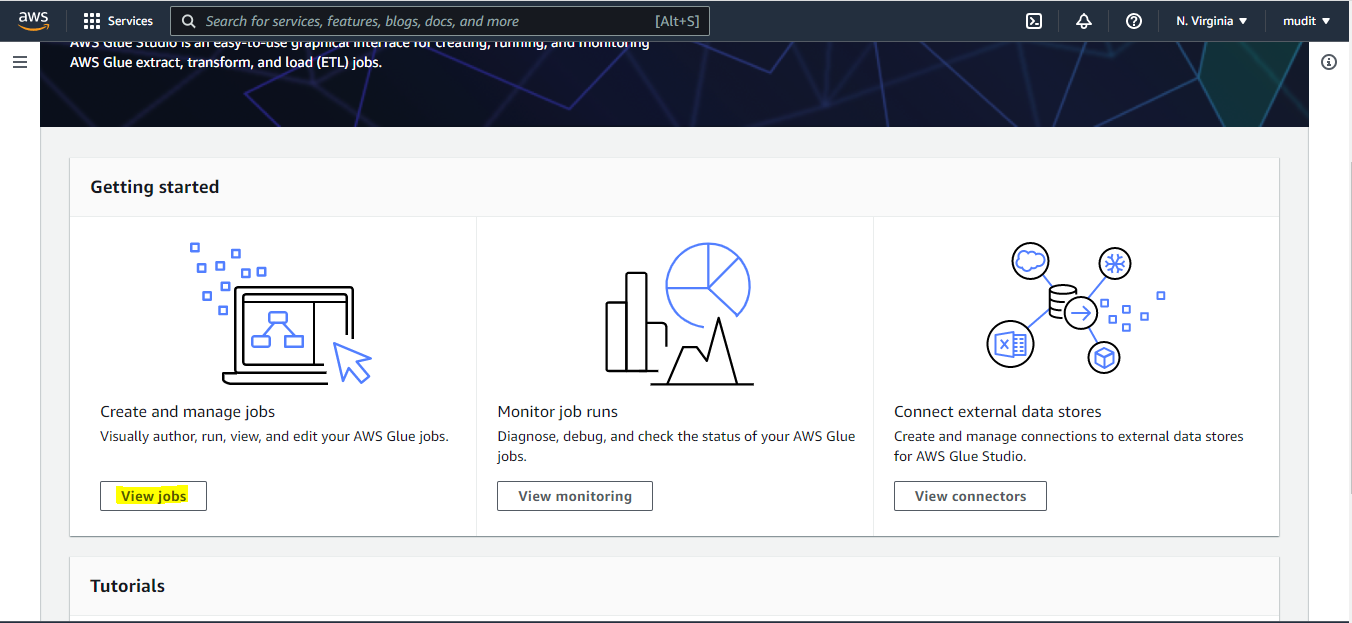
Scroll down and click on View Jobs to open the job creation screen.
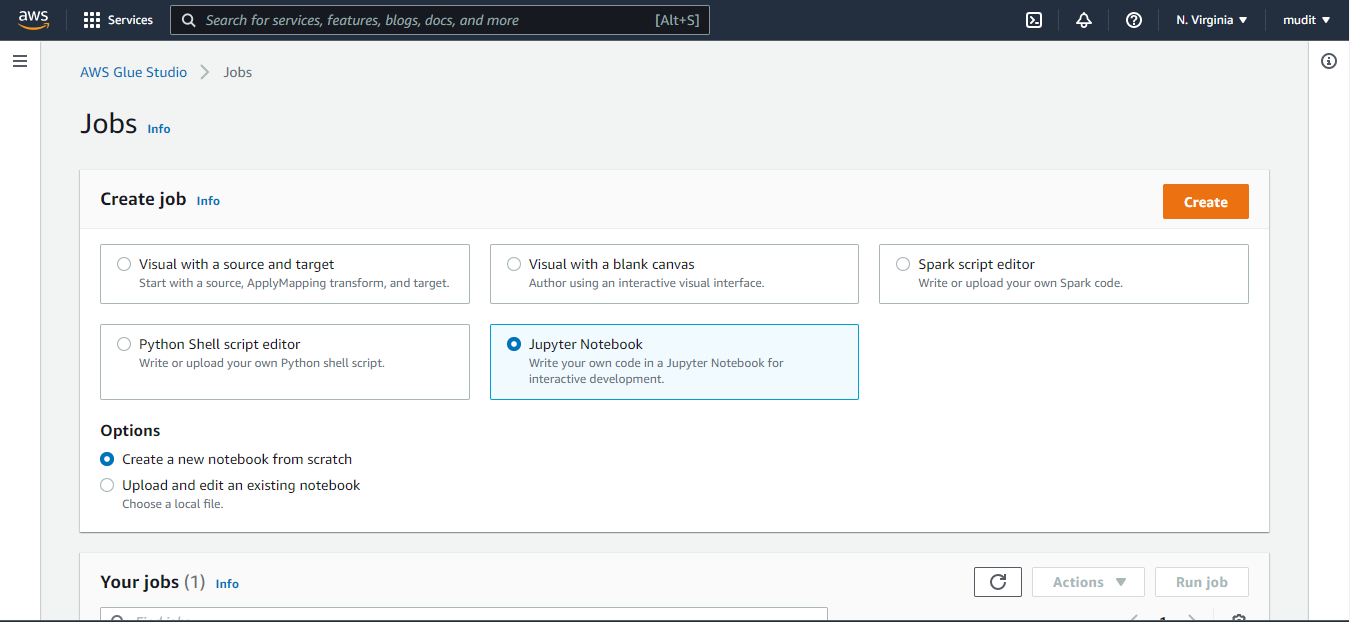
On the job creation window, select Jupyter Notebook and then select Create a new notebook from scratch from the below options. Click on Create to proceed to the next window.
Step 3: Name the Glue Job and Assign the IAM Role
This step involves naming the glue job and assigning an IAM role to it. Enter a valid name for the authored job and assign an IAM role.
While assigning the IAM role, keep note that the IAM role must have the permissions to access the source and the targets used by the job.
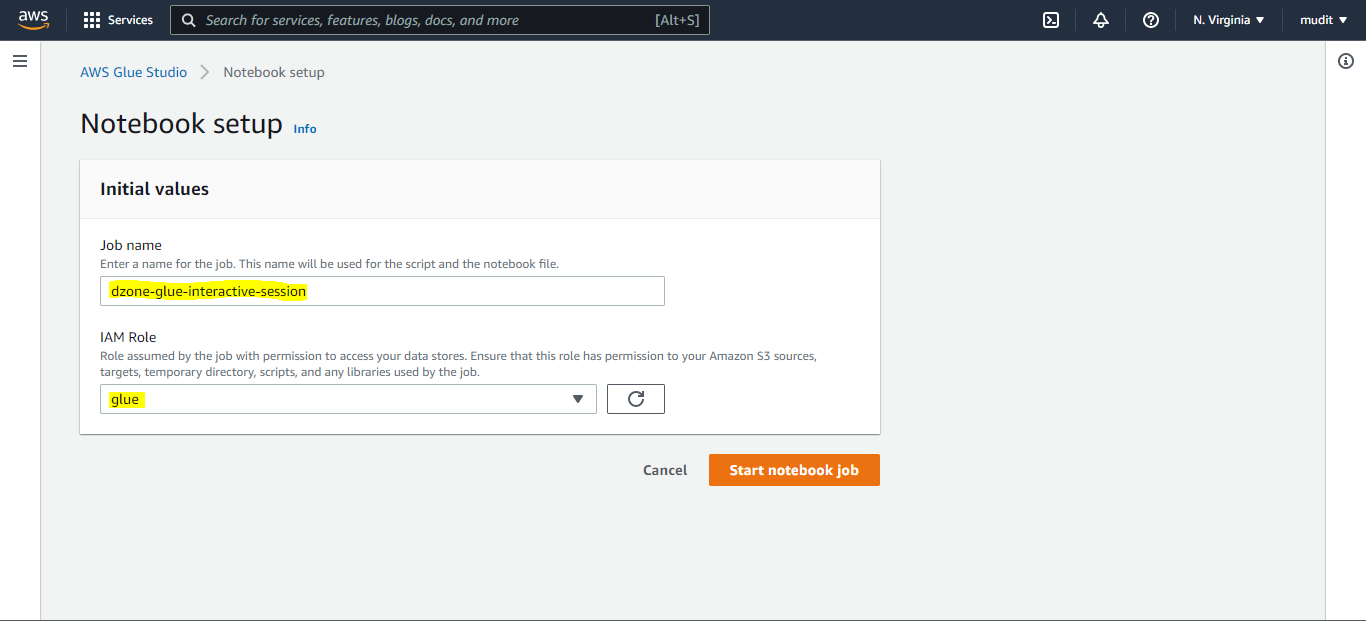
Click on the Start notebook job below and your job will be up and running in a few seconds.
Step 4: Starting the Interactive Session
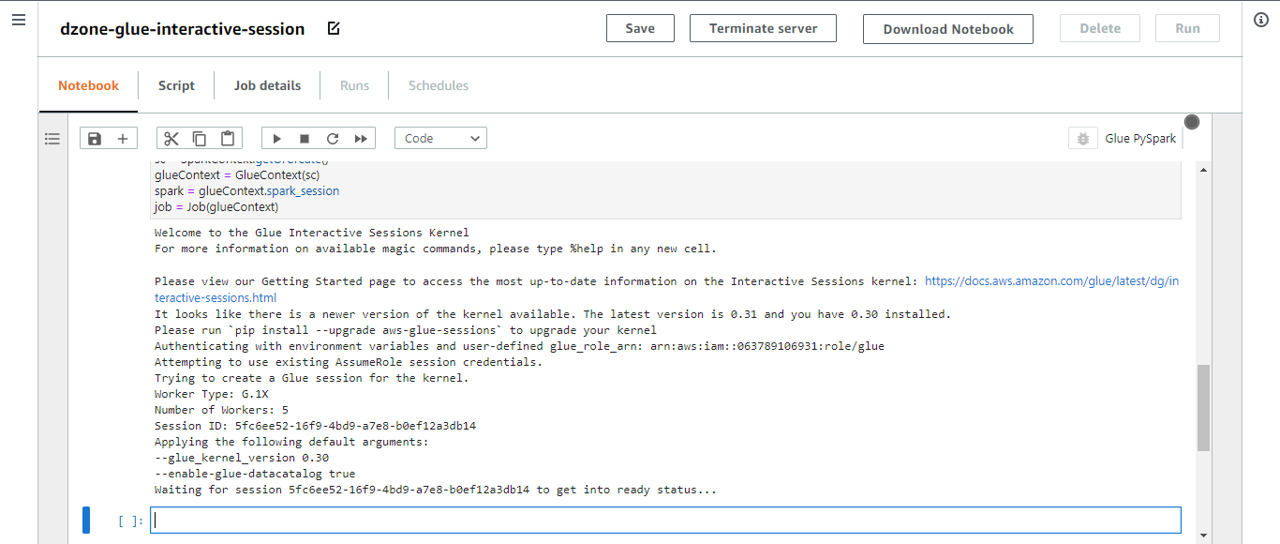
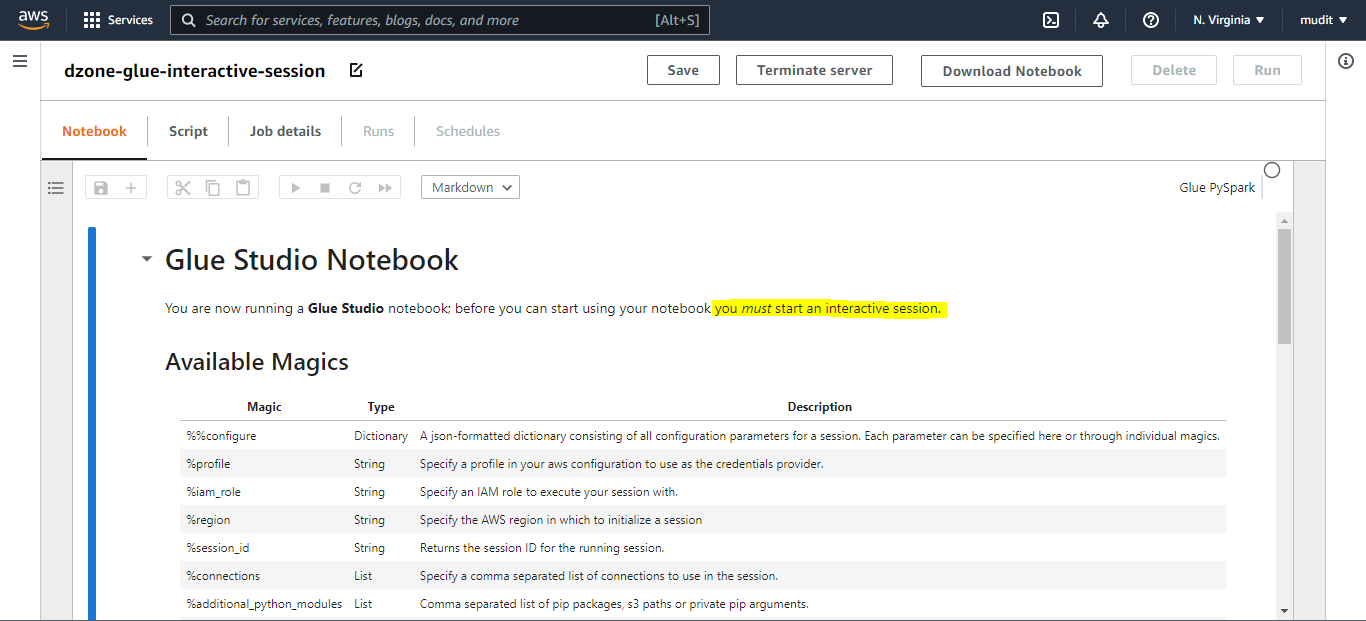
You need to start an interactive session before you can start using the notebook. Starting an interactive session is an easy task. Just scroll down and run the first cell to start the interactive session. As this is a Jupyter Notebook, Shift + Enter will execute the cell. As soon as you execute the first cell, the interactive session will start.
Step 5: Terminating the Interactive Session
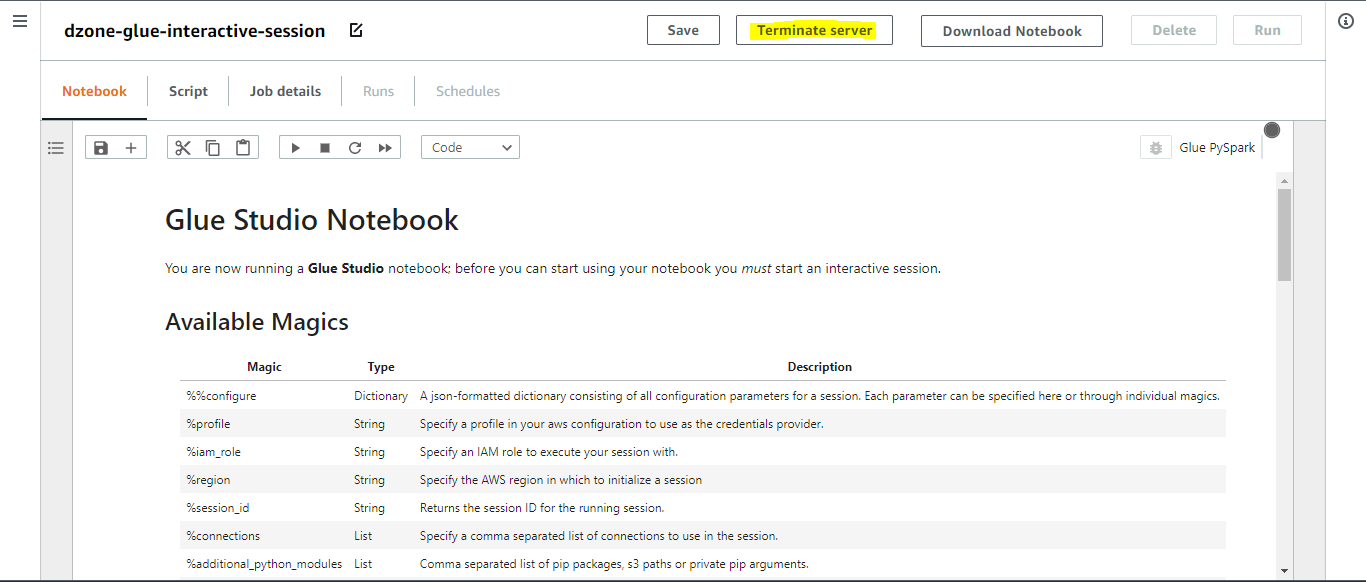
Once the job runs successfully you need to terminate the interactive session. Click on Terminate Server to avoid unwanted billing or use %stop_session magic.
Magics supported by AWS Glue Interactive Sessions for Jupyter
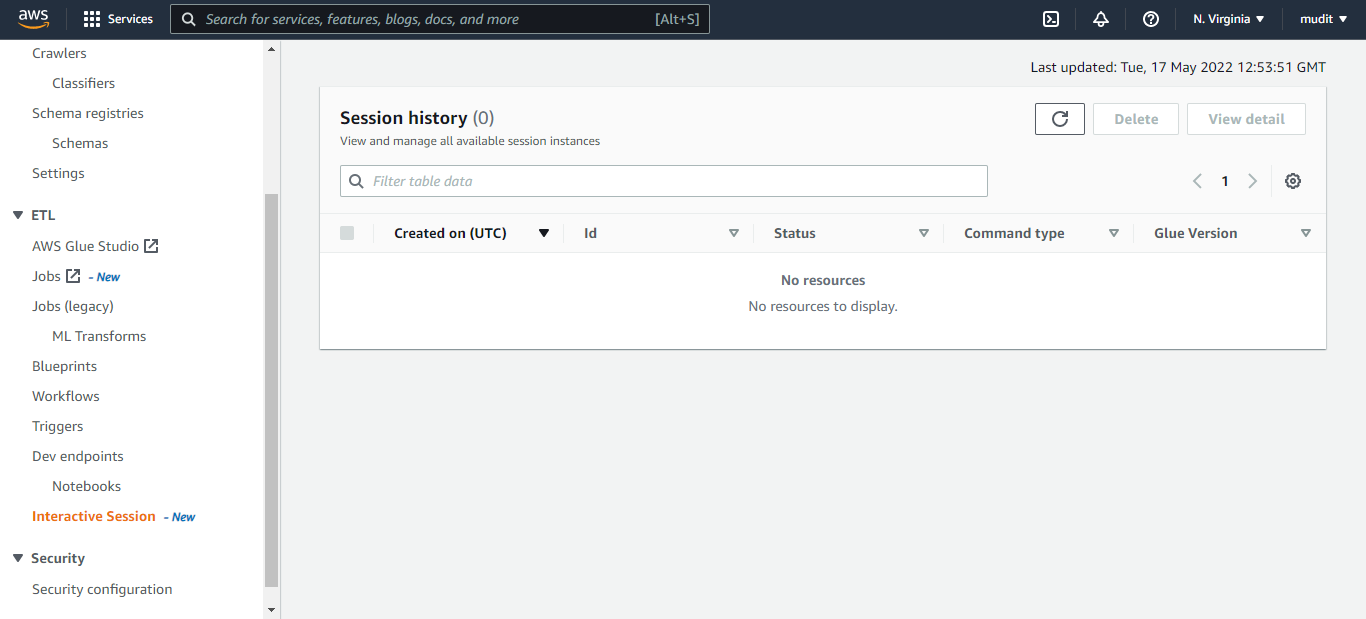
To confirm the termination of the session, open AWS Glue again and search for Interactive Session on the left menu. If there are any unwanted sessions in the READY state, manually delete them.
Glad you reached the end of the blog. If you have any doubts please comment below. Thanks.
Opinions expressed by DZone contributors are their own.

Comments