Development of the Open-Source Telegram Bot for MQTT IoT
Experience of development a flexible and an easy-to-configure for your needs open-source MQTT client Telegram bot.
Join the DZone community and get the full member experience.
Join For FreeToday I will be sharing my experience in developing a flexible Telegram-bot. His purpose: obtaining information and controlling IoT devices via the MQTT protocol.
What’s so special? Because this is not just a bot with two-three hardcoded buttons to operate a light bulb (there are many examples of that on the Internet), but a bot that supports flexible subscriptions and commands to operate directly from the menu, without any changes introduced to the source code. It’s a ‘NoCode solution’, so to speak.
The bot is based on Go and the source code is made freely available on GitHab under MIT license. In this article, I’m talking about some technical aspects of implementation and the resulting functionality with usage samples.
What for?
Several factors have been pieced together. First of all, I have long wanted to transfer my smart intercom (sorry, it’s in russian) to something lighter and more universal than IoTManager. One Telegram-bot covers the entire multitude of devices and operating systems. Leave compatibility issues to comrade Durov. At last, I can open the intercom from my laptop.
Secondly, I really wanted to practice bot-writing, and I am very attracted to the very idea of managing something by means of a messenger. This is how Vas3k in his club made an admin panel via Telegram, isn’t that cool?
Functionality
Writing a bot with a few hardcoded buttons is tedious. I decided to make a more versatile solution with a customized user menu and display graphics support.
The following functionally was the basic goal:
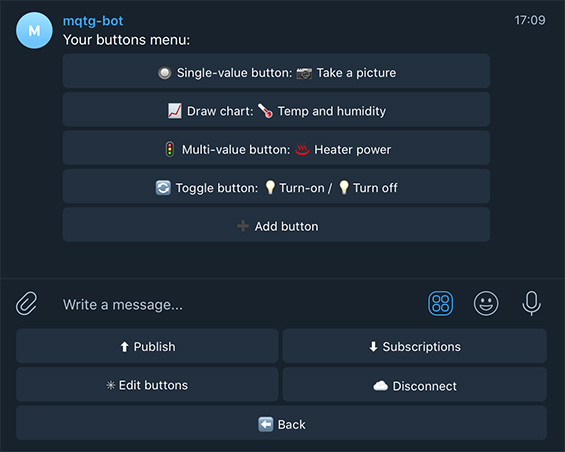
- Multi-level user menu with the possibility of creating the following buttons: folder (for tree-like menu), single-value-command button, toggle button, multi-value-command button, show the last message received for the topic, draw chart
- Subscription to arbitrary topics (including receiving images)
- Storage of value history
- Manually sending a message to the topic
All the functionality is available directly from the bot menu without the need to change the source code. Edit the menu on the go and use it:

You can give a try to my copy of the bot at @mqtg-bot. Notice that there may be some crashes because he is deployed on the free Heroku dyno. If he doesn’t respond to /start, now you know the reason. You can run your bot by consulting the README instruction.
Switch
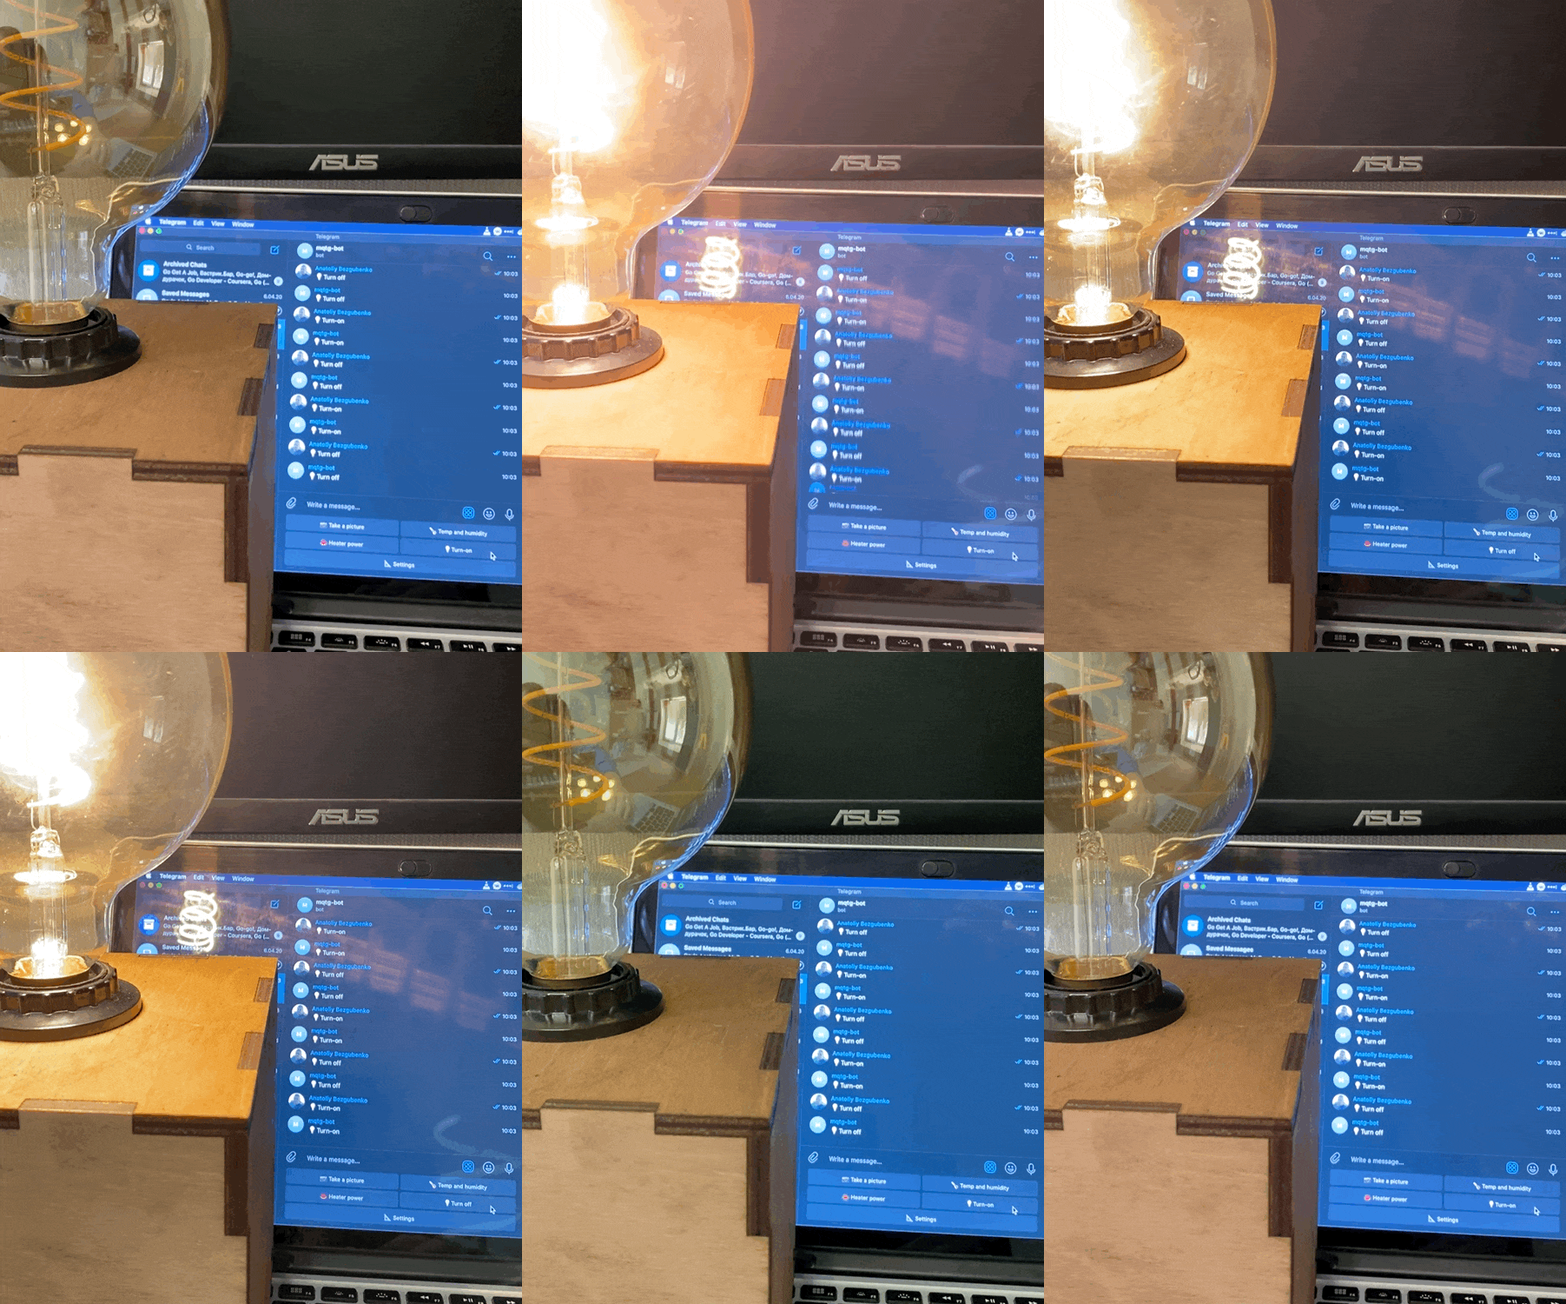
The easiest one you could think of was to turn on/off the relay. For that purpose, I even assembled a small decorative desk lamp with a Sonoff Mini Wi-Fi relay inside. Let’s add a switch and to the bot menu and voilà:

Chart Creation
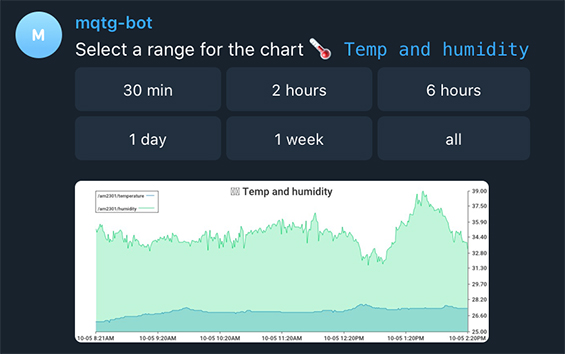
It seems to me that every person who is interested in the IoT topic, first of all, connects the humidity and temperature sensor to Arduino or esp8266/32. My wife and I thus monitored the humidity in the flat after my daughter’s birth — in wintertime we experienced an issue when the house was centrally heated.
Subscribe to and receive a data from MQTT topic and draw a chart:

Subscription Parsing Data by JSONpath Expressions
To parse only the necessary value from received JSON you can use classic JsonPath expressions in the following format: $.home.sensors[0].temperature and bot will select and store only required data.
Receiving Images From Camera
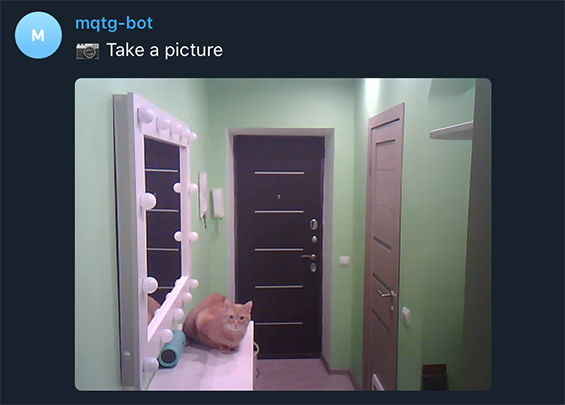
One example of bot usage is to obtain IP camera images. Any binary data up to 256MB per message can be transferred via MQTT. Here we have endless usage options. For example, we can capture several images from an IP camera by signal from a motion sensor and send the images to Telegram. As an example, I sent images from the ESP32-CAM module on request. The Arduino sketch is stored in the examples folder of repository (it also sends reads data from the humidity and temperature sensor AM2301).
This is how it looks like:

A Couple of Implementation Features
The most time was spent writing the edited user menu, storing and loading it.
As a basis, I created the button interface, which describes a number of methods needed for button operation:
xxxxxxxxxx
type ButtonI interface {
GetType() button_types.ButtonType // each button must know its own type for marshalling
GetName() string
// methods for working with buttons "commands", these are the actions that are performed when user clicks
GetCurrentCommand() *CommandType
GetCommands() []*CommandType
AddNewCommand(*CommandType)
DeleteCommand(int)
// .... several methods are hidden here ....
SetParent(*FolderButton)
GetParent() *FolderButton // methods for tree-like menu
GetButtons() *[]ButtonI
AddButton(ButtonI)
DelButton(int32)
// redefine json marshall/unmarshall methods
MarshalJSON() ([]byte, error)
UnmarshalJSON([]byte) error
}
Menu Marshaling/Unmarshalling
As you may have already noticed, the interface overrides the Marshal/Unmarshal JSON methods which are used to save/download the user menu to/from the DB.
When saving each object, the type of object must be marked so that it can then be deserialized.
xxxxxxxxxx
func (b *FolderButton) MarshalJSON() ([]byte, error) {
b.Type = b.GetType()
return json.Marshal(*b)
}
With unmarshalling it is a little more complicated as the structure of the user menu is not known in advance. We have to unmarshal JSON recursively in the map[string]interface{} and cast each object into a button of a certain type.
xxxxxxxxxx
func parseDataMap(dataMap *map[string]interface{}) ButtonI {
var outButton ButtonI
fType, _ := (*dataMap)["Type"].(float64)
switch button_types.ButtonType(fType) {
case button_types.FOLDER:
var folderButton FolderButton
folderButton.Name, _ = (*dataMap)["Name"].(string)
buttons, _ := (*dataMap)["Buttons"].([]interface{}) // recursive data parser call
folderButton.Buttons = make([]ButtonI, 0, len(buttons))
for _, button := range buttons {
buttonMap, ok := button.(map[string]interface{})
if ok {
ButtonI := parseDataMap(&buttonMap)
folderButton.Buttons = append(folderButton.Buttons, ButtonI)
}
}
outButton = &folderButton case button_types.MULTI_VALUE:
var multiValueButton MultiValueButton
// fill in the required button fields
outButton = &multiValueButton
// ... similar cases for all other button types ... return outButton
}
I have a strong feeling that saving/restoring menus in this way is a little bit complicated, but I haven’t thought of anything better yet. I would sincerely welcome advice on how to store user menus with different types of buttons and potentially unlimited nesting possibilities.
Coding Information in Callbacks
The data length in Telegram’s inline keyboard callback (the menu attached to the message) is limited to 64 characters.
To add all the necessary information to each button in the callback, I have created the following structure:
xxxxxxxxxx
type QueryDataType struct {
MessageId int64
Keyboard KeyboardType // inline keyboard type
Path []int32 // where we are (to navigate a multi-level menu)
Action ActionType // basic action
IntValue int32 //
BoolValue bool // additional action data
Index int32 //
}
It is marshaled into protobuf and encoded into base64. So we have a total of 64 characters — that’s quite enough for me. How would you have done that?
What’s Next?
There are the following ideas for enhancing functionality:
- More flexible adjustment of charts (names for legends, axis min/max values, custom time axis format, etc.)
- Management of saved messages history
- Response to a received topic message (e.g. sending a command when certain data are received in the topic)
- Audio data reception
Please feel free to share any ideas you have in the comments box.
In Conclusion
I hope the article was of any help and does not look like self-promotion. I’m not looking for fame or money. It’s just a small contribution to open source and the IoT community. Two years ago I plunged into web development, but I still miss hardware tasks. The result was the creation of this project. Of course, the bot may require some additional lines of code. That’s why I need your response — that way I can see whether I should develop it further for the benefit of the community. Keep coding and have a nice day!
Links
Published at DZone with permission of Anatoliy Bezgubenko. See the original article here.
Opinions expressed by DZone contributors are their own.

Comments