Deploying an Angular 6 Application to Cloud Foundry
We go over two interesting open source technologies, Angular and Cloud Foundry, and show you how to deploy a web app to the cloud.
Join the DZone community and get the full member experience.
Join For FreeIntroduction
In this article, I'll go through the steps to deploy an Angular 6 application on Cloud Foundry. This article is for the developers who have knowledge of both Angular and Cloud Foundry.
Cloud Foundry
Cloud Foundry is an open-source Platform as a Service (PaaS) that provides you with a choice of clouds, developer frameworks, and application services. Cloud Foundry is designed to be configured, deployed, managed, scaled, and upgraded on any cloud IaaS provider.
Refer: https://docs.cloudfoundry.org/
Angular
Angular is a JavaScript UI framework. Angular code is mostly written in TypeScript. Angular helps us to combine UI templates, dependency injection, and end-to-end testing. Angular helps developers to develop single page web applications (SPAs) for both desktop and mobile.
Refer: https://angular.io/docs
Cloud Foundry CLI
Cloud Foundry uses the Cloud Foundry Command Line Interface (CF CLI) to deploy applications to the cloud. We will mention the application deployment parameters in our manifest.yml file. There are a few built-in build packs available in Cloud Foundry that we can use to deploy our applications. Build packs are nothing but the framework and the runtime support for the applications which we deploy.
Refer: https://docs.cloudfoundry.org/cf-cli/index.html
Deploying Angular Applications in Cloud Foundry
Before deploying Angular applications, we need to generate deployable files using the Angular CLI. For this, we need to run a command ng build --prod. --prod instructs the Angular CLI to create a production version of the deployable files.
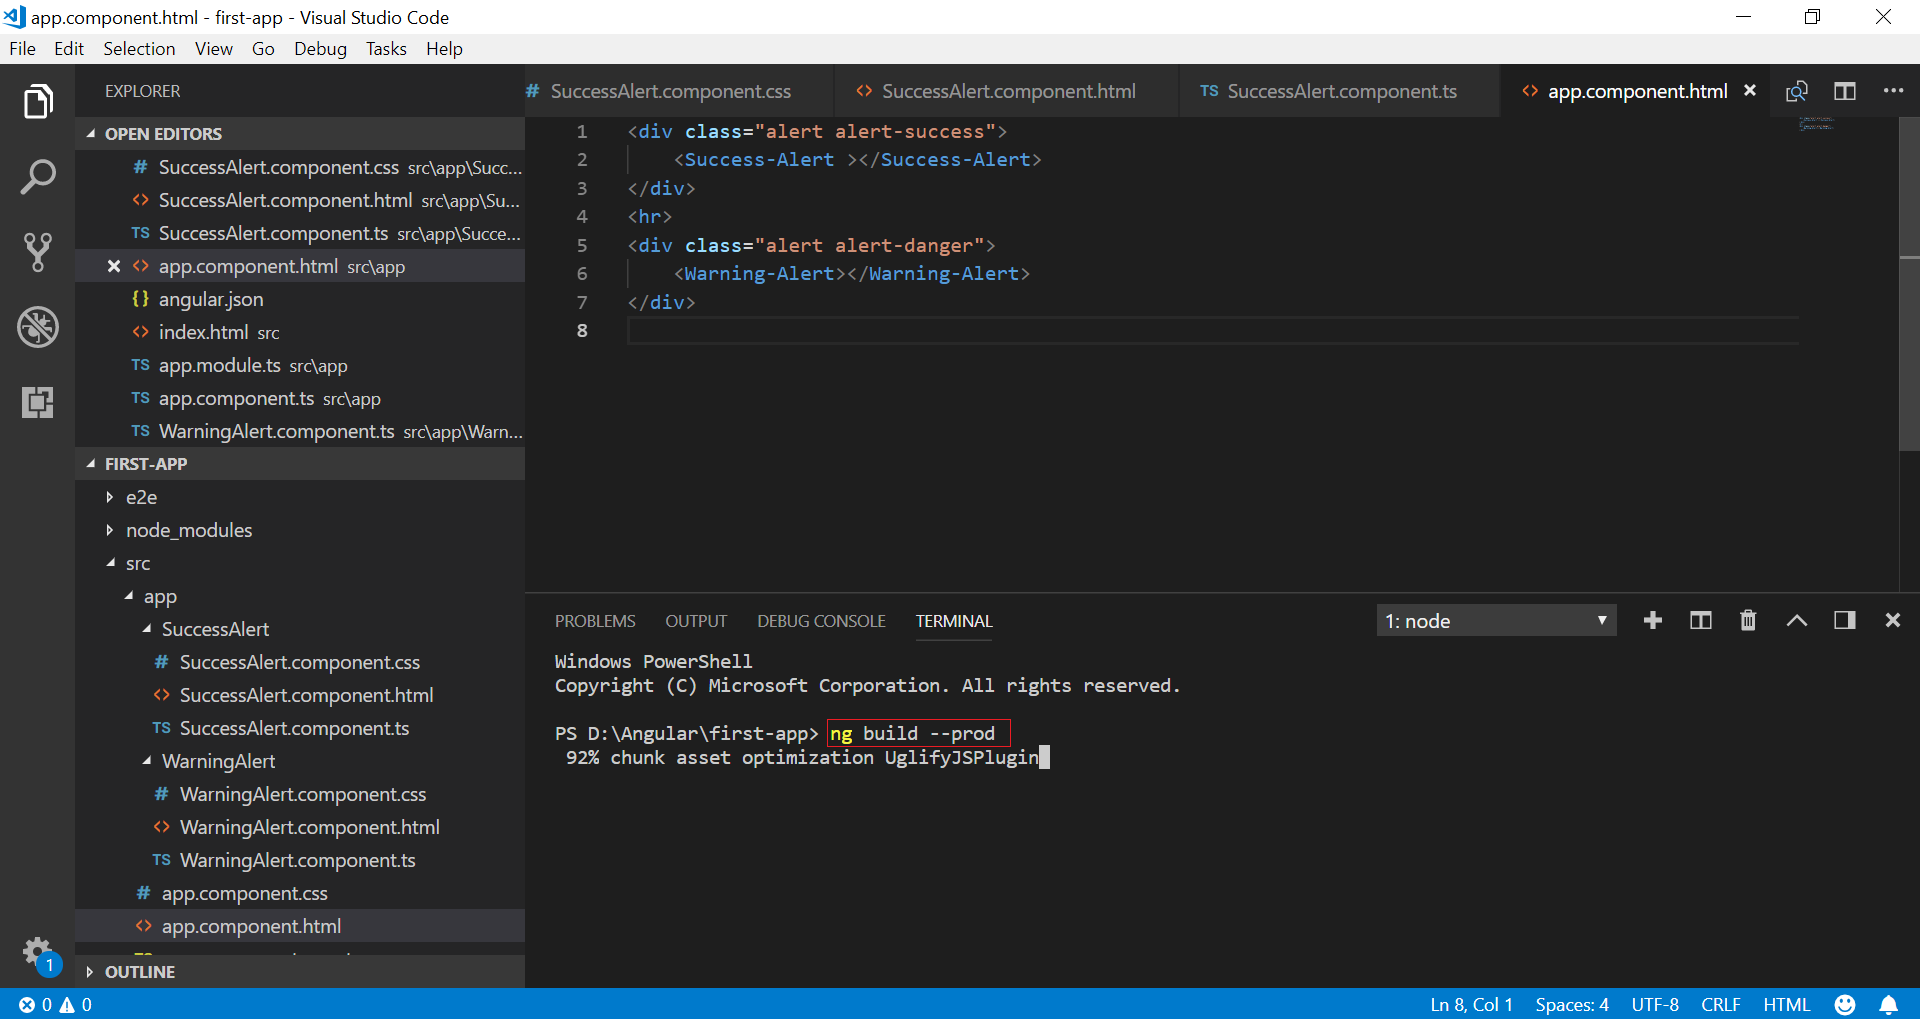
After running the above commands, Angular CLI will create a ‘dist’ folder inside the project folder. This ‘dist’ will contain all the deployable files. Angular transpiles all the TypeScript code to JavaScript in order to create these files.
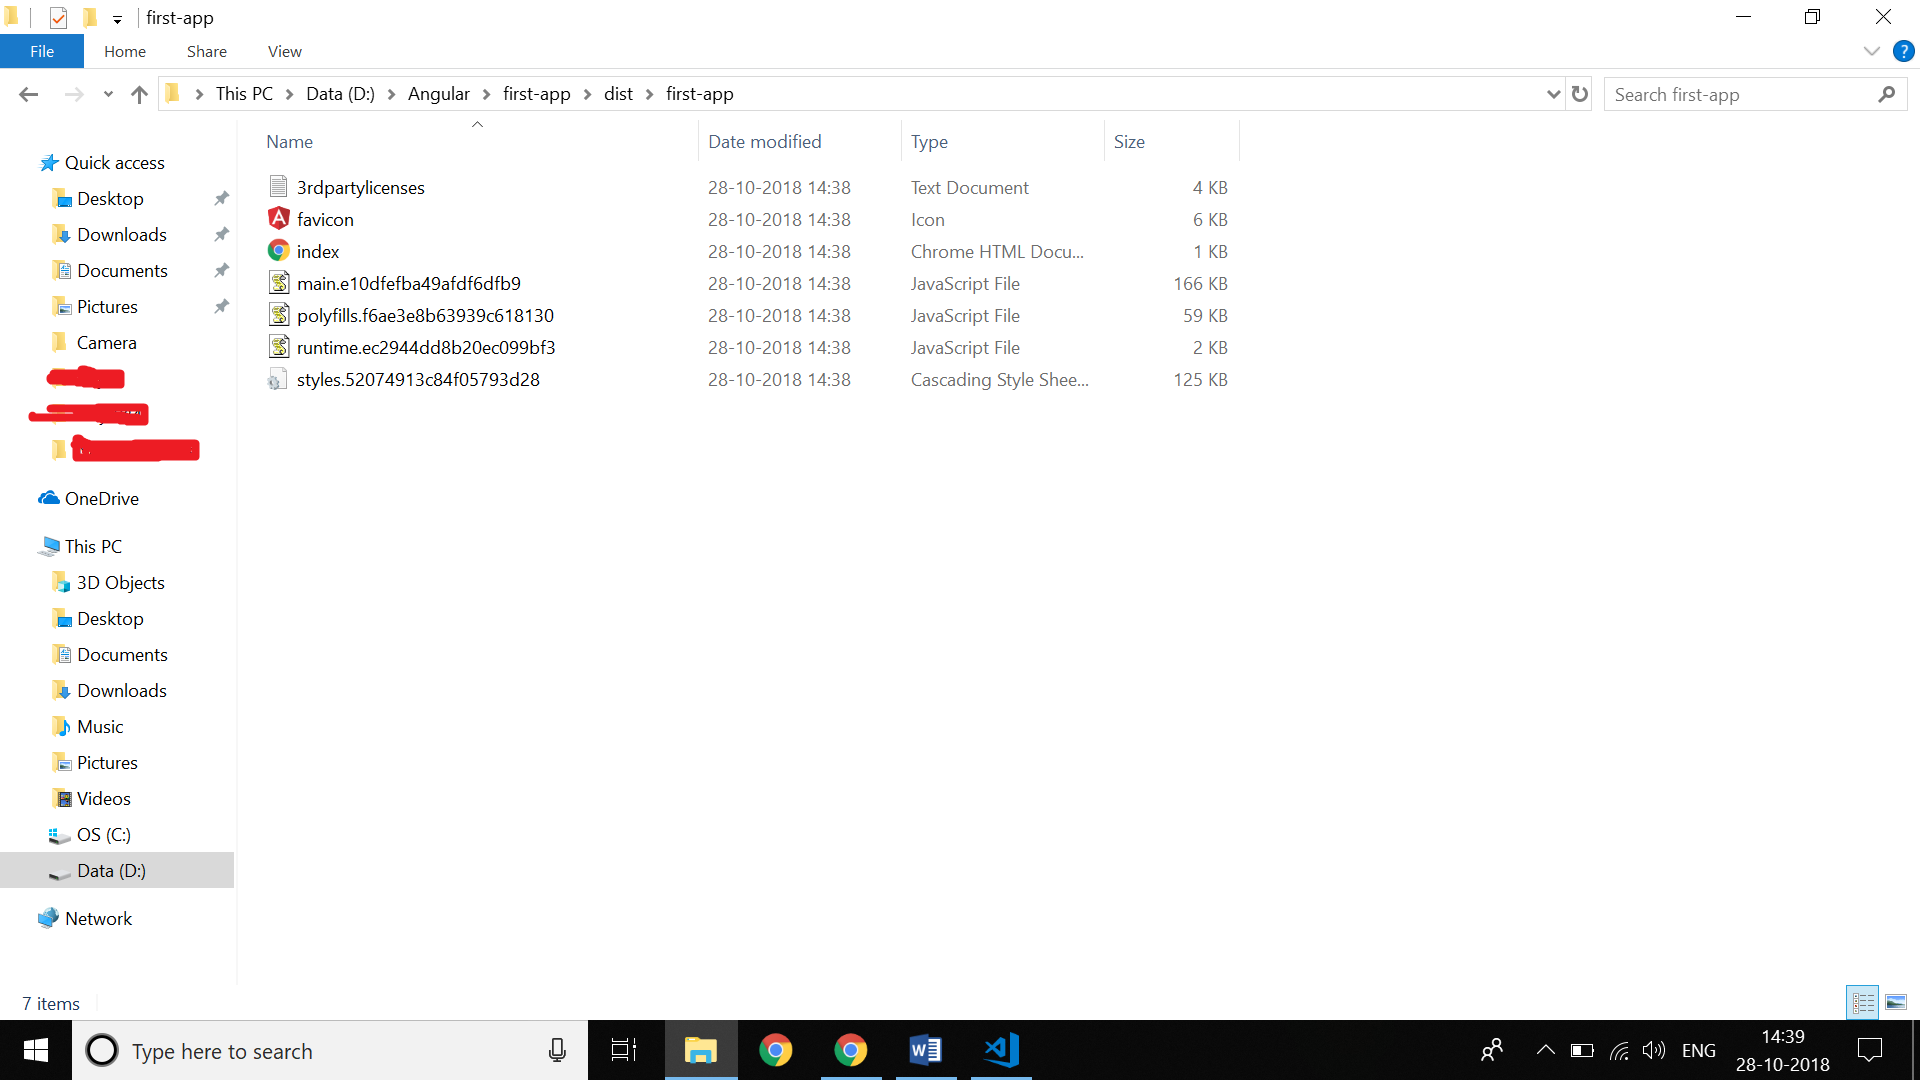
These files will only contain HTML, JavaScript, and CSS files. So, basically, these files are static files. i.e., these are all UI files and don’t need any backend code. So, we can use ‘staticfile_buildpack’ while deploying these to cloud.
We need to create the manifest.yml file to deploy to Cloud Foundry. And as we are using staticfile_buildpack to deploy our code, we also need a Staticfile file to configure Nginx (Cloud Foundry uses the Nginx web server to deploy static websites).
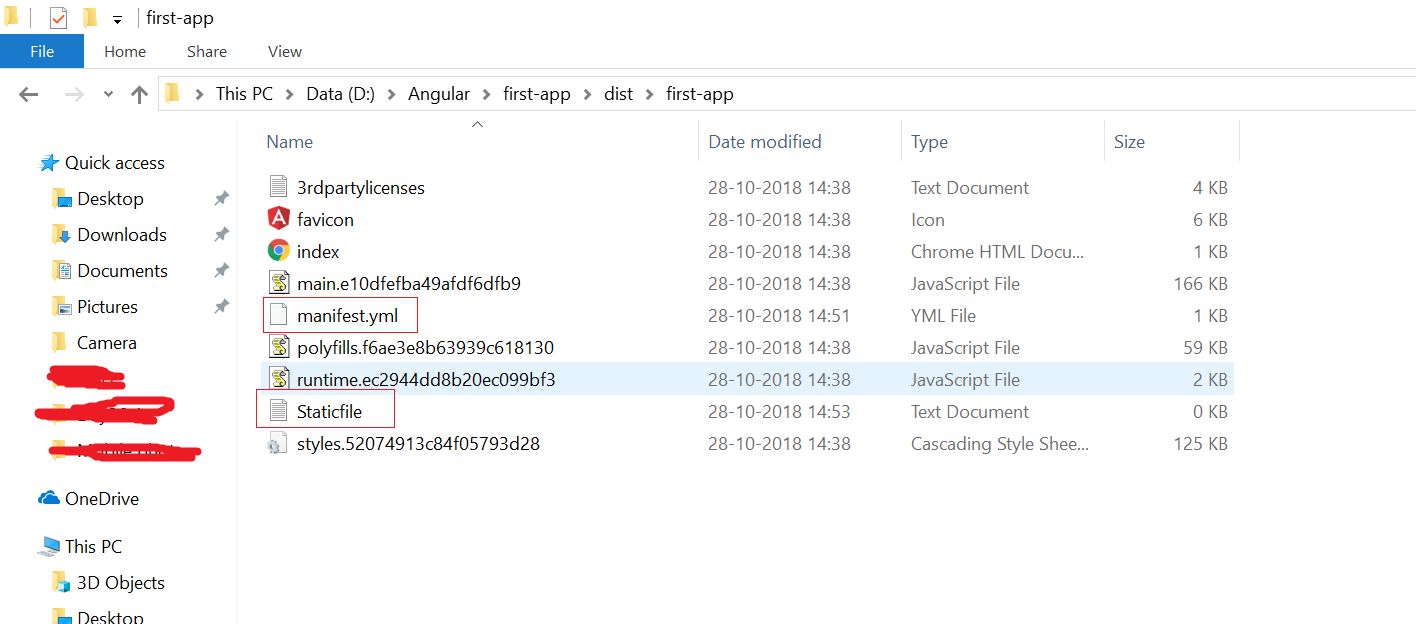
The manifest.yml file will contain the parameters required to deploy the application to Cloud Foundry. For example, memory to be allocated, build pack to be used, etc.
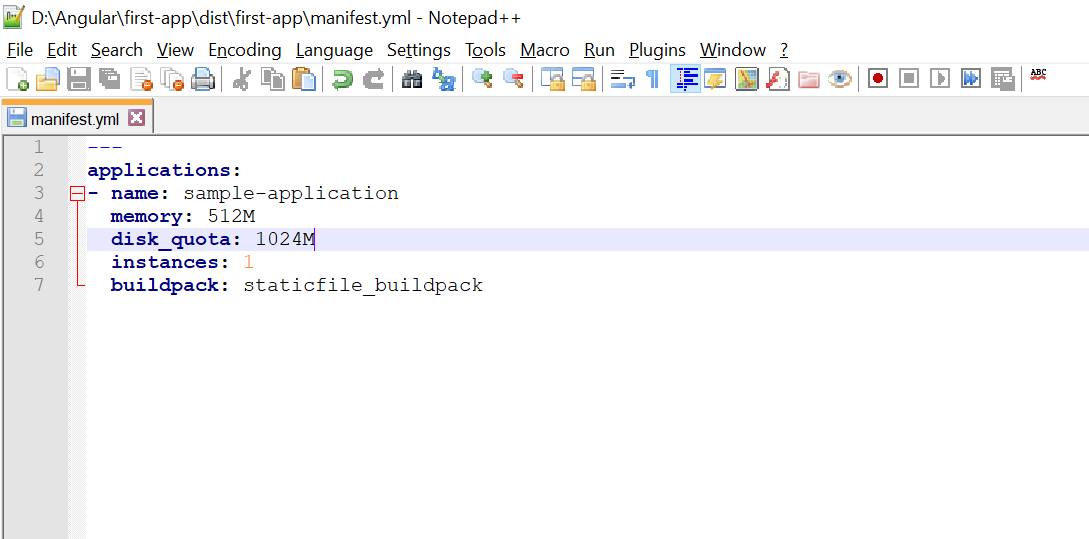
In this demo application, Staticfile is an empty text file. If we want, we can provide some configuration settings for the Nginx server inside Staticfile.
Refer: https://docs.cloudfoundry.org/buildpacks/staticfile/index.html
After this, move into the ‘dist’ folder and login to Cloud Foundry using the details provided by your cloud service providers. Now, run the ‘CF push’ command. In this tutorial, I am using Pivotal Cloud foundry as my Cloud Service Provider.
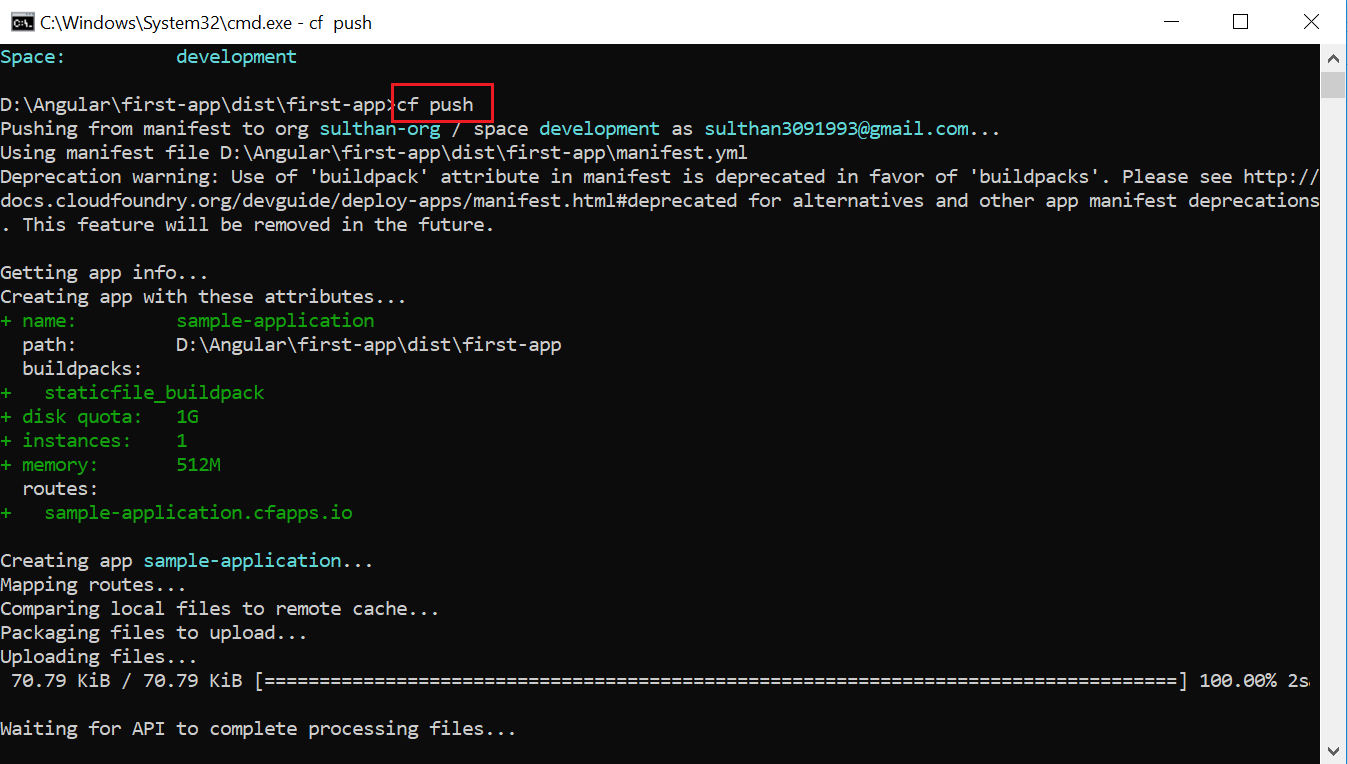
This will deploy your Angular application to Cloud Foundry.
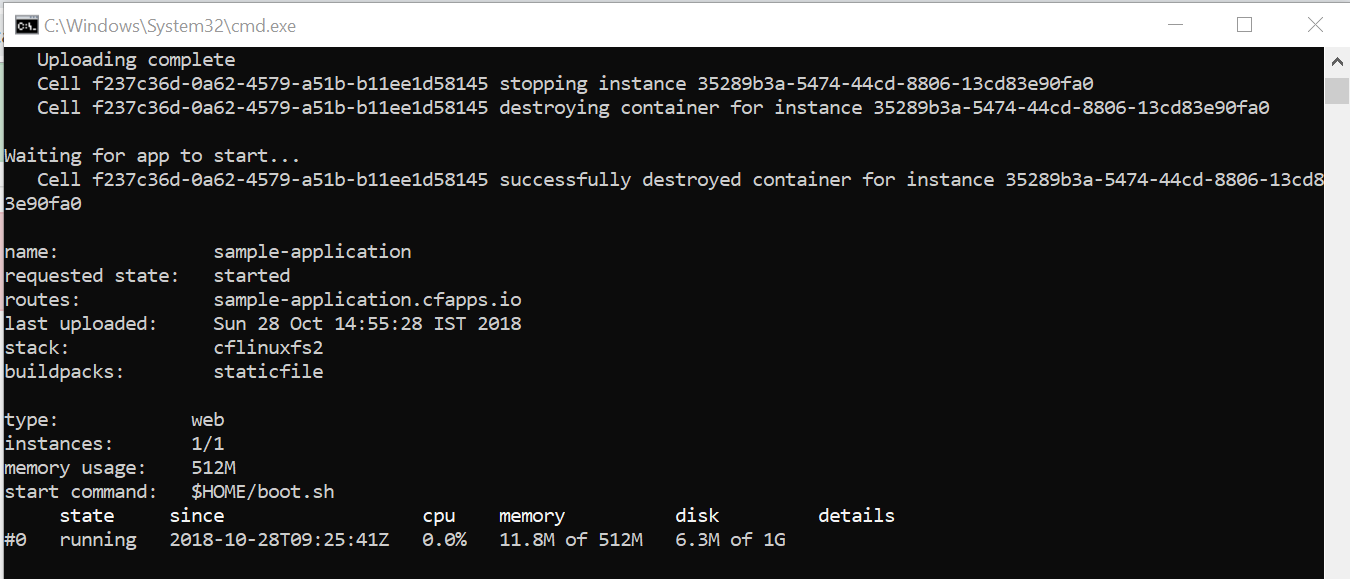
While deploying, the Cloud Foundry CLI will provide the route to access our application. If not, use the CF apps command to get the route.

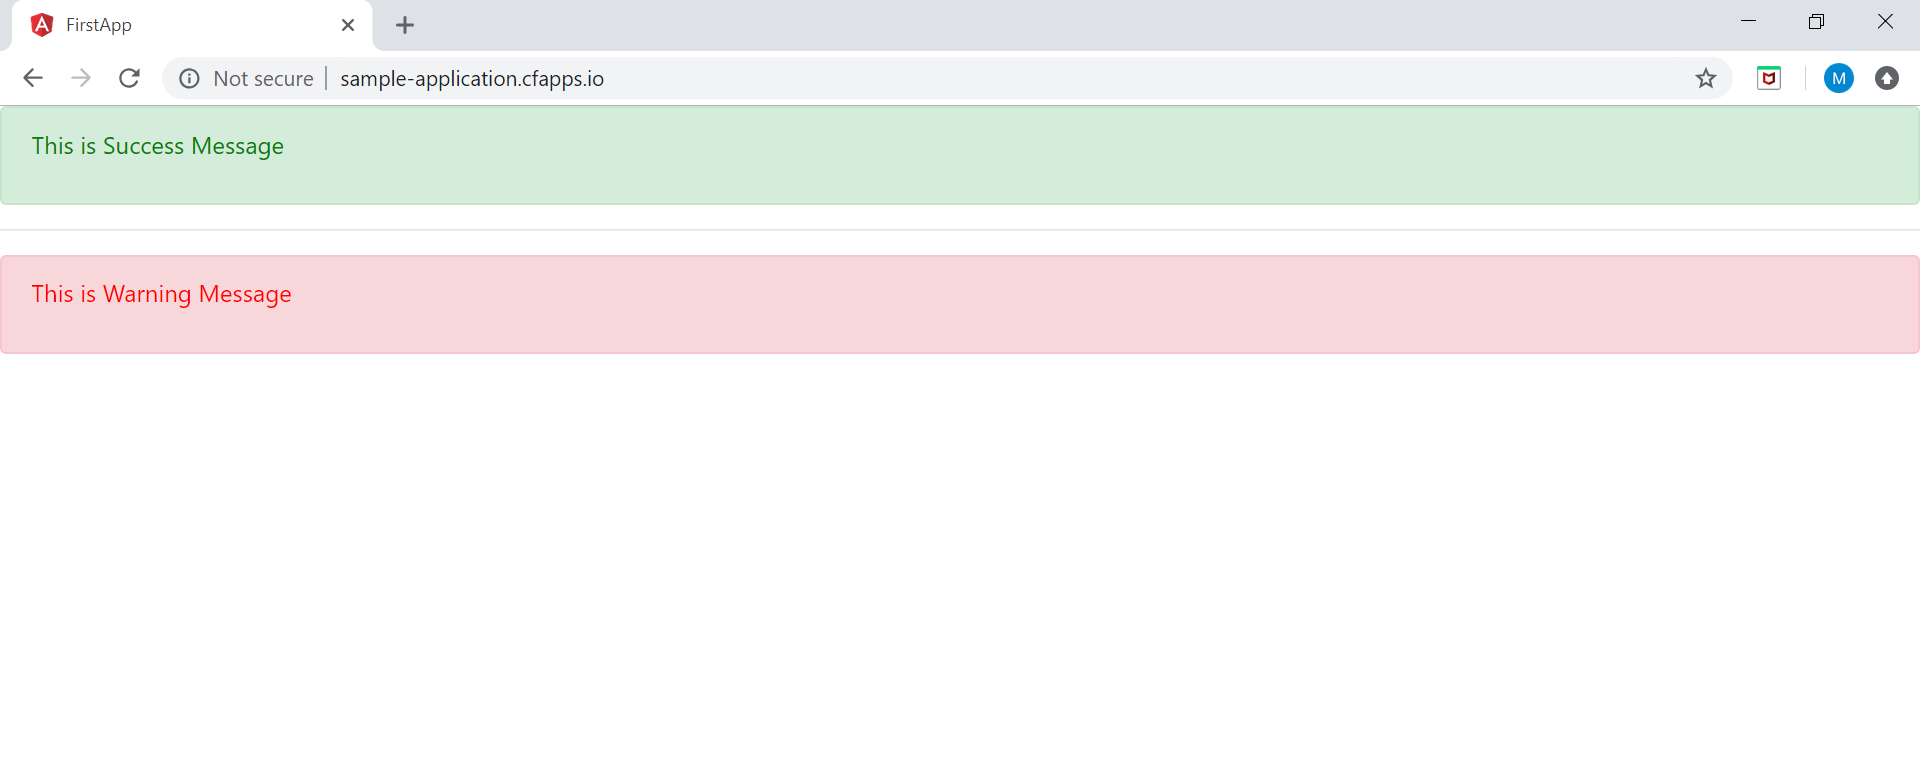
We can access the URL in our browser to access our web application.
If you enjoyed this article and want to learn more about Angular, check out our compendium of tutorials and articles from JS to 8.
Opinions expressed by DZone contributors are their own.

Comments