Creating a System API Using MuleSoft
In this tutorial, you will learn how to build and expose system APIs with MuleSoft through the API-led connectivity approach.
Join the DZone community and get the full member experience.
Join For Free1.0 Overview
Recently I have been through a MuleSoft training course; it's free, so I would highly recommend you attend the course. The name of this online course is "MuleSoft University API-Led Connectivity with Anypoint Platform."
One of the main concepts that I will borrow from and use in this demo is API Led connectivity development. To learn more about the approach, please attend the course. What I will focus on in this write up is how we can build and expose “System APIs.”
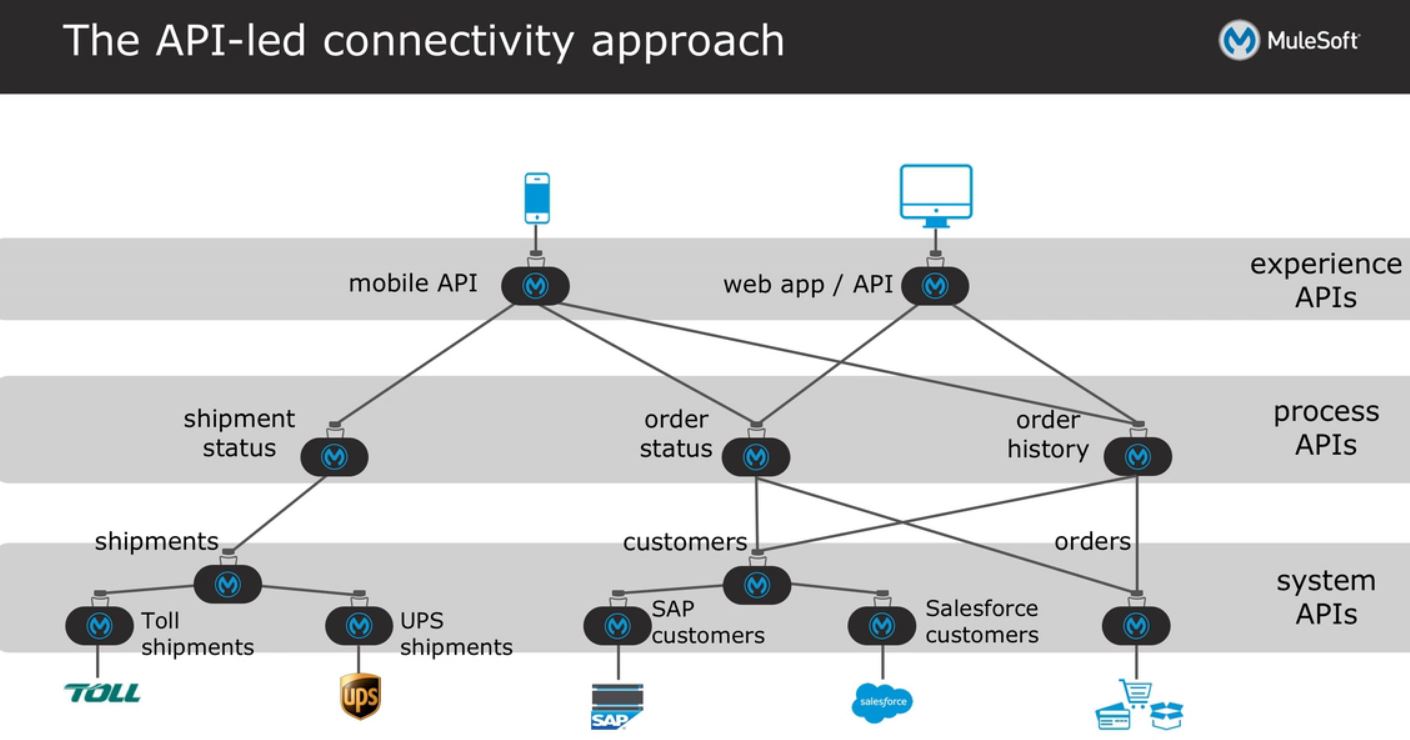
A system API, as seen from the diagram above, is used to expose connectivity to legacy/monolithic systems for the purpose of integration connectivity. One way of doing this is to expose business entities sitting in these legacy/monolithic systems as OData (Understand OData in 6 steps). The next few sections will talk about how we could expose the entity of Employee as an OData API.
1.1 The Scenario
Let’s assume that there is a requirement to expose the employee entity as an OData object. The reason for this requirement is that the master data for employees is sitting in a legacy/monolithic system, but there are new systems that need to interact with this entity.
One of the solutions for this requirement is to expose the Employee entity as an OData API. OData specification dictates that the data of the entity is to be exposed in JSON format, and OData is exposed via REST architecture (utilizing only the conventional HTTP).
1.1.1 Setting up the Mock Legacy Database
In order for me to illustrate how this is done we need to create a mock legacy database. The detail instruction on how this can be done is detailed in my previous article describing MuleSoft’s database connector (at section 2.1).
You can download the full db script from a GitHub repository that I have set up: DB Script.
2.0 Developing the Employee System API
In order for us to expose the Employee entity as an OData API, we need to us Mule’s API Kit. If your Anypoint Studio does not have the APIKit installed, you might need to do it before you start. The following sections are a step by step guide on how to configure and develop the mentioned System API.
2.1 Creating the Scaffold
The first step in creating the system API is to set up the scaffold. The first time I did this, I took quite some time mucking around, so I will walk through the details steps here so I can spare you the trials and error.
1. Create a Maven Project by the name of “EmployeeOData”
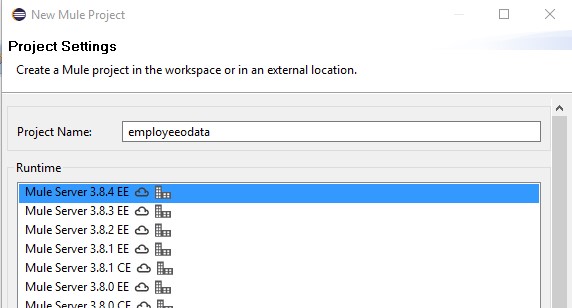
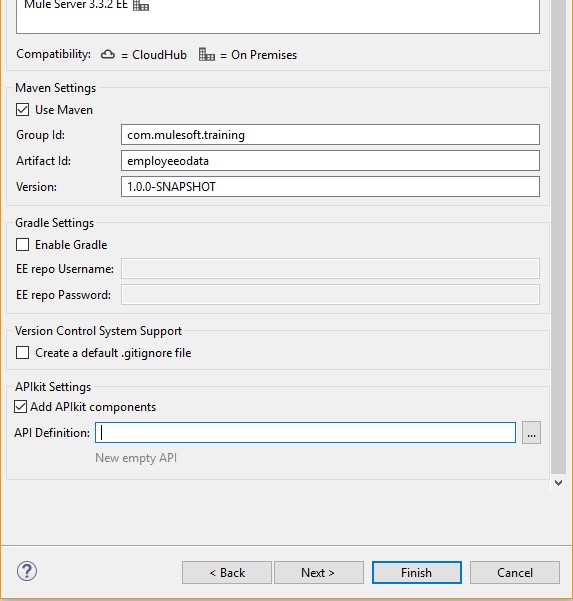
2. Then, at the same project creation dialog, you need to check the “Use Maven” checkbox and also the “Add APIKit Components.” Leave the API Definition text box empty and click next.
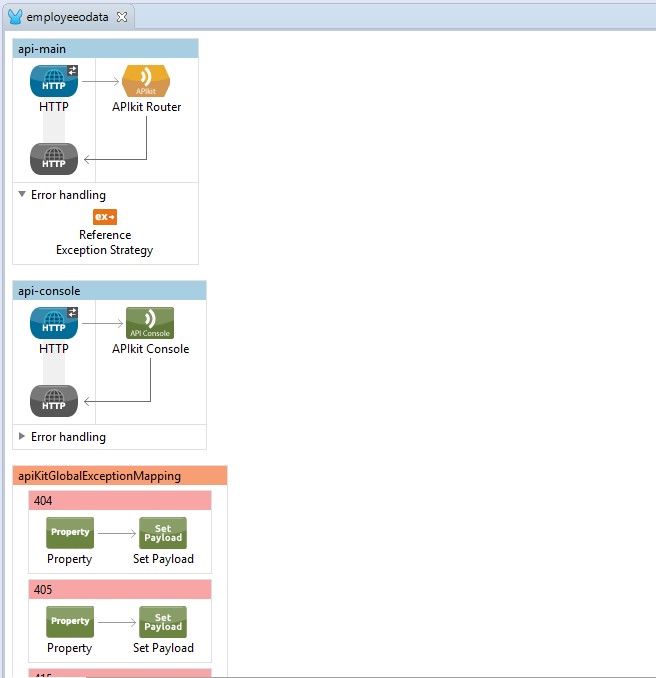
3. Click Next, next, and then click finish. Upon a success, you will see the following output in your Anypoint Studio:
4. Now it’s time for us to set up the POM file for Maven to be able to set up relevant dependencies for your newly created project. Refer to the complete POM file I have and add in missing configuration to your local POM.XML: Complete POM.XML.
Now if you run mvn –x clean package in your Windows/Linux command prompt, you will get a successful build.

2.2 Creating the OData JSON Schema
The next thing to do after you have the scaffold is to build the OData JSON schema for the employee entity. To do this, you need to build the following structure into your project:
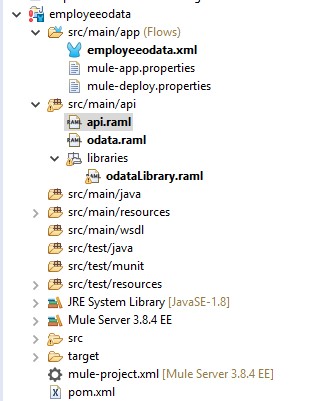
In this section, we go through the steps of creating Odata.raml, odataLibrary.raml, and finally the api.raml.
1. The first thing to do is to create a libraries folder in src/main/api, then in this folder you need to create a file by the name of odataLibrary.raml, in this file I need you to copy and paste the content the following link to the mentioned file: odataLibrary.raml.
2. Now let’s build the Employee OData model. It is always tricky to write up specifications in RAML; you could always use the notepad or any text editor, you could also use Anypoint Studio’s text editor, but if this is your first foray into writing up RAML schema for OData I would recommend you use the ATOM edATOM editor.itor. All you need to do is to install the API-Workbench for Atom and you are ready to go.
2a) Once you are in Atom, click on the file menu and click on the open folder, browse to the API folder, and select folder.
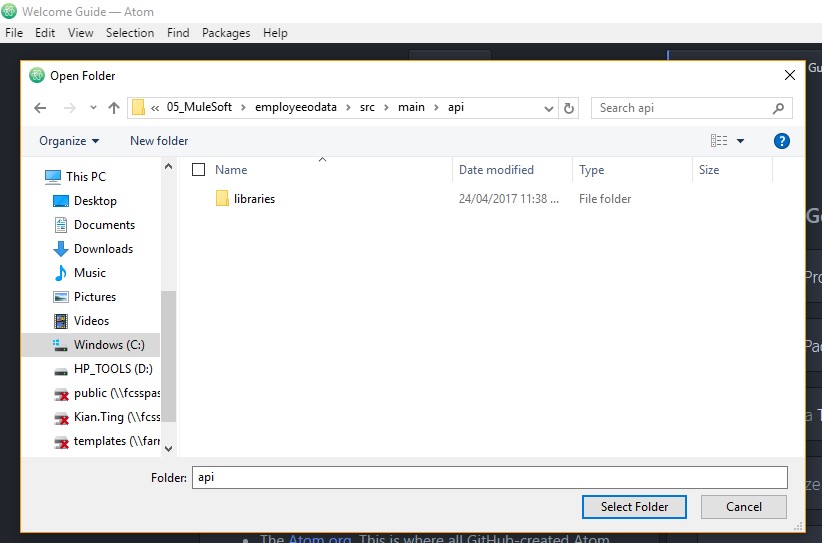
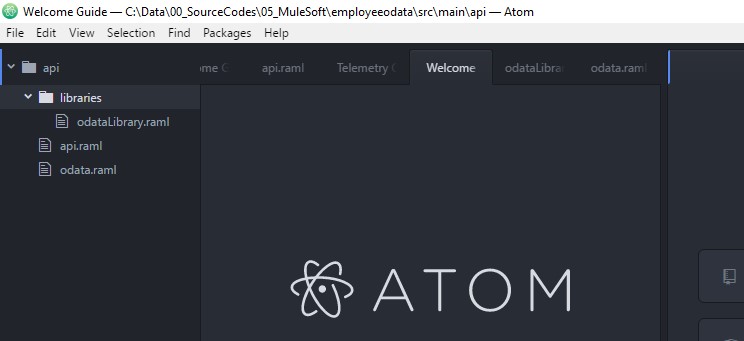
2b) Once selected, you will see the following screen:
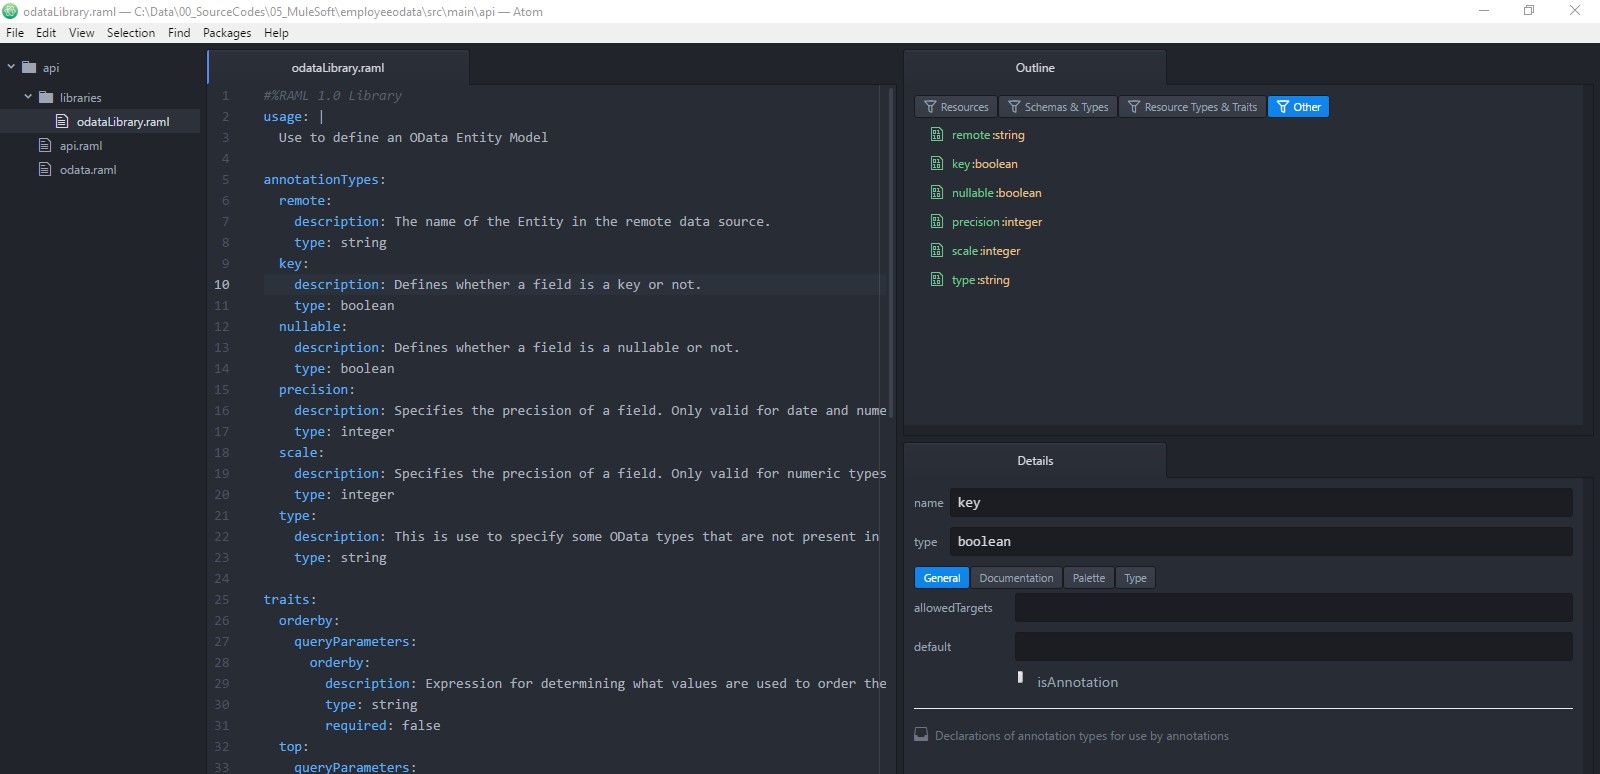
2c) Open up the odataLibrary.raml, you will be able to see that the file is good and that there are no syntax errors.
3. Now let’s define the OData schema for Employee, at Atom Editor open the “odata.raml” file, it is blank from the start, so now we will need to populate it with a schema. The following picture depicts what the Employee entity looks like in the database.
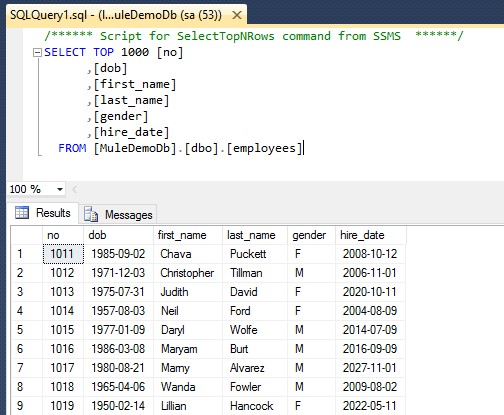
With this, we are going to write up a specification, to façade the entity as a system API.
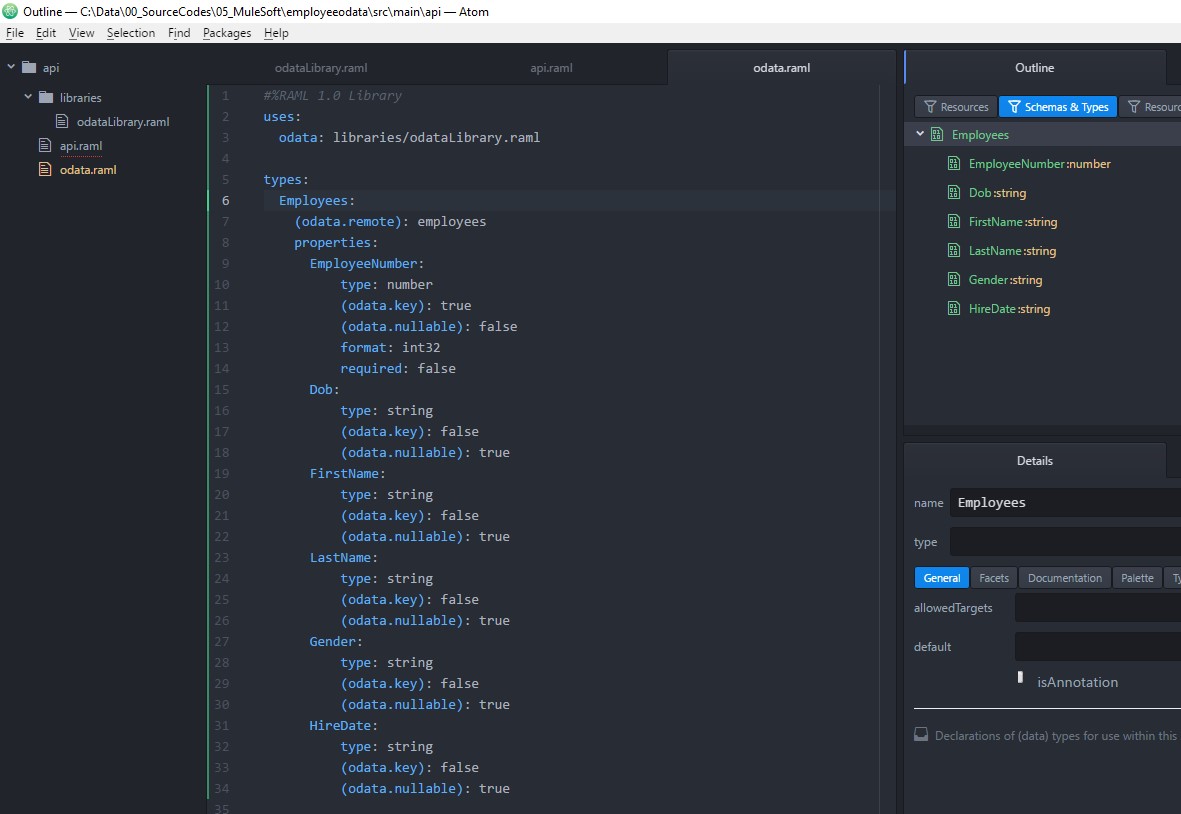 You can also download the full working odata.ramlfile from the following link: Odata.Raml.
4. Next step is to regenerate the api.raml. To do this you need to right click the odata.raml, select “Mule > Generate ODATA API from RAML Types”, as depicted by the following screen.
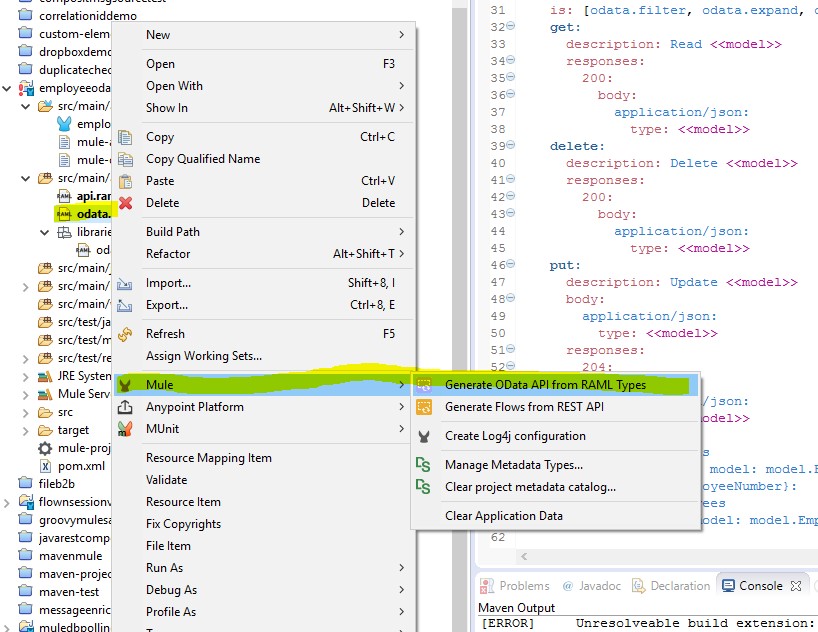 Api.raml- The content of your api.raml should be automatically updated to the content similar that of mentioned in the following link: Api.raml.
With all this, you will have the initial scaffold API structure to which you can build your implementations.
Opinions expressed by DZone contributors are their own.

Comments