Creating an Online Spreadsheet Application
Looking to make a spreadsheet web application for your team to chart their work? Read on to learn how to do just that using the open-source framework, Webix.
Join the DZone community and get the full member experience.
Join For FreeThe main aim of this article is to describe the process of creating an online spreadsheet app with minimal effort. We'll start by considering some fundamental questions for a better understanding of the subject matter. Then we'll continue with a practical example.
What Is Spreadsheet Application Software?
Spreadsheet applications provide users with the possibility to organize, analyze, and store data in tabular form. They represent computerized simulations of paper accounting worksheets. If you haven't worked with one of those, let's take a look at some examples.
What Are the Examples of Spreadsheet Applications?
The most obvious example of spreadsheet software is Microsoft Excel. Being a part of the Microsoft Office package, it had almost no competitors for many years.
Among examples of free spreadsheet applications, we can mention OpenOffice and LibreOffice. But modern trends imply the "migration" of office software to the web. You can get access to online spreadsheet applications from almost anywhere, there's no need to install and update it, and you can always work on a document together with your colleagues. As a response to such requirements, the Google Sheets application has appeared. This solution provides great out-of-the-box functionality.
But in some cases, users may need some extra features that are not supported by Google Sheets. For example, you can't use it as a part of a bigger app, configure the appearance, etc. For this reason, if you want to create an enterprise app, you'll need something else.
How to Create a Spreadsheet Application
The intention of some end-users to work with a spreadsheet app that is configured for specific needs has led to the diversity of development tools. To choose a proper one, you have to define your goals clearly.
If all that you want is an online app that consists only of a spreadsheet, you can use a library such as Handsontable or DataTables. Their only purpose is to create fast and full-fledged online apps that present data in the form of a table. But if you're looking for something more complex, you can take a look at the libraries that provide a wide variety of widgets.
For example, you could use Kendo UI and its Spreadsheet widget or Webix SpreadSheet as a stand-alone tool, or combine it with other Webix widgets.
In this article, we will describe how you can use the Webix JavaScript Library for creating an online spreadsheet app. It can work as is or you can integrate it into a more complex B2B application.
DIY Guide With Webix Spreadsheet
Webix JavaScript Spreadsheet is a widget that you can use for building fully functional and customizable online tables:
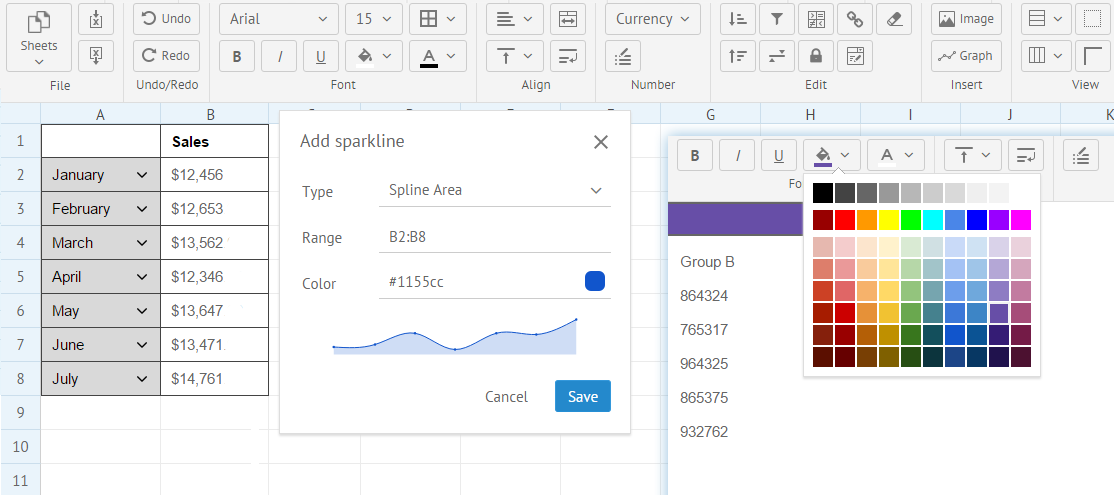
While you work on your documents online, all data is stored locally. It can guarantee that all the information that you work with will be kept secure and always at hand. It's possible to export your tables into an Excel file and to import Excel data into SpreadSheet.
All elements in Webix Spreadsheet are easy to manage. You can edit and format the content of cells, resize them, change the default appearance details (e.g. styles, fonts, and border types), align text, merge cells in rows and columns, etc. Mathematical functions are included as well. The localization feature allows you to follow the rules of various languages. Read more about the Spreadsheet in Webix documentation.
Step 1: Installing Webix and Initializing the App
To use the Webix JavaScript Library, you need to get the PRO version of the library or download the free Trial version. Next, you have to include the required files from the codebase folder - one CSS and one JavaScript file:
<script src="codebase/webix.js" type="text/javascript"></script>
<link rel="stylesheet" type="text/css" href="codebase/webix.css">
The Spreadsheet widget requires including two more files:
<script src="codebase/spreadsheet.js" type="text/javascript"></script>
<link rel="stylesheet" type="text/css" href="codebase/spreadsheet.css">
After that, you can use the object constructor to initialize Webix. To add a proper widget to the page, you should use the view property. Webix follows the declarative programming paradigm. That means all you need to do is to describe what you want to get without specifying exactly how it should be done. Thus, we can create a Spreadsheet using the following code:
//object constructor
webix.ui({
    /* optional, we can interact with widget using its ID */
    id:"ssheet",
    /* the widget that we want to create */
    view:"spreadsheet"
    /* optional, enable the full toolbar */
    toolbar: "full",
    /*...more properties...*/
});
That’s all you need to do for creating a basic spreadsheet app. The result is shown below:
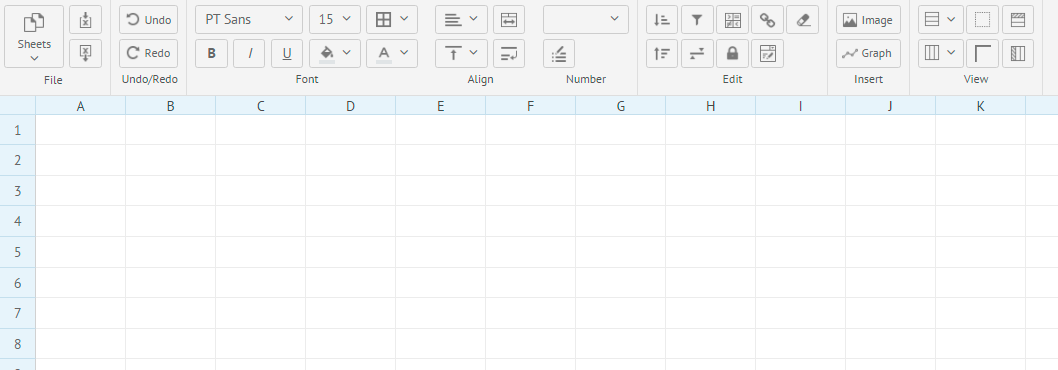
If you have some previous experience with office apps, it won’t be any trouble for you to start working with this one.
There are the usual undo/redo buttons. Using the buttons that allow working with the font, you can change the font size, its color, make it bold or italic, etc.
The Align section allows setting vertical and horizontal alignment, enabling text wrap, etc. You can choose the number format as well. The available options include the common format, currency ($98.20), number (2,120.50), and the percent format (50%).
Looks great, but to understand how this app works, let’s fill it with some data.
Step 2: Loading and Saving Data in the Component
Webix Spreadsheet works with a JSON format. The data that you want to load should be presented as a JSON object that consists of four parameters:
- Data
- Sizes
- Spans
- Styles
If you want to take a closer look at how data is presented in this widget, you can check this documentation page about Spreadsheet data.
To save the current state of your spreadsheet, you can use the serialize() method:
var states = $$("ssheet").serialize();This method returns an object that consists of the parameters described above.
If you work with multiple sheets, you can serialize them all at once using the following code:
var states = $$("ssheet").serialize({sheets: true});To load data into the spreadsheet from an inline data source, you can use the parse() method:
webix.ui({ /* spreadsheet definition */});$$("ssheet").parse(states,"json");You can also include the data.js file that contains the required data just like any other JavaScript file:
<script src="data.js"></script>Then you can use the data property to tell Webix what variable contains the data description:
data: base_dataIf you want to load data from a server, you can use the load method or the URL parameter:
webix.ui({
    id:"ssheet",
    view:"spreadsheet",
    //load file from a server
    url:"data.js"
});
//or make it that way
$$("ssheet").load("data.js");
Or you can place the data parameter directly in the spreadsheet configuration:
webix.ui({
    view:"spreadsheet",
    data:[
        {
            "styles": [
                ...
            ],
            "sizes": [
                ...
            ],
            "data": [
                ...
            ],
            "spans": [
                ...
            ]
        };
    ]
});
You can export the existing Excel file as well. We’ll add this feature later.
After you fill the spreadsheet with data, you should get the following result:
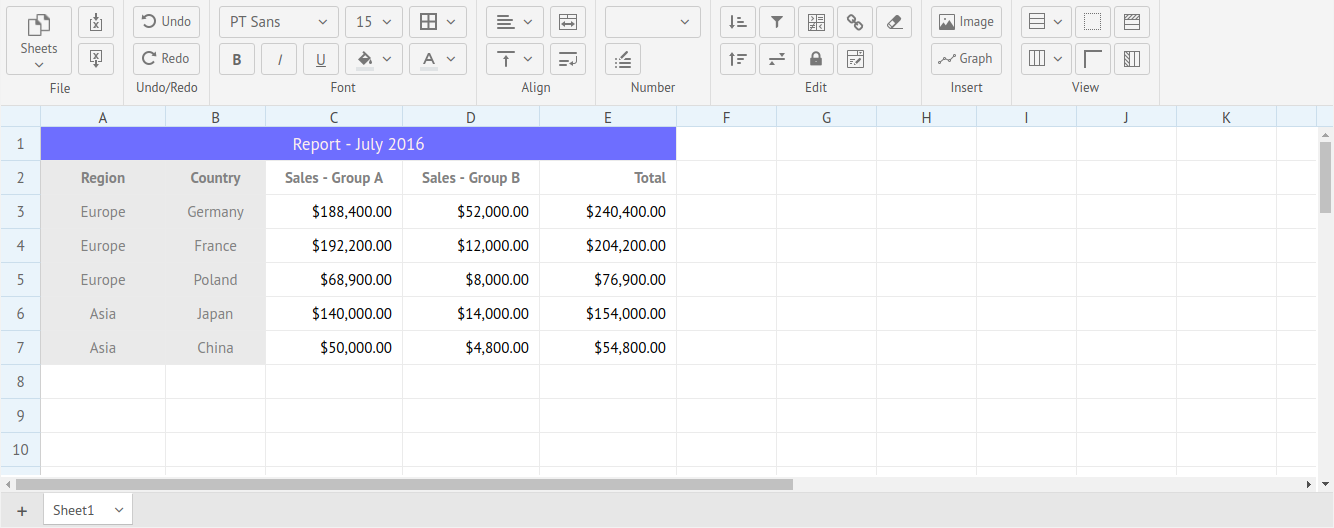
When you change the cell’s content, Webix sends a POST Ajax request to the corresponding server-side script saving your changes. Since server-side issues are not a part of this article, you can check this documentation page about Spreadsheet data - Saving Data to learn how the saving process works.
Well, let’s return to our spreadsheet app. It looks like a working application. But we have to admit that the basic spreadsheet application is TOO basic. To fix it, let’s learn what the configuration process looks like.
Step 3: Changing Configuration Settings
To configure this web office app, you can simply add the properties that enable or disable the required functionality. Let’s start with enabling the formula editor:
webix.ui({
    id:"ssheet",
    view:"spreadsheet",
    toolbar: "full",
    //add live editor to the app
    liveEditor: true
});
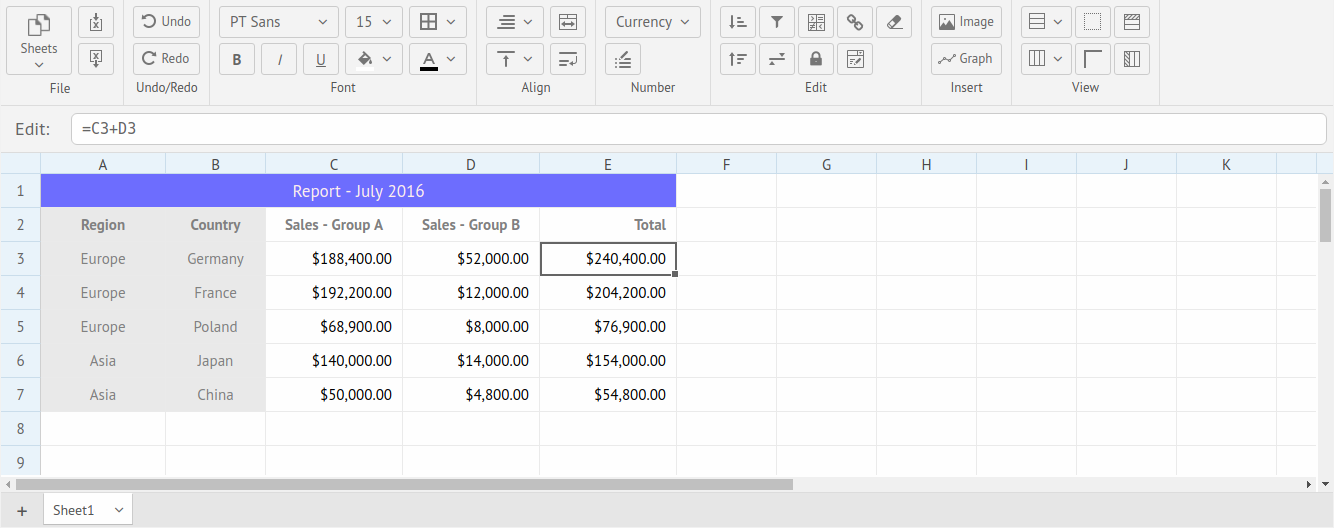
This code will create an inline editor of formulas in Spreadsheet. It allows for the creation of a new formula or editing the existing one. Here’s how it looks like:
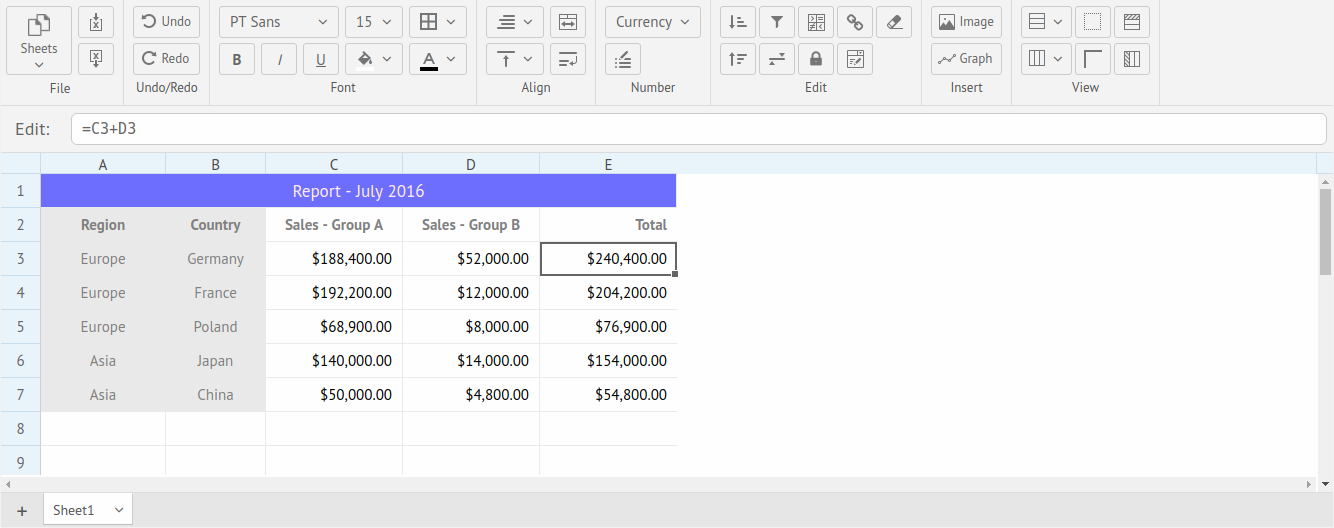
If you plan to use a lot of math equations, this editor will become pretty helpful.
Since our table is not very big, we can specify a certain number of columns or rows in our app using the following code:
// setting the number of columns
columnCount:5,
// setting the number of rows
rowCount:10
Here’s the result:
To enable the read-only mode, you can use the readonly property:
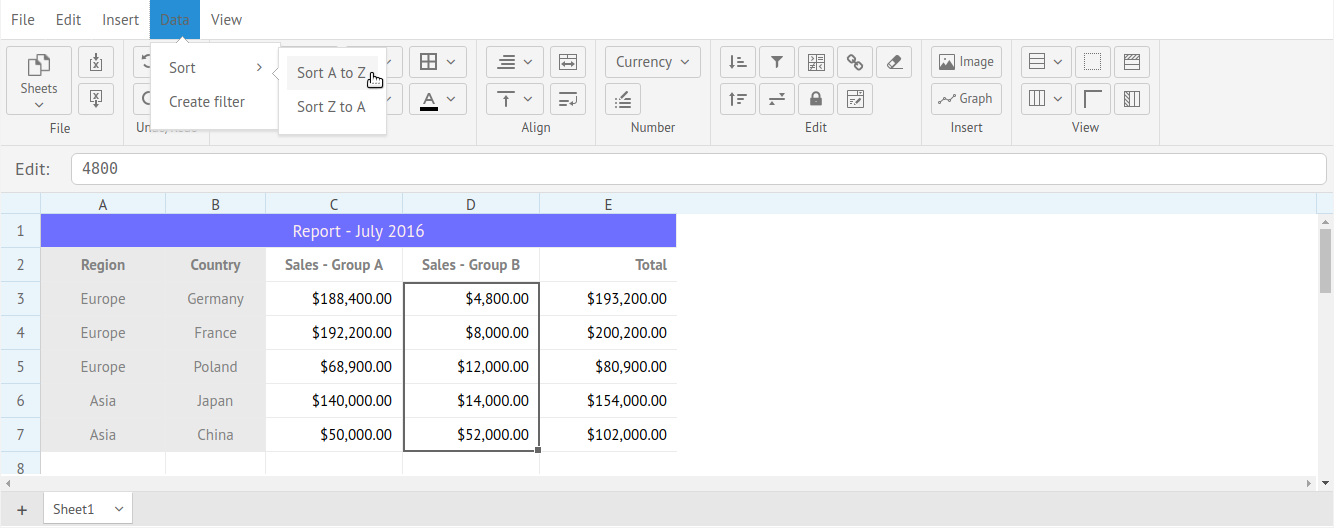
readonly:trueTo simplify the routine jobs, like inserting images or graphs, sorting, and filtering, you can enable a drop-down menu using the following code line:
menu: trueNow you can get access to the required functions of a spreadsheet in a few clicks:
Step 4: Customizing the Toolbar
Webix doesn’t force you to use the default set of buttons that is available on the toolbar. You can leave as many of them as you want, which can be helpful if you want to save some space, like in the case of a mobile application. You can also add extra buttons to extend the functionality of your app.
To enable the toolbar customization functionality, you have to remove the toolbar:"full" code line. Now, your spreadsheet app will contain the basic toolbar.
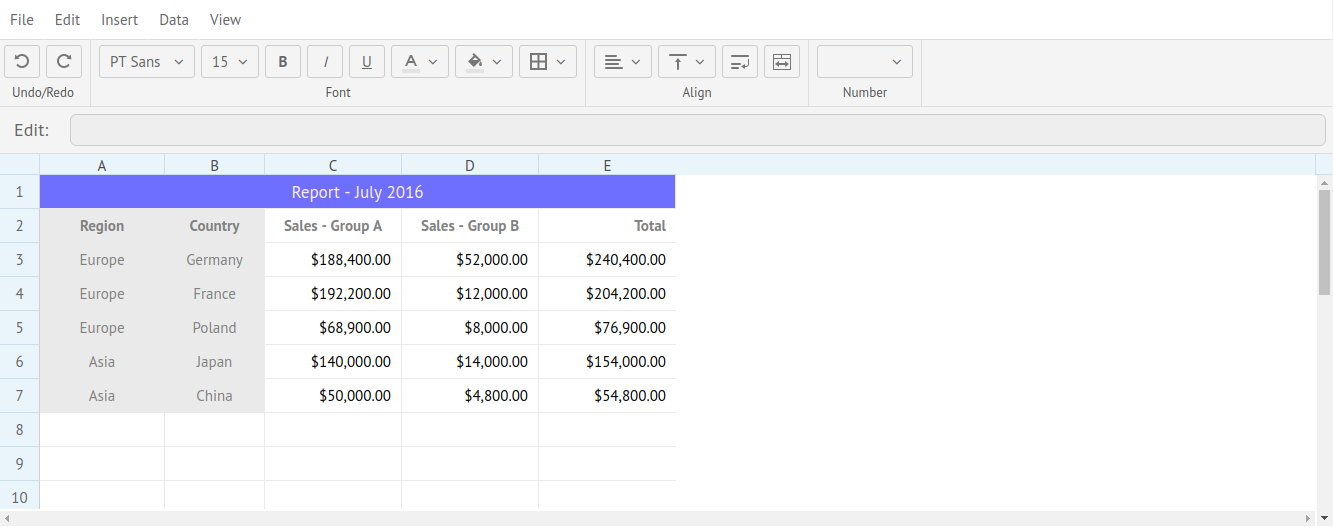
Settings of the default toolbar are specified within the buttons object. Imagine that your users are experienced enough to use the keyboard shortcuts instead of the Undo/Redo buttons.
It means that we can get rid of these buttons. We can use the saved space to add something useful to the toolbar. Webix allows exporting spreadsheets to PNG and PDF formats. Let’s add the Export to block with two buttons that will allow users choose one of these formats:
buttons: {
  //no Undo/Redo block
  "font": ["font-family","font-size","font-weight","font-style",
  "text-decoration","color","background","borders"],
  "align": ["text-align","vertical-align","wrap","span"],
  "format": ["format"],
  //a new block with two buttons
  "Export to": [
    {view:"button", name:"toPNG", label:"PNG"},
    {view:"button", name:"toPDF", label:"PDF"}
  ]
}
Let’s check the results:
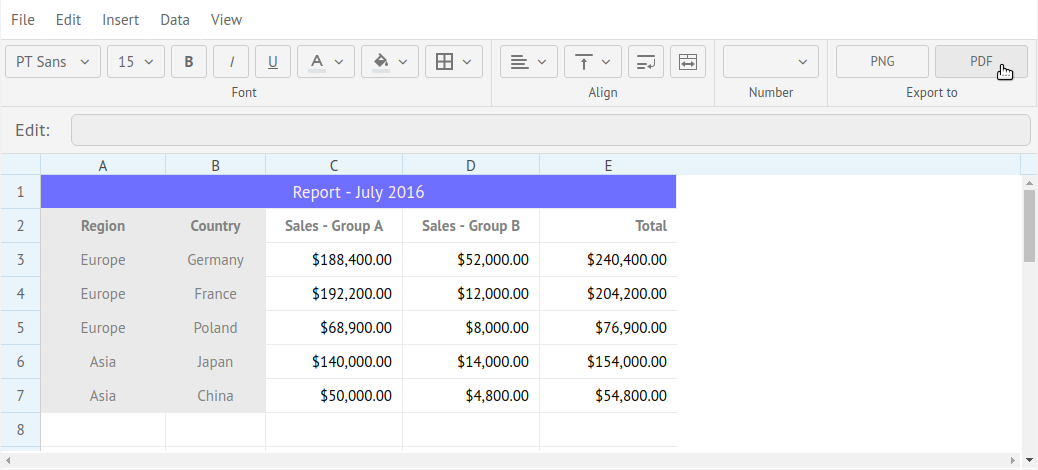
Here’s our new block. But the buttons won’t work until we add the required code. To define a function that will be executed on clicking the button, we should use the click() function. To export a sheet to a PNG file, you can use the toPNG() method that takes the value of the spreadsheet ID as a parameter. Here’s how you can make your button useful:
{view:"button", name:"toPNG", label:"PNG", click:function(){
    webix.toPNG("ssheet");
}},
Exporting as a PDF works the same way. But in this case you have to use the following method:
webix.toPDF("ssheet");You can export your data to an Excel file as well:
webix.toExcel("ssheet");But remember that the drop-down menu already allows you to export and import from Excel files, so if you enabled it, there’s no reason to duplicate the same functionality.
Result of Working With Webix Spreadsheet
The main feature of Webix Spreadsheet is the ability it gives you to use a minimum amount of code to build a working widget. By following the declarative programming paradigm, Webix allows you to define what widget you want to create and where it should get data. And everything will work.
Further configuration allows defining the details of how your future app will work. You can customize the toolbar, add import and export features, change the cell formatting, etc. These and many other available features let you decide whether your app will be lightweight and contain only the minimal amount of the required features or it'll provide the user with the whole range of necessary functions.
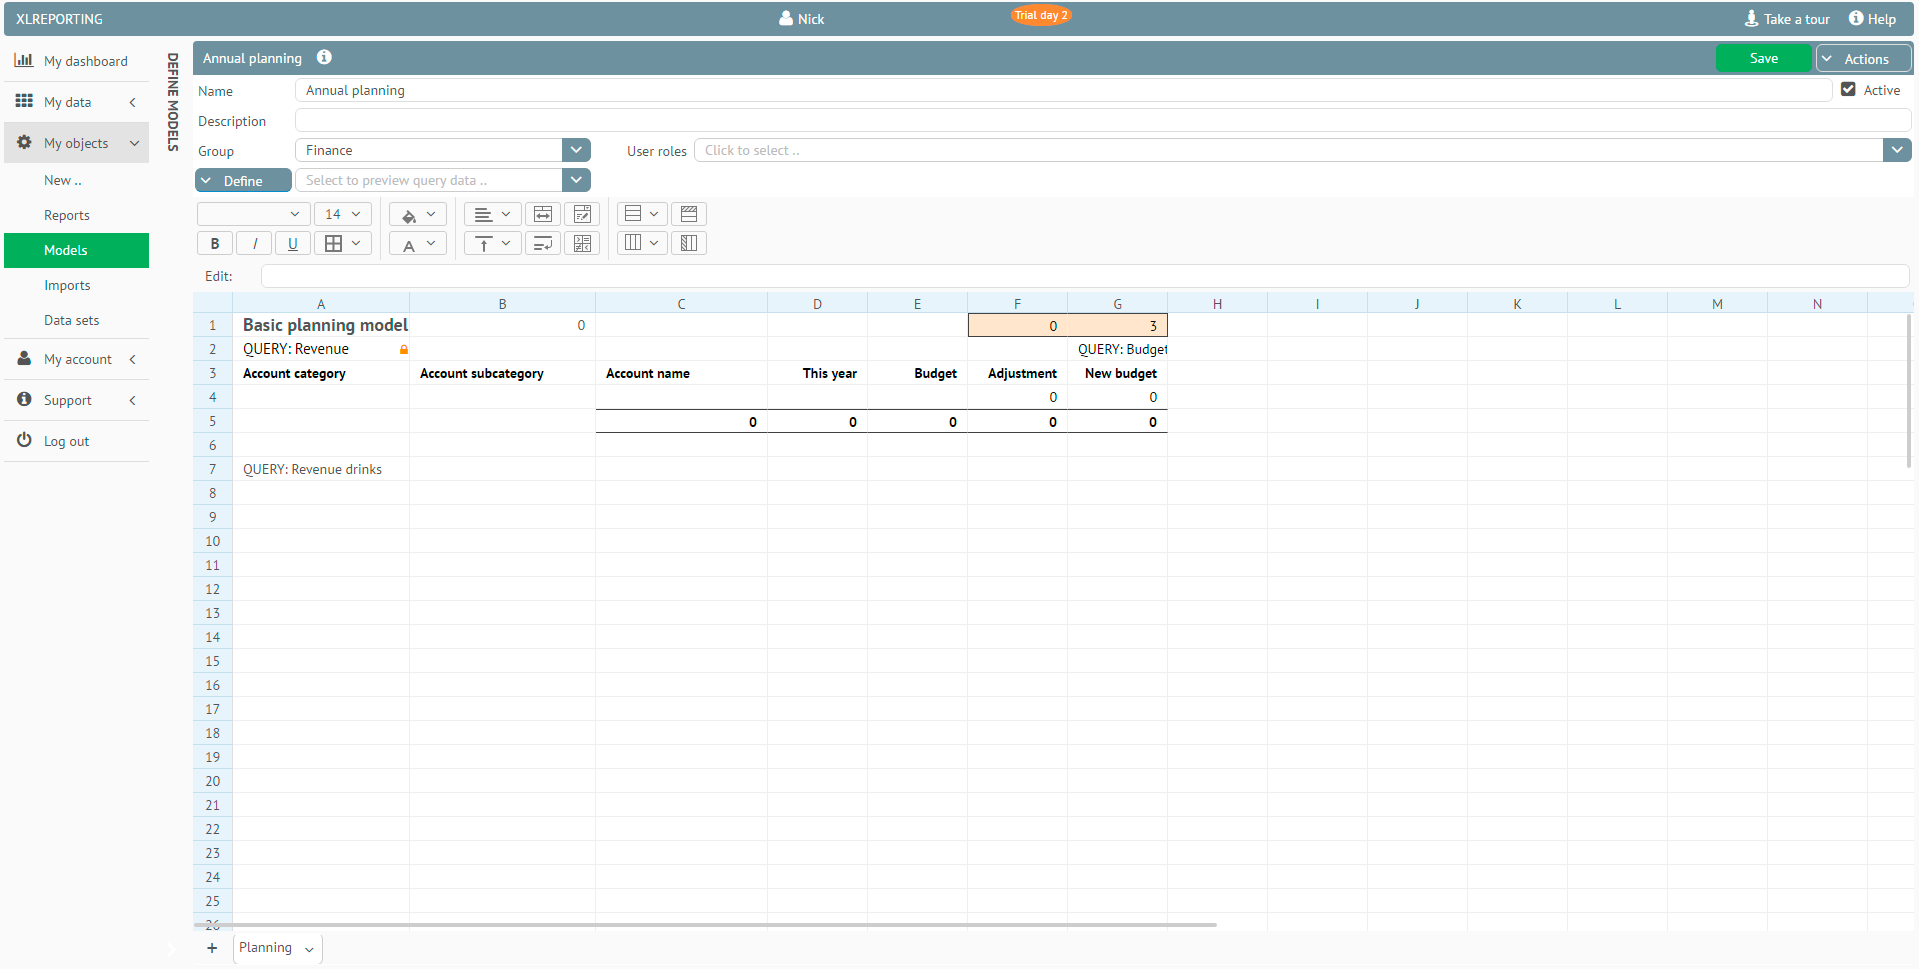
If you're curious about possible results that you can get using this spreadsheet, you can check the XLReporting app that allows you to automate reporting, consolidating, and budgeting processes:
This article covers only the basic features of this SpreadSheet widget. Following the detailed guides, you’ll learn how to localize your application, create icon buttons for the toolbar and group them, work with cell content, manipulate the columns, and a lot of other useful stuff. Check this Spreadsheet documentation page to learn more.
Opinions expressed by DZone contributors are their own.

Comments