Building CI/CD Pipelines for Java Using Azure DevOps
Visual Studio Team Services has become Azure DevOps. Java devs can learn how to build a release automation pipeline for their web applications.
Join the DZone community and get the full member experience.
Join For FreeLet’s face it, most Java developers cringe and run when they see the term “Visual Studio” with the misconception that the tool will be for .NET users only. I have to confess; I was one of those guilty Java developers until I discovered that it is actually a powerful solution for any language or platform to utilize during project release cycles.
The Azure DevOps service offers several features for such as adding team members, Kanban boards, Repo options, Build/Release Pipelines, Test Plans, Build Artifacts (e.g. Maven) and much more. It also integrates with your favorite tools like Eclipse, IntelliJ, Jenkins or Chef. For microservices, Java developers will be happy to know that it supports container build services like Docker, Kubernetes, Cloud Foundry etc.
This tutorial will demo the use of Azure DevOps to set up a release automation to build and deploy a Java web application.
Prerequisites
- Register or log into your Azure DevOps account
- Copy and save the Git URL for the sample Java code from GitHub
- Create an Azure Web App (Note: choose the following options for this Java web app. OS = Linux, Runtime Stack = JRE 8)
How to Build CI/CD Pipelines for Java Using Azure DevOps
1. Create a Project and Git Repository
- On the Azure DevOps projects page, click "New Project" then enter your project name.
- Select "Git" in the "Version Control" drop-down, then click the "Create" button to continue
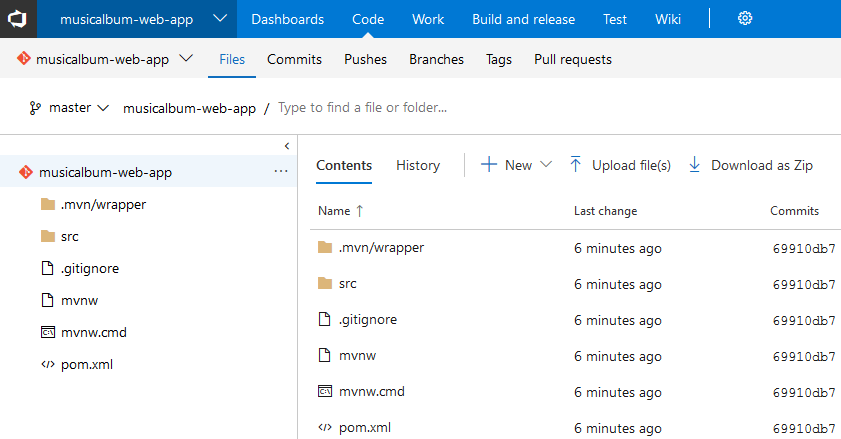
- Click on the "import" button below the "or import a repository" to paste in the Git URL for the sample Java code above. Then click on "Import" to continue
2. Create a Build Definition for Maven
The build definition in Azure DevOps automatically executes all the tasks in the build each time there’s a commit in the Java source application. In this example, Azure DevOps will use Maven to build a Java Spring Boot project.
- Click on the Build and Release tab on top of your Azure DevOps project page. Then select the "Builds" link
- Click on the New Pipeline button, and then "Continue" to start defining your build tasks
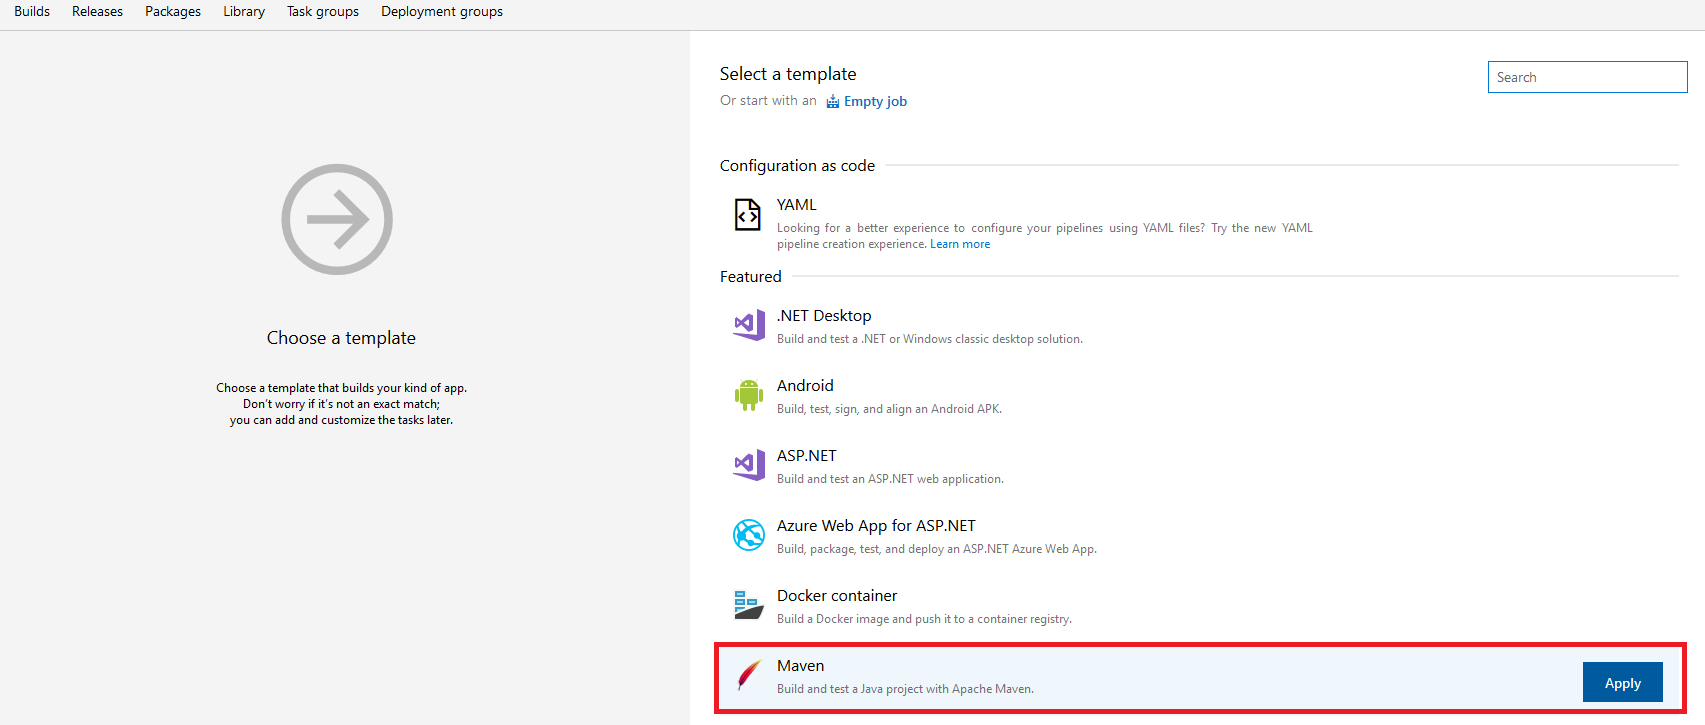
- Select "Maven"from the list of templates, then click on the "Apply" button to build your Java project
![Image title]()
- Use the drop-down menu for the Agent pool field to select Hosted Linux Preview option. This informs Azure DevOps which build server to use. You can also use your private customized build server
- To configure your build for continuous integration, select the Triggers tab and check the Enable continuous integrationcheckbox.
![Image title]()
- Use the Save & queue drop-down menu to select the Save & queue option.
- In the pop-up window, verify that "Hosted Linux Preview" is select as the Agent pool field. Then click on the queue button to build the java application.
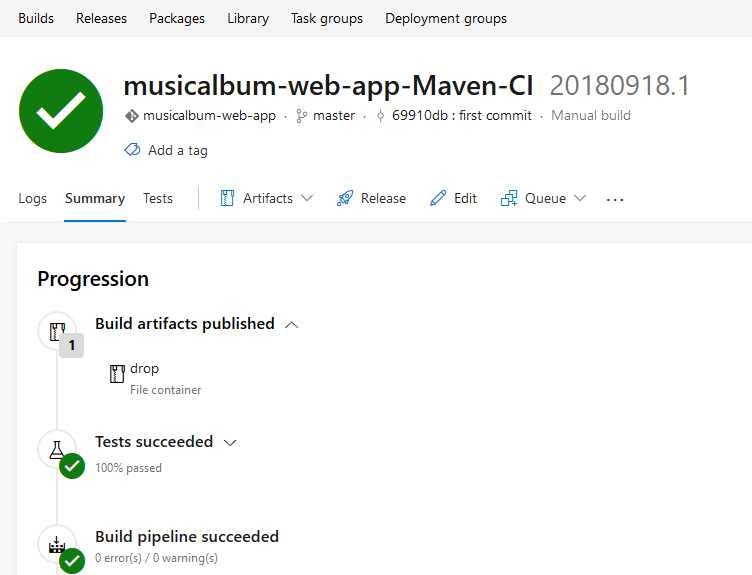
- Verify that the build tasks completed successfully by clicking on the generated build number.
3. Create a Release Definition the Java Web App
The release pipeline in Azure DevOps automatically triggers the deployment of build artifacts to any target environment like Azure as soon as the Build process completes successfully. The release pipeline can be created for dev, test, staging or production environments.
- Click on the Build and release tab on top of your project page. Then select the “Releases” link.
- Click on the New pipeline button. On top of the list of templates, then click on the “Empty job” link
- Enter a "Stage name" (e.g Dev, Test, Staging or Production). Then click on the “X” button to close the pop-up window
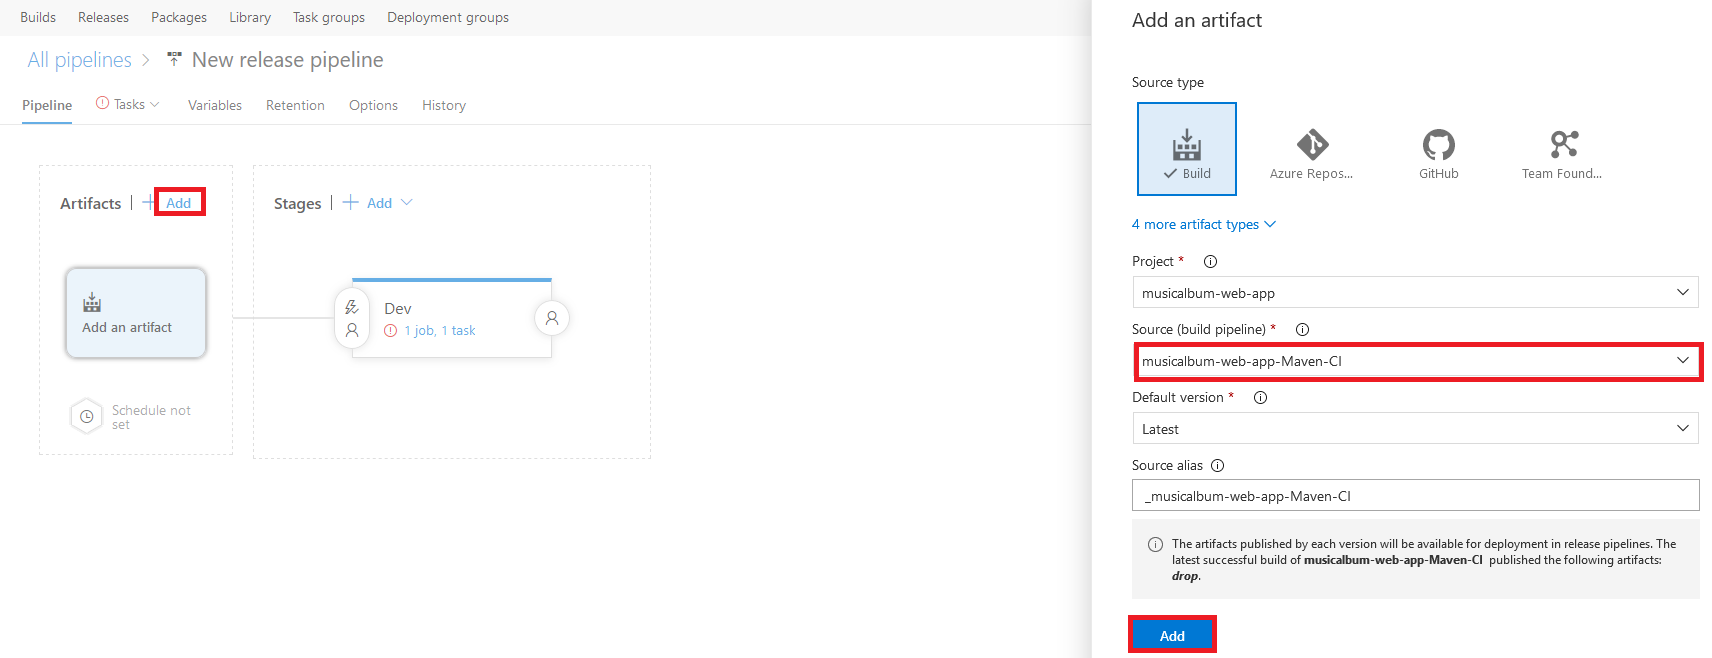
- Click on the "+ Add" button in the Artifacts section. This will link artifacts from the build definition (e.g. Maven build) to this release definition.
![Image title]()
- Use the drop-down menu for the "Source (build pipeline)" to select your build definition. Then click the "Add" button to continue.
- Click on the "Tasks" tab on the pipeline. Then, select your stage name.
- Click on the "+" link on the Agent Job section to add a deployment task.
- Select the "Azure App Service Deploy" task under the list of tasks, then click on the "Add" button
- On the "Azure App Service Deploy" page, set the version to "4.* (preview)" in the drop-down menu
- Use the "Azure subscription" drop-down menu to select your Azure subscription ID.
- Select "Web App on Linux" from the "App Service type" drop-down menu
- Select the name of the Azure Web App instance you created above in the "App service name" drop-down menu.
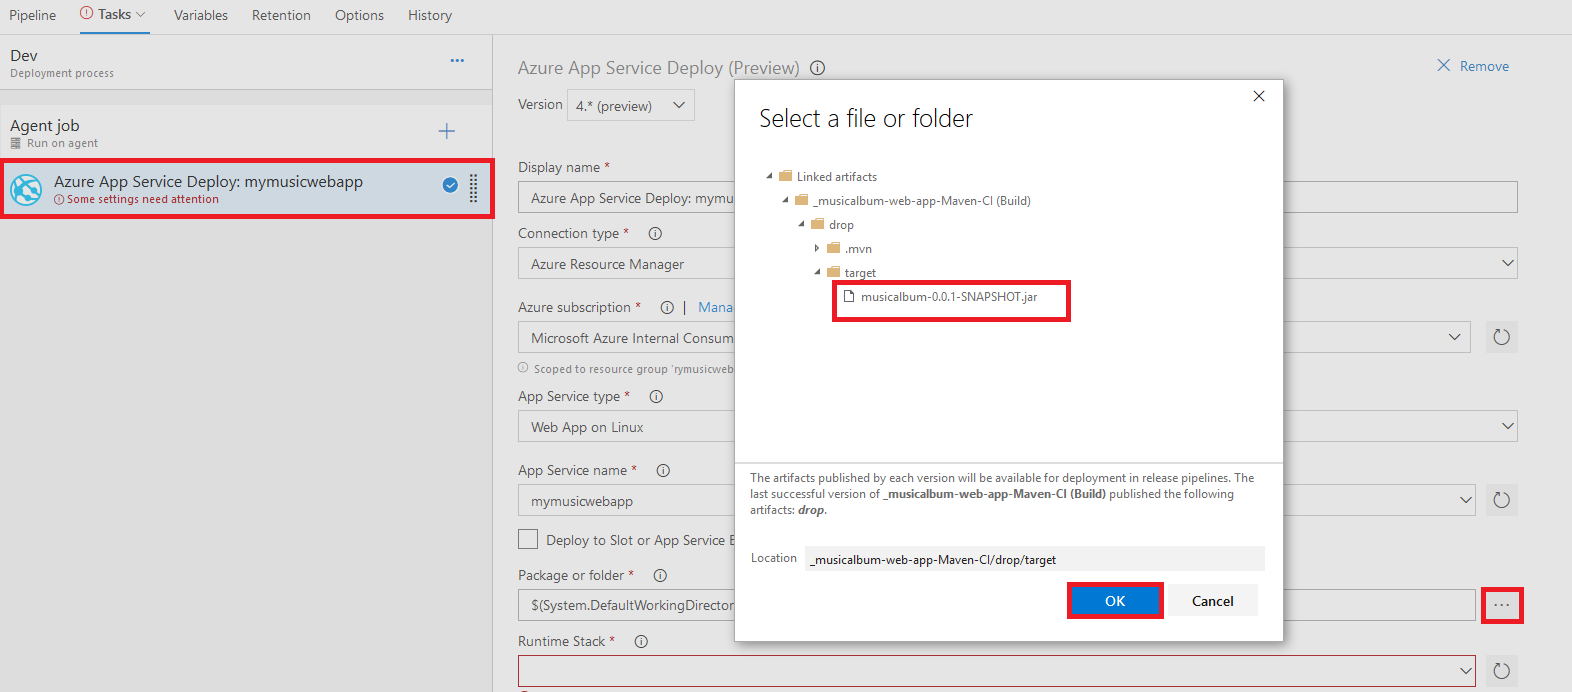
- For the "Package or folder" field, navigate to the project generated .jar file
![Image title]()
- Select the "JRE 8" in the "Runtime Stack" drop-down. Note: click the refresh button next to the field if you don’t see the JRE 8 in the list.
- Click on the "Agent job" link on the left navigation bar. Select "Hosted Linux Preview" in the Agent pool drop-down menu
- To enable continuous deployment, click the "Pipelines" tab
- In the Artifacts section, click on the lightning icon. Then set the "Continuous deployment trigger" to Enabled. Click on the "Save" button, then the "OK" button.
![Image title]()
- Click on the "+ Release" drop-down menu, then select "Create a release."
- In the pop-up window, click on the "Create" button.
- Click on the generated “release number” to check the status of your deployment.
4. Test Your Deployed Java Web Application
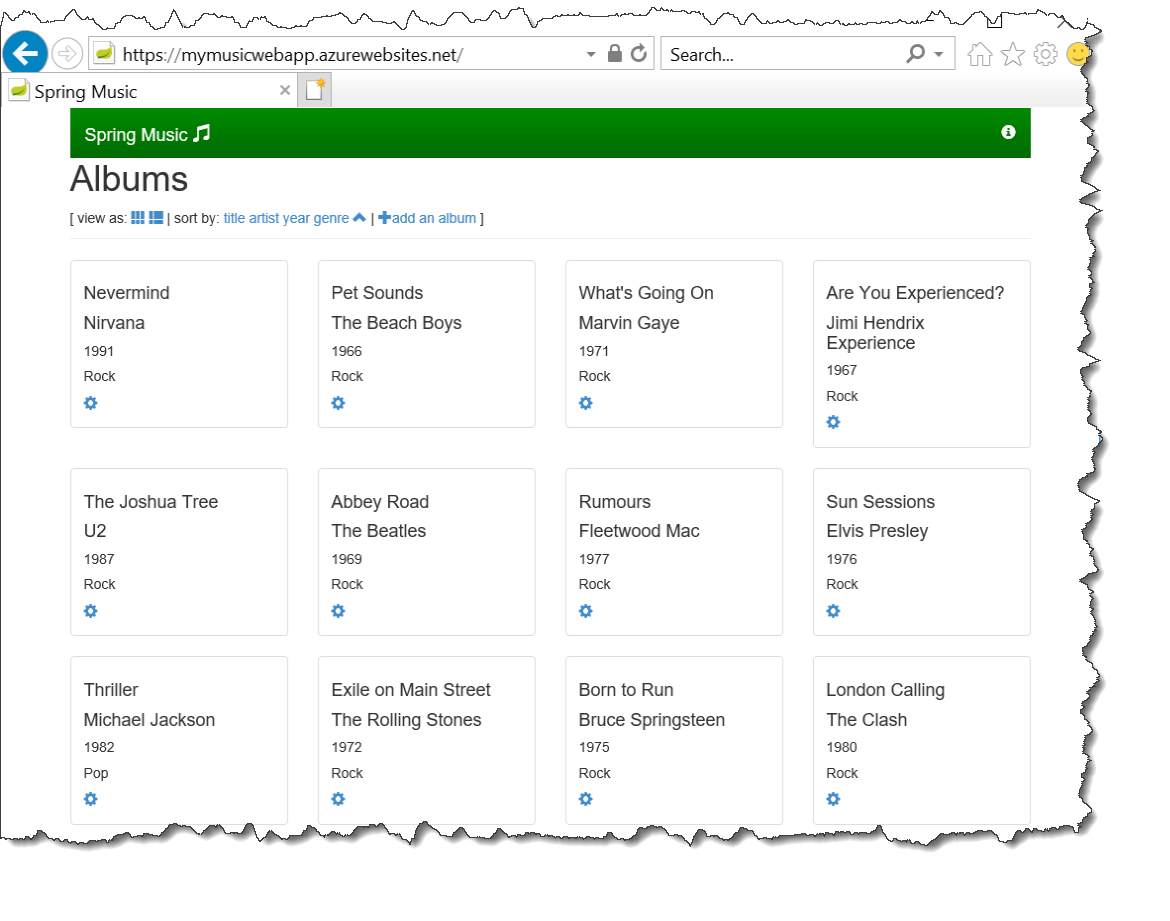
- Open a web browser and paste your web app URL:
https://{your-app-service-name}.azurewebsites.net - The web page should display the Spring Music Albums:
Summary
It's nice to see Microsoft making strides to enable all developers by taking simple steps like naming changes that are more attractive and embrace many developer communities. Azure DevOps provides developers and teams with a robust solution to collaborate and automatically generate CI/CD pipelines to deliver applications faster.
Opinions expressed by DZone contributors are their own.



Comments