Build and Deploy a Node.js Application into Azure Web Apps Using Azure DevOps (CI/CD)
In this tutorial, we look at how to get a Node.js app up and running and then deploy it to an instance of Azure DevOps.
Join the DZone community and get the full member experience.
Join For FreeThis post is as an introduction to Azure DevOps. If you're new to this topic, check out a helpful DZone article here.
We'll use an azure-pipelines.yml file at the root of the repository. Get this file to build the Node.js application using CI (Continuous Integration) Build.
Follow the instructions in Create your build pipeline to create a build pipeline for your node application.
Steps:
The agent pool needs to be selected on Microsoft-hosted agents. This is the VM where the build runs. If the hosted agent is not working, use the self-hosted agent machine as a host.
pool: name: Hosted Ubuntu 1604 demands: npm- This task detects all open source components in your build, security vulnerabilities, and scans for libraries and outdated libraries (including dependencies from the source code). You can view it at the building level, project level, and account level.
steps: - task: whitesource.whitesource.task-hash-collector.WhiteSource@18 displayName: 'WhiteSource ' inputs: cwd: 'cctitan-ui-code' extensions: '.json .js .ts .css .html' productName: UIcode WhiteSourceService: 'cc-titan' enabled: false- Install Node.js for the specified path of your project. A specific version of your node needs to mention it, or else specify multiple versions of a node on a build and test application.
- task: NodeTool@0 displayName: 'Use Node 8.x' inputs: versionSpec: 8.x- Use the npm task to install and publish npm packages. Make sure that the working directory contains a package.json file.
task: Npm@1 displayName: 'npm install' inputs: workingDir: 'cctitan-ui-code' verbose: false- Install the latest version of Angular CLI using npm. Later, use the ng tool from other scripts.
- task: Npm@1 displayName: 'install angular cli@latest' inputs: command: custom workingDir: 'cctitan-ui-code' verbose: false customCommand: 'install -g @angular/cli@latest '- Use a bash script task to write shell commands for checking the Angular version you have (
ng), build the apps (ng build), and deploy the build artifacts. - bash: | ls /home/vsts/work/1/s cd cctitan-ui-code ls ng --version ls ng build ls- White source bolt is a free developer tool for finding and fixing open source code vulnerabilities.
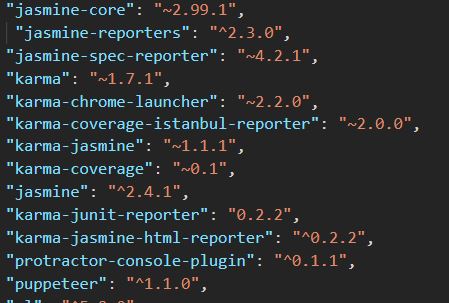
- task: whitesource.ws-bolt.bolt.wss.WhiteSource Bolt@19 displayName: 'WhiteSource Bolt' inputs: cwd: 'cctitan-ui-code'- Before executing the test-cases and producing code-coverage reports, some changes in root repository of the code, some additions need to be made to the package.json file under dev dependencies section.
![Image title]()
- Some changes in root repository of the code, some additions to the angular.json file, under test add code-coverge shoud be true.
![Image title]()
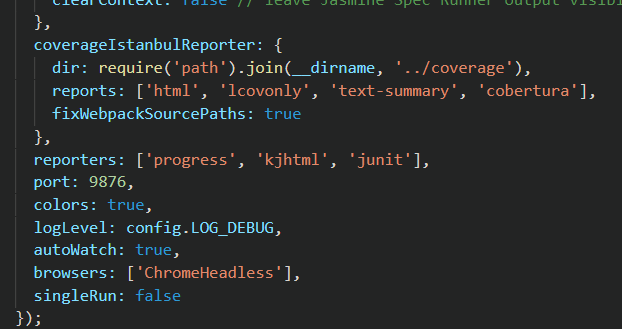
- Run the unit test cases through Karma by using the Jasmine test framework. You need to add the required plugins before running the test. You may also need to make some changes in the root repository of the code and some additions to the karma.conf.js file to add plugins and code coverage formats.
![Image title]()
![Image title]()
- Run unit tests (
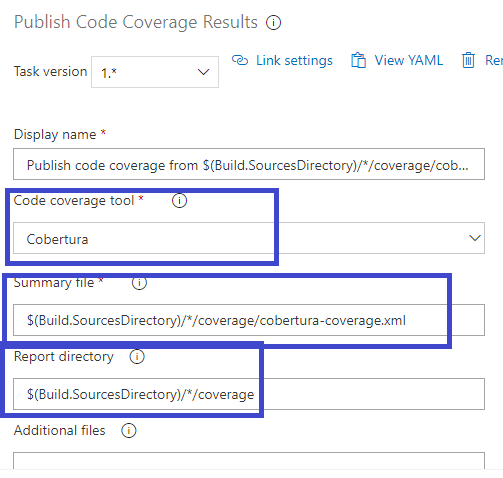
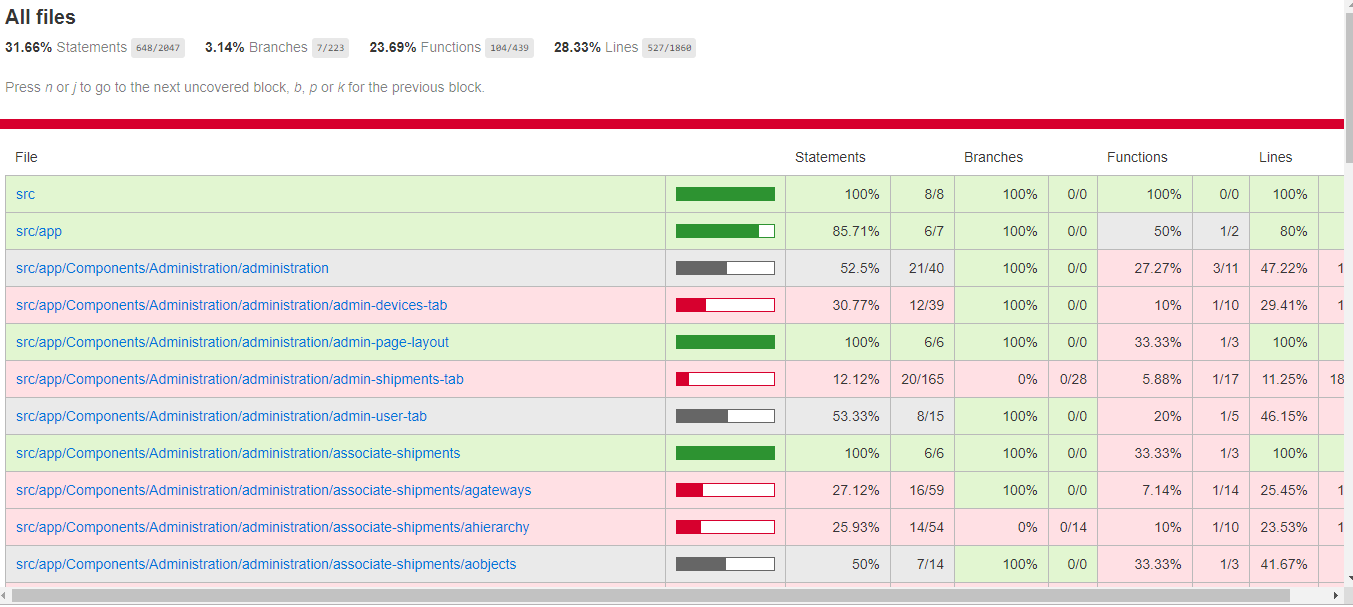
ng test) in the root of the project and generate code-coverage reports. Karma reporters are directly passed to the Karma runner. - bash: | cd CCtest npm install karma karma-jasmine karma-chrome-launcher karma-jasmine-html-reporter karma-coverage-istanbul-reporter npm install karma-coverage --save-dev npm install karma karma-coverage ng test --watch=false --code-coverage displayName: 'CodeCOverage tests'- A code coverage report is generated by using published code coverage results. The two types of tools are there, i.e. Cobertura or JaCoCo code coverage tools. You can use either but the results will be generated in XML format.
- The path of the summary file is to identify the code-coverage statistics such as line coverage and class methods, etc.
- Report code-coverage results in the form of HTML are stored in the report directory, users can access the artifacts and summary of a build.
![Image title]()
![Code coverage Code coverage]()
- Use this task to archive files compression formats such as .rar, .zip, and .tar.gz.
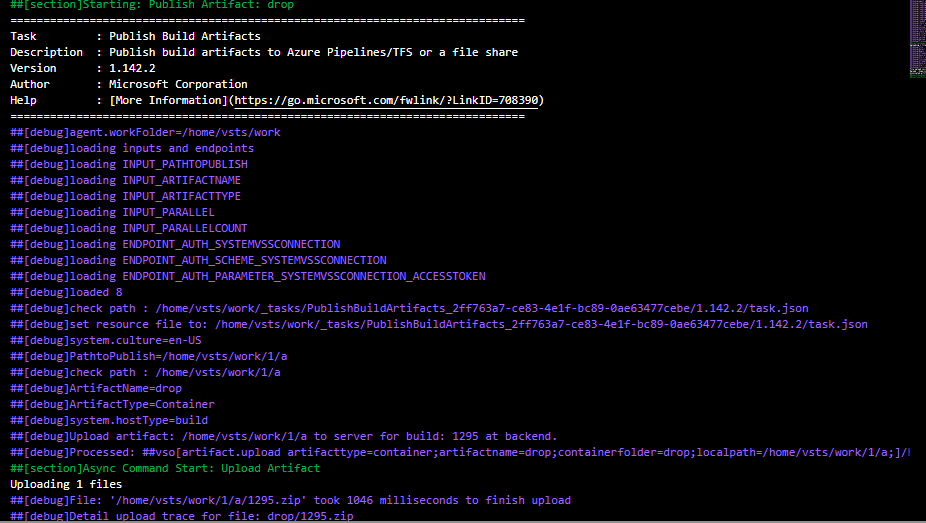
- task: ArchiveFiles@2 displayName: 'Archive cctitan-ui-code/dist' inputs: rootFolderOrFile: 'cctitan-ui-code/dist' includeRootFolder: false- Use this task in building pipelines to publish the build artifacts to Azure pipelines. This will store it in the Azure DevOps server so you can later download and use it for the releases (CD) pipeline.
- task: PublishBuildArtifacts@1
  displayName: 'Publish Artifact: drop'
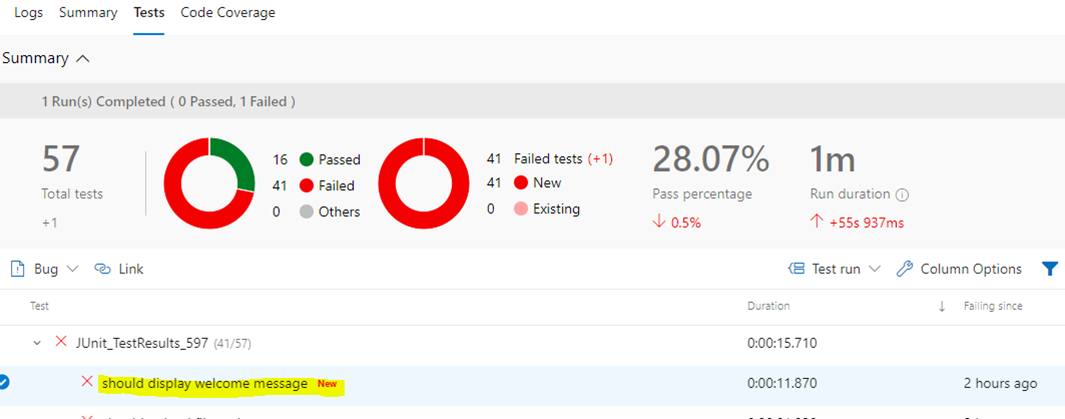
Publish the test results to Azure pipelines or TFS when tests are executed to provide complete test reports and analytics. Use the test runner that supports the required test results format. Some specific result formats include JUnit, NUnit, and Visual Studio Test (TRX). This task will generate the JUnit XML formats, and Azure DevOps Build will use this XML file in its build task to grab the test results and publish to the dashboard summary of the build.
steps: - task: PublishTestResults@2 displayName: 'Publish Test Results **/test-results*.xml **/e2e-results-junit*.xml ' inputs: testResultsFiles: | **/test-results*.xml **/e2e-results-junit*.xml mergeTestResults: true continueOnError: true condition: succeededOrFailed()![Image title]()
- Run end-to-end (E2E) tests (
npm run e2e) using Protractor. - Use a headless browser, like Chrome Puppeter, to run on hosted agents. Some additions need to be in the file protractor.conf.js file to generate test results using JUnit reporter.
![Image title]()
- Click into the 'Variables' tab in build, add a system.debug as a name and set the value to true. This will troubleshoot to the build in debug mode.
![Image title]()
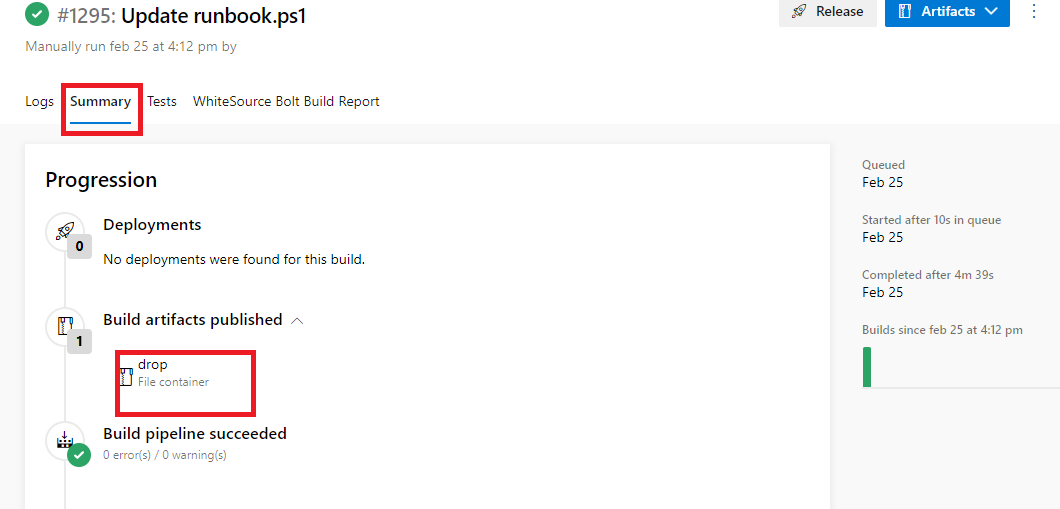
- After the build has succeeded, build artifacts are published in the summary section. These published artifacts will be used to deploy the app later in a release (CD) pipeline.
![Image title]()
- Get the logs for a build generated during the build of the job.
![Image title]() Release Pipeline (CD) for Deploy a Node.js into Azure Web App
Release Pipeline (CD) for Deploy a Node.js into Azure Web App ![Image title]()
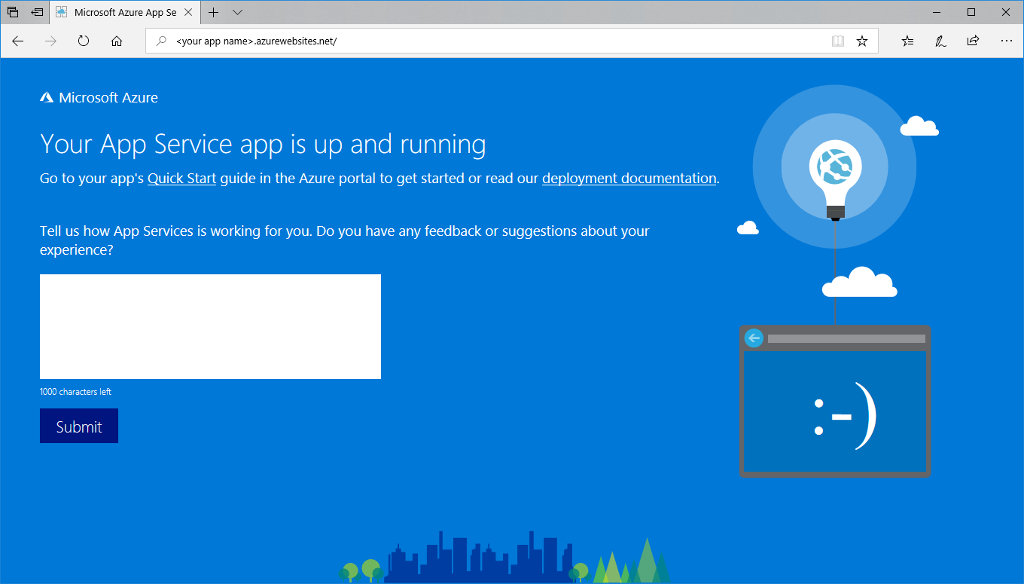
- This will build and deploy our Node.js code (CI) into a web app through the Azure App service (CD).
- Select the Azure Resource Manager subscription for the deployment.
- To configure a new service connection, select the Azure subscription from the list and click 'Authorize.'
- Use the existing service principal, or if the subscription is not listed, set up an Azure service connection.
- Set the type as function app on windows, then choose the web app's name that you created in the azure-portal.
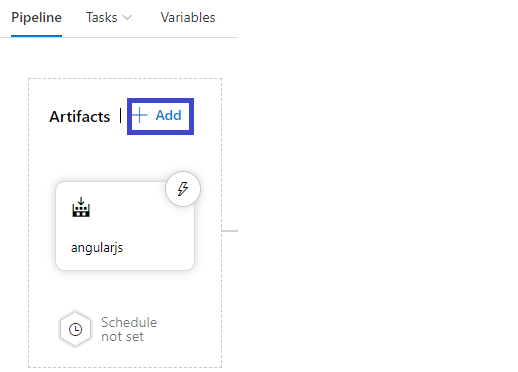
- In a release (CD) pipeline, artifacts are used as an input for Continuous Integration (CI) build code (Node.js) by using a package or a folder containing the app service's contents that were generated via a compressed zip or war file.
 steps:
- task: AzureRmWebAppDeployment@3
  displayName: 'Deploy Azure App Service'
  inputs:
    azureSubscription: '$(Parameters.ConnectedServiceName)'
    appType: '$(Parameters.WebAppKind)'
    WebAppName: '$(Parameters.WebAppName)'
    TakeAppOfflineFlag: true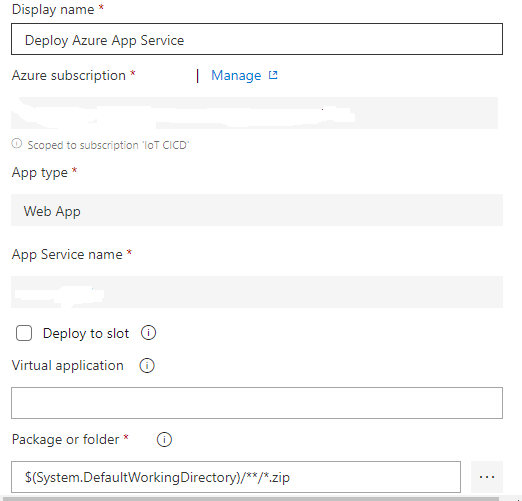
Opinions expressed by DZone contributors are their own.





 Release Pipeline (CD) for Deploy a Node.js into Azure Web App
Comments