Build Your First Chrome Extension With Rust and WebAssembly
This article will help you transform your browser extension development by combining Rust's safety with WebAssembly's performance.
Join the DZone community and get the full member experience.
Join For FreeChrome extensions have traditionally been built using JavaScript, HTML, and CSS. However, with the rise of WebAssembly (Wasm), we can now leverage Rust's performance, safety, and modern development features in browser extensions.
In this tutorial, we will create a simple Chrome extension that uses Rust compiled to WebAssembly.
Prerequisites
Before we begin, you'll need:
# Install Rust and Cargo
curl --proto '=https' --tlsv1.2 -sSf https://sh.rustup.rs | sh

# Install Node.js and npm (using nvm for version management)
curl -o- https://raw.githubusercontent.com/nvm-sh/nvm/v0.39.0/install.sh | bash && nvm install 23

# Install wasm-pack (required for WebAssembly compilation and JavaScript bindings)
cargo install wasm-packNote: While Rust and Cargo provide basic WebAssembly support, we specifically need wasm-pack for this project as it handles the WebAssembly compilation process and generates optimized JavaScript bindings for browser integration.
Project Structure
Our Chrome extension will have the following structure:
rust-chrome-extension/
├── Cargo.toml
├── manifest.json
├── package.json
├── popup.html
├── popup.js
└── src/
    └── lib.rs
Setting Up the Project
1. First, create a new Rust project:
cargo new rust-chrome-extension --lib
cd rust-chrome-extension
2. Update your Cargo.toml with the necessary dependencies:
[package]
name = "rust-chrome-extension"
version = "0.1.0"
edition = "2021"

[lib]
crate-type = ["cdylib"]

[dependencies]
wasm-bindgen = "0.2"
3. Create a simple Rust function in src/lib.rs:
use wasm_bindgen::prelude::*;

#[wasm_bindgen]
pub fn greet(name: &str) -> String {
    format!("Hello, {}! From Rust!", name)
}
4. Create manifest.json for the Chrome extension:
{
  "manifest_version": 3,
  "name": "Rust Chrome Extension",
  "version": "1.0",
  "description": "A simple Chrome extension using Rust and WebAssembly",
  "action": {
    "default_popup": "popup.html"
  }
}
5. Create popup.html:
<!DOCTYPE html>
<html>
<head>
  <title>Rust Chrome Extension</title>
</head>
<body>
  <input type="text" id="name" placeholder="Enter your name">
  <button id="greet">Greet</button>
  <div id="output"></div>
  <script src="pkg/rust_chrome_extension.js"></script>
  <script src="popup.js"></script>
</body>
</html>
6. Create popup.js:
import init, { greet } from './pkg/rust_chrome_extension.js';

async function main() {
  await init();

  document.getElementById('greet').addEventListener('click', () => {
    const name = document.getElementById('name').value;
    const output = greet(name);
    document.getElementById('output').textContent = output;
  });
}

main();
Building the Extension
1. Build the Rust code to WebAssembly:
wasm-pack build --target web2. Load the extension in Chrome:
- Open Chrome and navigate to
chrome://extensions/ - Enable "Developer mode"
- Click "Load unpacked" and select your project directory
How It Works
Let's break down the key components:
1. Rust Code (lib.rs)
- We use
wasm-bindgento create JavaScript bindings for our Rust function - The
#[wasm_bindgen]attribute makes our function available to JavaScript - Our simple
greetfunction takes a name parameter and returns a formatted string
2. HTML (popup.html)
- Creates a basic UI with an input field and button
- Loads the WebAssembly module and JavaScript code
3. JavaScript (popup.js)
- Initializes the WebAssembly module
- Sets up event listeners for user interaction
- Calls our Rust function and displays the result
Testing the Extension
After loading the extension in Chrome:
- Click the extension icon to open the popup
- Enter a name in the input field
- Click the "Greet" button
- You should see a greeting message generated by the Rust code!
Demo
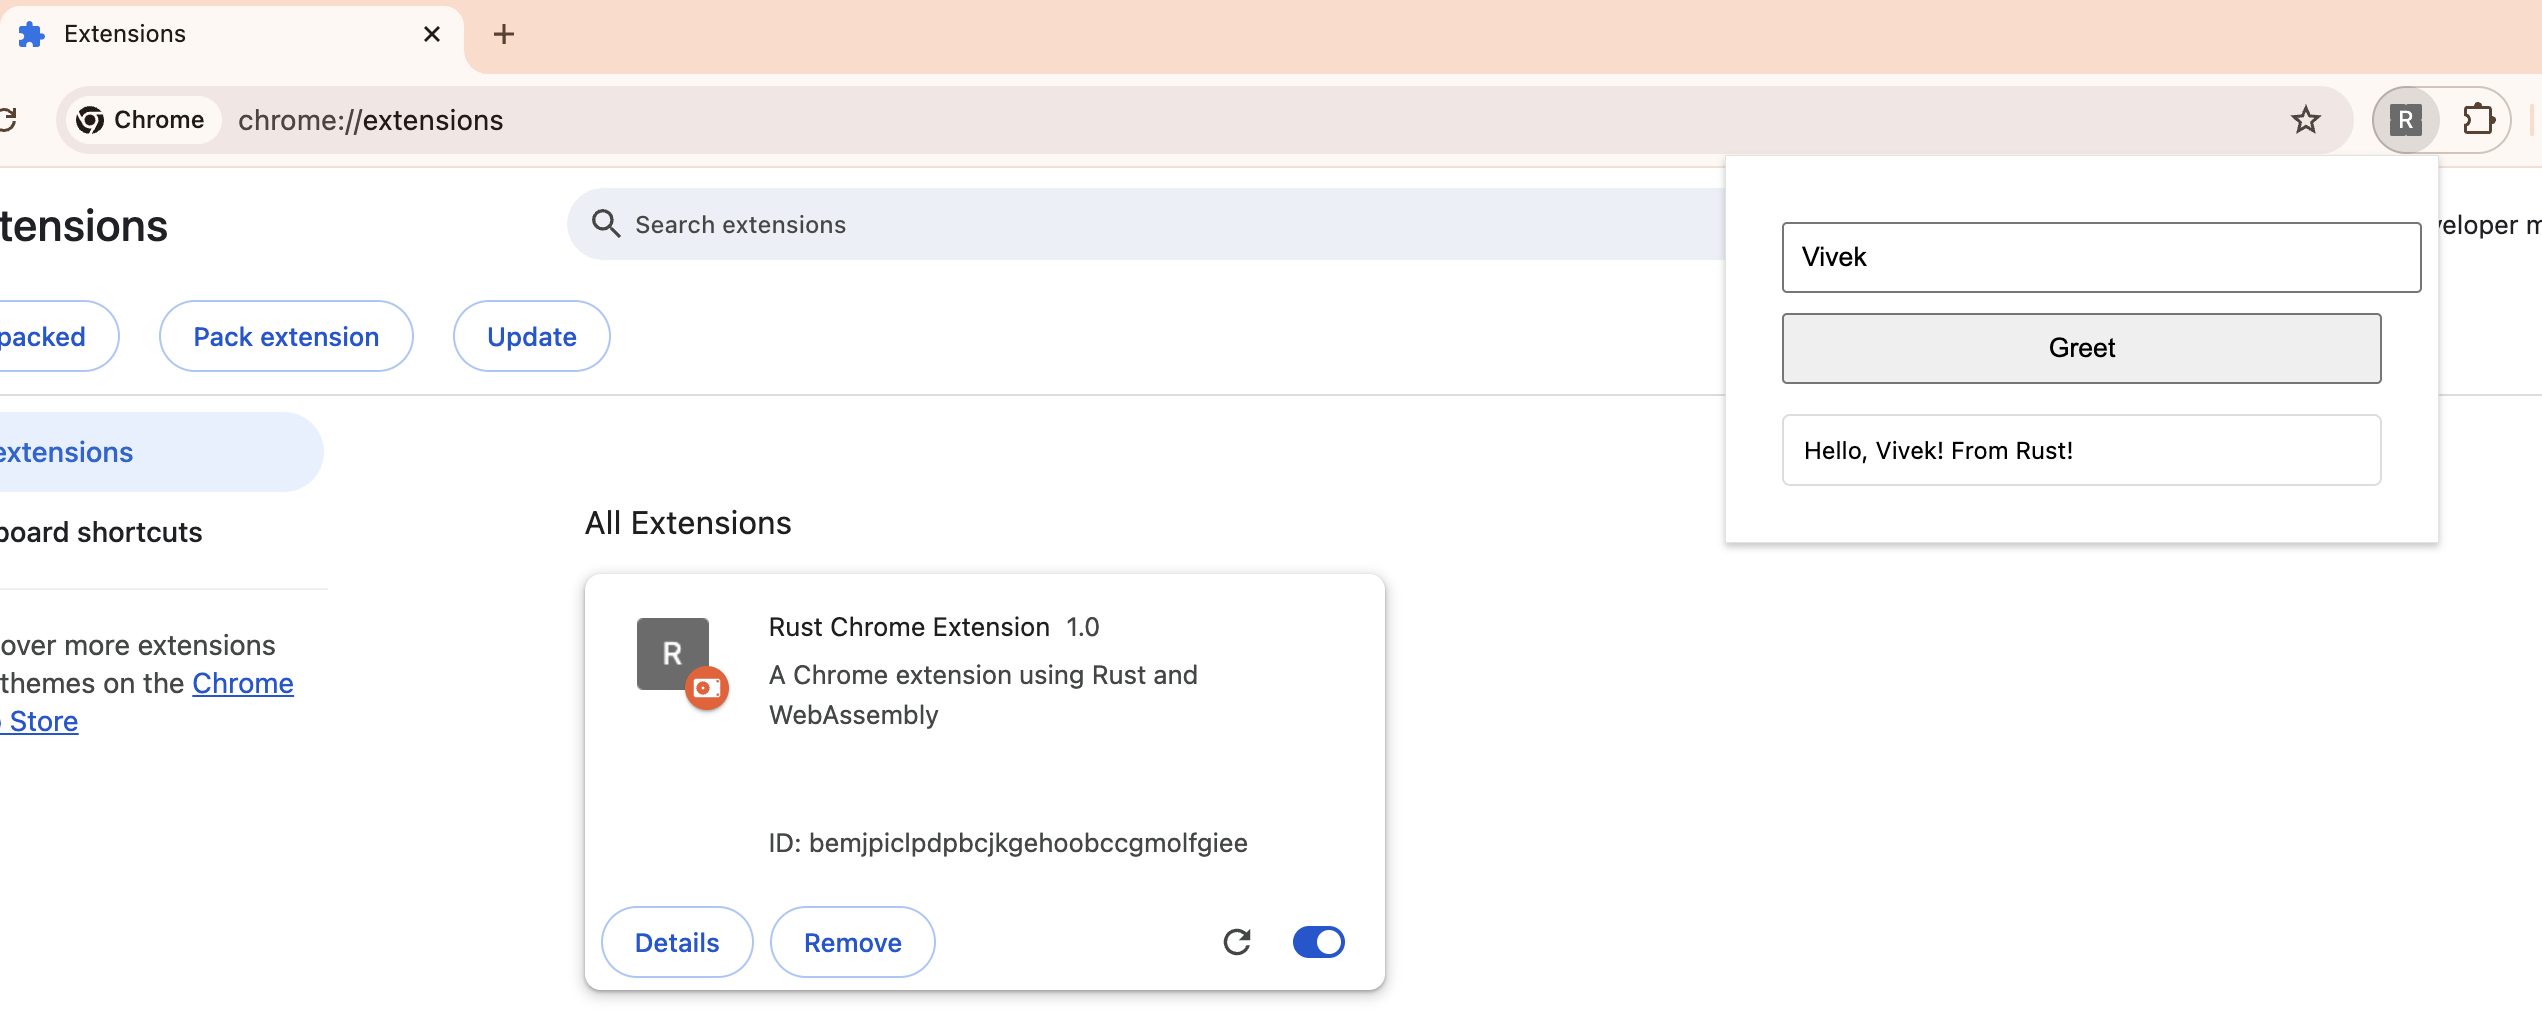
Here's what our extension looks like in action:

Sample output when you enter "Vivek" and click the Greet button:
Hello, Vivek! From Rust!
For a live demonstration and more examples, check out the demo folder in the GitHub repository.
Why Choose Rust for Chrome Extensions?
Building browser extensions with this system programming language offers compelling advantages that set it apart from traditional JavaScript-based development.
Here's a detailed breakdown of key benefits:
| Feature | Description | Example |
|---|---|---|
| Performance | Native-speed execution through WebAssembly (WASM) compilation | Processing large datasets or images runs significantly faster than JavaScript, delivering superior user experience |
| Memory Safety | Advanced ownership model eliminates common bugs and vulnerabilities | Prevents null pointer dereferences and memory leaks that typically crash JavaScript extensions |
| Concurrency | Built-in support for safe multi-threading | Fetch data from multiple APIs simultaneously without race conditions |
| Cross-Browser Compatibility | WASM compilation ensures consistent performance across browsers | Your extension works seamlessly on Chrome, Firefox, and Edge |
| Framework Integration | Seamless handling of complex computations alongside modern front-end frameworks | Use React for UI while performing intensive calculations in the background |
Additional benefits include:
- Modern tooling: Access to a powerful ecosystem and efficient package management through cargo
- Type system: Catch errors at compile time rather than runtime
- Growing ecosystem: Expanding collection of libraries specifically for browser extension development
- Future-proof: As WebAssembly evolves, this technology stack becomes increasingly valuable for web development
Complete Code
The complete source code for this tutorial is available on rust-chrome-extension.
Conclusion
We've successfully created a simple Chrome extension that leverages Rust and WebAssembly. While this example is basic, it demonstrates how to combine these technologies and sets the foundation for more complex extensions.
The combination of Rust's safety and performance with Chrome's extension platform opens up new possibilities for building powerful browser extensions. As WebAssembly continues to evolve, we can expect to see more developers adopting this approach.
Give it a try in your next Chrome extension project — you might be surprised by how easy it is to get started with Rust and WebAssembly!
Opinions expressed by DZone contributors are their own.

Comments