Build and Interact With This Chatbot Through Voice and Audio
This tutorial walks you through the process of defining intents and entities and building a dialog flow for your chatbot to respond to customer queries.
Join the DZone community and get the full member experience.
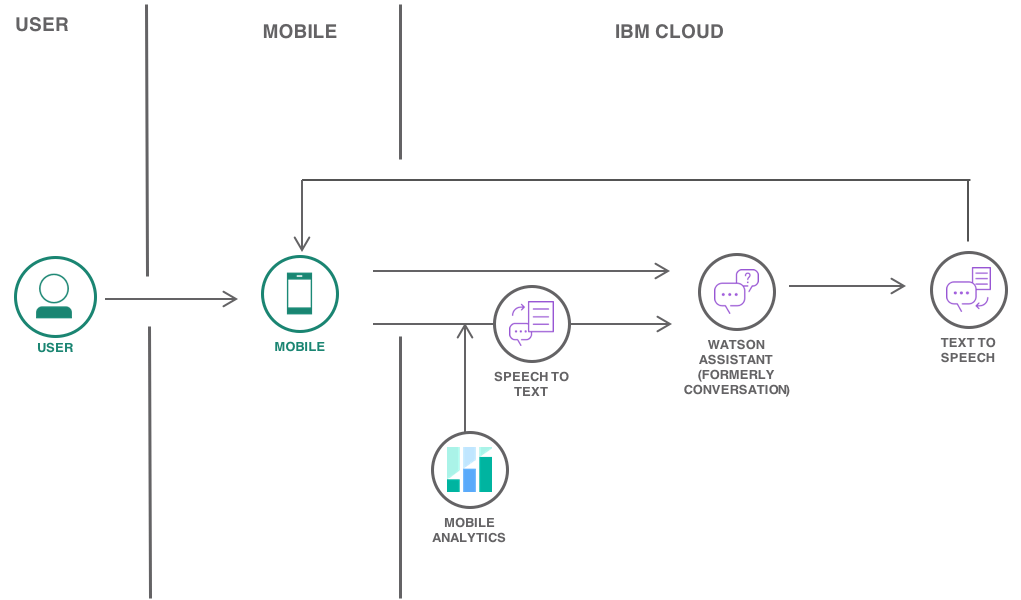
Join For FreeThis post is an excerpt from our recent solution tutorial with step-by-step instructions showing how easy it is to quickly create a voice-enabled Android-native chatbot with Watson Assistant, text-to-speech, speech-to-text, and Mobile Analytics services on IBM Cloud.
This tutorial walks you through the process of defining intents and entities and building a dialog flow for your chatbot to respond to customer queries. You will learn how to enable speech-to-text and text-to-speech services for easy interaction with the Android app. Also, you can track the app’s usage metrics through the Mobile Analytics service.

Objectives
- Create a chatbot (i.e. create a workspace, define an intent and entity, and build the dialog flow).
- Allow end users to interact with chatbot using voice and audio.
- Configure and run the Android app.
- Add Mobile Analytics to track usage.
Before You Begin
- Download and install Android Studio.
Create a Workspace
To begin, you will create Watson Assistant service on IBM® Cloud and add a workspace. A workspace is a container for the artifacts that define the conversation flow.
For this tutorial, you will save and use Ana_workspace.json file with predefined intents, entities and dialog flow to your machine.
- Go to the IBM Cloud Catalog and select Watson Assistant service > Lite plan under Watson. Click Create.
- Click Service credentials on the left pane and click New credential to add a new credential.
- Click View credentials to see the credentials. Save the credentials in a text editor for quick reference.
- Navigate to Manage on the left pane and click on Launch tool to see the Watson Assistant dashboard.

- Click on the Workspaces tab.
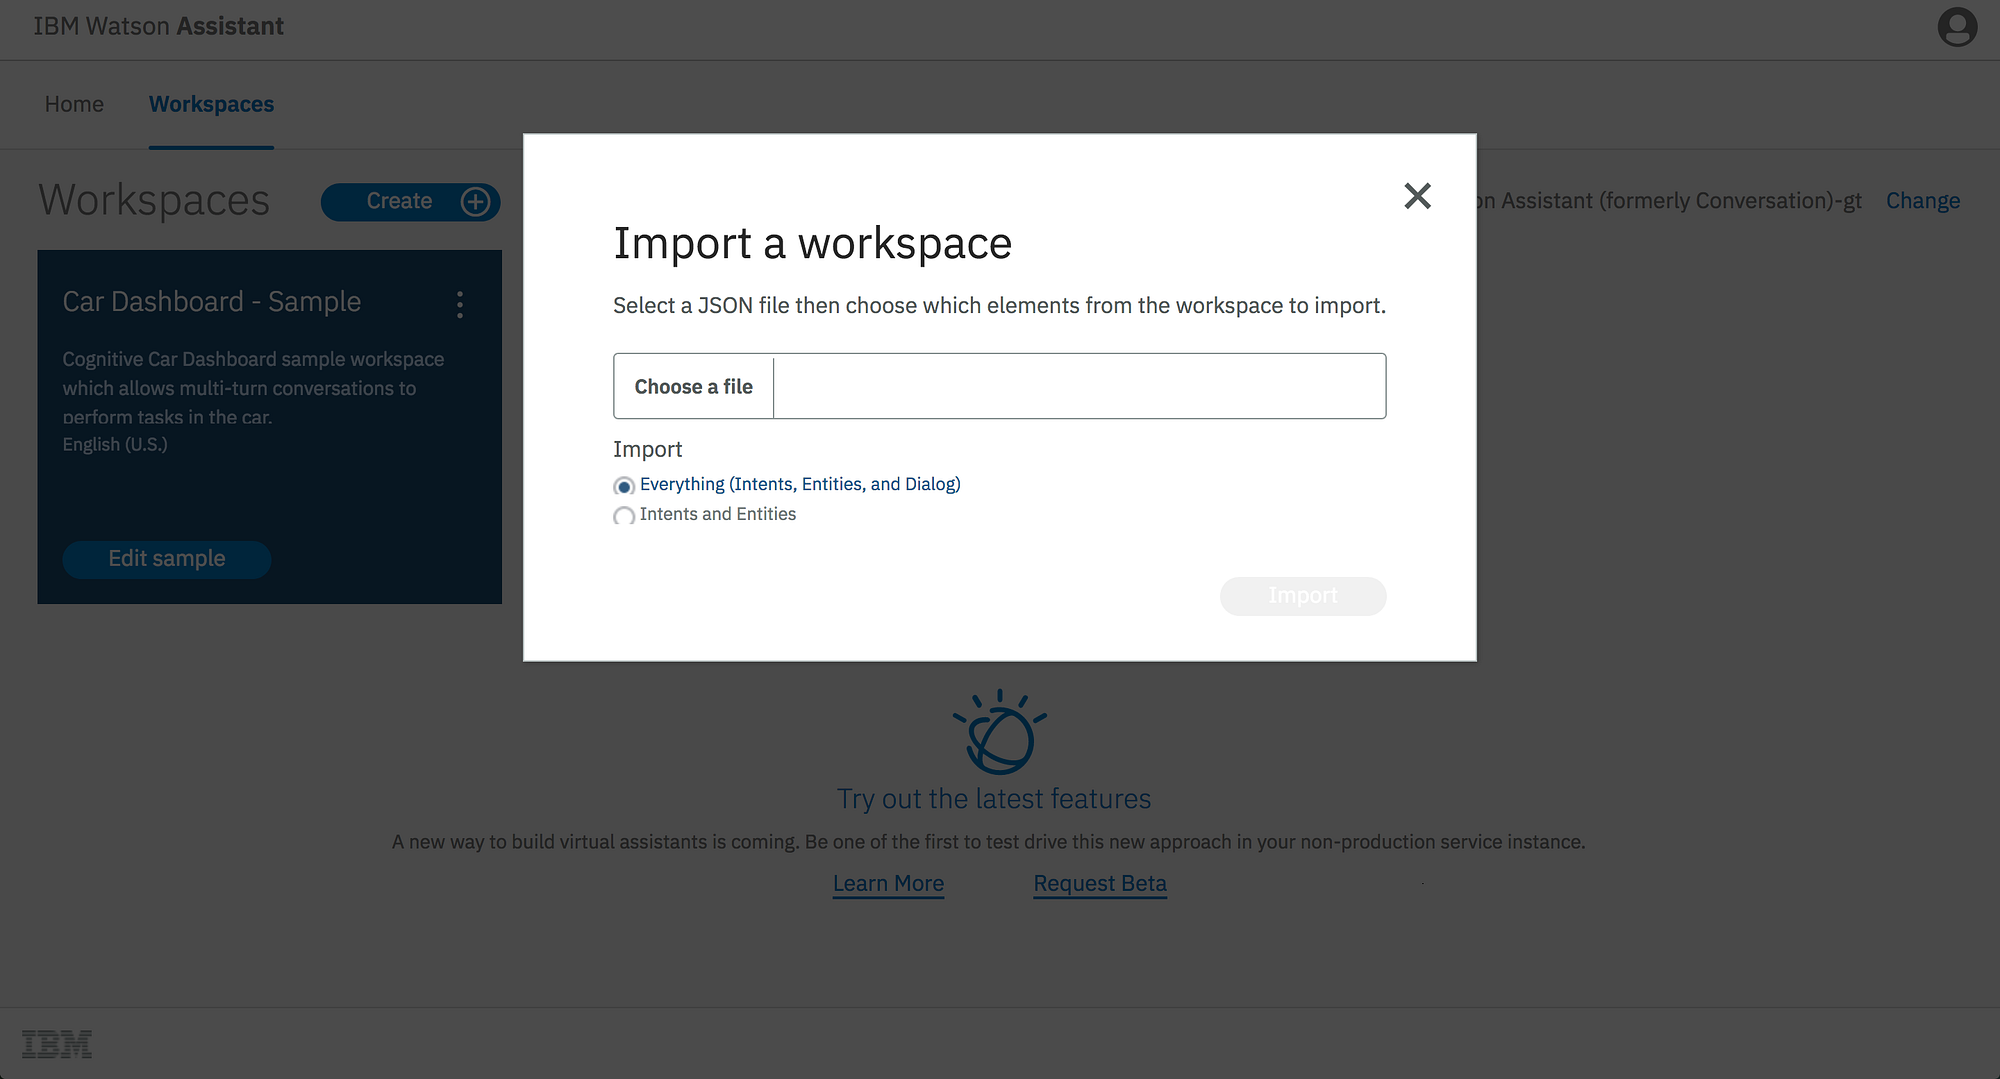
- Click the Import workspace icon and choose the JSON file downloaded above.

- Select the Everything option and click Import. A new workspace is created with predefined intents, entities, and dialog flow.
- On the left pane, click this icon to see all your workspaces:

- Click this icon on the
Anaworkspace to View details of the workspace.
 Copy and save the
Workspace ID for future reference.
What Is an Intent?
An intent represents the purpose of a user’s input, such as answering a question or processing a bill payment. You define an intent for each type of user request you want your application to support. By recognizing the intent expressed in a user’s input, the Watson Assistant service can choose the correct dialog flow for responding to it. In the tool, the name of an intent is always prefixed with the # character.
Simply put, intents are the intentions of the end-user. The following are examples of intent names.
#weather_conditions#pay_bill#escalate_to_agent
What Is an Entity?
An entity represents a term or object that is relevant to your intents and that provides a specific context for an intent. You list the possible values for each entity and synonyms that users might enter. By recognizing the entities that are mentioned in the user’s input, the Watson Assistant service can choose the specific actions to take to fulfill an intent. In the tool, the name of an entity is always prefixed with the @ character.
The following are examples of entity names
@location@menu_item@product
Read the complete tutorial here!
Next Steps
- Define an intent
- Define an entity
- Build the dialog flow
- Add speech-to-text and text-to-speech capabilities
- Configure and run the Android app
- Add Mobile Analytics to track usage
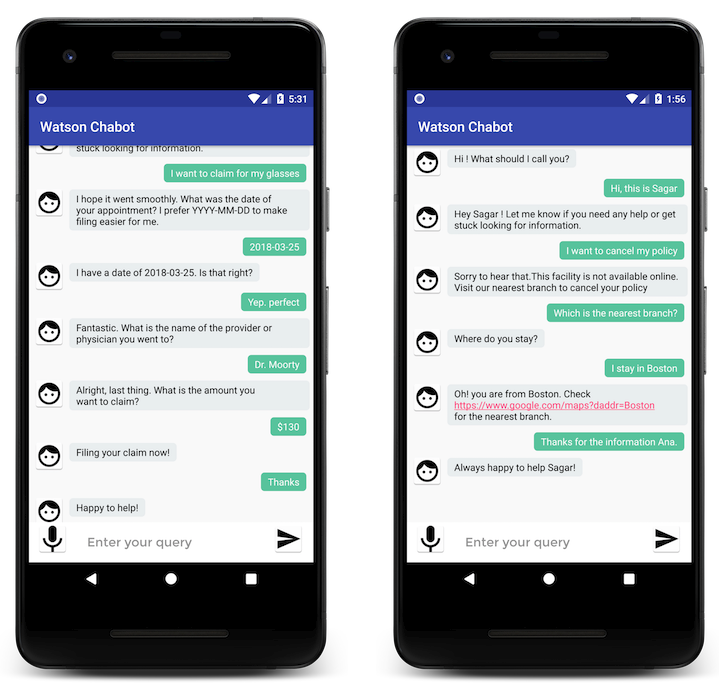
Once you complete all the steps and run the app on an emulator or on an Android device, this is how it looks:

Opinions expressed by DZone contributors are their own.

Comments