AWS Workflow With PyCharm
Avoid some of the snafus of creating a workflow using AWS Toolkits with this tutorial.
Join the DZone community and get the full member experience.
Join For Free

Setting up AWS-Toolkit with Docker and SAM CLI
Along with the ever-increasing power and usage of Amazon Web Services has come a need for a developer workflow, and until November 2018, developers were left to find their own — albeit inefficient — workflows for uploading lambda functions with dependencies, APIs, and creating CloudFormation stacks. Following Amazon’s announcement of their AWS Toolkits I ran into some bugs getting the workflow configured correctly following their instructions. Hopefully, this guide will alleviate some of your troubles as well!
Environment Details:
macOS Mojave 10.14.5
PyCharm 2019.1.3 (Community Edition)
aws-cli 1.16.179
botocore 1.12.169
Python 3.6.5 (more on this later)
Installation
One of the main advantages of AWS-Toolkit is the ability to build your Lambda along with its dependencies inside a Docker container, and any results you have in this container are guaranteed upon live deployment to AWS!
Install AWS-Toolkit
brew upgrade && update
brew tap aws/tap
brew install aws-sam-cli # Check installation with sam --version
Set AWS Credentials/Region
Log into your AWS account and click on your username in the top right of the screen, in the dropdown menu that appears select My Security Credentials. On the page that appears select Access keys then Create New Access Key. Click Show Access Key in the modal that appears and keep the window open for the next step.
Enter the Access Key ID and Secret Access Key you have displayed in your browser from the preview step and select your desired region (the default output is fine).
The CLI stores these results in ~/.aws/credentials and ~/.aws/config if you need to access them later for debugging.
Install Docker:
brew cask install dockerOpen Docker and check to see if it is running with docker ps .
Install PyCharm Plugin:
Go to Settings > Plugins search for “AWS Toolkit” and click Install .
Restart PyCharm.
Configuration
Go to
File > Create New ProjectChoose
AWS Serverless ApplicationBy default, PyCharm will use an
AWS SAM Hello Worldtemplate.Create a new virtual environment (do not inherit global site-packages).
Ensure you have the correct runtime (for me, Python 3.6).
Note: if there are compatibility issues with Python 3.7 (in the event they have not been patched) downgrade to version 3.6.5 or set up a new environment with anaconda if you have it installed (check python version with -V).
Connect your credentials by selecting the Profile:default option upon clicking the menu on the bottom right of the screen. (If you see Profile:default this means PyCharm detected the credential data you created earlier with aws-configure). If you do not see Profile:default then selecting All Credentials > Edit AWS Credential file(s) will open ~/.aws/credentials and ~/.aws/config that should have been created earlier. This option will enable you to debug whether or not PyCharm found the correct credentials.
Go to
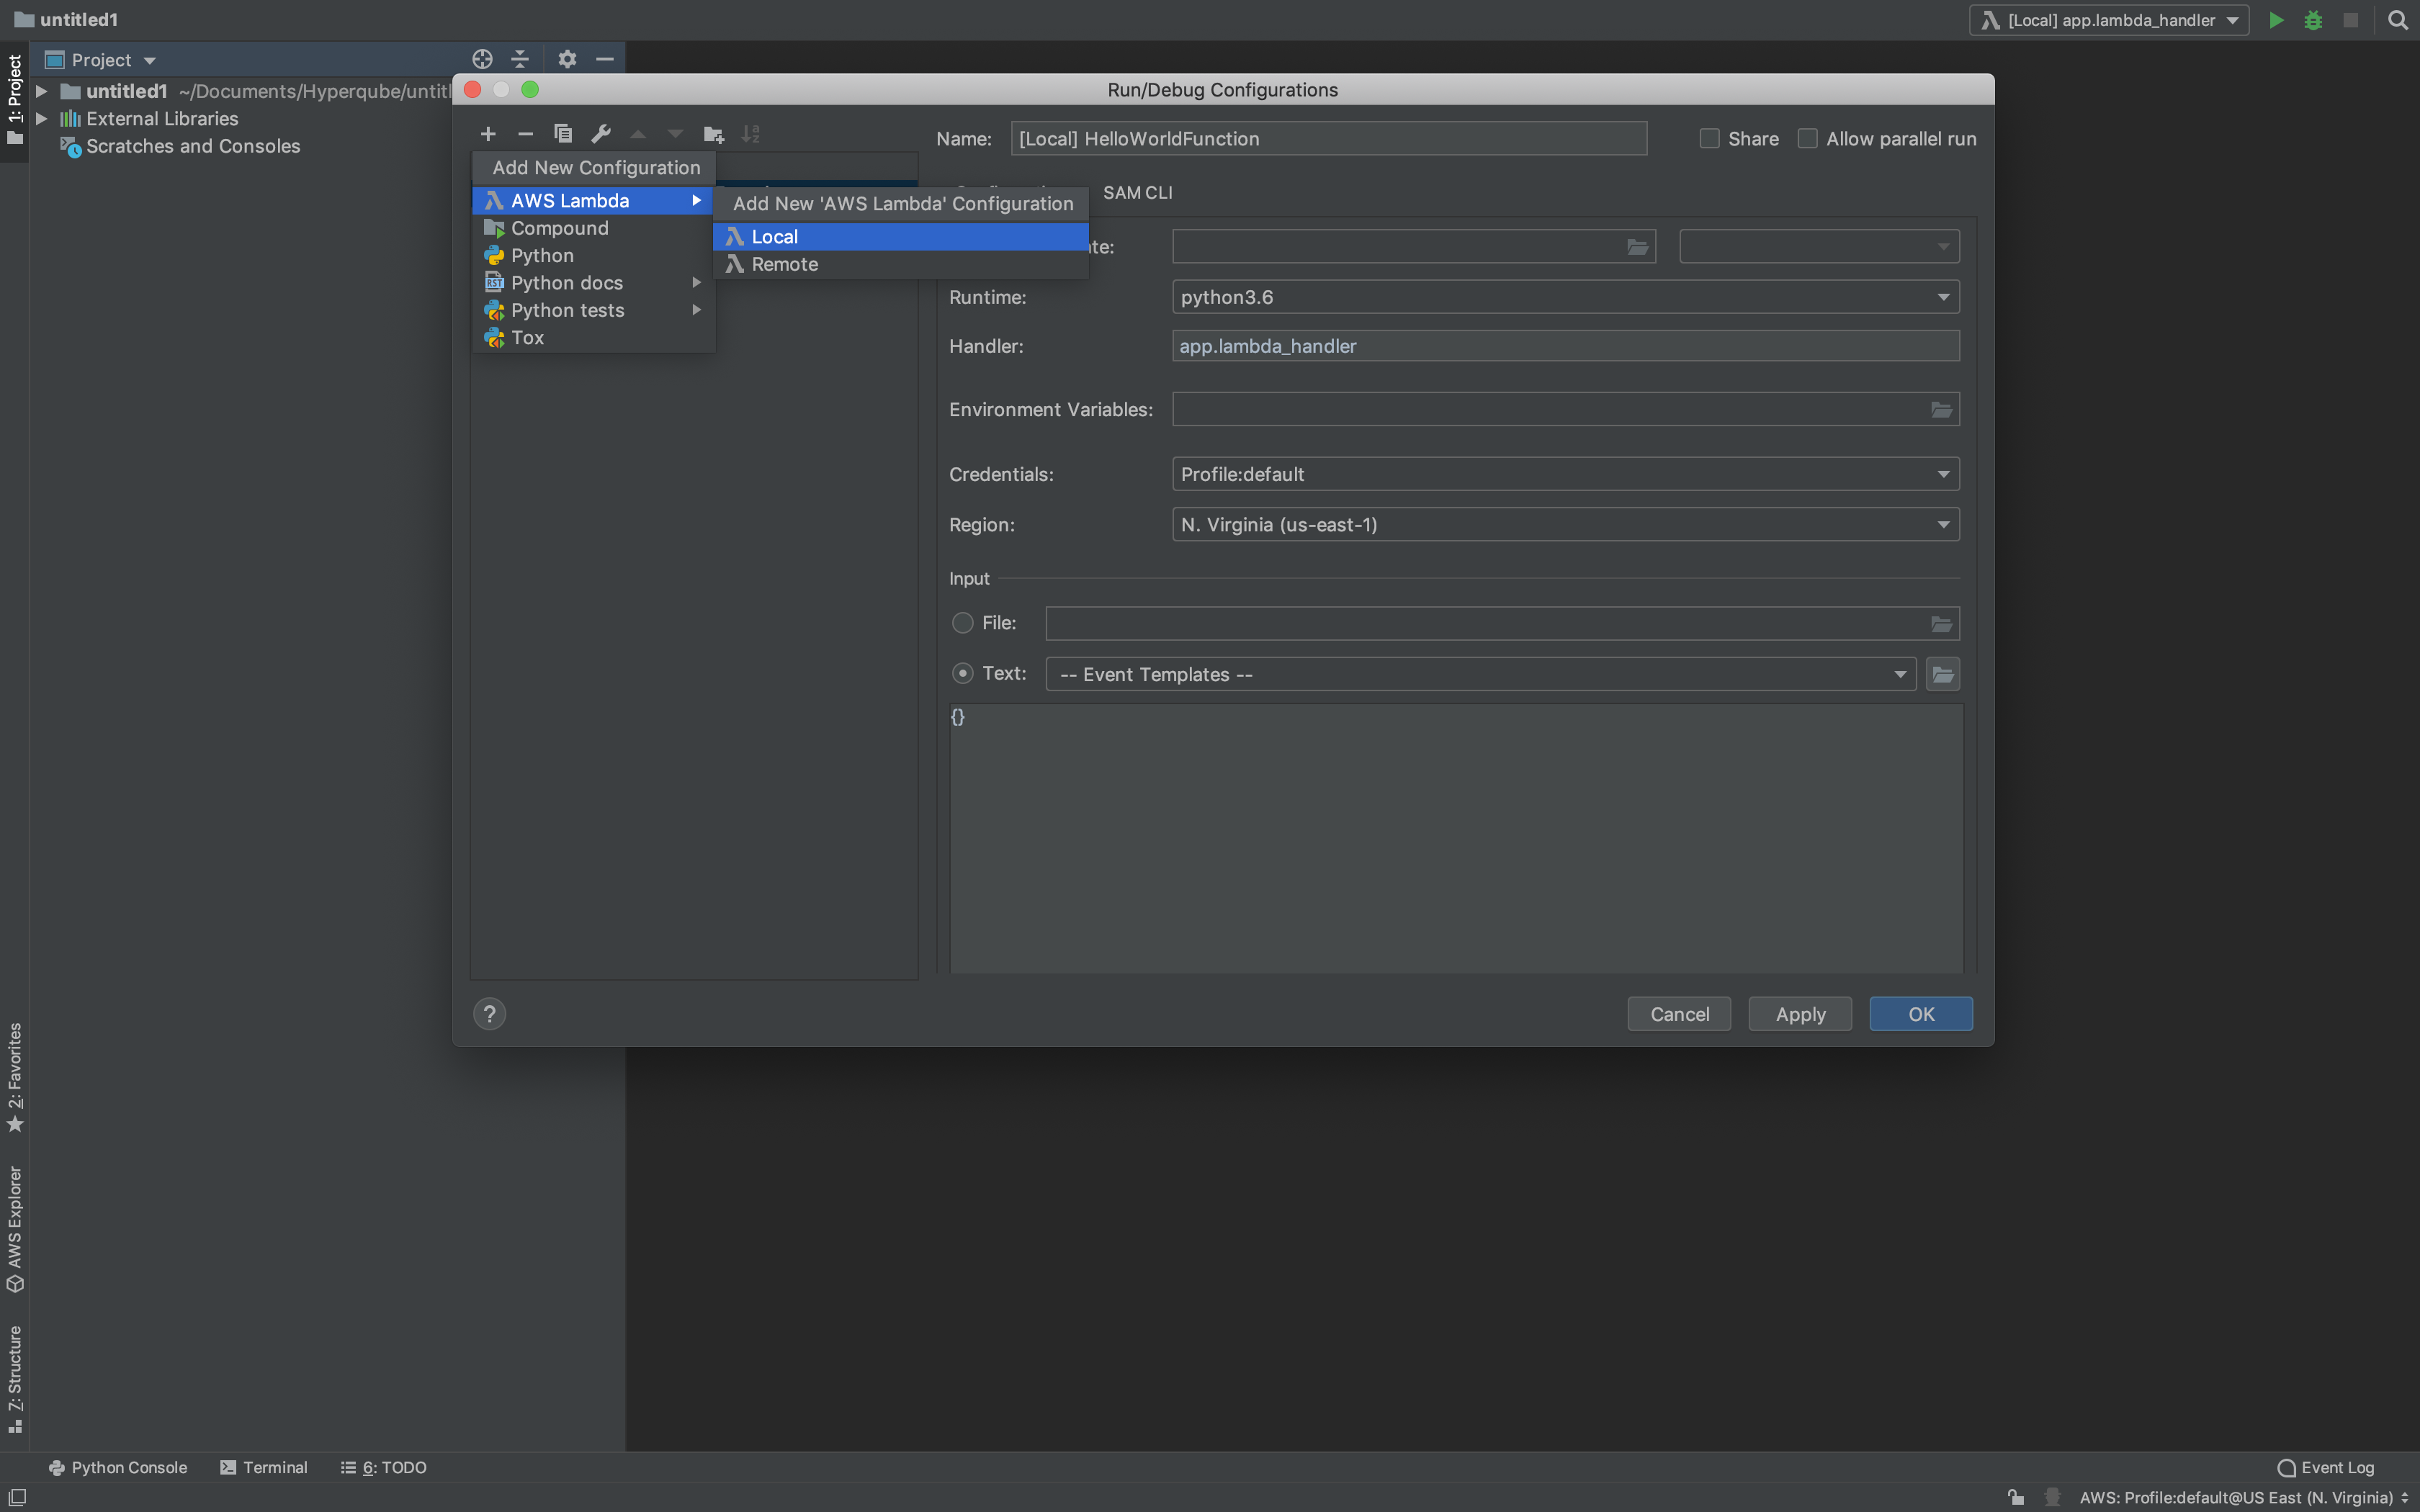
Run > Edit ConfigurationsSelect the plus sign to create a new run configuration then
AWS Lambda > Local

Select the runtime in accordance to the Python version we just build the virtual environment with. Do not install dependencies in this virtual environment since they won’t be needed (thanks to Docker) and this will minimize the size of your project.
Although PyCharm will complain that it cannot find the packages, they will be installed on the Docker image at runtime so this is not a problem.
Ensure you have the correct handler:
app.lambda_handler(formatted as<filename>.<function_name>)Verify that Credentials and Region are correct and enter
{}in the Input field.Select
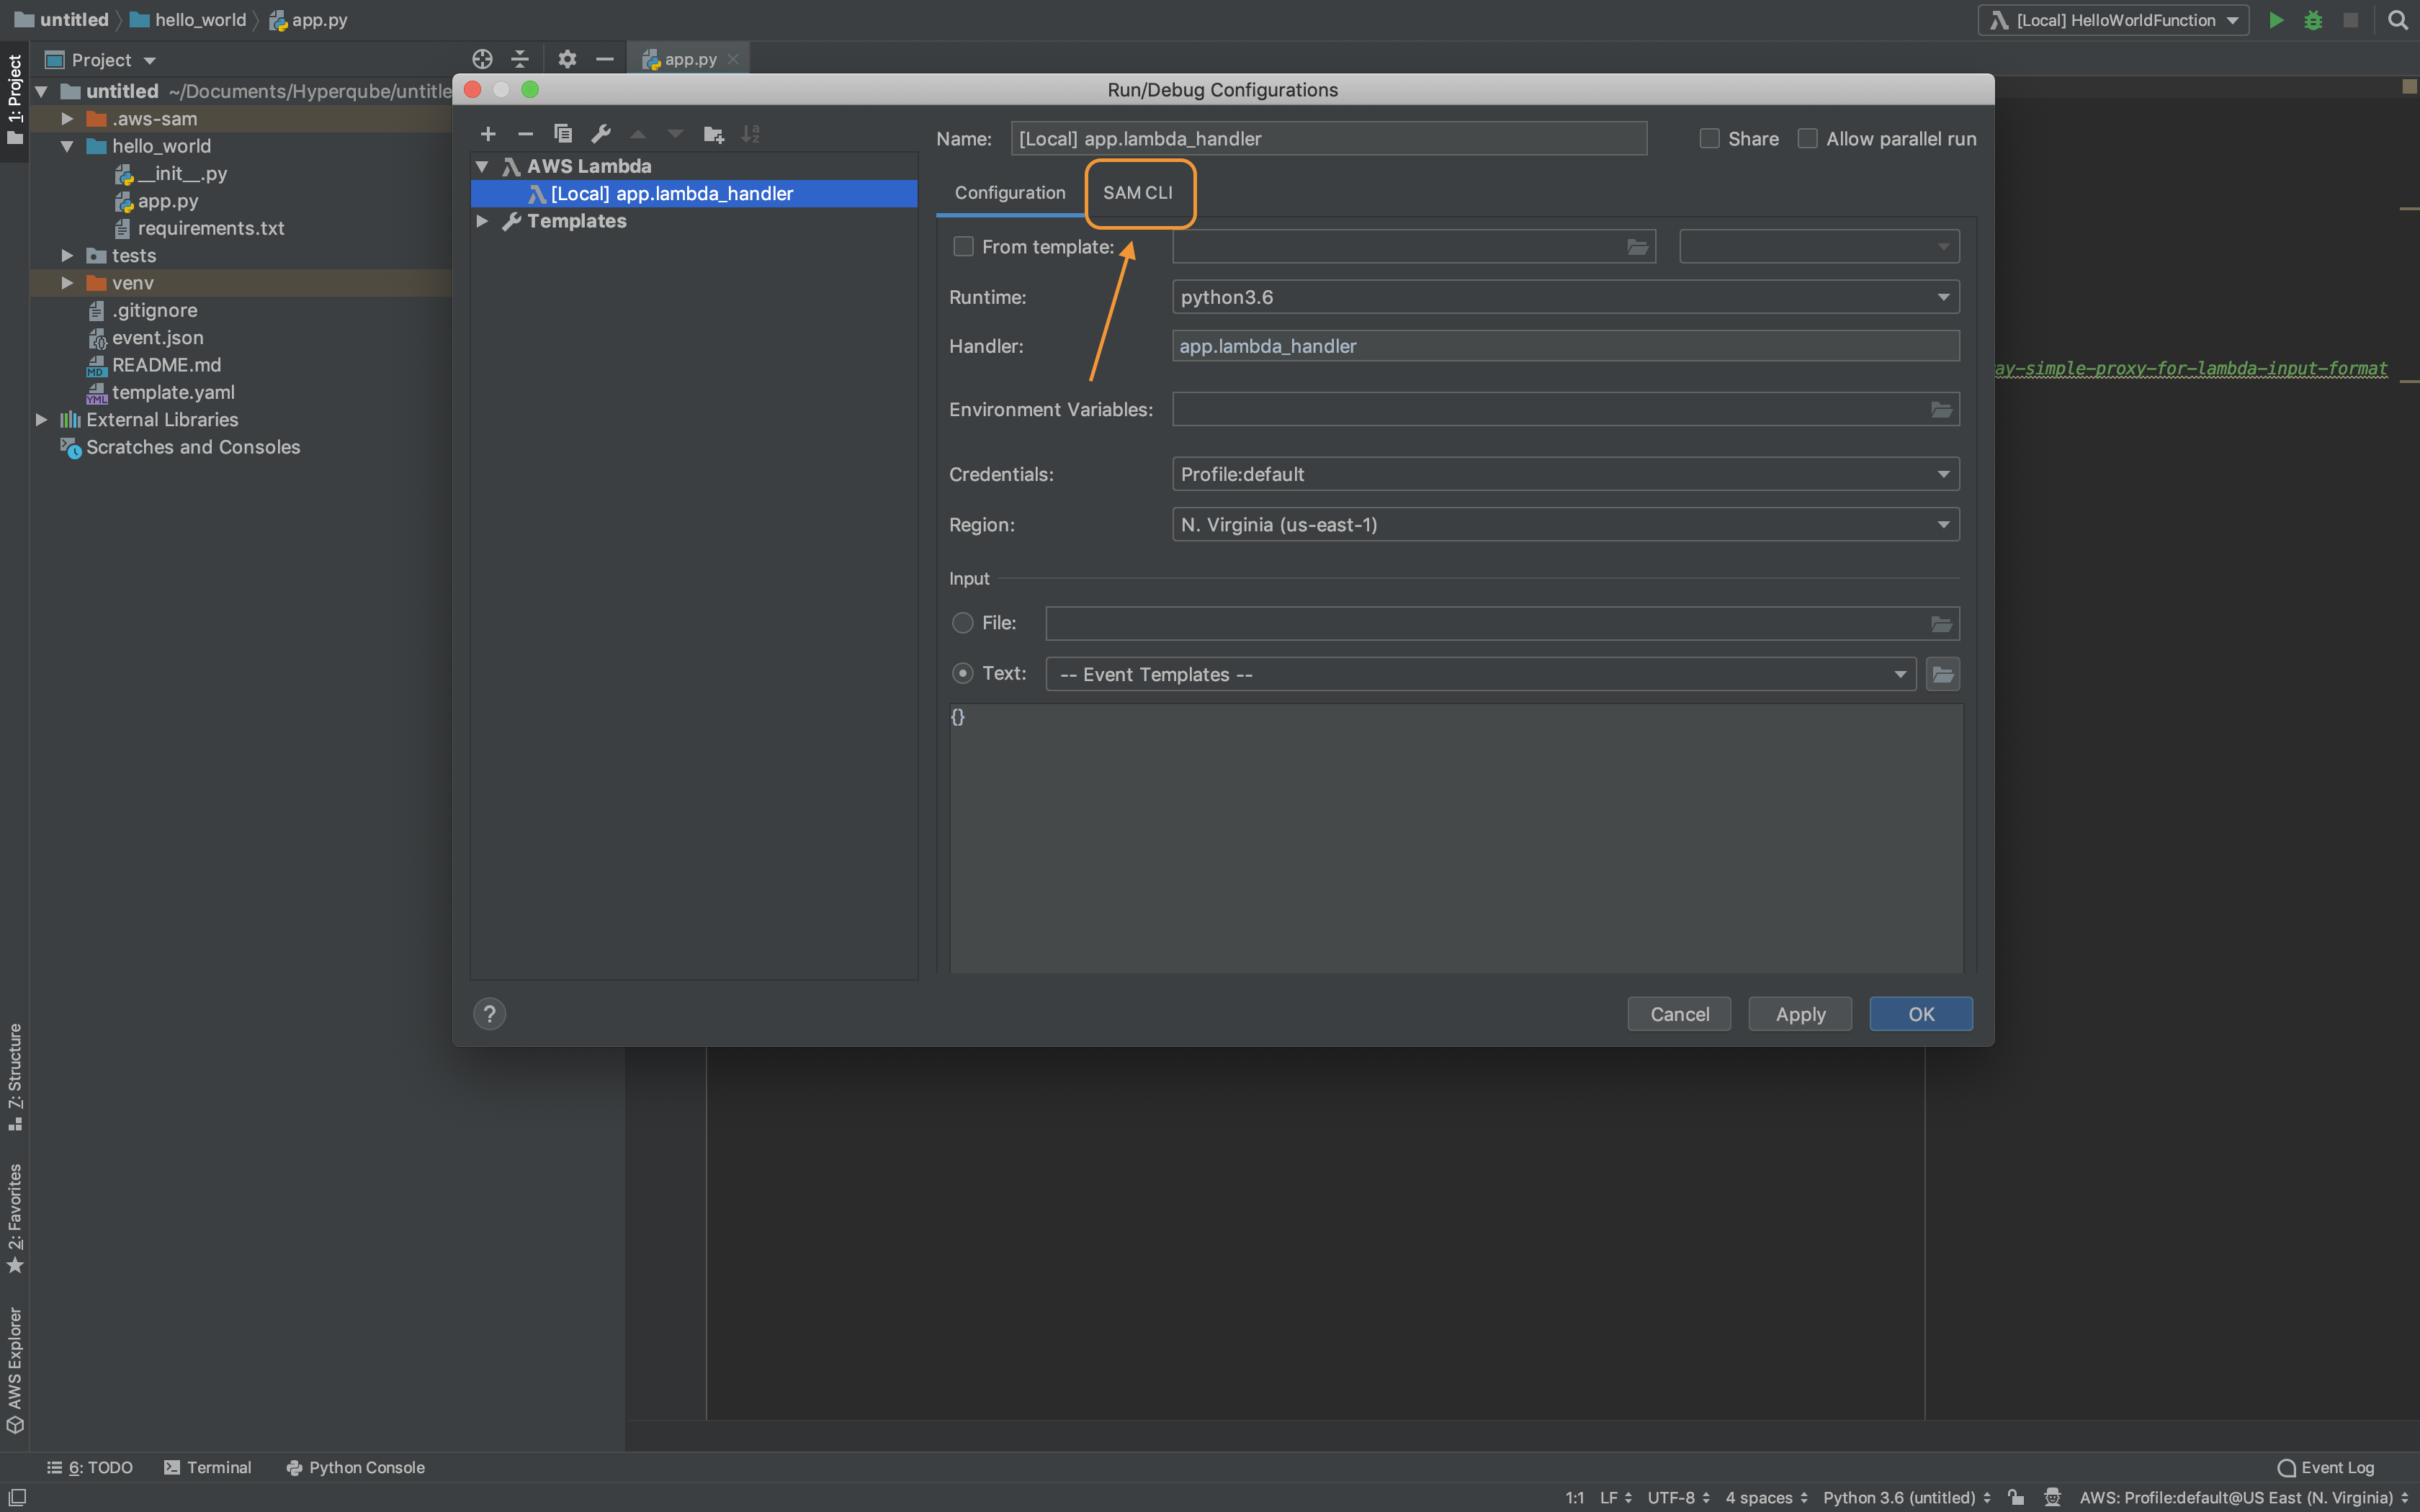
SAM CLIthen checkBuild function inside a container.

This enables the --use-container flag which helps resolve dependency issues when you add new modules during development
Run function with Run > Run [Local] app.lambda_handler or click the AWS symbol next to the lambda_handler() definition then Run [Local] app.lambda_handler
When running the function for the first time, fetching the Docker image will take some time.

The Hello World Template should return a status code 200
Deployment
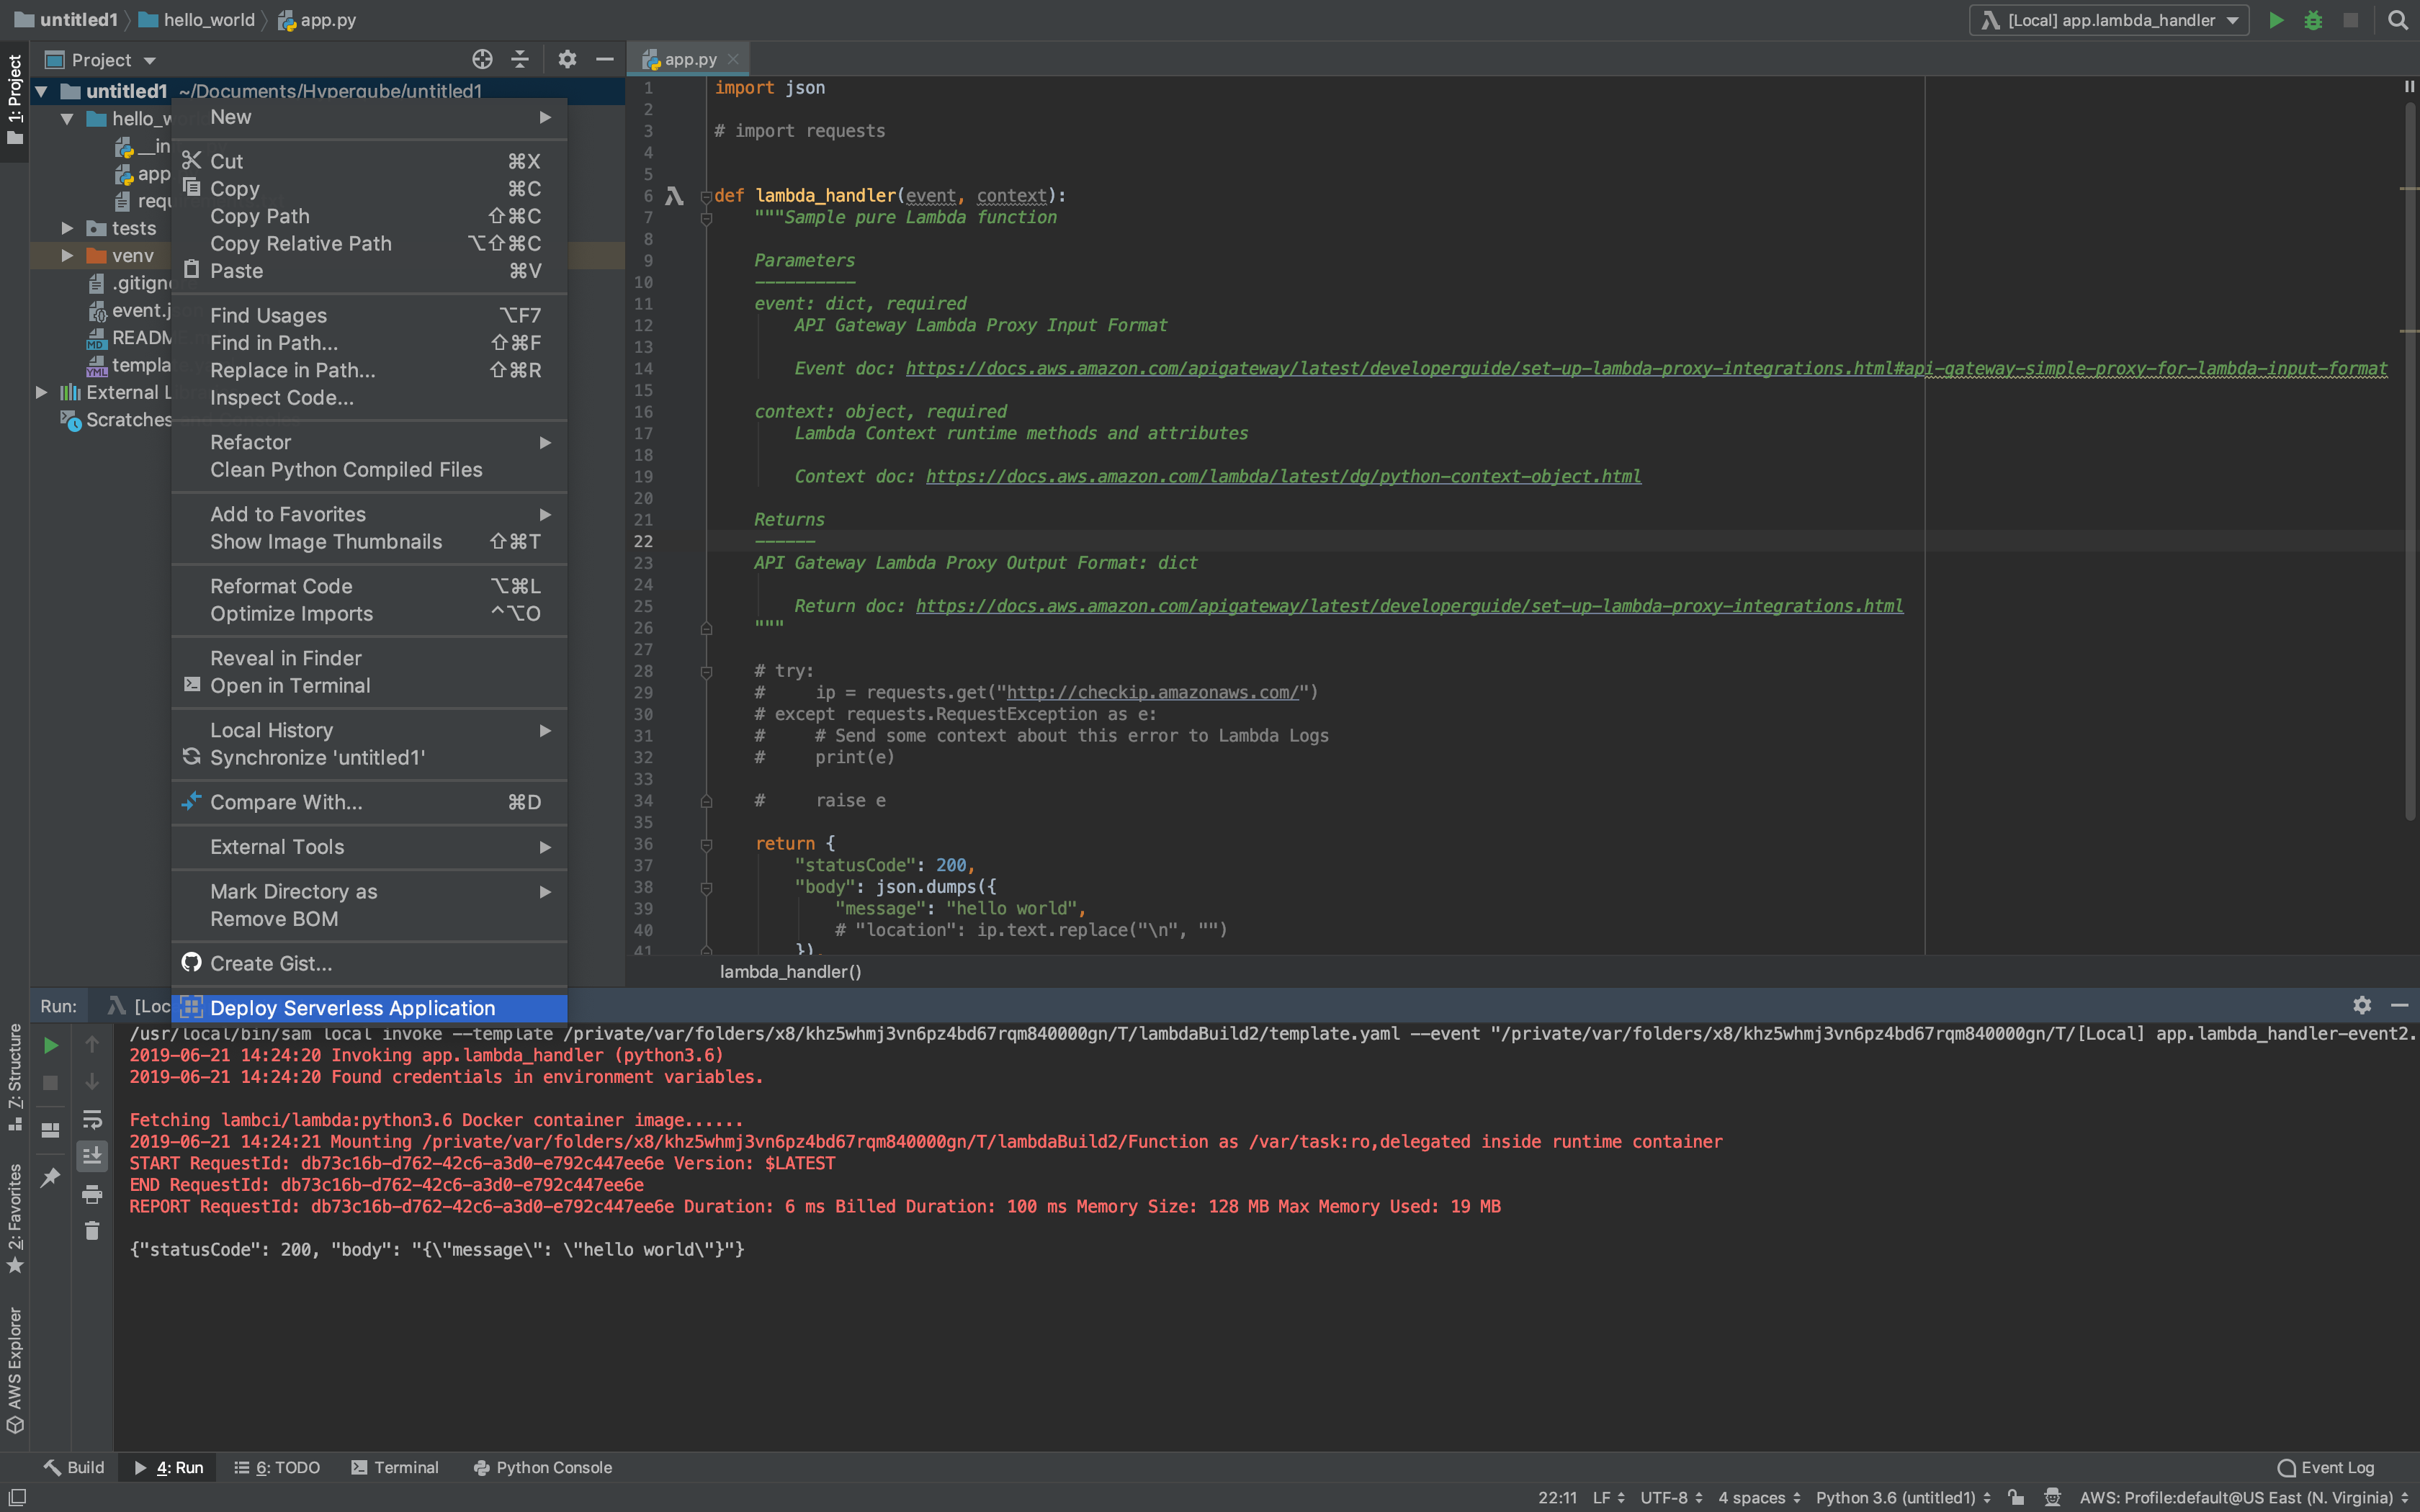
Right-click on the root folder and select Deploy Serverless Application

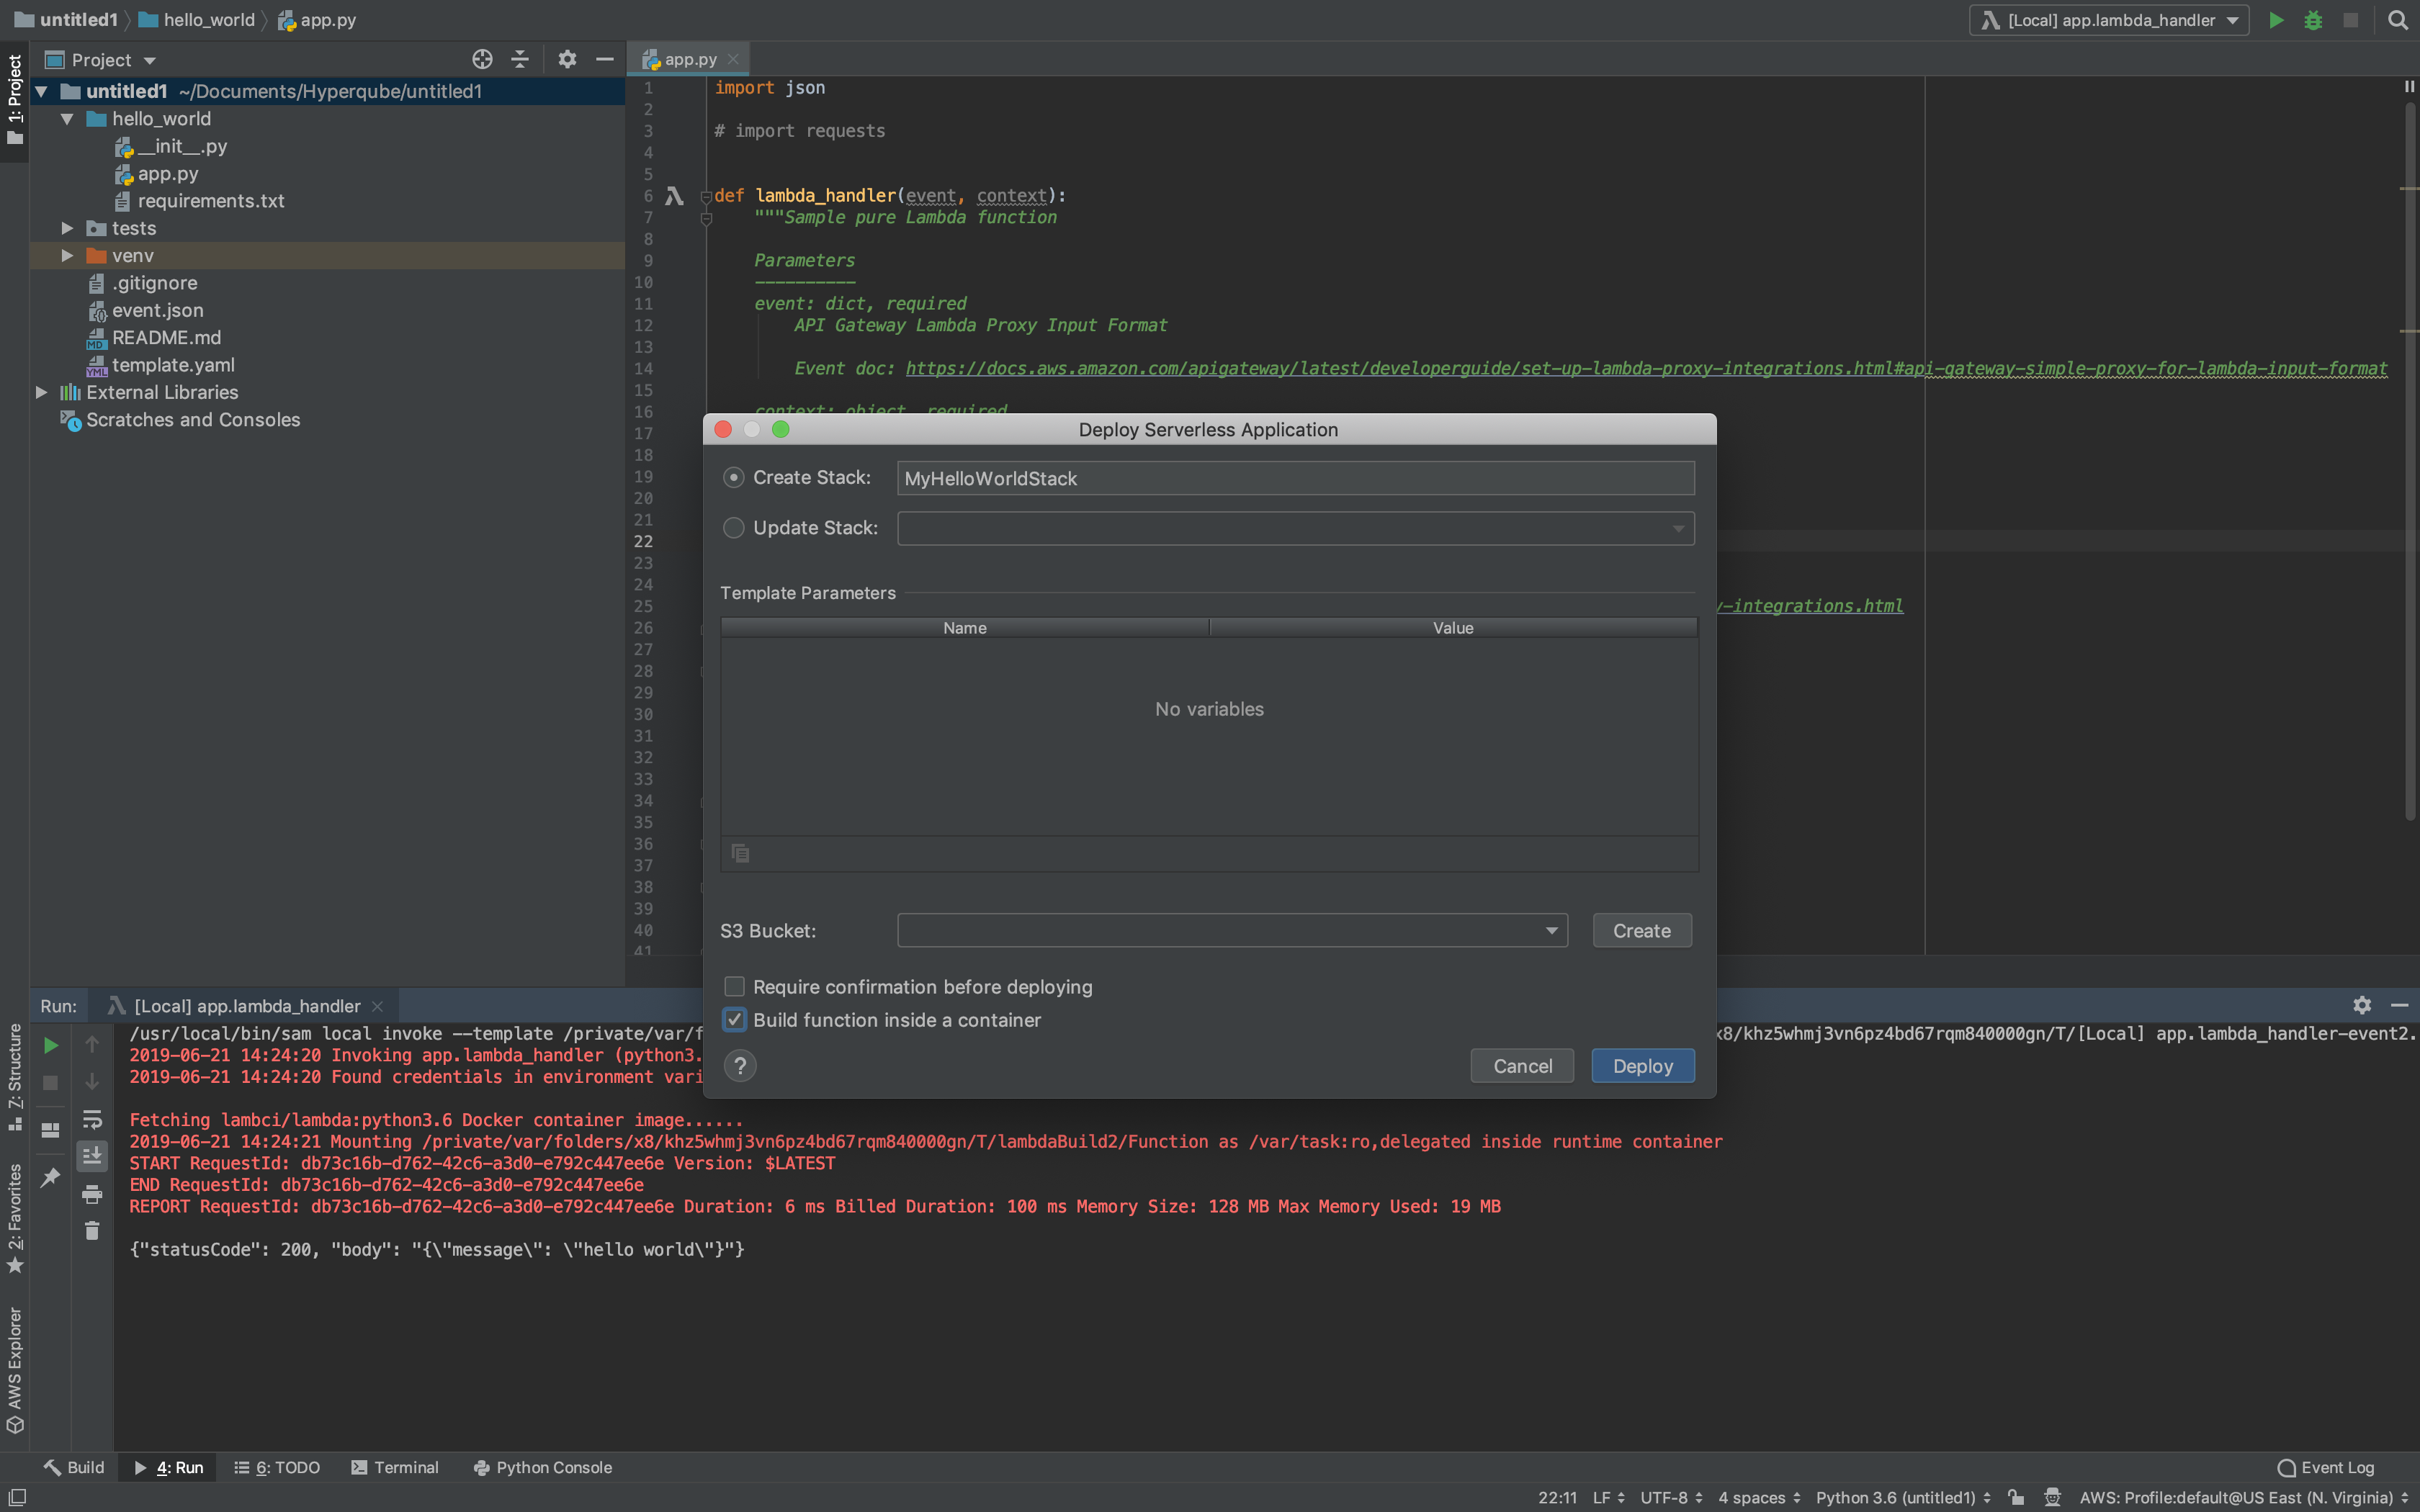
Select
Create Stackand enter a name for the CloudFormation stack. If the name is not unique within the AWS namespace, a unique string will be appended to your entry.Check
Build function inside a container

Click Deploy and a CloudFormation stack will be created in the region you specified!
Opinions expressed by DZone contributors are their own.

Comments