Advanced Load Testing Scenarios With JMeter (Part 3): Top 4 Timers
In part three of this series, see which four timers work well with JMeter for better control during your load testing.
Join the DZone community and get the full member experience.
Join For FreeWelcome to part three of the “Advanced Load Testing with JMeter” series. If you missed part two, which explained Data-Driven Testing and Assertions, check it out here.
In this part, we will go over the top four recommended Timers, as they are the most useful for common testing needs . Timers enable us to incorporate the natural delays users make into our tests.
JMeter offers many different timers. In this blog post we will go over the four types we recommend. For a more comprehensive list and explanations, see here.
To see the full JMeter Timer List, click on the Thread Group -> Add -> Timer.
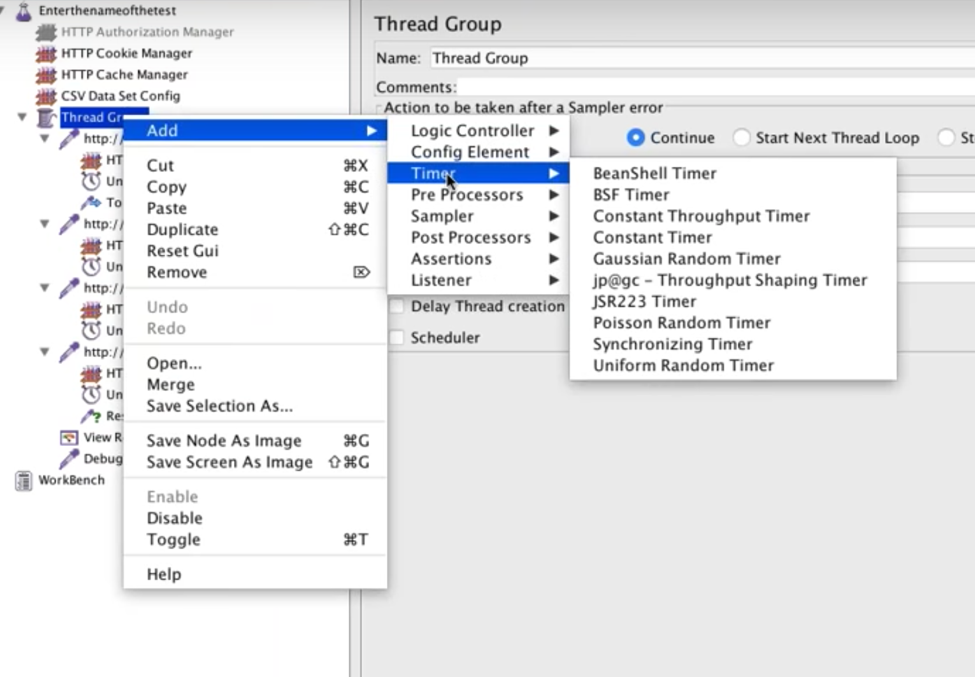
1. The Uniform Random Timer
We highly recommend using the Uniform Random Timer. This is also the timer the BlazeMeter chrome extension recorder adds. Its main advantage is that it can simulate different delay lengths. This helps simulate realistic user behaviour on the web page.
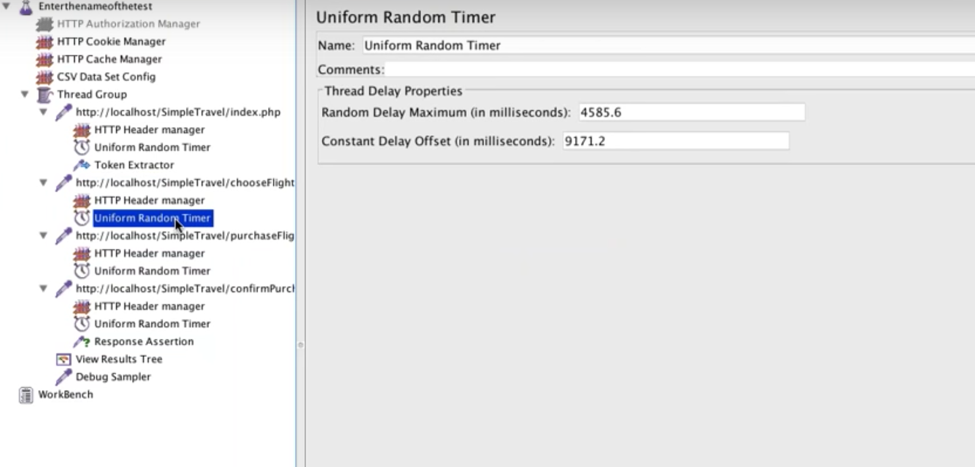
The Uniform Random Timer enables you to insert two parameters:
1. A constant delay that will always occur.
2. A random delay that occurs randomly.
Together the two parameters create a range of optional pauses that JMeter will incorporate into the test. In this example, the threads will pause anywhere between ~9 seconds to ~14 seconds before the request it’s placed under is sent.
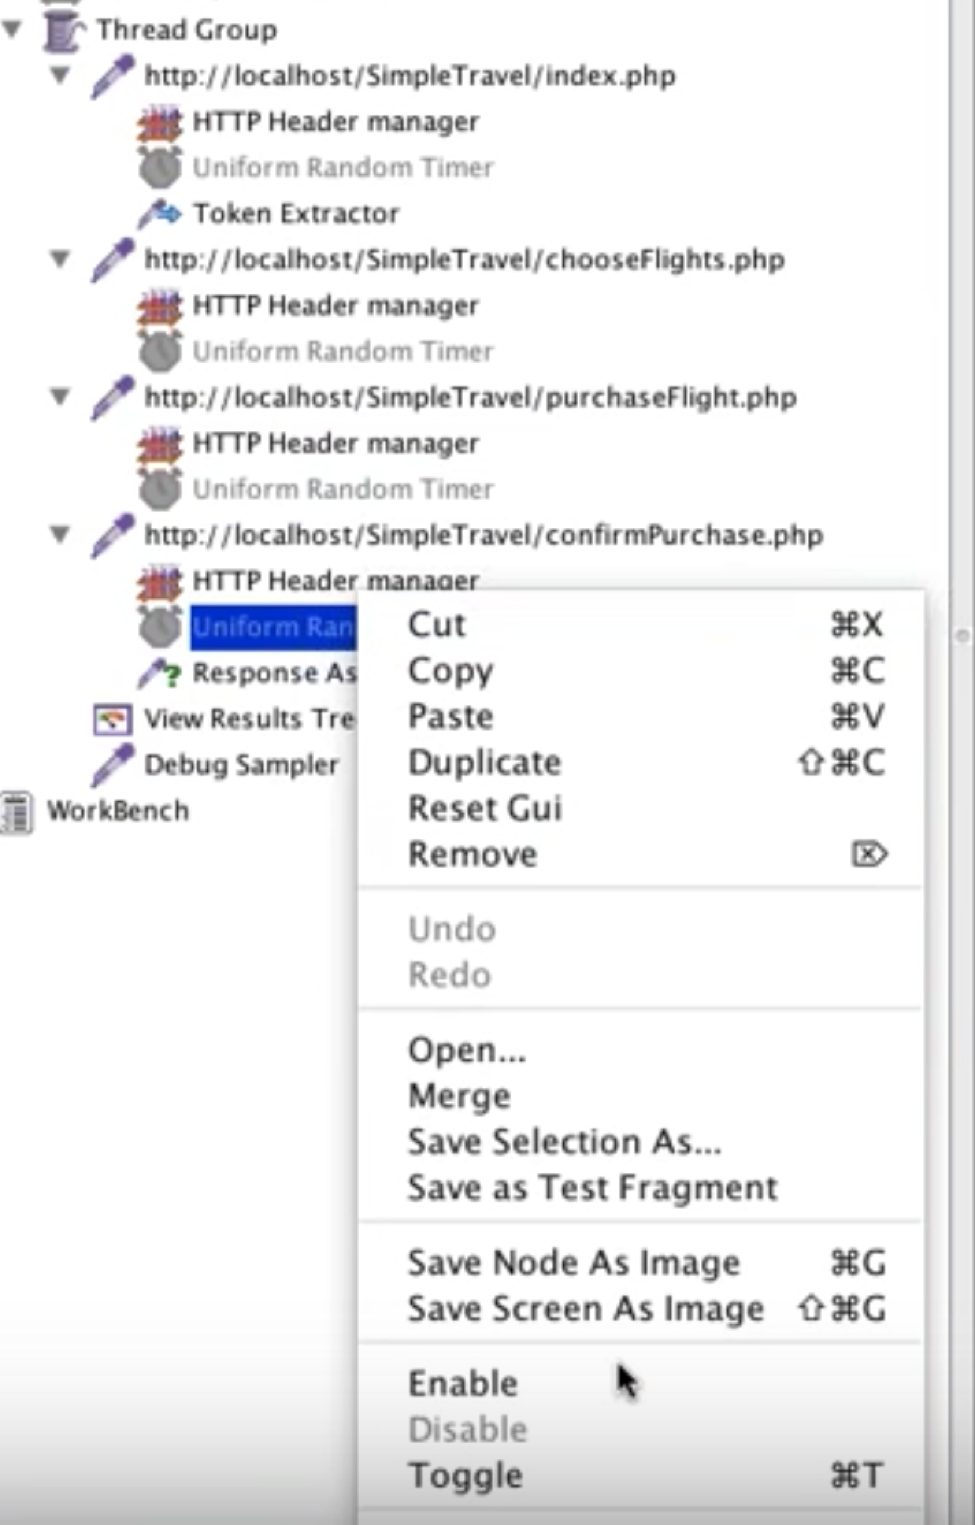
While each sampler has its own Uniform Random Timer, you can turn them all off:
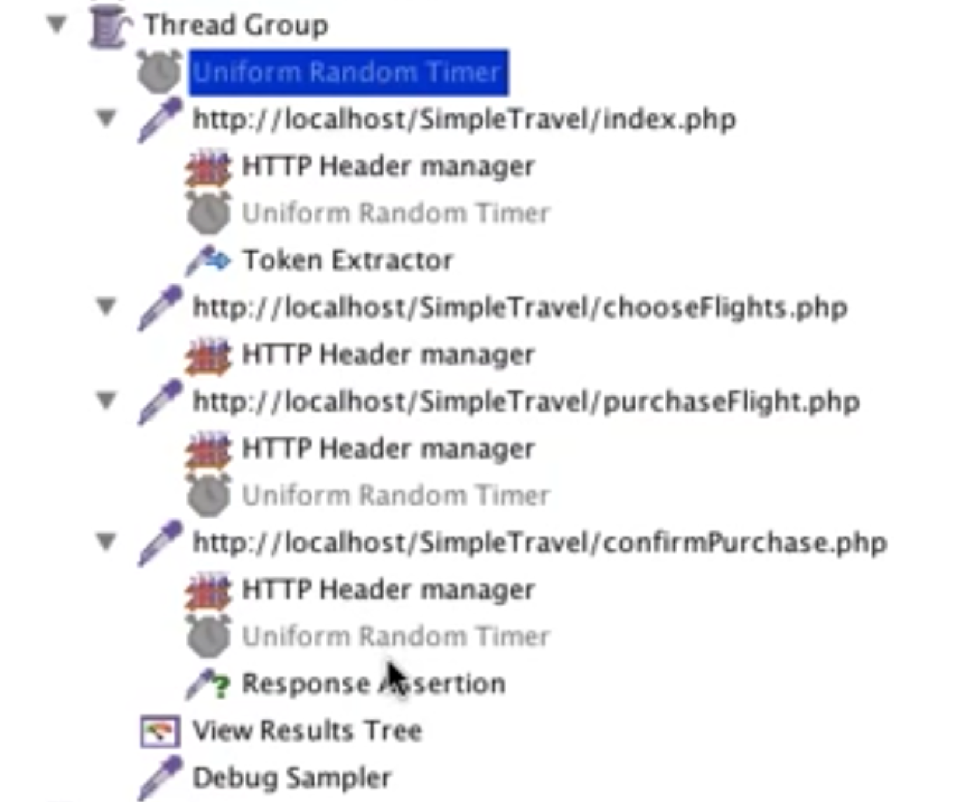
After turning them off, you can move the one you want above the thread group. Its parameters will now run for each sampler. A timer will be executed before all the requests in the scope it’s in.
2. The Constant Timer
The Constant Timer also simulates delays between requests, but it’s used for adding a permanent delay as opposed to a randomized delay.
In this example, the constant delay added is 300 milliseconds long.

This timer will apply to every single request. If requests include additional timers, the delays will add up.
3. The Constant Throughput Timer
The Constant Throughput Timer doesn’t measure user delays but rather limits the requests per second by adding delays between the requests. This timer enables you to see what the server does and how it functions under a specific request-per-second rate, which is another important way to discover bottlenecks.
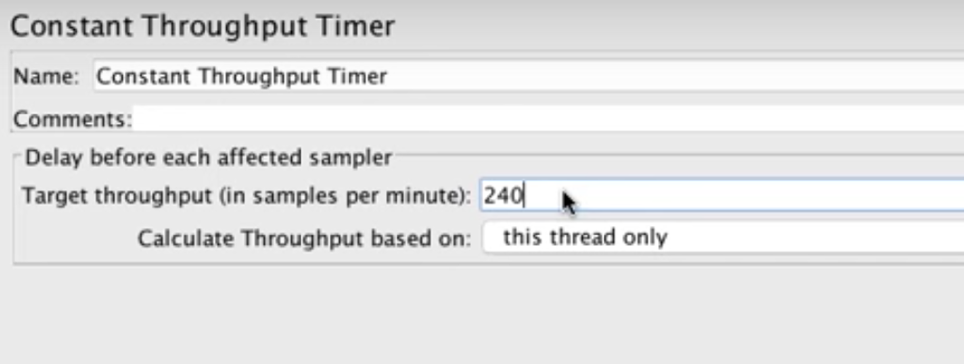
(Note that we have to adapt from requests per second to requests per minute).
This timer can also be modified on the fly, so if you monitor your test in real time and you notice that the server is handling X requests per second, then you can increase it to X+100 and see how it endures under the new hit rate. For detailed explanations on modifying the Constant Throughput timer on the fly, please refer to this article.
This timer can be applied for various threads configuration:

To view Throughput more accurately we need to add the Aggregate Listener.
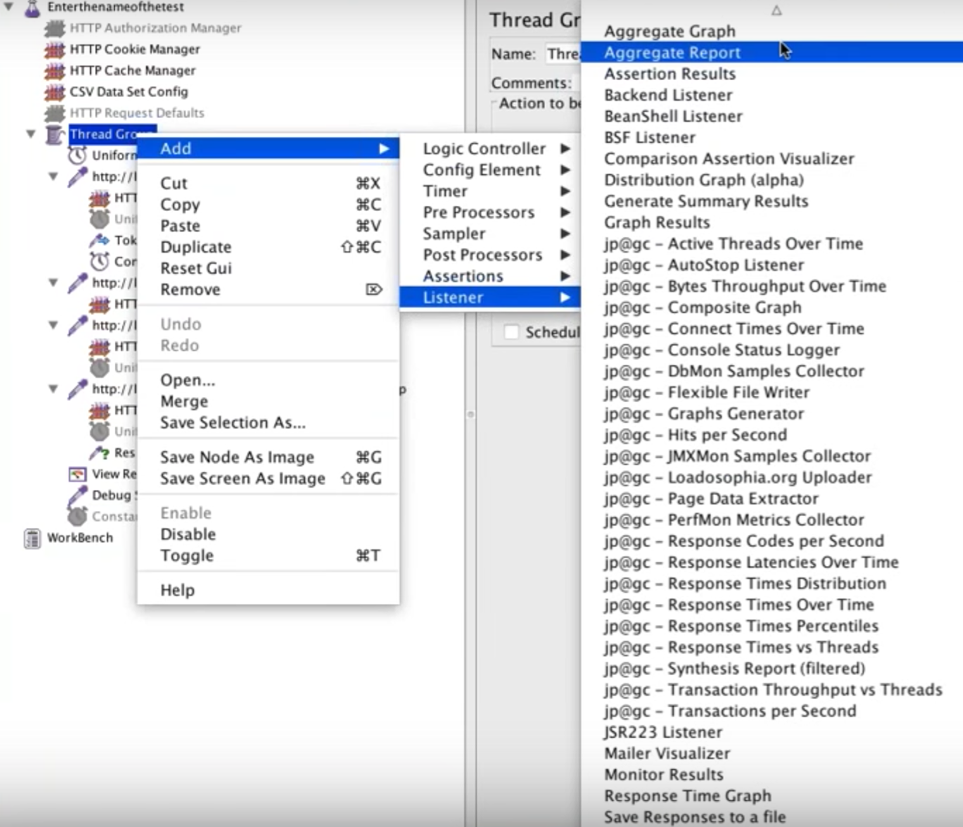

Now run the test. It might take some time to get to its target.
4. The Synchronizing Timer
The Synchronizing Timer stops all threads when hitting the tested Number of Virtual Users, and then has them all perform the same action at once. This Timer is useful for extra stress testing. In this example, we will test 20 users simultaneously purchasing a flight ticket.
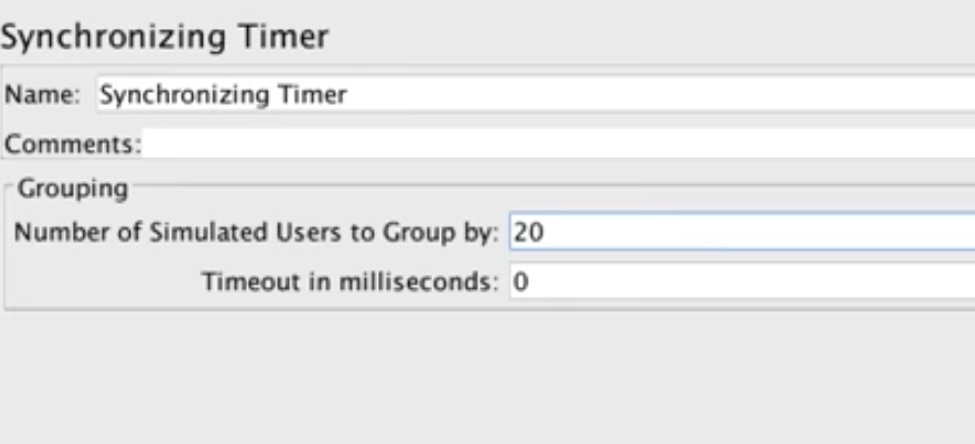
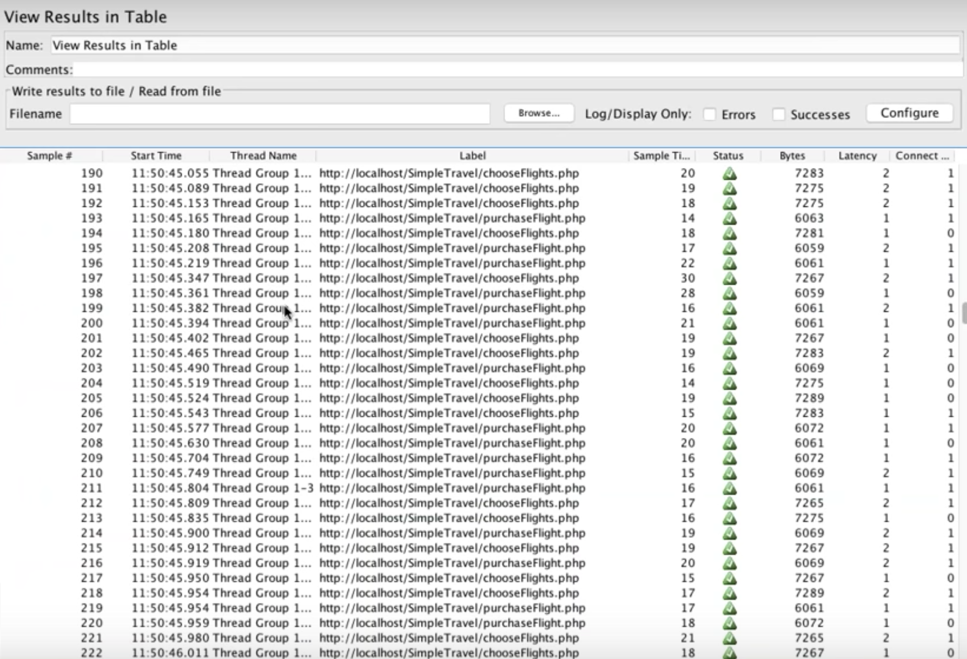
Add the ‘View Results in Table’ Listener. See how all the flight purchasing is occurring at approximately the same millisecond:
Congratulations! You are now ready to use Timers. Stay tuned for next time, for our final blog post in this series.
Published at DZone with permission of Noga Cohen, DZone MVB. See the original article here.
Opinions expressed by DZone contributors are their own.

Comments