A Beginner's Guide to Denodo
Join the DZone community and get the full member experience.
Join For Free
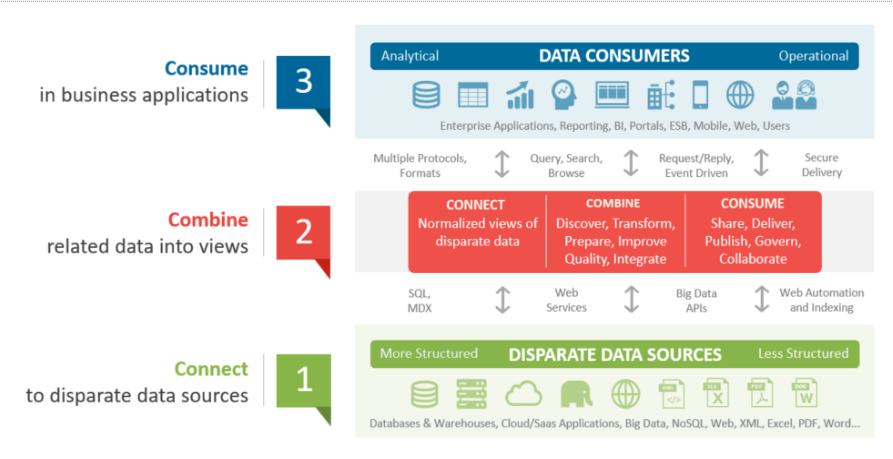
Data Virtualization is a layer to combine real-time data from disparate data sources and make data available to businesses without sharing any technical aspects (e.g. data source, data structure, data center, database, etc.). Denodo works on the "Three Cs principle."
Denodo’s 3 Cs Principles
Connect — Connect to any data source (e.g. databse, files, APIs etc.).
Combine — Since the motive of data virtualization is to gather data from multiple sources and combine them to fulfill a business requirement, this layer is meant to cater exactly to that purpose. This layer expects a developer to define the data transformation and combination to meet business requirements.
Consume — Finally a medium/way to make real-time data available to the data consuming platform. Denodo supports a variety of ways to expose data to consumers (e.g. web services (SOAP/REST), JDBC drivers, and an ODBC interface).
Denodo Admin Tool Start Steps
Now, let’s learn about Denodo’s 3 Cs implementation hands-on. Until now, I assume that the Denodo installation is complete. If not, then please see the installation guide.
You may also like: Denodo Data Virtualization — Interview.
1. Launch Denodo Admin Tool After Installation
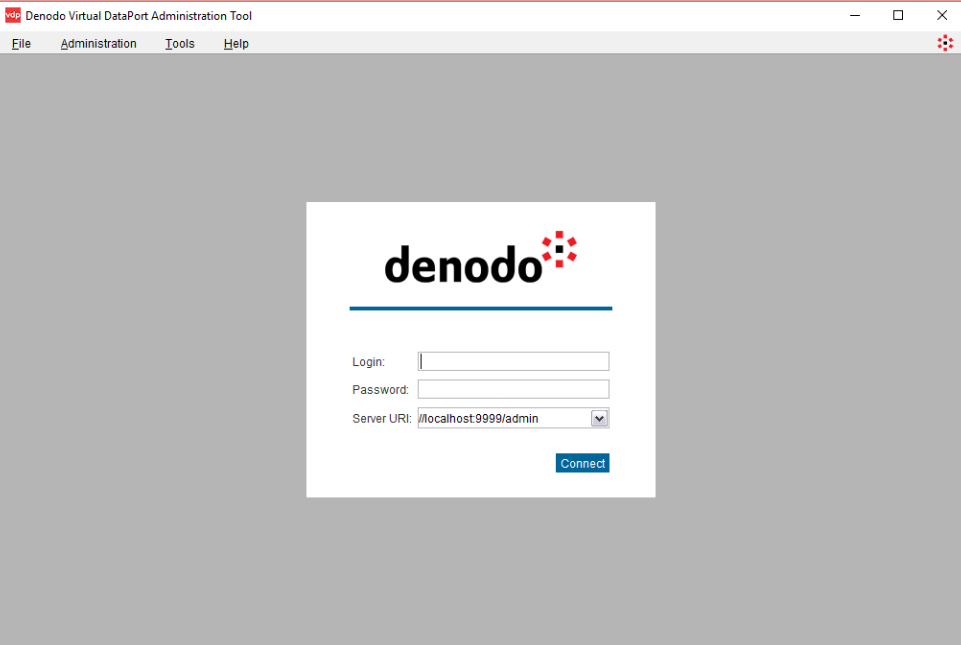
2. Login to the Denodo Admin Tool, provide user credentials, and click on "connect." You should be able to see the landing view on the admin tool (as shown below).
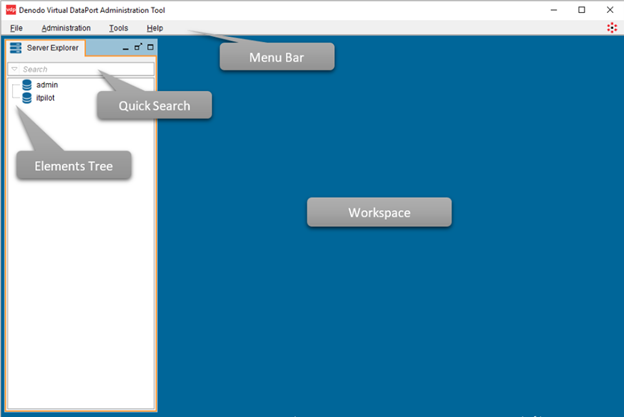
Note: Admin and itpilot are the default databases that Denodo uses. You should refrain from deleting them.
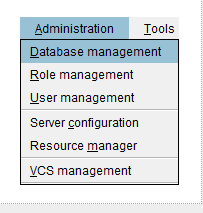
3. If you are starting a new project, the best way is to create a new database. To create a new database, go to Menu à Administration à Database management à New.
4. Denodo has its nomenclature divided into layers — Data Source, Base View, Derived View, Web Service. Create these folders in the new database with the mentioned nomenclature (Right-click on database name à New à Folder). This will help to maintain the different elements based on their functionality.
Connect
Let’s look at Denodo’s first C Principle, “Connect.” Here, we will create a data source to connect to the required data source.
Data Source Creation Steps
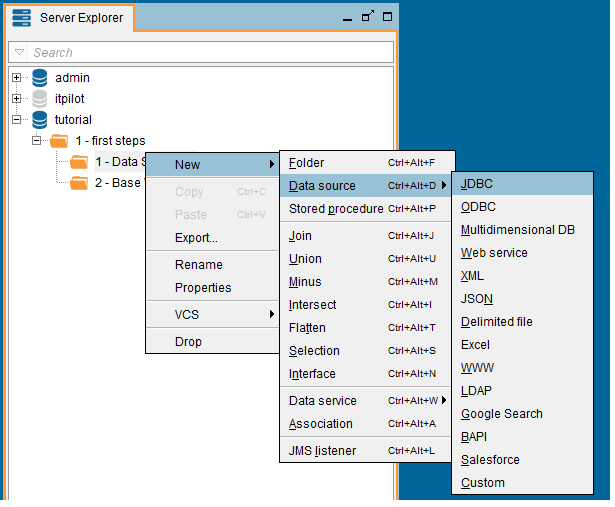
- Right-click on the Data Source folder --> New --> Data source --> JDBC.
![Creating new data source]()
- Name the data source.
- Select “MySQL 5” as the database adaptor.
- Change the Database URI to match the local MySQL installation.
- Enter the database login/password.
- Click on “Connection Pool configuration” and test the connection “Test connection."
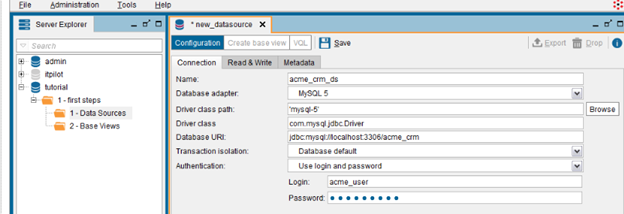
Note: Until now, we've worked exclusively with relational data sources, but Denodo also supports other data sources, such as files, NoSQL databases, APIs, etc.
Combine
This is the second major C principle. We will learn to create a base view in this section. The base view will connect to the data source created in “Connect” and provide a different variety of operations that can be performed on Base Views to create Derived Views.
Base View Creation Steps
- Double click on the Data Source --> Create Base View.
- Select the table/view from which the base view should be created.
- Select the columns that should be part of the base view. Here, the developer can control the information that he wants to expose on the Base View.
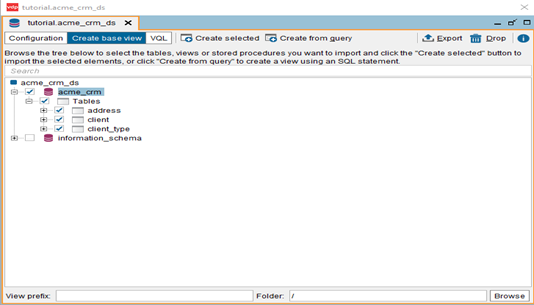
Base View Testing Steps
- Right-click on Base View --> VQL Shell --> Select... --> Execute.
- You should see a select query on the right side of the element tree, which should give real-time results.

Note: Once the Base View is created, Derived Views can be created by querying single/multiple Base Views.
Derived Views
Derived Views are simple views that are created by using single/multiple Base Views combined with different operations like JOIN/UNION/MINUS etc.
Join Operation Steps
- Right-click on Base View--> New --> Join. This will open a new view window.
- You can drag and drop the views from the element tree.
- Drag the desired join column from one view and connect it to the join column of other views. Since multiple join operations are supported by Denodo, you can join multiple views to get the required result. See the screenshot below where the client and address are joined on
Client_id.Clientandclient_typeare joined onclient_typeandcode.
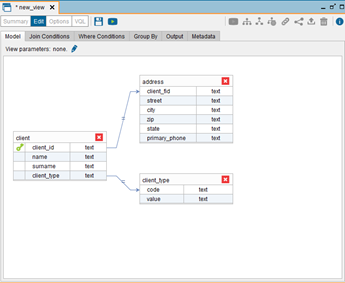
4. For selecting only the required columns out of these three views, click the Output tab and remove the non-required columns by using the checkbox.
5. Rename the view to a logical name and click on the save button or ctrl + s.
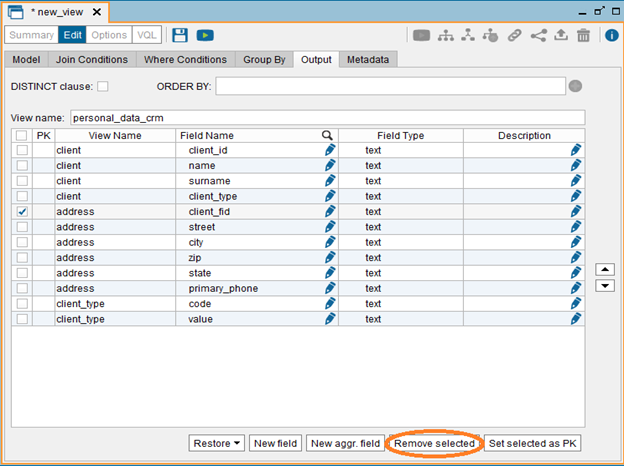
Apart from the JOIN Operation, Denodo tool also provides many more relational operations: UNION, PROJECTION, SELECTION, AGGREGATION, MINUS/INTERSECTION, FLATTEN
New views can be created by using similar steps as above Right-click-New Operation
Consume
This is the third important C principle of Denodo. This principle’s implementation would make real-time data available to business users/enterprise applications.
Let’s see how Denodo will make the data available for user consumption. Denodo works on the client-server architecture. It provides JDBC drivers, ODBC interface, RESTful Web Services (with XML, HTML, JSON outputs)
Here, I am explaining the “how-to” for Denodo’s RESTful Web services. Denodo web services use HTTP and are based on REST (Representational State Transfer) architecture principles.
- Define a set of operations using HTTP verbs (GET, PUT, POST or DELETE).
- The format of the data returned is typically HTML, XML, or JSON.
- Every view in Denodo can be published as a REST web service to enable data access by external applications.
- Denodo also supports ODATA 4.0 web services as well.
Creating a Web Service
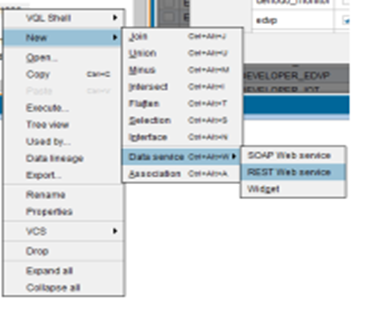
- Right Click on the Derived View/BaseView --> New --> Data services --> REST Web Service.
![Selecting REST Web Service]()
- This will show you the view from which you created the web service. Multiple views can be added as part of a single web service on use case Demand.
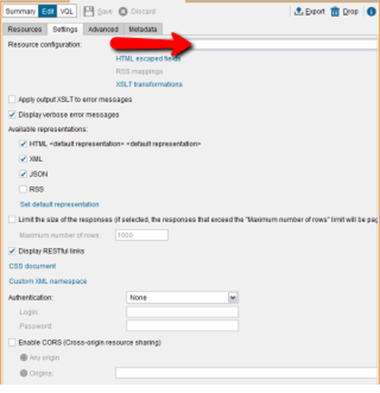
- Provide a logical name to your web service and select the required data representation from JSON/XML/HTML.
Deploying Web Service
- Right-click on web service Deploy.
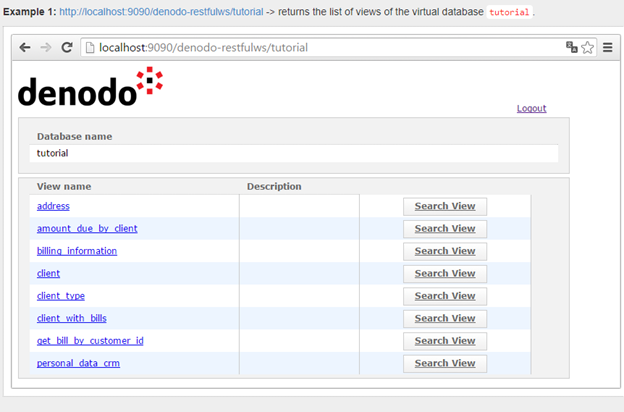
- This step will deploy the web service and will give you the URL on which web service is available.
Published at DZone with permission of Priyanka Mudgal. See the original article here.
Opinions expressed by DZone contributors are their own.

Comments