7 Easy Steps to Generate Both XML and HTML Reports in Cypress
This tutorial explains an easy way to generate merged XML and HTML report in cypress Automation Framework.
Join the DZone community and get the full member experience.
Join For FreeThe common requirement when we are working with automation tests in we need to generate both XML and HMTL reports. When it comes to Cypress it relies on Mochawesome reporter. In this article, I will explain to you a simple way to generate HTML and Junit XML reporter in your Cypress end-to-end Automation framework.
If you look over the internet there are many articles but for beginners, it's very complicated Since there is some complexity involved.
This tutorial also answers the Questions commonly searched on the internet
How to Generate XML and HTML files in Cypress?
How to configure HTML and XML files with cypress?
How to Integrate HTML and XML files with Cypress?
How to Generate and Merge Junit XML file using mocha Junit reporter in Cypress?
How to Configure reports into Cypress End to End Automation framework?
This article also talks about merging Junit XML file into a single file
Let’s get started.
Generating both XML and HTML reports with Screenshots and Merging all XML files in Cypress
Assumptions:
Here the assumption is you have already working cypress framework and you are looking for integrating both Junit and HTML reports into your cypress.
Step 1: Download Required npm Packages
We need to download few npm packages
npm install cypress-mochawesome-reporter junit-report-merger mocha-junit-reporter cypress-multi-reporters mocha
cypress-multi-reporters: This package is used for configuring multiple reports in our case Junit reporter and HTML reporter.
mocha-junit-reporter: Mocha Junit Reporter generates Junit XML file for each spec.
junit-report-merger: Since the Mocha Junit Reporter generates a JUnit XML file for each spec we need to merge them all at the end to create a single XML file.
cypress-mochawesome-reporter: This package helps to generate HTML reports.
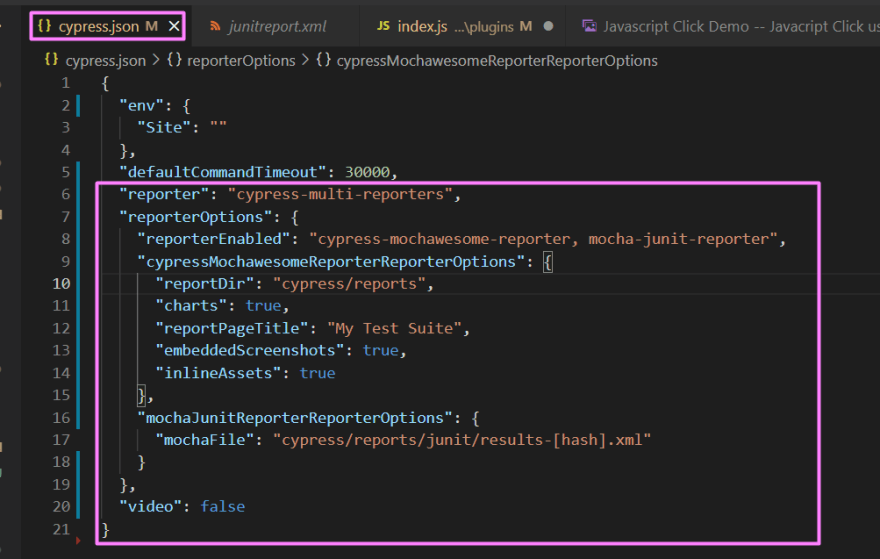
Step 2: Configure Reporters in cypress.json File
Navigate to Project Root Folder > open cypress.json
Copy and paste the below code.
cypress.json file
"reporter": "cypress-multi-reporters",
  "reporterOptions": {
    "reporterEnabled": "cypress-mochawesome-reporter, mocha-junit-reporter",
    "cypressMochawesomeReporterReporterOptions": {
      "reportDir": "cypress/reports",
      "charts": true,
      "reportPageTitle": "My Test Suite",
      "embeddedScreenshots": true,
      "inlineAssets": true
    },
    "mochaJunitReporterReporterOptions": {
      "mochaFile": "cypress/reports/junit/results-[hash].xml"
    }
  },
  "video": false
Screenshot:

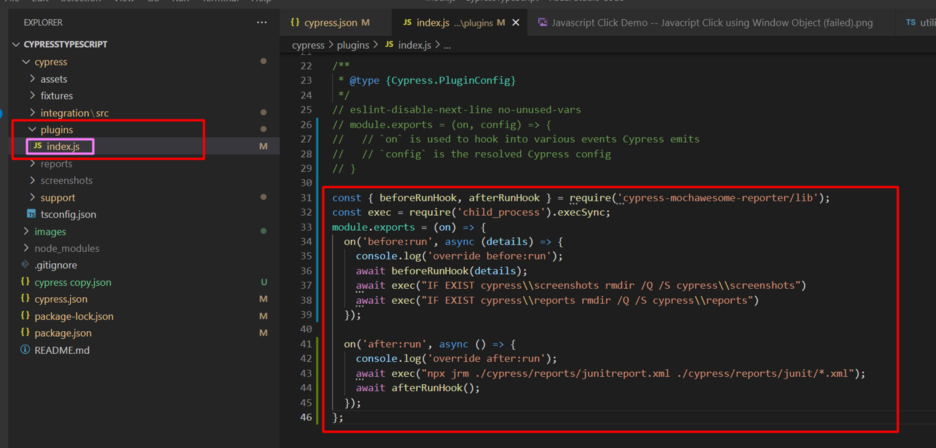
Step 3: Configure plugin/index.js File
From your Project root folder > open cypress folder > open plugin folder > open index.js file
Copy and paste the below code.
//index.js inside plugin folder
const { beforeRunHook, afterRunHook } = require('cypress-mochawesome-reporter/lib');
const exec = require('child_process').execSync;
module.exports = (on) => {
  on('before:run', async (details) => {
    console.log('override before:run');
    await beforeRunHook(details);
    //If you are using other than Windows remove below two lines
    await exec("IF EXIST cypress\\screenshots rmdir /Q /S cypress\\screenshots")
    await exec("IF EXIST cypress\\reports rmdir /Q /S cypress\\reports")
  });
on('after:run', async () => {
    console.log('override after:run');
    //if you are using other than Windows remove below line (having await exec)
    await exec("npx jrm ./cypress/reports/junitreport.xml ./cypress/reports/junit/*.xml");
    await afterRunHook();
  });
};Screenshot:

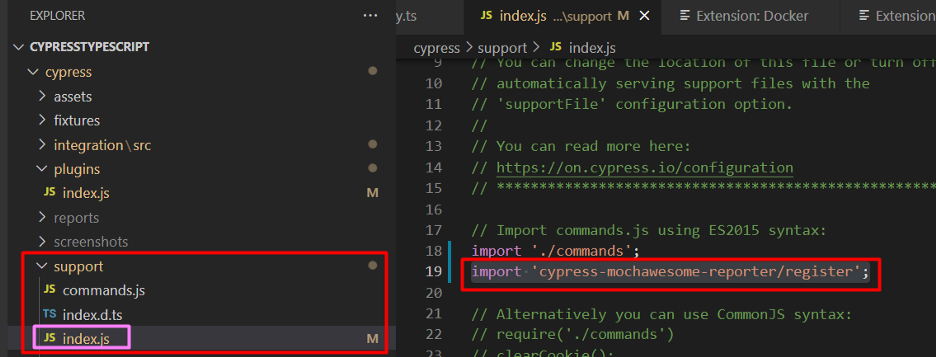
Step 4: Add an Entry Into support/index.js
From your Project Root folder > Navigate to cypress folder > open support folder > open index.js file
Add below code snippet into index.js
//index.js inside support folder
import 'cypress-mochawesome-reporter/register';
Step 5: Run Your Test
Run your test with either npx cypress run command.
Or, If you are already having the package.json script command use it to run your specs.
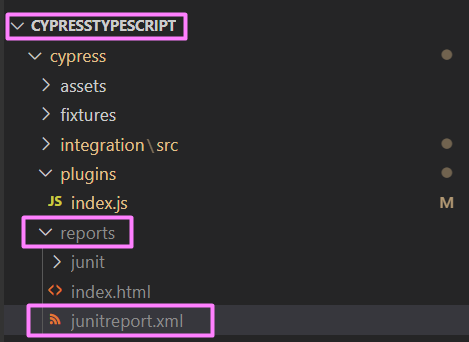
Step 6: Viewing HTML File
The Complete generated HTML file is located in the below location
Project Root folder > cypress > reports > index.html

You can use this XML file when you integrate with CI/CD either Jenkins, Azure DevOps, or any other tools.
Hope you enjoyed this…
Encourage me to write more articles and help the community.
If you are looking for any help, support, guidance contact me on LinkedIn|https://www.linkedin.com/in/ganeshsirsi/.
Opinions expressed by DZone contributors are their own.


Comments