Windows Subsystem for Linux 2 (WSL2) for Dockerized .NET Core Application Development
Check out how you can use the recently-released version of WSL2 to run a Dockerized .NET Core app.
Join the DZone community and get the full member experience.
Join For FreeWith the announcement of Windows Subsystem for Linux 2 (WSL2), Microsoft started shipping a full-blown Linux kernel with Windows 10. With this, WSL2 came equipped with a plethora of goodies for Developers and WSL enthusiasts. Now that Windows 10 has a Linux Kernel in it, it is needless to say that it's the right time to the shift the gear and test the best of both worlds.
With that said, now you can install Docker in WSL2 and get a taste of a Linux-based Docker development experience. In this article we are going to setup WSL2 on your PC, install Docker and we will run a Dockerized .NET Core web app.
Get Your PC Ready for WSL2
Prerequisites
Get the Right Windows 10 Build
WSL2 is only available for Windows 10 version 1903, Release 18917 or higher. If you are Windows Insider then you have to download this release as a very first pre-requisite.
Enable Hyper-V
Follow this link if you haven’t enabled Hyper-V in your Windows 10.
Install WSL2
Now that the basic time-consuming part is done, time to setup WSL2. Fire up your PowerShell terminal in Administrative mode and run the below commands. This will enable the virtualization feature which will be used by WSL2
Enable-WindowsOptionalFeature -Online -FeatureName Microsoft-Windows-Subsystem-Linux
Next you have to find out your Installed Linux Distribution, so that you can set that distribution to work as WSL version 2.
wsl -l -v
If you do not have WSL installed already then click on this link and install your WSL.
Now run the command listed. This will convert your current Linux Distribution to WSL version 2. This step took 25 minutes for me to complete
wsl --set-version Ubuntu 2
Finally, if you want to use your WSL2 as the default version then execute the command below.
wsl --set-default-version 2
This completes your WSL2 installation to your Windows 10 PC. For a detailed installation guide check this out. Next is to install Docker on WSL.
Install and Run Docker on WSL2
Open your WSL2 terminal and check whether Docker is present in your system or not by executing –
docker --version
If you receive -bash: /usr/bin/docker: No such file or directory then you know that Docker is not present in your system and you are ready to install Docker in WSL2.
Step 1: Update your Linux software repository with:
sudo apt-get update
Step 2: Download Docker dependencies.
sudo apt-get install apt-transport-https ca-certificates curl software-properties-common

Step 3: Add Docker PGP key
curl -fsSL https://download.docker.com/linux/ubuntu/gpg | sudo apt-key add –

Step 4: Install the Docker Repository
sudo add-apt-repository "deb [arch=amd64] https://download.docker.com/linux/ubuntu $(lsb_release) -cs) stable"

Step 5: Update the software repository
sudo apt-get update
Step 6: Install the latest Docker version
sudo apt-get install docker-ce

This step completes the installation Docker on your WSL2. Now you have to do a quick check.
Step 7: Check Docker Version
To check whether Docker is installed properly or not, check the Docker version using this command docker --version. If you don’t get an error like – bash: /usr/bin/docker: No such file or directory and see the Docker version then you know that Docker is installed successfully.

Now that Docker is installed, you need to start the Docker service. To check whether Docker Service is running or not execute below commands
Step 8: Check Docker service status
service docker status
orsudo service docker status

Step 9: Running Docker servicesudo service docker start

Look for OK in your terminal. To re-verify the service status, use this command:
sudo service docker status

Step 10: Check Docker container and image status
If you want to know more information about running Docker images use:
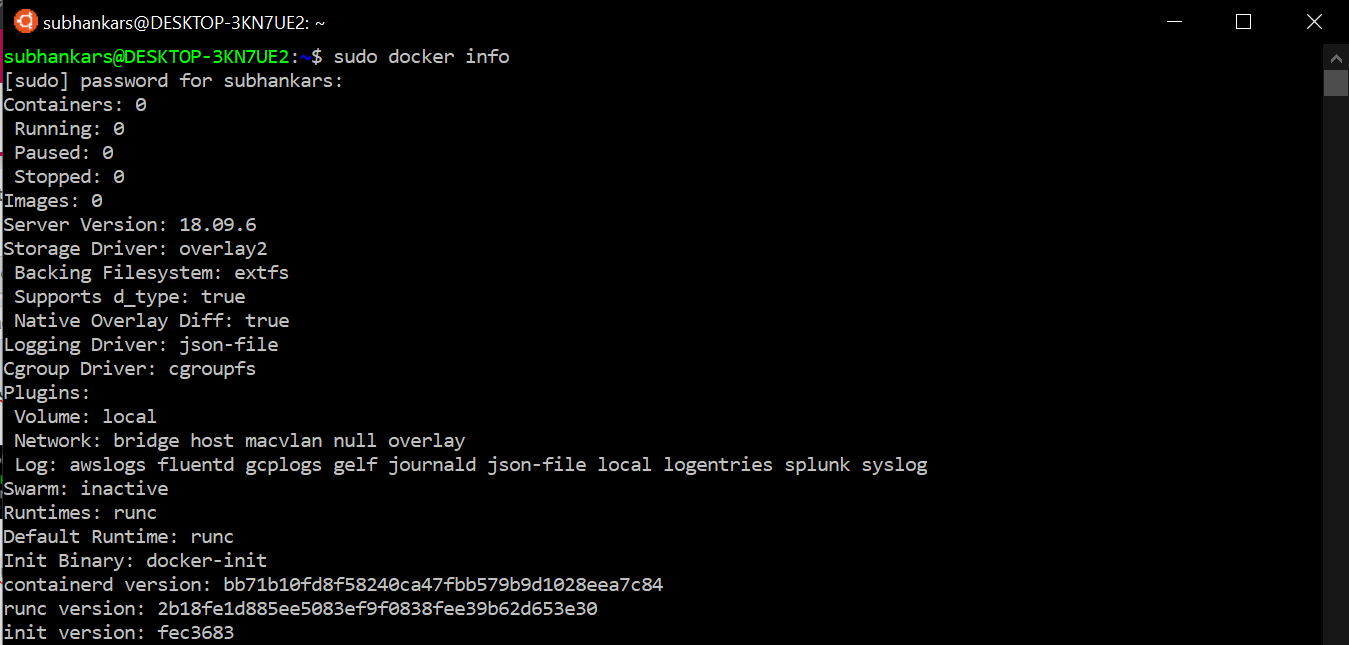
sudo docker info

or sudo docker ps

This will show you the status of all your image details. At this point in time, it won’t show anything as we haven’t created any Docker container yet.
In the next step, we are going to create a Docker container for the .NET core application and run it, and then we will re-visit these stats.
Note: You can run docker ps and docker info without sudo. If you get a socket error while running docker ps and docker info without sudo, then run sudo usermod -a -G docker $USER and completely logout from the terminal. Now you should be able to run these commands without sudo.
Dockerize Your .NET Core Web app
So far we have covered how to configure WSL, install Docker on it and run it. Now it’s time to Dockerize an existing .NET Core MVC application and run it.
For this example I have created a simple .NET Core app with an MVC template outside of WSL using
dotnet new mvc
Create a new directory named first-docker on WSL and copied the above .NET project contents. Opened a Visual Studio Code editor from the current directory. Added the following Dockerfile
FROM mcr.microsoft.com/dotnet/core/sdk:2.2 AS build-env
WORKDIR /app

# Copy csproj and restore as distinct layers
COPY *.csproj ./
RUN dotnet restore

# Copy everything else and build
COPY . ./
RUN dotnet publish -c Release -o out

# Build runtime image
FROM mcr.microsoft.com/dotnet/core/aspnet:2.2
WORKDIR /app
COPY --from=build-env /app/out .
ENTRYPOINT ["dotnet", "first-docker.dll"]
I’m calling this application as first-docker and hence the output dll is first-docker.dll. See Line 16. Added a . dockerignore file to exclude bin and obj folder. Added the following lines into it.
/bin
/obj
Now that the Dockerfile is added, it’s time to build the Docker container with all the .NET runtime along with building the project inside.
Use the following command in the WSL2 bash within the current working directory
docker build -t first-docker .
It will start installing the required package to build .NET Core Container as shown below:

On a successful build of the image, you will see something like this
To run your first Dockerized .NET Core app, execute the following command
docker run -d -p 8080:80 --name dotnetcoredocker first-docker

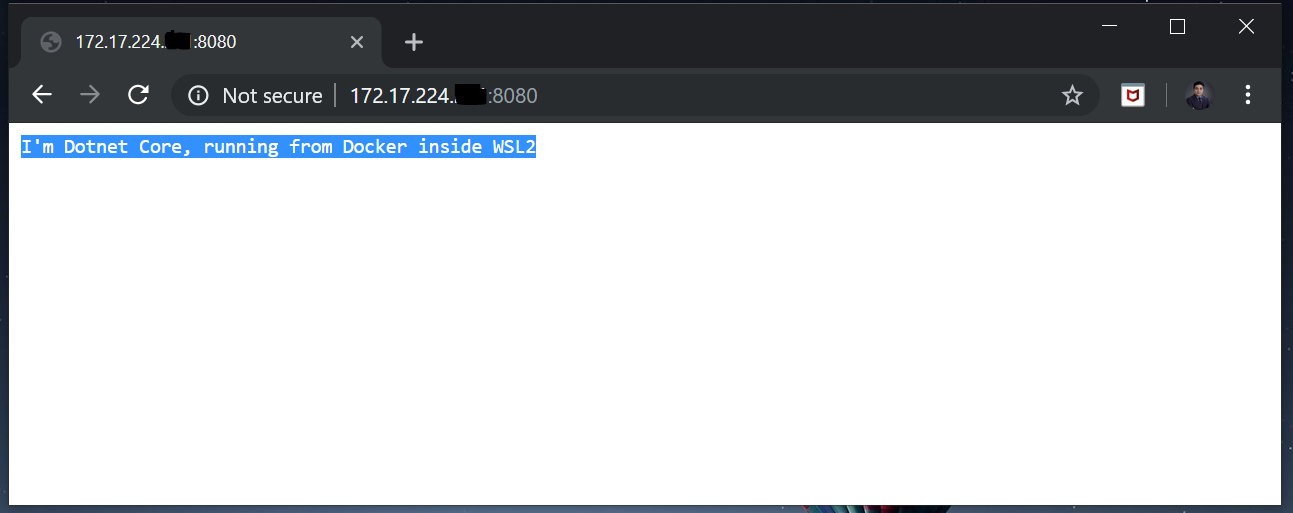
This will run the .NET Core MVC app and will start listening to the 8080 port. To access it from your Windows 10 browser you have to open the URL with the IP address. To get your WSL2’s IP use the following command
ip addr | grep eth0

Once you get your IP address type http://<ip_address>:port_no in a browser running on your Windows 10, and you'll have your first Dockerized .NET Core MVC Web App running on WSL2.
Note: With the initial release of WSL2, localhost wasn't supported, but with the release of Windows 10 Insider Preview Build 18945, it is made available.

Final check and wrap up
Now that your first Dockerized .NET Core application is running perfectly, on WSL2 let’s check few final things.
While running docker ps we have seen that there was no running container and also in the output of docker info command, the number of containers and images was 0.
While the Dockerized web application is running in the browser, let’s run those commands again and see the difference:
docker info
docker ps
Notice that the Container and Running instance count increased to 1 from 0. An image with name first-docker is running in a container named dotnetdocker and it’s listening to 8080 port as configured in the Dockerfile.
This completes the full circle, starting from Installing WSL2 in your Windows 10 PC, installing Docker, and finally running a Dockerized .NET Core Web application from WSL2. Enjoy your first Dockerized app on WSL2.
Explore Further
While you can use the above approach to set up your Docker environment in your PC, you can also use the newly launched Docker Desktop WSL 2 Tech Preview. With this Tech Preview release, Docker Desktop and the Windows Subsystem for Linux 2 (WSL2) uses Hypervisor in the background to run Linux containers on Windows 10. Read more about it.
Published at DZone with permission of Subhankar Sarkar. See the original article here.
Opinions expressed by DZone contributors are their own.

Comments