Write a Smart Contract With ChatGPT, MetaMask, Infura, and Truffle
Let’s put ChatGPT to a web3 test and see what kind of smart contract can be created using MetaMask, Infura, and Truffle. Will it be mainnet ready?
Join the DZone community and get the full member experience.
Join For FreeYou’ve probably heard that Generative AI has demonstrated the potential to disrupt a huge number of industries and jobs—and web3 is no exception. But how well can ChatGPT create smart contracts? Can using ChatGPT to code smart contracts make you a 10x developer? In this article, we’ll try it out and see. We’ll walk through writing and deploying an Ethereum smart contract using MetaMask, Infura, and Truffle - and we will ask ChatGPT for instructions on how to do everything from the code to the deployment.
The goal is to see if we can break down the task of creating a smart contract into a set of simple prompts. Ideally, ChatGPT can parse those prompts and give good (and accurate) answers to them, making us a faster, and better, developer.
Let’s see what we can do!
A Note on Accuracy
ChatGPT is a Large Language Model (LLM) extremely proficient in explaining blockchain concepts, providing advice, and even generating code snippets related to web3 development. However, keep in mind that some of the code or answers it generates may be partially or completely incorrect. Access to ChatGPT does not remove the need to know the basics of blockchain development. However, even a beginner can use artificial intelligence to dramatically increase productivity.
The second point to note is that the free, public version of ChatGPT isn’t very aware of events, updates, and practices that have emerged after 2021. This can be an issue in a field such as web3 development, where everything is improving and changing at a breakneck pace. However, it is possible to get good answers if something that you’re asking is fundamental and has been stable over the years (for instance, Truffle and Solidity).
Create an Escrow Contract With Truffle and ChatGPT
To see what ChatGPT can do, we’re going to ask it to create an escrow smart contract that allows a buyer and a seller to exchange money, and we’ll have ChatGPT establish an arbiter to resolve disputes. Let’s see what Generative AI can do!
Step 1: Install MetaMask
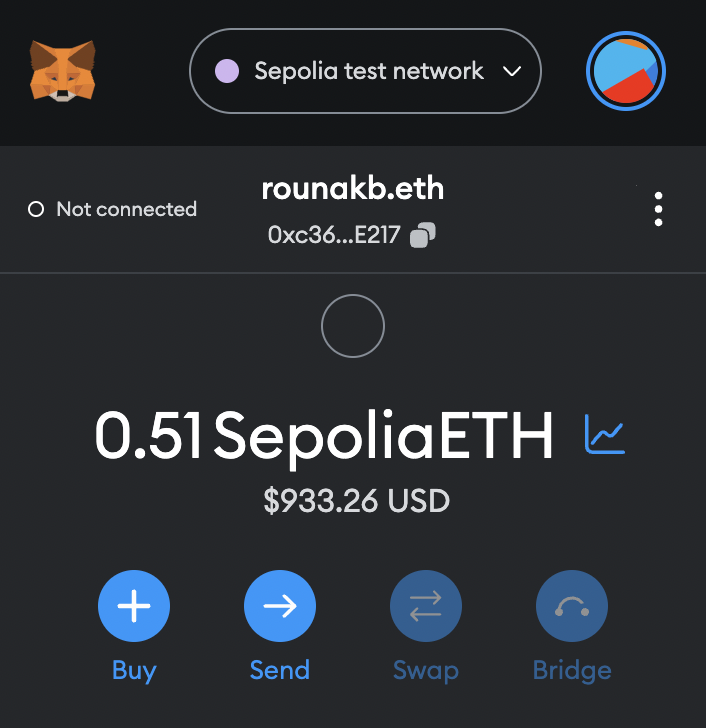
First, we need to set up a wallet. We’ll use the MetaMask wallet—the most popular Ethereum option—and add the Sepolia test network. MetaMask is secure and easy to use.
You can download the MetaMask extension for your browser here. Then, just install and set up the wallet. You’ll be given a “secret phrase”—keep this private and safe! Never store it anywhere public.
Note: If you need background or a primer on web3, check out this previous article I wrote on learning web3/smart contracts/Solidity.
Next, click on the “Network” tab in the top-right. Click on the option to show test networks.
You should now see the Sepolia test network in the dropdown. Select that.
Step 2: Get SepoliaETH
To deploy and interact with a smart contract, you need ETH. Since we are using the Sepolia test network, we’ll need to get some Sepolia test ETH. Don’t worry—it’s free!
You can obtain free SepoliaETH from Infura’s recently released faucet here. This faucet gives up to 0.5 SepoliaETH each day for free.

Step 3: Install Node and NPM
In order to build an escrow system using Truffle, we will need Node and NPM.
To check to see if it’s installed, run:
$ node -vYou should see the Node version.
Step 4: Sign Up for Infura
Infura is an RPC provider. They provide easy API-based access to everything we need to connect to—and work with—the Ethereum blockchain (and quite a few others).
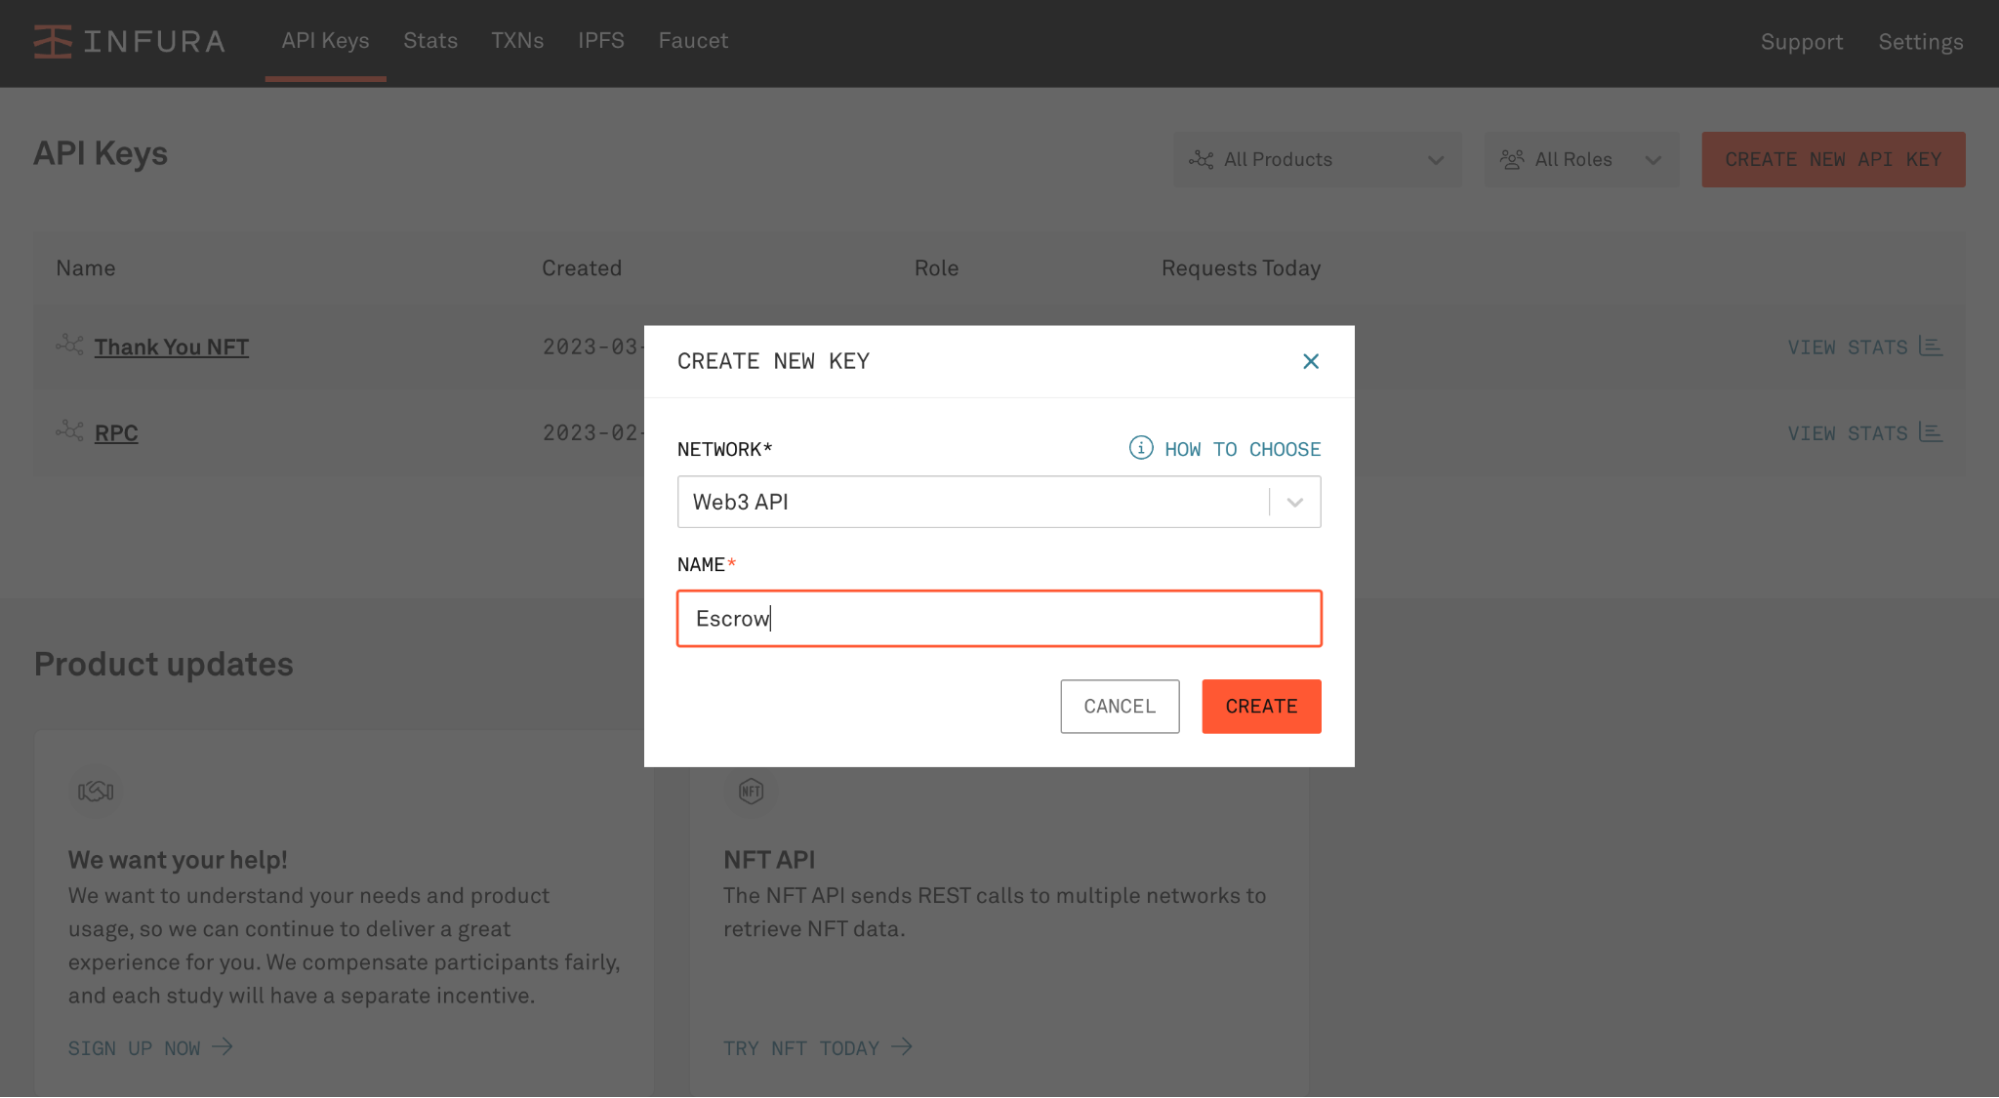
Sign up for a free account. Then go to the dashboard and select Create New Key.

Choose Web3 API as the network and name the new key Escrow (though you can name it whatever you want).
Click Create, and Infura will generate an API key. This key is what you need to access your RPC endpoint. For our purposes, we just want the Sepolia endpoint (https://sepolia.infura.io/v3/<your API key>).
Step 5: Create the Node Project
Next, we need to create our Node project and then complete our setup with any necessary packages.
$ mkdir escrow && cd escrow
$ npm init -y
To deploy and test our contract, we’ll use Truffle. Truffle is a suite of tools that give you everything you need to develop, test, and deploy smart contracts. Let’s install it:
$ npm install —save truffleYou can create a project skeleton using Truffle by running:
$ npx truffle initTo check that everything ran correctly:
$ npx truffle testWe now have Truffle successfully configured. Let’s next install the OpenZeppelin contracts package. This package will give us access to a few more helpful functionalities that we may require.
$ npm install @openzeppelin/contractsWe’re almost done with the setup! Next, we have to allow MetaMask and Truffle to work together. We need Truffle to be able to sign transactions, pay gas, etc. For this, we’ll use hdwalletprovider. Install it:
$ npm install @truffle/hdwallet-providerAnd finally, let’s use dotenv to keep our wallet information secure.
$ npm install dotenvStep 6: Sign Up for ChatGPT
We won’t be writing the escrow smart contract code from scratch. Instead, we’ll see what ChatGPT can do.
In order to use ChatGPT, sign up for a free account with OpenAI.
Once you’ve signed up for an account, visit this page. You should see an interface that looks something like this:

Step 7: Create the Escrow Contract
Next, we’ll have ChatGPT create an extremely simple escrow contract that allows a buyer and a seller to exchange a certain amount of money, and an arbiter to resolve disputes.
Let’s use the following prompt in ChatGPT.
As an expert smart contract developer, create a smart contract using Solidity that implements an escrow.
There will be three parties: the buyer, the seller, and the arbiter.
The constructor will set the buyer, seller, and arbiter. It will also set the value which will be equal to the amount sent to the constructor.
There will be two functions.
The first function allows the buyer or the arbiter to release funds to the seller.
The second function allows the buyer or the arbiter to refund the amount back to the buyer.
Implement any other functions that you may think are relevant.
Note the “As an expert smart contract developer” beginning of the prompt. This type of “role-playing” with ChatGPT works very well.
Now ChatGPT will generate a unique response for you. And this response will change every time. So you may not get the same output that is shown below, but it should be something similar.
Sure, here's an example implementation of an escrow smart contract in Solidity:

```
pragma solidity ^0.8.0;

contract Escrow {
    address payable public buyer;
    address payable public seller;
    address public arbiter;
    uint public value;
    bool public released;
    bool public refunded;

    constructor(address payable _buyer, address payable _seller, address _arbiter) {
        buyer = _buyer;
        seller = _seller;
        arbiter = _arbiter;
        value = msg.value;
    }

    function release() public {
        require(!released, "Funds have already been released.");
        require(msg.sender == buyer || msg.sender == arbiter, "Only buyer or arbiter can release funds.");
        released = true;
        seller.transfer(value);
    }

    function refund() public {
        require(!refunded, "Funds have already been refunded.");
        require(msg.sender == buyer || msg.sender == arbiter, "Only buyer or arbiter can refund funds.");
        refunded = true;
        buyer.transfer(value);
    }

    function getBalance() public view returns (uint) {
        return address(this).balance;
    }

    function setArbiter(address _arbiter) public {
        require(msg.sender == arbiter, "Only arbiter can set arbiter.");
        arbiter = _arbiter;
    }

    function setSeller(address payable _seller) public {
        require(msg.sender == seller, "Only seller can set seller.");
        seller = _seller;
    }
}
```

The `Escrow` contract has a constructor that takes three arguments: the addresses of the buyer, seller, and arbiter, and sets the `value` equal to the amount sent to the constructor.

The `release()` function allows the buyer or the arbiter to release the funds to the seller. It first checks that the funds haven't already been released, and that the caller is either the buyer or the arbiter. If both conditions are met, the `released` variable is set to `true`, and the `value` is transferred to the seller's address.

The `refund()` function allows the buyer or the arbiter to refund the funds back to the buyer. It first checks that the funds haven't already been refunded, and that the caller is either the buyer or the arbiter. If both conditions are met, the `refunded` variable is set to `true`, and the `value` is transferred back to the buyer's address.

The `getBalance()` function returns the balance of the contract.

The `setArbiter()` function allows the arbiter to set a new arbiter.

The `setSeller()` function allows the seller to set a new seller.

Note that this is a very basic implementation of an escrow contract and should not be used in production without thorough testing and auditing. Also, there may be additional features that you may want to add to suit your specific use case.
Upon inspection, the snippet provided by ChatGPT is pretty good! But it does have an error—the constructor is not marked payable even though we’re accessing msg.value and expecting Ether to be sent to it.
Again, an important note: Never expect ChatGPT to give you code that is 100% correct. More often than not, you will have to make small corrections like we did here.
Also, notice that ChatGPT uses an earlier version of Solidity, and it uses a practice of fund transfer that is not considered best practice anymore. For the purpose of this tutorial, we’ll just let it be.
In the contracts folder of your project, create a new file called Escrow.sol and add the code provided by ChatGPT with the corrections.
// SPDX-License-Identifier: MIT

pragma solidity ^0.8.0;

contract Escrow {
    address payable public buyer;
    address payable public seller;
    address public arbiter;
    uint public value;
    bool public released;
    bool public refunded;

    constructor(address payable _buyer, address payable _seller, address _arbiter) payable {
        buyer = _buyer;
        seller = _seller;
        arbiter = _arbiter;
        value = msg.value;
    }

    function release() public {
        require(!released, "Funds have already been released.");
        require(msg.sender == buyer || msg.sender == arbiter, "Only buyer or arbiter can release funds.");
        released = true;
        seller.transfer(value);
    }

    function refund() public {
        require(!refunded, "Funds have already been refunded.");
        require(msg.sender == buyer || msg.sender == arbiter, "Only buyer or arbiter can refund funds.");
        refunded = true;
        buyer.transfer(value);
    }

    function getBalance() public view returns (uint) {
        return address(this).balance;
    }

    function setArbiter(address _arbiter) public {
        require(msg.sender == arbiter, "Only arbiter can set arbiter.");
        arbiter = _arbiter;
    }

    function setSeller(address payable _seller) public {
        require(msg.sender == seller, "Only seller can set seller.");
        seller = _seller;
    }
}
Make sure the contract is compiling correctly by running:
$ npx truffle compileStep 8: Update Your Truffle Config
Next, we’ll do a little configuring without ChatGPT. This is a standard setup and will depend on the environment we’re using.
Create a new .env file in your project’s root directory and add the following:
INFURA_API_KEY = "https://sepolia.infura.io/v3/<insert API key here>"

MNEMONIC = "<insert metamask secret phrase here>"
Now let’s configure the Infura endpoint. In truffle.config.js replace the existing code with this standard config:
require('dotenv').config();
const HDWalletProvider = require('@truffle/hdwallet-provider');
const {INFURA_API_KEY, MNEMONIC} = process.env;

module.exports = {
    networks: {
      development: {
        host: "127.0.0.1",
        port: 8545,
        network_id: "*"
      },
      sepolia: {
        provider: () => new HDWalletProvider(MNEMONIC, INFURA_API_KEY),
        network_id: '11155111',
      }
    }
};
Step 9: Deploy the Contract
Now it’s time to deploy! Instead of giving you the script to deploy our contract using Truffle, let’s ask ChatGPT for the relevant instructions.
In the same window that you used to ask for the escrow contract code, we’ll enter the following prompt:
Give me a migration script that deploys the Escrow contract using Truffle.
I need to send 0.001 ETH to the constructor during deployment. And I need the address that deploys the contract to be the buyer.
We get this response:
Sure, here's an example migration script that deploys the `Escrow` contract and sends 0.001 ETH to the constructor during deployment. In this script, the address that deploys the contract will be set as the buyer.

1. Create a new JavaScript file named `2_deploy_escrow.js` (the number at the beginning indicates the order in which the migrations will be executed).
2. Copy the following code into `2_deploy_escrow.js`:

```
const Escrow = artifacts.require("Escrow");

module.exports = async function(deployer, network, accounts) {
  const buyer = accounts[0]; // set the buyer as the address that deploys the contract
  const seller = "0x2222222222222222222222222222222222222222"; // replace with seller address
  const arbiter = "0x3333333333333333333333333333333333333333"; // replace with arbiter address
  const value = web3.utils.toWei('0.001', 'ether'); // change to the value you want to send

  await deployer.deploy(Escrow, seller, arbiter, { from: buyer, value: value });
};
```

3. Replace the seller and arbiter addresses with the actual Ethereum addresses of the parties involved in the escrow transaction.
4. Save the file.
5. Make sure you have a network configured in your `truffle-config.js` file. If you want to deploy to a testnet, you'll need to configure your Truffle project to use the network you want to deploy to.
6. Run `truffle migrate --network <network-name>` to deploy the contract to the specified network. Replace `<network-name>` with the name of the network you want to deploy to, e.g. `ropsten` for the Ropsten testnet. This will deploy the contract and send 0.001 ETH to the constructor with the address that deploys the contract set as the buyer.
Once again, the instructions provided by ChatGPT are mostly correct. It gets the naming wrong (we want it to be prefixed with 1_ and not 2_) and makes a minor mistake in setting the arguments of the deploy function.
Let’s create a new 1_deploy_contract.js file in the migrations folder. Add the following, slightly modified code.
const Escrow = artifacts.require("Escrow");

module.exports = async function (deployer, network, accounts) {
    const buyer = accounts[0]; // set the buyer as the address that deploys the contract
    const seller = accounts[1]; // replace with seller address
    const arbiter = accounts[2]; // replace with arbiter address
    const value = web3.utils.toWei('0.001', 'ether'); // change to the value you want to send

    await deployer.deploy(Escrow, seller, arbiter, { from: buyer, value: value });
};
And finally, let’s deploy our contract:
$ truffle migrate --network sepoliaYou should see something similar to this:
Compiling your contracts...
===========================
> Everything is up to date, there is nothing to compile.


Migrations dry-run (simulation)
===============================
> Network name:    'sepolia-fork'
> Network id:      11155111
> Block gas limit: 30000000 (0x1c9c380)


1_deploy_contract.js
====================

   Deploying 'Escrow'
   ------------------
   > block number:        3400252
   > block timestamp:     1682974543
   > account:             0xc361Fc33b99F88612257ac8cC2d852A5CEe0E217
   > balance:             0.506876109994053108
   > gas used:            849556 (0xcf694)
   > gas price:           2.500000007 gwei
   > value sent:          0.001 ETH
   > total cost:          0.003123890005946892 ETH

   -------------------------------------
   > Total cost:     0.003123890005946892 ETH

Summary
=======
> Total deployments:   1
> Final cost:          0.003123890005946892 ETH


Starting migrations...
======================
> Network name:    'sepolia'
> Network id:      11155111
> Block gas limit: 30000000 (0x1c9c380)


1_deploy_contract.js
====================

   Deploying 'Escrow'
   ------------------
   > transaction hash:    0x7a7804d92a6b6e805991eeb8249d79a2b8c5da43cffe633a31f987e9fe596654
   > Blocks: 1            Seconds: 33
   > contract address:    0x64ccE52898F5d61380D2Ec8C02F2EF16F28436de
   > block number:        3400258
   > block timestamp:     1682974584
   > account:             0xc361Fc33b99F88612257ac8cC2d852A5CEe0E217
   > balance:             0.506876109994053108
   > gas used:            849556 (0xcf694)
   > gas price:           2.500000007 gwei
   > value sent:          0.001 ETH
   > total cost:          0.003123890005946892 ETH

   > Saving artifacts
   -------------------------------------
   > Total cost:     0.003123890005946892 ETH

Summary
=======
> Total deployments:   1
> Final cost:          0.003123890005946892 ETH
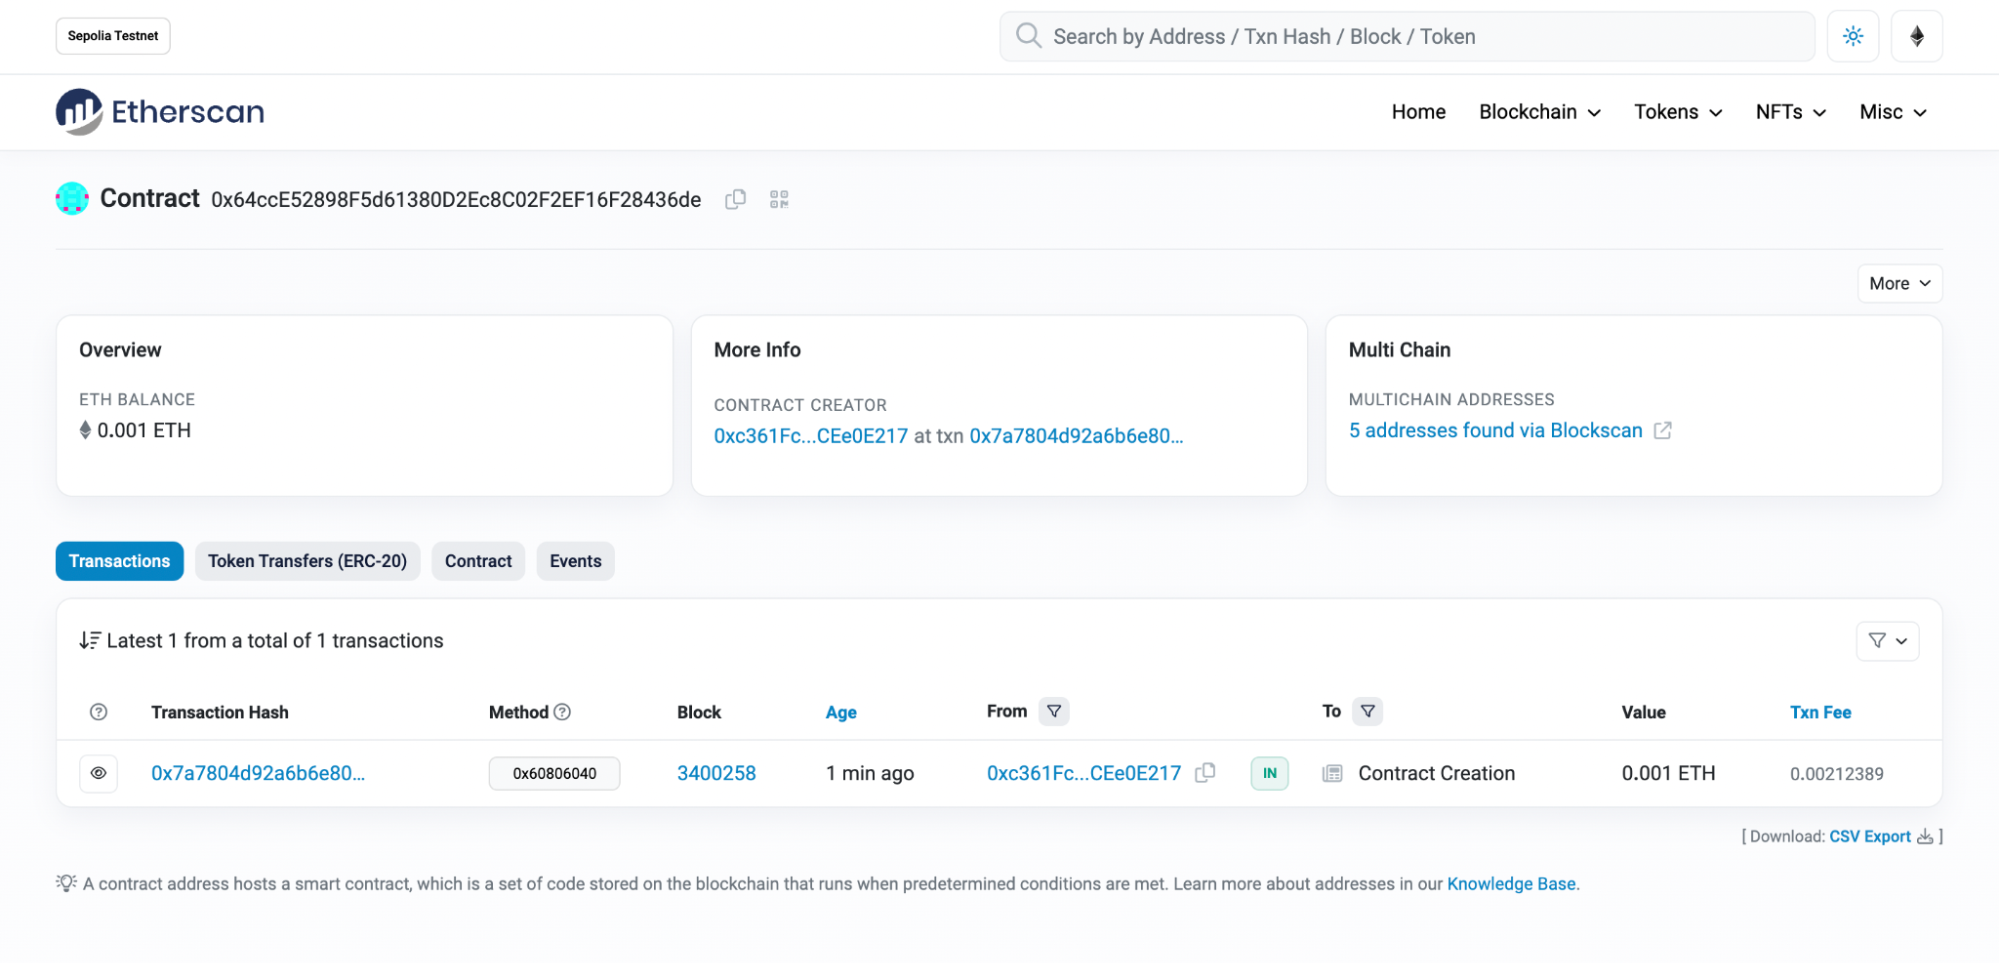
To validate deployment, you can find your contract’s address on Sepolia Etherscan:

Congratulations! You’ve deployed your contract. And you did this using ChatGPT to generate more than 95% of your code.
Tips and Tricks
Here are a few tips and tricks for using ChatGPT when coding:
- ChatGPT has limited knowledge and has a knowledge-base cutoff of September 2021. So some of those best practices and the latest developments in smart contracts are going to be missing from its knowledge.
- There are several versions of ChatGPT. GPT-4 tends to give better answers but is a paid service. GPT-3.5 (which we used here) is free, and does pretty well.
- Make your questions as specific as possible.
- Don’t stop with writing code. ChatGTP can debug your code, audit it, document it, make it pretty, analyze it, find vulnerabilities, and more.
Conclusion
ChatGPT was an extremely useful co-developer. But it wasn’t perfect. I wouldn’t use it to create unmodified code that I pushed to mainnet—especially if I was a new developer. But as a coding partner, and as a place to start, it was helpful. It saved me significant time and created surprisingly good code. In the hands of an experienced developer, I believe it can increase productivity by many times. I plan on using it quite heavily on future projects, alongside MetaMask, Infura, and Truffle.
Have a really great day!
Opinions expressed by DZone contributors are their own.

Comments