Working With Multiple testng.xml Files
In this tutorial, learn how to work with multiple TestNG XML files in a single project and organize your test suites to run as required.
Join the DZone community and get the full member experience.
Join For FreeWhile working on an open source GitHub project that was created to showcase the working of Selenium WebDriver framework with Java, as the project grew, there was a need to create multiple testng.xml files for running different tests.
These multiple files were created to segregate the tests and place all the tests related to a respective website in a single testng.xml (I have used different demo websites to demo different actions that can be automated using Selenium WebDriver).
I thought of throwing some light on the usage of multiple testng.xml files and how to execute tests. Since Maven is the build tool that is being used, a single testng.xml file is required to run all the tests in the project. Also, there are cases that had to be debugged for the test failures by running a single testng.xml file.
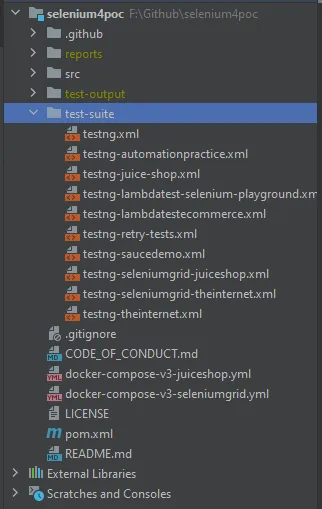
In this project, I have created 9 different testng.xml files that have multiple tests, and I am running all tests in these 9 different testng.xml files using a single testng.xml file. Yes, that is possible!
So, join my journey where I will demonstrate how to execute multiple testng.xml files using a single testng.xml file. I will also be shedding some light on executing a single testng.xml file out of the 9 available ones and running it from the command line using Maven.
Running Multiple testng.xml Files Using a Single testng.xml File
Let’s first focus on running all the tests with all the 9 different testng.xml files. The solution to this is to use the <suite-files> </suitefiles> tag in your testng.xml file and provide the other testng.xml file’s path between this tag. Here is the example file to demonstrate what I am talking about:
<?xml version="1.0" encoding="UTF-8"?>
<!DOCTYPE suite SYSTEM "http://testng.org/testng-1.0.dtd">
<suite name="Selenium 4 POC Tests ">
<suite-files>
    <suite-file path="testng-saucedemo.xml"/>
    <suite-file path="testng-automationpractice.xml"/>
    <suite-file path="testng-theinternet.xml"/>
    <suite-file path="testng-juice-shop.xml"/>
    <suite-file path="testng-lambdatestecommerce.xml"/>
    <suite-file path="testng-seleniumgrid-theinternet.xml"/>
    <suite-file path="testng-lambdatest-selenium-playground.xml"/>
    <!--        <suite-file path="testng-seleniumgrid-juiceshop.xml"/>-->
</suite-files>
</suite>
Once we execute this file, it will execute the respective testng.xmls in the order as updated between the <suite-files> tag. So, “testng-saucedemo.xml” will be executed first, and then, “testng-automationpractice.xml” will be executed, and so on.
All the testng.xml files provided in the above example have multiple tests in them. So, all the tests within the respective testng.xml will get executed and after completion, the next XML file will be picked for execution.
The following are the contents of the testng-saucedemo.xml file:
<?xml version="1.0" encoding="UTF-8"?>
<!DOCTYPE suite SYSTEM "http://testng.org/testng-1.0.dtd">
<suite name="Sauce Demo Website Tests" parallel="tests" thread-count="4" verbose="2">
<test name="selenium 4 Tests with Chrome Browser">
    <parameter name="browser" value="chrome"/>
    <classes>
        <class name="io.github.mfaisalkhatri.tests.saucedemo.SauceDemoTests">
            <methods>
                <include name="loginSauceDemoTest"/>
                <include name="logOutSauceDemoTest"/>
            </methods>
        </class>
    </classes>
</test> <!-- Test -->
<test name="selenium 4 Tests with Firefox Browser">
    <parameter name="browser" value="firefox"/>
    <classes>
        <class name="io.github.mfaisalkhatri.tests.saucedemo.SauceDemoTests">
            <methods>
                <include name="loginSauceDemoTest"/>
                <include name="logOutSauceDemoTest"/>
            </methods>
        </class>
    </classes>
</test> <!-- Test -->
<test name="selenium 4 Tests with Edge Browser" enabled="false">
    <parameter name="browser" value="edge"/>
    <classes>
        <class name="io.github.mfaisalkhatri.tests.saucedemo.SauceDemoTests">
            <methods>
                <include name="loginSauceDemoTest"/>
                <include name="logOutSauceDemoTest"/>
            </methods>
        </class>
    </classes>
</test> <!-- Test -->
<test name="selenium 4 Tests with Opera Browser" enabled="false">
    <parameter name="browser" value="opera"/>
    <classes>
        <class name="io.github.mfaisalkhatri.tests.saucedemo.SauceDemoTests">
            <methods>
                <include name="loginSauceDemoTest"/>
                <include name="logOutSauceDemoTest"/>
            </methods>
        </class>
    </classes>
</test> <!-- Test -->
</suite> <!-- Suite -->
Once all the tests as updated in this XML file get executed (doesn’t matter pass or fail), and the execution is done, the next file will be picked for running another set of tests.
Running the suite files in parallel is not supported by testng.
Running a Single testng.xml File Using Maven
You have an option in IDE to run your tests using testng.xml file by right-clicking on it and selecting the option to run the tests. However, when it comes to executing the tests in the CI/CD pipeline, that option does not hold well, as you need to execute the tests using commands in the automated pipeline.
Configuring Your Project To Run suite-xml File Using Command Line
We need to set the following configuration to be able to run the testng.xml file using Maven.
Update the Maven Surefire plugin in your pom.xml:
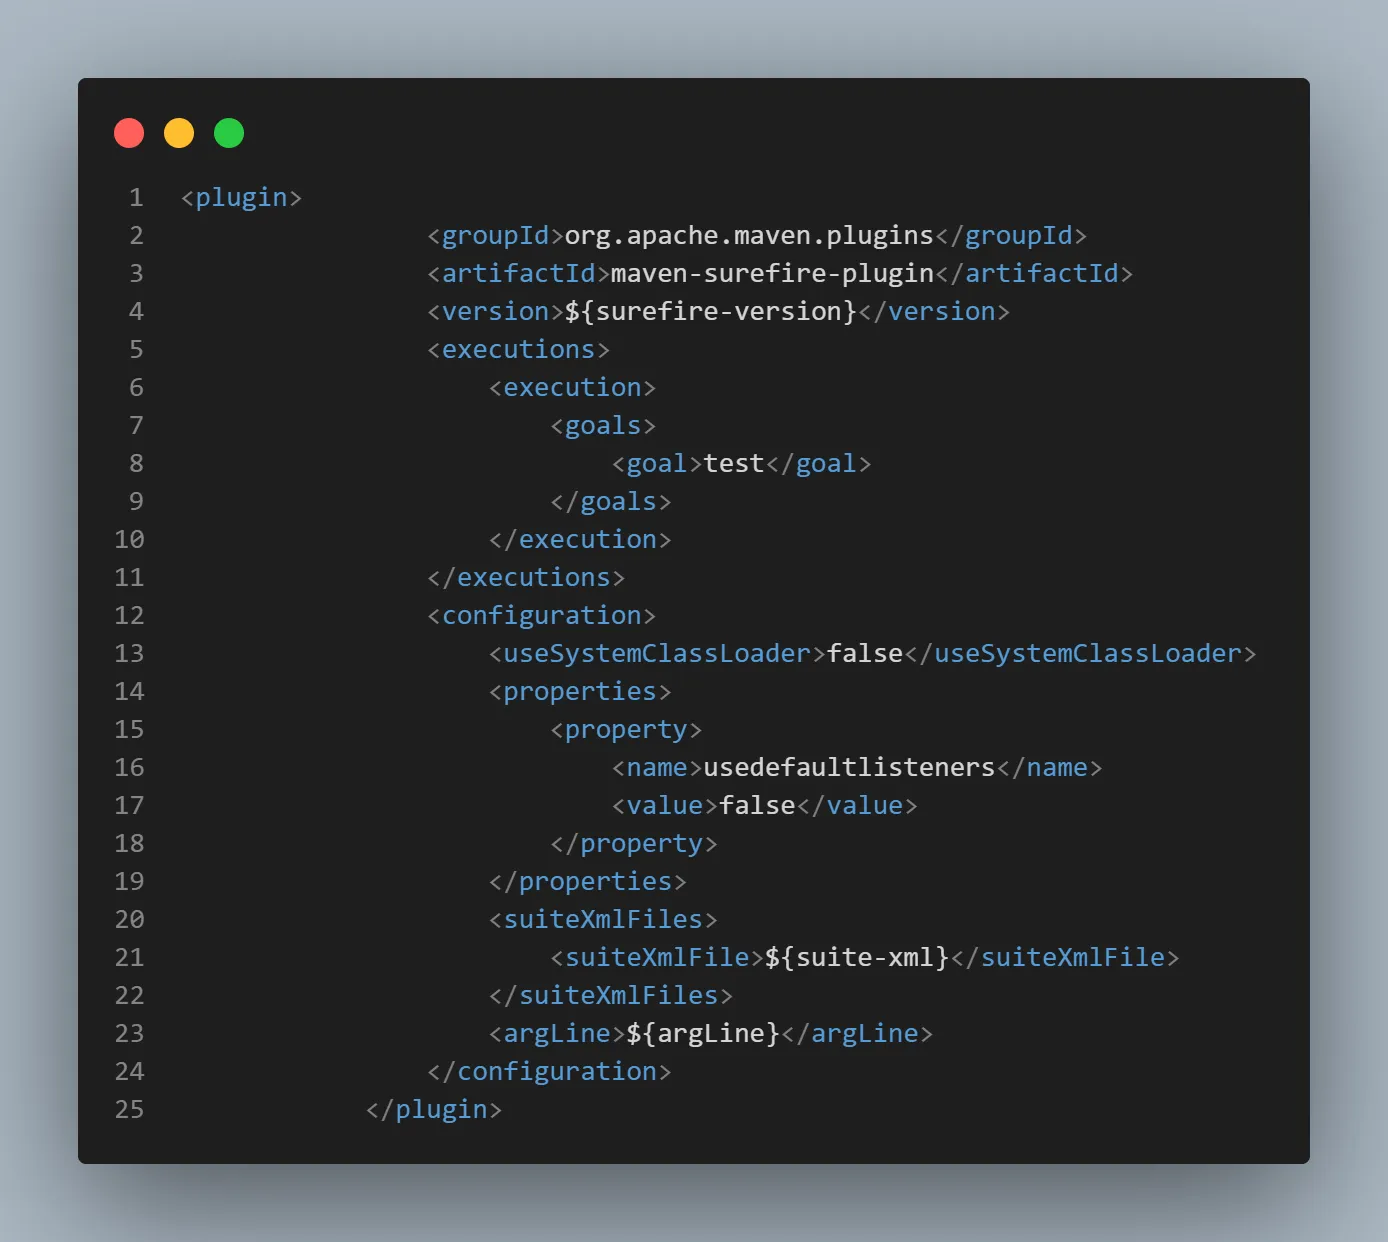
Notice the <SuiteXmlFile> tag in the above screenshot. The value for suiteXmlFile is set as ${suite-xml}. We will be setting the default value for this declaration in the properties block of the pom.xml file as follows: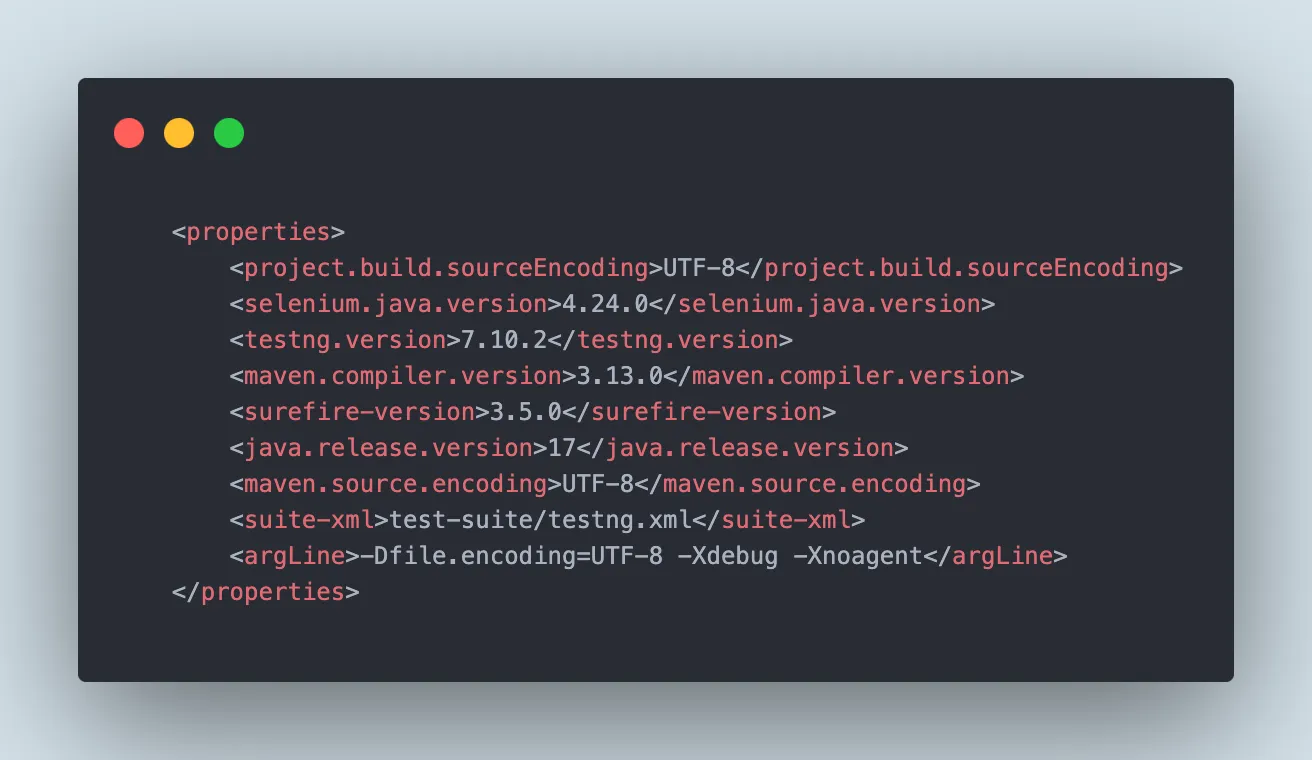
The default path to testng.xml is set for the file that we used in the above section of this blog and have updated the suite-files path in it.
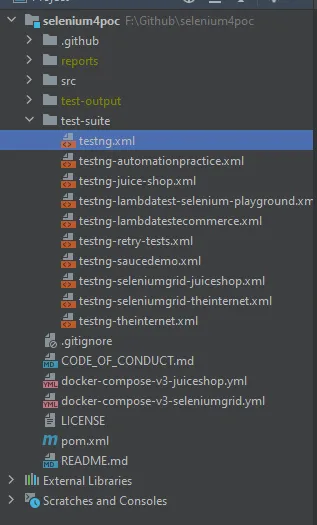
So, now if we run the command mvn clean install or mvn clean test, Maven will pick up the testng.xml default file based on the file path that is updated in the properties block and execute all the tests.
Now, the question that comes to mind is: “What should I do if I want to execute any other testng.xml file, is it possible to do so?”
The answer is “Yes”: we can run any testng.xml file in our project by adding the -Dsuite-xml=<testng.xml file path> in our mvn command.
Remember, we had earlier set this configuration in our Maven Surefire plugin block in pom.xml.
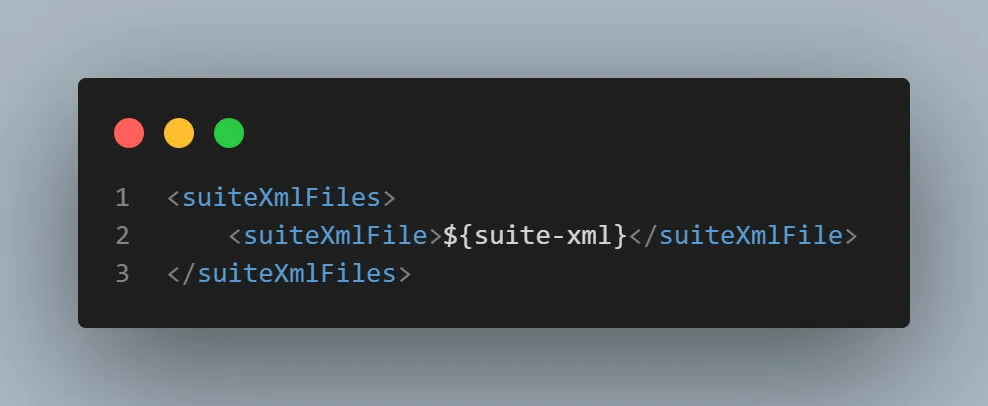
We just need to pass the values for the suite-xml property variable in the command line, which can be done using the -D option in mvn command:
mvn clean test -Dsuite-xml=<testng.xml file path>Let’s now try our hands with the command line and run different testng.xml files using Maven from the command line, as we just learned.
We will run the testng-internet.xml file, check that it should override the existing default testng.xml, and run only the one that we pass in the command. We need to pass the full path where the testng.xml is saved, and in our case, it is available in test-suite folder, so the full path is test-suites\testng-theinternet.xml. Here is the command that we will run (make sure you are on the project's root folder path in the command line window before you execute the Maven command):
mvn clean test -Dsuite-xml=test-suite\testng-theinternet.xml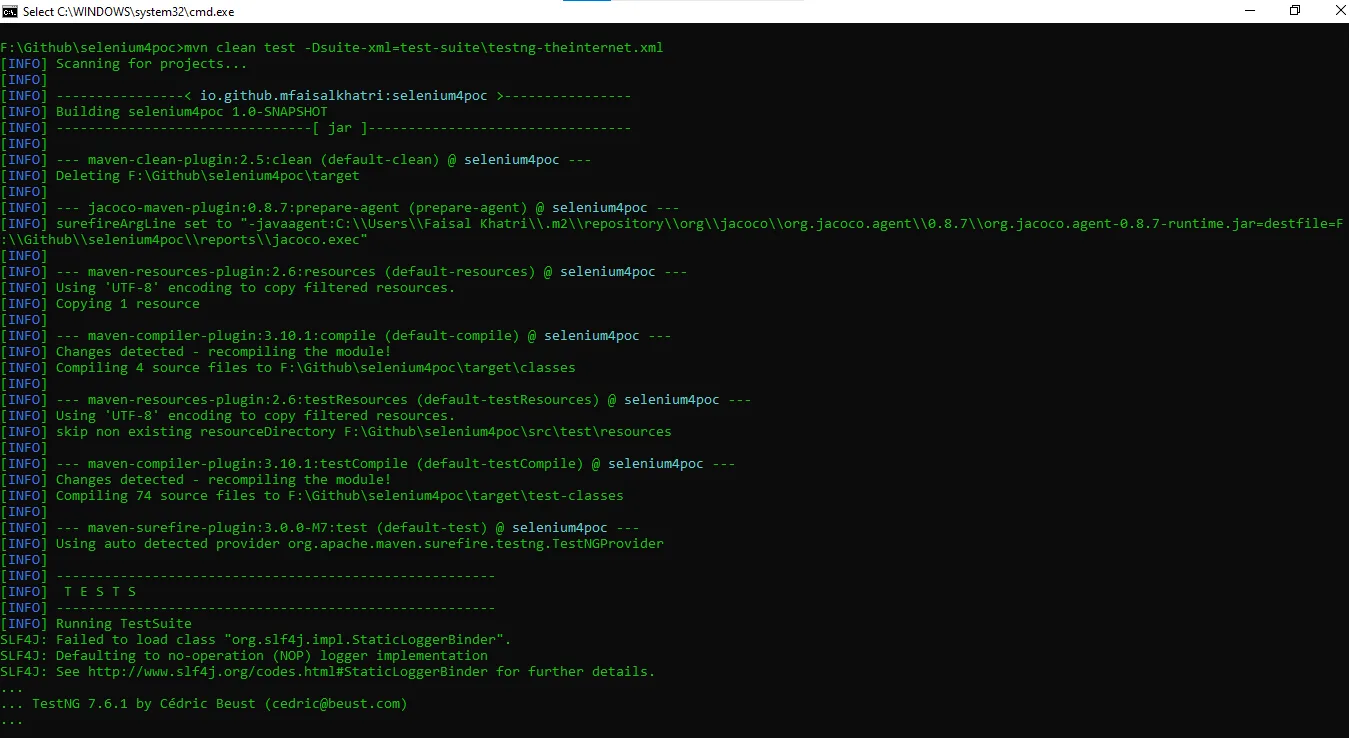
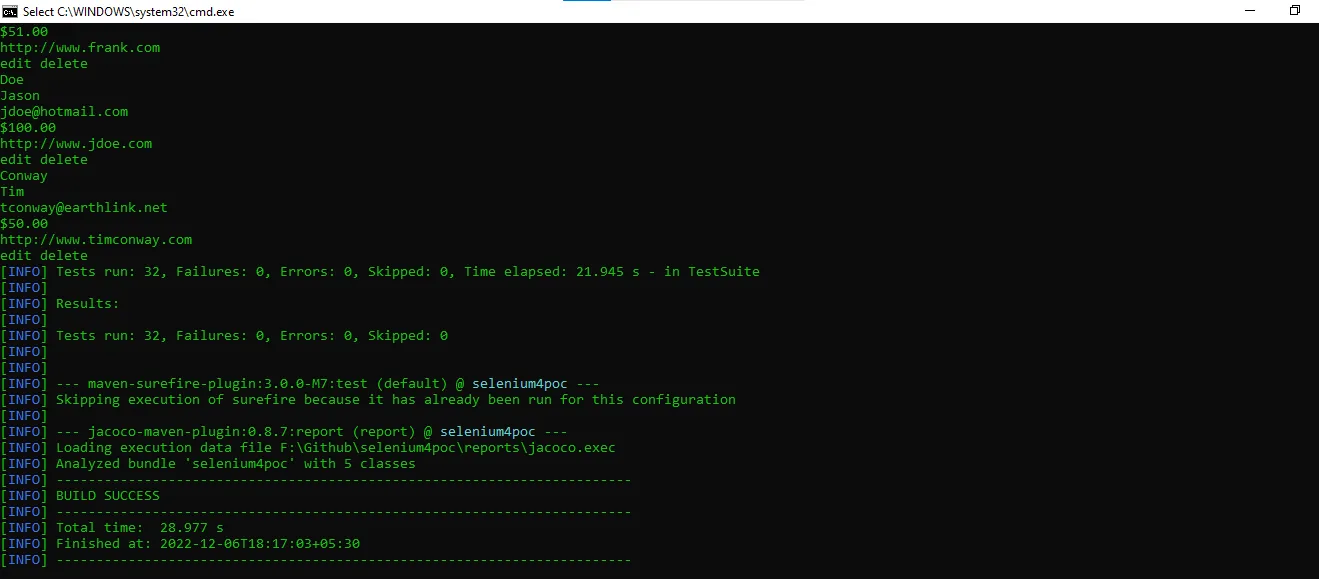
"-Dsuite-xml" option can be used with other maven commands like as follows : mvn clean install/ mvn clean verify, etc.
The tests were successfully run and the results were printed on the console. It says 32 tests ran and passed successfully.
To confirm that the correct XML file was picked and tests were executed, let’s execute the tests for testng-theinternet.xmlfile using IDE and check the number of tests executed.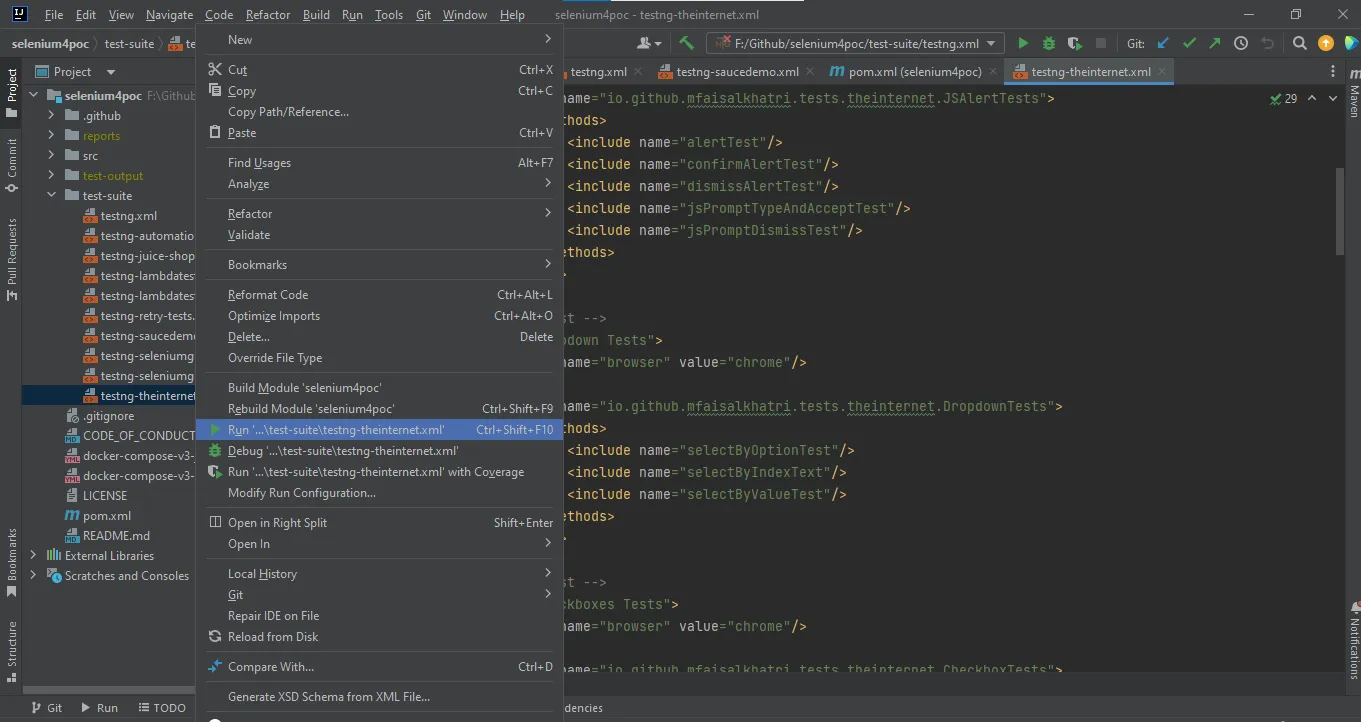
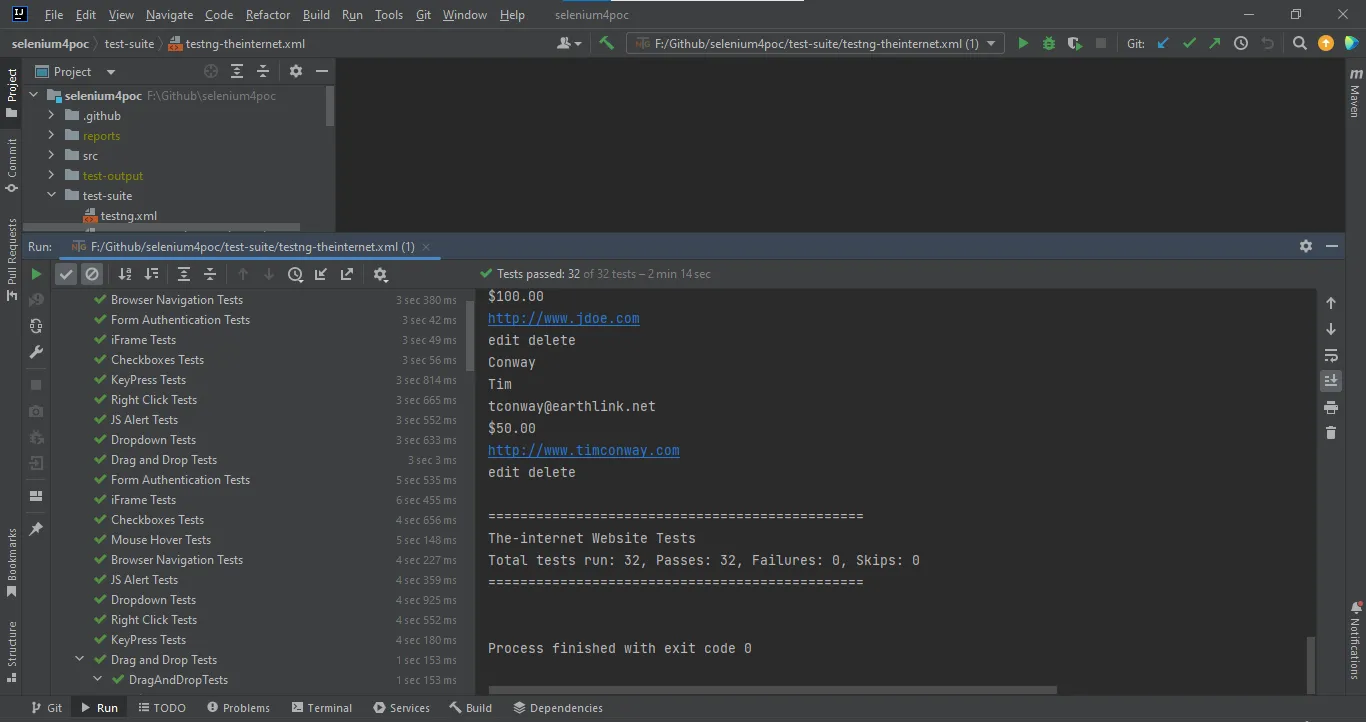
We can see that 32 tests were executed and passed, which confirms that the tests we executed using the mvn command were correctly executed for the testng.xml file we passed.
Conclusion
We can have multiple testng.xml files to segregate the tests based on the different modules/websites in our project and these multiple testng.xml files can be executed using a single testng.xml file.
Likewise, we can execute a testng.xml file from the command line using the Maven Surefire plugin.
Published at DZone with permission of Faisal Khatri. See the original article here.
Opinions expressed by DZone contributors are their own.

Comments