WebSockets With Wicket Tutorial
In this tutorial, we go over how to use the Wicket framework while taking advantage of WebSockets in our Java code. Let's get to it!
Join the DZone community and get the full member experience.
Join For FreeWebSockets is a standard that has existed since 2011 when the RFC-6455 was published. This protocol establishes a permanent full-duplex connection between a browser and a server over a single TCP connection. The protocol is widely supported at the time when this tutorial is being written. You can check on the Can I Use website.
So much for a short introduction. My motivation for using WebSockets was that I needed a webpage that is periodically updated. The first option I used was Ajax requests to the server. However, the timing was so inaccurate that I had to search for an alternative and came up with a solution using WebSockets which worked perfectly when it came to accuracy and latency. The implementation I use for this tutorial is written in the Apache Wicket framework.
One of the main advantages of implementing WebSockets with Apache Wicket is the absence of user-made JavaScript code (yes, this is my personal preference). All the JavaScript is generated by the framework.
Prerequisites:
Maven
Java 1.8
Basic knowledge of Apache Wicket (can be obtained here)
If you are familiar with Apache Wicket skip section 1.
1. Creating a Wicket Project
Let's use the quick start configuration form on Wicket's website: here.
Pick version 7.10, any server but WildFly, any group and artifact ID you may like.
Copy the command line command and execute it with Maven in your project directory.
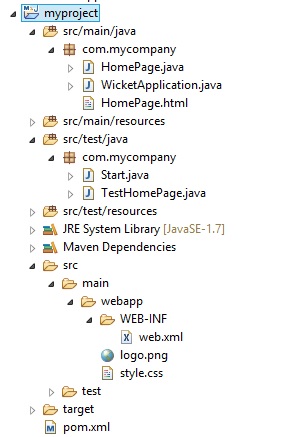
Open the existing project with your IDE. It may look something like this (in Eclipse):

- Compile the application with Maven (command
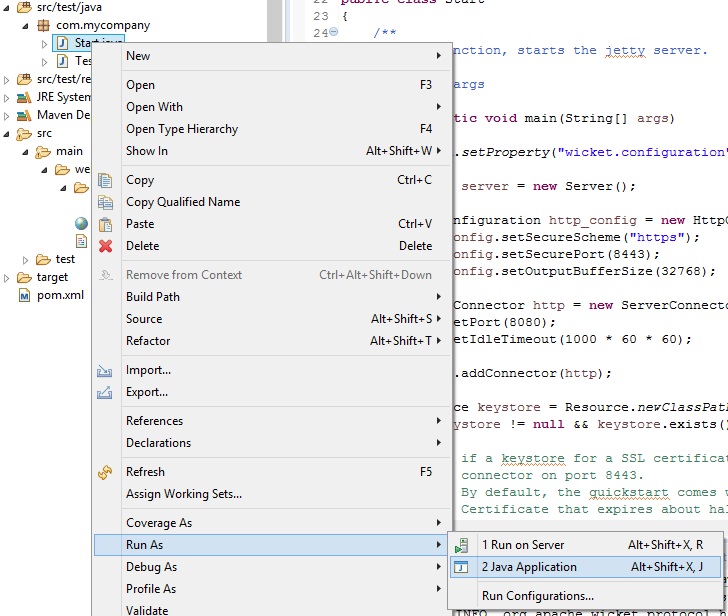
mvn clean install). Now you can run the Wicket web application by running the file src/test/java/Start.java with the inbuilt Jetty server. The URL should be
http://localhost:8080.Example in Eclipse:

This quick start includes a Maven dependency for the Jetty server. Currently, the version of Jetty I use is 9.2.19.v20160908. If you want to use a different version of Jetty or another container, have a look here for the correct setup.
2. Setting Up WebSockets
To enable WebSockets in a new application, a couple of things need to be altered:
In pom.xml, add a Wicket WebSocket dependency:
<dependency> <groupId>org.apache.wicket</groupId> <artifactId>wicket-native-websocket-javax</artifactId> <version>${wicket.version}</version> </dependency>- In the file src/test/java/Start.java: there are two lines that need to be uncommented to enable Jetty to work with WebSockets (we're not interested in exceptions in this tutorial):
// uncomment the next two lines if you want to start Jetty with WebSocket (JSR-356) support
// you need org.apache.wicket:wicket-native-websocket-javax in the classpath!
ServerContainer serverContainer;
try {
  serverContainer = WebSocketServerContainerInitializer.configureContext(bb);
  serverContainer.addEndpoint(new WicketServerEndpointConfig());
} catch (ServletException e1) {
  // TODO Auto-generated catch block
  e1.printStackTrace();
} catch (DeploymentException e2) {
  // TODO Auto-generated catch block
  e2.printStackTrace();
}
The application is now ready to run code using WebSockets.
3. Implementing WebSocket Behavior
The demonstration of a WebSockets application is going to be done by a simple application which sends periodic updates to connected clients. The application will push an integer to the client webpage so the user can visually check if the message was received and processed correctly.
The application will consist of two pages: one for administration and one to display the results. The administration page will enable a user to choose if the number that is being sent to clients is increasing, decreasing, or constant. The client page then simply establishes the WebSocket connection and displays the number that is being pushed by the server.
3.1. Client-Side Logic
You can learn Apache Wicket basics here, in case you are not familiar with this framework. The starting point for this tutorial is an existing class that extends the web page. The WebSockets connection can be simply implemented by adding an anonymous inner class, WebSocketBehavior. The WebSocket logic is then controlled by overriding different methods for different situations. In this example, the overridden methods are onConnect and onPush.
private void addWebSocketUpdating () {
  add (new WebSocketBehavior() {
    private static final long serialVersionUID = 1L;

    @Override
    protected void onConnect (ConnectedMessage message) {
      super.onConnect (message);

      WebSocketService.getInstance().addService(message);
    }

    @Override
    protected void onPush(WebSocketRequestHandler handler, IWebSocketPushMessage message) {
      super.onPush (handler, message);

      if (message instanceof WSMessage) {
        WSMessage msg = (WSMessage) message;
        updateModel.setObject(msg.getNumber());
      }
      handler.add (numberLabel);
    }
  });
}
In the case of the overridden method,
onConnect, the page only registers itself as a receiver of messages.In the case of the overridden method
onPush, the page is listening to WebSocket messages. Each message that is received is used for updating the existing label element on the webpage.
3.2. Server-Side Logic
The logic which controls the sending of updates to the web page is mostly covered by the following snippet.
private List<ConnectedMessage> connections = new ArrayList<ConnectedMessage> ();
private WebSocketPushBroadcaster broadcaster;

public void addClient (ConnectedMessage message) {
  ConnectedMessage conMsg = new ConnectedMessage (message.getApplication(), message.getSessionId(), message.getKey());
  connections.add(conMsg);

  if (null == broadcaster) {
    WebSocketSettings webSocketSettings = WebSocketSettings.Holder.get(message.getApplication());
    IWebSocketConnectionRegistry webSocketConnectionRegistry = webSocketSettings.getConnectionRegistry();
    broadcaster = new WebSocketPushBroadcaster (webSocketConnectionRegistry);
  }

  Updater.getInstance().join();
}

@Override
public void sendMessage (int number) {
  if (null != broadcaster) {
    WSMessage message = new WSMessage(number);
    broadcaster.broadcastAll(connections.listIterator().next().getApplication(), message);
  } else {
    throw new RuntimeException ("WebSockets can not send message");
  }
}
As you can see, there are two important methods that handle the connection of a new webpage to the server and the actual sending of the message to the client.
The
addClientmethod adds the input connection to the array list of all existing connections. It also creates an instance ofWebSocketPushBroadcasterif it does not exist yet.The
sendMessagemethod then takes the input integer and creates an instance of a WebSockets message (the classWSMessageis a POJO with implementedIWebSocketPushMessageand serializable interfaces) and sends it to all stored connections.
4. Conclusion
As you can see in the previous sections, building a web application with WebSockets can be quite an easy task with Apache Wicket.
The complete example of this simple working code can be found here. The steps to follow are:
Clone the repository.
Build with Maven (section 1. step 4.).
Run the file, src/test/java/Start.java (section 1. step 5.).
Open a web browser. The application runs by default on
http://localhost:8080. Open one tab with the client link to receive the WebSocket messages. Then, open the second tab with the admin link to control the content of the messages.
Thanks for reading. Hope this short example was useful.
Opinions expressed by DZone contributors are their own.

Comments