WebDriverIO Tutorial: Handling Alerts and Overlay In Selenium
In this WebDriverIO tutorial on alert handling in Selenium, I’ll show you how to handle alerts and pop-ups as well as overlay modal in WebDriverIO.
Join the DZone community and get the full member experience.
Join For FreeYou’d hardly find a website these days without alerts and pop-ups! The alert boxes warn you whenever you perform a wrong action or to enter details to access a website. These alert boxes stop you from performing any other browser functions till the alert is resolved. This is why it becomes important that you handle them in your Selenium test automation scripts.
In this WebDriverIO tutorial on alert handling in Selenium, I’ll show you how to handle alerts and pop-ups as well as overlay modal in WebDriverIO. I will also cover the different types of alerts you will face during automation and what are the key points you need to follow for alert handling in Selenium using WebDriverIO.
Types Of Alerts In WebDriverIO
Alerts and pop-ups are pretty common in any website development, and while performing Selenium test automation you have to handle them as well. These alerts or rather javascript alerts, are pop up that takes your attention away from the current browser and forces you to read them. You won’t be able to perform any further browser action if you don’t know how to handle the alerts, this stands true for both manual and automation.
It is important to note that you can’t identify alerts using devtools or by XPath. Also, since they can’t be handled as a window, this is why it gets a bit tricky to handle them, but don’t worry, you’d find more about this in the latter section of this WebDriverIo tutorial.
There are three types of alerts that you’d need to handle in WebDriverIO.
Alert pop up
Confirmation Alert
Prompt pop up
Alert Pop Ups
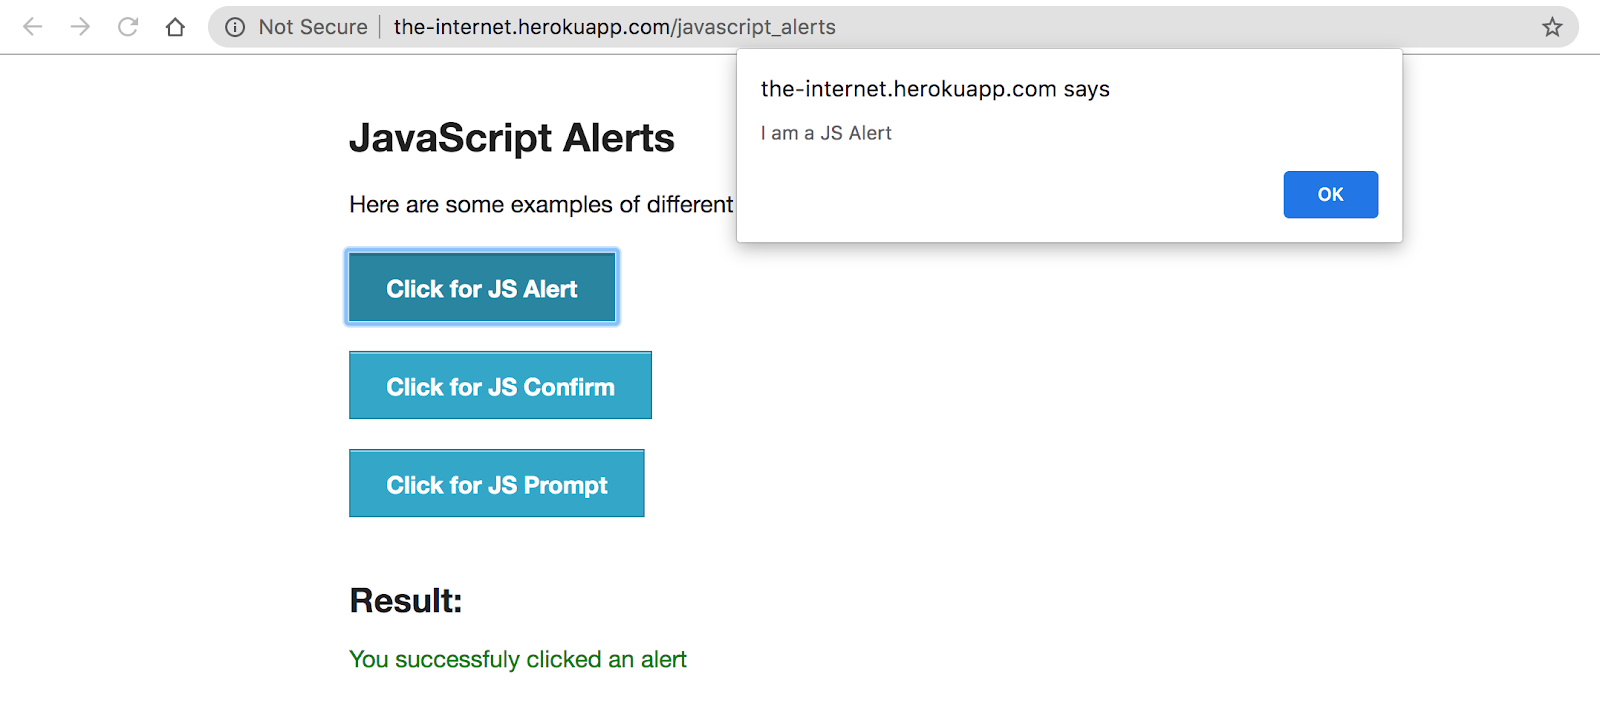
The alert pop up or alert() method displays an alert box with just a message and ‘OK’ button. This alert used to inform the user about some information. There is only one button ‘OK’ displayed with the text of information. Here, the user has only one option to press the OK button. Below is the example of alert pop up.

Confirmation Alert
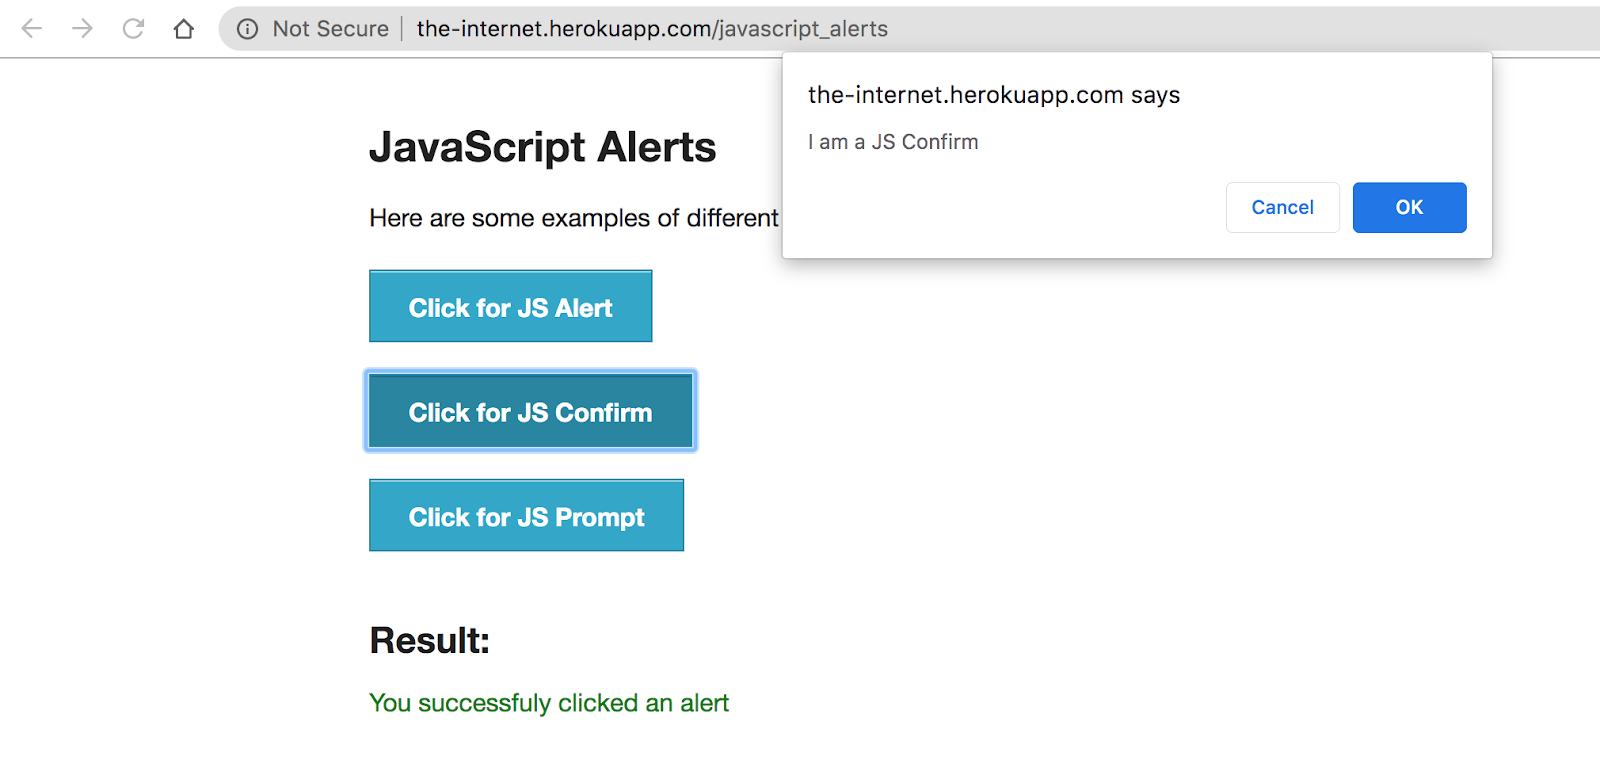
The confirmation alert is the second type of alert with a message, where it gives the user the option to press OK or Cancel. Here is the example of a confirmation alert.

Prompt Pop-Up
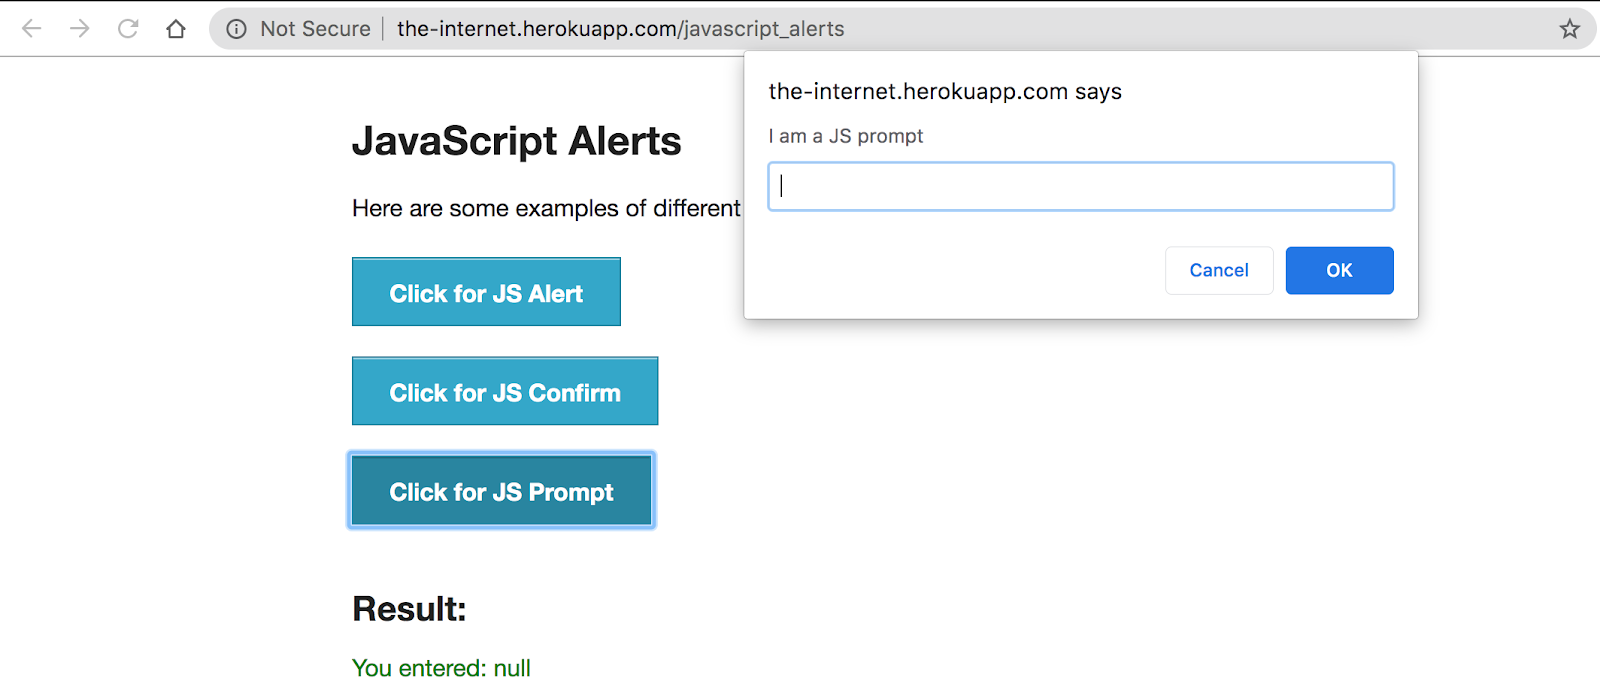
The prompt pop up is the last alert where this used to let the user give input for the website. Here, the user can give input and press the OK button or press Cancel to avoid giving input. Below is the example of the prompt pop up.

Apart from these in-built javascript alerts, there is also one more pop up which is known as modal. The main difference between an alert and modal is that alert can not go off without requested actions e.g, OK, or Cancel. In the modal, it is made using the < div > tag by giving special CSS code. This modal can go off by clicking somewhere other than the modal.
Overlay Modal
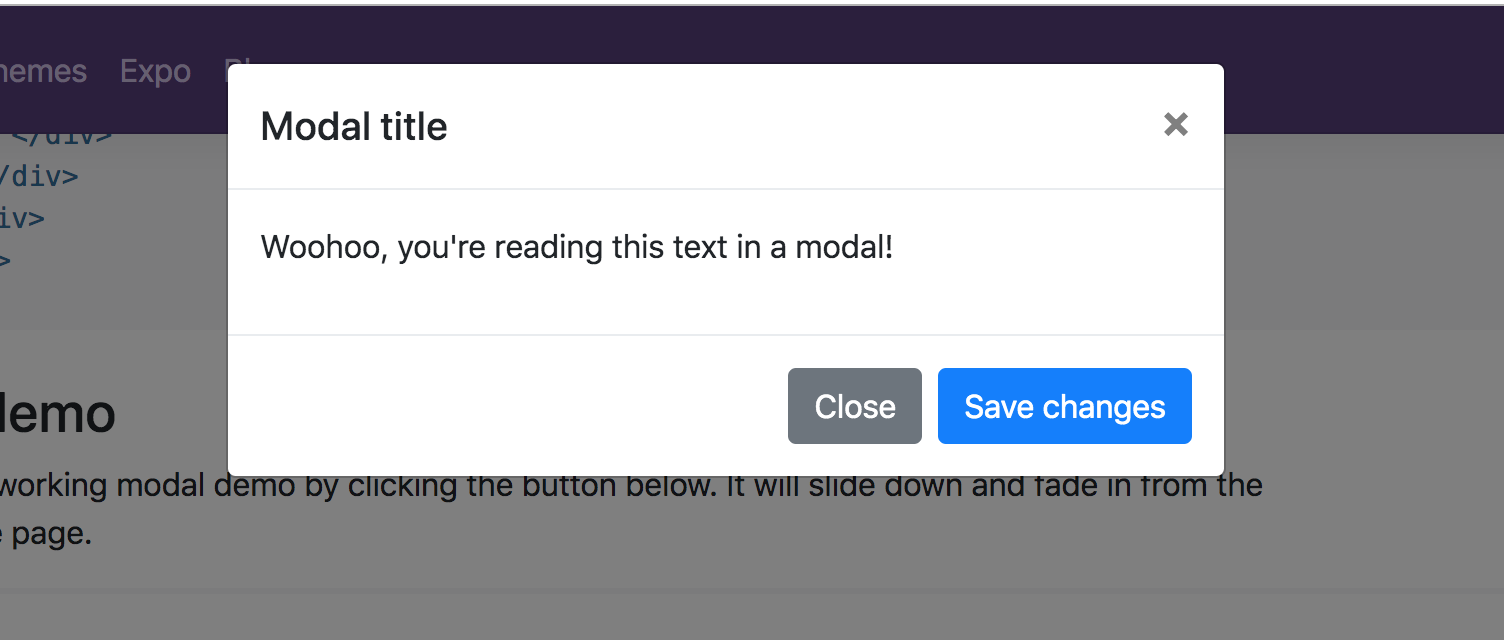
This modal is built using the client-side framework e.g bootstrap, ReactJS. A developer can be used to display some information, pop up, and form. There is no special
Here is an example of Overlay Modal:

Now, that you are familiar with a different kind of alert and modal available in javascript. I’ll show you more about alert handling in Selenium in this WebDriverIO tutorial.
Alert Handling In Selenium Using WebDriverIO
If you are familiar with alert handling in Selenium test automation with other frameworks, you’d assume that you’d have to switch to the alert before alert handling in Selenium. .For example in Java, you have to create a switchTo() method and then need to access the alert() method in order to perform an action. This is not the case here, you’ll see how as we further progress in this WebDriverIO tutorial. For Selenium C# lovers, we have previously covered and article on alert handling in Selenium C# , feel free to check it out.
For example,
driver.switchTo().alert().accept();
Similarly, dismiss(), sendkeys() methods are also accessible.
Since you do not have to use the switchTo() method before alert handling in Selenium, it gets a tad bit easier to perform Selenium test automation.
The methods you’d need for alert handling in Selenium for automated browser testing are:
acceptAlert()
dismissAlert()
getAlertText()
sendAlertText()
isAlertOpen()
The big advantage of WebDriverIO is that alerts can be accessed directly from the driver or browser object for Selenium test automation. E.g
xxxxxxxxxx
browser.acceptAlert();
browser.dismissAlert();
browser.getAlertText();
browser.sendAlertText();
browser.isAlertOpen();
acceptAlert()
acceptAlert() method is similar to driver.switchTo().alert().accept() selenium java. It helps users to click on the ‘OK’ button on Alert pop up.
Syntax:
browser.acceptAlert();
Example:
xxxxxxxxxx
describe("This is example of Alert pop up ", function () {
it("Simple Alert pop up", function () {
browser.url("http://the-internet.herokuapp.com/");
browser.pause(5000);
$("=JavaScript Alerts").click();
browser.pause(5000);
$(".//button[text()='Click for JS Alert']").click();
browser.pause(5000);
browser.acceptAlert();
browser.pause(5000);
});
});
dismissAlert()
dismissAlert() method is used to click on the ‘Cancel’ button. If you compare this method with In selenium java then it is like driver.switchTo().alert().dismiss()
Syntax:
browser.dismissAlert();
Example:
xxxxxxxxxx
describe("This is example of Alert pop up ", function () {
it("comfirmation pop up", function () {
browser.url("http://the-internet.herokuapp.com/");
browser.pause(5000);
$("=JavaScript Alerts").click();
browser.pause(5000);
$(".//button[text()='Click for JS Confirm']").click();
browser.pause(5000);
browser.dismissAlert();
browser.pause(5000);
});
});
getAlertText()
getAlertText() method is used to read the message written on pop up. This is similar to driver.switchTo().alert().getText() in the Selnium java.
Syntax:
browser.getAlertText();
Example:
describe("This is example of Alert pop up ", function () {
it("getAlertText() pop up", function () {
browser.url("http://the-internet.herokuapp.com/");
browser.pause(5000);
$("=JavaScript Alerts").click();
browser.pause(5000);
$(".//button[text()='Click for JS Confirm']").click();
browser.pause(5000);
const msg = browser.getAlertText();
console.log(msg);
browser.pause(5000);
browser.acceptAlert();
browser.pause(5000);
});
});
sendAlertText()
sendAlertText() method is used to send input to the textbox displayed on the prompt pop up. This method has one parameter which passed to send text to the input box. sendAlertText() method is similar to driver.switchTo().alert().sendKeys() in the Selenium Java.
Syntax:
browser.sendAlertText(String str)
Example:
xxxxxxxxxx
describe("This is example of Alert pop up ", function () {
it("sendAlertText() Pop up ", function () {
browser.url("http://the-internet.herokuapp.com/");
browser.pause(5000);
$("=JavaScript Alerts").click();
browser.pause(5000);
$(".//button[text()='Click for JS Prompt']").click();
browser.pause(5000);
browser.sendAlertText("This is Input Text");
browser.pause(5000);
browser.acceptAlert();
browser.pause(5000);
});
});
isAlertOpen()
isAlertOpen() method is used to check whether the alert is visible or not. This method returns a boolean value to the user and based on this boolean value user can make a decision.
Syntex:
browser.isAlertOpen()
Example:
xxxxxxxxxx
describe("This is example of Alert pop up ", function () {
it("isAlertOpen check pop up", function () {
browser.url("http://the-internet.herokuapp.com/");
browser.pause(5000);
$("=JavaScript Alerts").click();
browser.pause(5000);
$(".//button[text()='Click for JS Alert']").click();
browser.pause(5000);
const isOpen = browser.isAlertOpen();
if (isOpen) {
console.log("===========>" + isOpen);
browser.acceptAlert();
browser.pause(5000);
}
});
});
Handling Overlay Modal Using WebDriverIO
By now you already know the difference between Alerts and Overlay Modal in this WebDriverIO tutorial. An alert can be closed only by the intended action, while overlay modal can be closed by clicking anywhere on the background. I’ll now show you how to automate Overlay Modal using WebDriverIO.
When you are automating the modal you do not have to work on special code or class. You just find out the object of the element directly using the WebDriverIO selector and perform the operation.
Here is how you can handle Overlay Modal in Selenium using WebDriverIO.
xxxxxxxxxx
describe("This is example of Modal pop up ", function () {
it("Handle Modal pop up", function () {
browser.url("https://jquerymodal.com/");
browser.pause(5000);
$(".//a[@href='#ex1']").click();
browser.pause(5000);
$(".//a[@href='#close-modal']").click();
});
});
Wrapping It Up!
In this WebDriverIO tutorial, I shed some light on alert handling in Selenium along with Overlay Modal using WebdriverIO. I also compared alert handling in Selenium using WebDriverIO with other frameworks. I showed how in WebDriverIO you can handle them without switching to them unlike other technologies such as Selenium Java.
Further, I explored the 5 WebDriverIO methods for alert handling in Selenium, these are acceptAlert(), dismissAlert(), getAlertText(), sendAlertText() and isAlertOpen. These methods help to automate Alert pop up but don’t help in handling Overlay Modal. You can access modal’s each and every element so that you can directly use the selector for individual elements and perform the operation. In case you want to know about browser commands in WebDriverIO, you can refer to the article linked.
I hope you have enjoyed reading this WebDriverIO tutorial on alert handling in Selenium. Feel free to reach out to us in case of any questions or doubts in the comment section down below.
Let’s Automate!
Published at DZone with permission of Harshit Paul, DZone MVB. See the original article here.
Opinions expressed by DZone contributors are their own.

Comments