Using Signal Sciences With Kubernetes
If you're using Signal Sciences to monitor your app, here's how you can get visibility throughout your entire environment using Docker and Kubernetes.
Join the DZone community and get the full member experience.
Join For FreeOne of the questions I hear regularly from customers is how to include Signal Sciences with some of the new technologies they are using to autoscale their environment. Containerization is an initiative that is being talked about regularly by customers across industry verticals. While the whole concept is great for providing new levels of economies of scale, redundancy and enabling CI/CD (Continuous Integration/Continuous Deployment), it can be a tricky thing to do in practice if your company has not moved over to this model. Not only do you need to potentially retrofit your application, or applications, to fit this model, you also need to ensure the technologies that secure your environment also work with it.
With the simple deployment model of our architecture it is very easy to include our components as part of the container running your application whether this is Apache, NGINX, PHP, Java, Node.js, or others. This article will walk you through how you can do this with Kubernetes in a fashion that will allow you to autoscale our WPP (Web Protection Platform) with your application deployment in Kubernetes.
Step 1: Creating the Docker Container
In order to be able to deploy something to Kubernetes we will need an initial Docker container to specify in the Kubernetes deployment. There is an example Docker container configuration at https://github.com/signalsciences/SigSciDockerExample. This repo also contains yaml files of the Deployment, Service, and Pods that get created as we walk through the process.
First, let’s take a look at the Dockerfile and understand some of the elements of what is going on.
With the copy command we are putting the repo information in place for apt in order to be able to automatically pull the Signal Sciences Agents and Modules.
COPY contrib/sigsci-release.list /etc/apt/sources.list.d/sigsci-release.listIn order to not get errors from Docker when building the container the run command does the following:
- Import the Signal Sciences gpg key for our apt repo.
- Install our Signal Sciences Agent & Module and install Apache2
- Clean out the apt cache to reduce the final docker size
- Enable the Apache Signal Sciences Module
RUN apt-get update; apt-get install -y apt-transport-https curl ; \
curl -slL https://apt.signalsciences.net/gpg.key | apt-key add -; \
apt-get update; apt-get install -y sigsci-agent sigsci-module-apache apache2; \
apt-get clean; /usr/sbin/a2enmod signalsciences; mkdir /var/lock/apache2
Alright, let’s clone the github repo to a local directory
git clone https://github.com/signalsciences/SigSciDockerExampleNext, we’ll need to move into the directory
cd SigSciDockerExampleYou will want to ensure that start.sh is executable
chmod +x start.shWe can use the provided Makefile to build the container automatically. The minimum options that you should specify should be DOCKERUSER, DOCKERNAME, DOCKERTAG.
make build DOCKERUSER=MYDOCKERUSER DOCKERNAME=sigsci-apache-demo DOCKERTAG=1.14.4–1.4.6Note: I like to have the tag be the versions of items I’m interested in, and I use this as a version control method. For example the tag 1.14.4–1.4.6 means SigSci-Agent-1.14.4 and SigSci-ApacheModule-1.4.6
At this point you can now test the container by doing
make run DOCKERUSER=MYDOCKERUSER DOCKERNAME=sigsci-apache-demo DOCKERTAG=1.14.4–1.4.6 SIGSCI_ACCESSKEY=YOURACCESSKEY SIGSCI_SECRETKEY=YOURSECRETKEYYou should see something like the following screenshot with the Arrow pointing to the container id.
Now we’ll need to deploy the container to your Docker container repository. By default I’m using Docker hub, but it can be configured otherwise.
make deploy DOCKERUSER=MYDOCKERUSER DOCKERNAME=sigsci-apache-demo DOCKERTAG=1.14.4–1.4.6Step 2: Creating Your Kubernetes Deployment
Believe it or not, the hardest part is now done. We new have a container that has Apache2 with the Signal Sciences module installed and the Signal Sciences agent. This container will be added into a pod within in Kubernetes. Anytime this pod is brought up all three components will be there which simplifies the deployment of Signal Sciences. Generally whenever you update your Apache2 container, the Signal Sciences components will also automatically be updated!
First lets log into your Kubernetes cluster and create a new application. All of these steps can also be performed via the command line using the Kubectl.
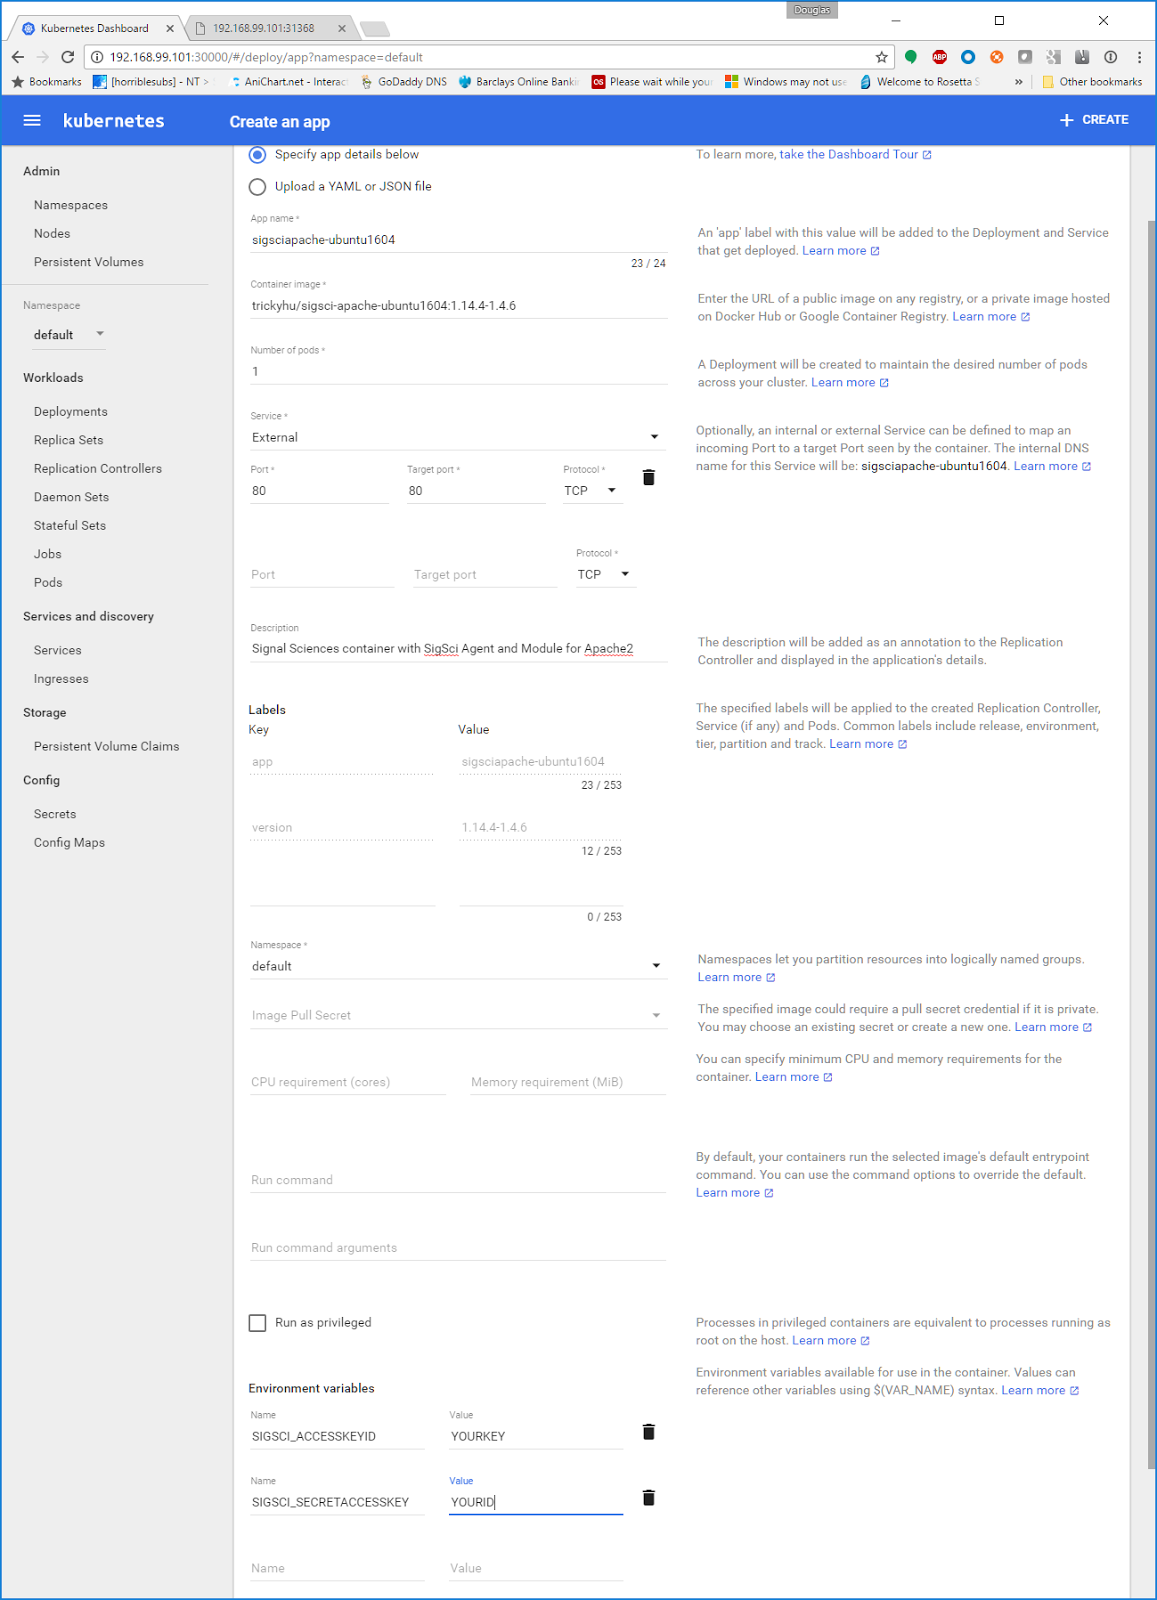
In the Create an App view you can either import one of the provided yaml files or input things manually. If you do import one of the YAML files you will need to update the environment variables for SIGSCI_ACCESSKEYID and SIGSCI_SECRETACCESSKEY to be the correct ones for your deployment.
You can get the agent keys in: https://dashboard.signalsciences.net -> Configuration -> Agents -> View Agent Keys
Create an App settings:
App Name: sigsci-apache-ubuntu1604
Container Image: DOCKERUSER/sigsci-apache-ubuntu1604:1.14.4–1.1.7
Service: External (This is done so that you can access the web server)
Port: 80
Target Port: 80
Description: Signal Sciences container with SigSci Agent and Module for Apache2
Environment Variables:
SIGSCI_ACCESSKEYID: YOURACCESSKEY
SIGSCI_SECRETACCESSKEY: YOURSECRETKEY
That’s it! You can hit deploy and see the deployment kick off. Once it is ready you can pull up the Kubernetes service information and try hitting the webpage.
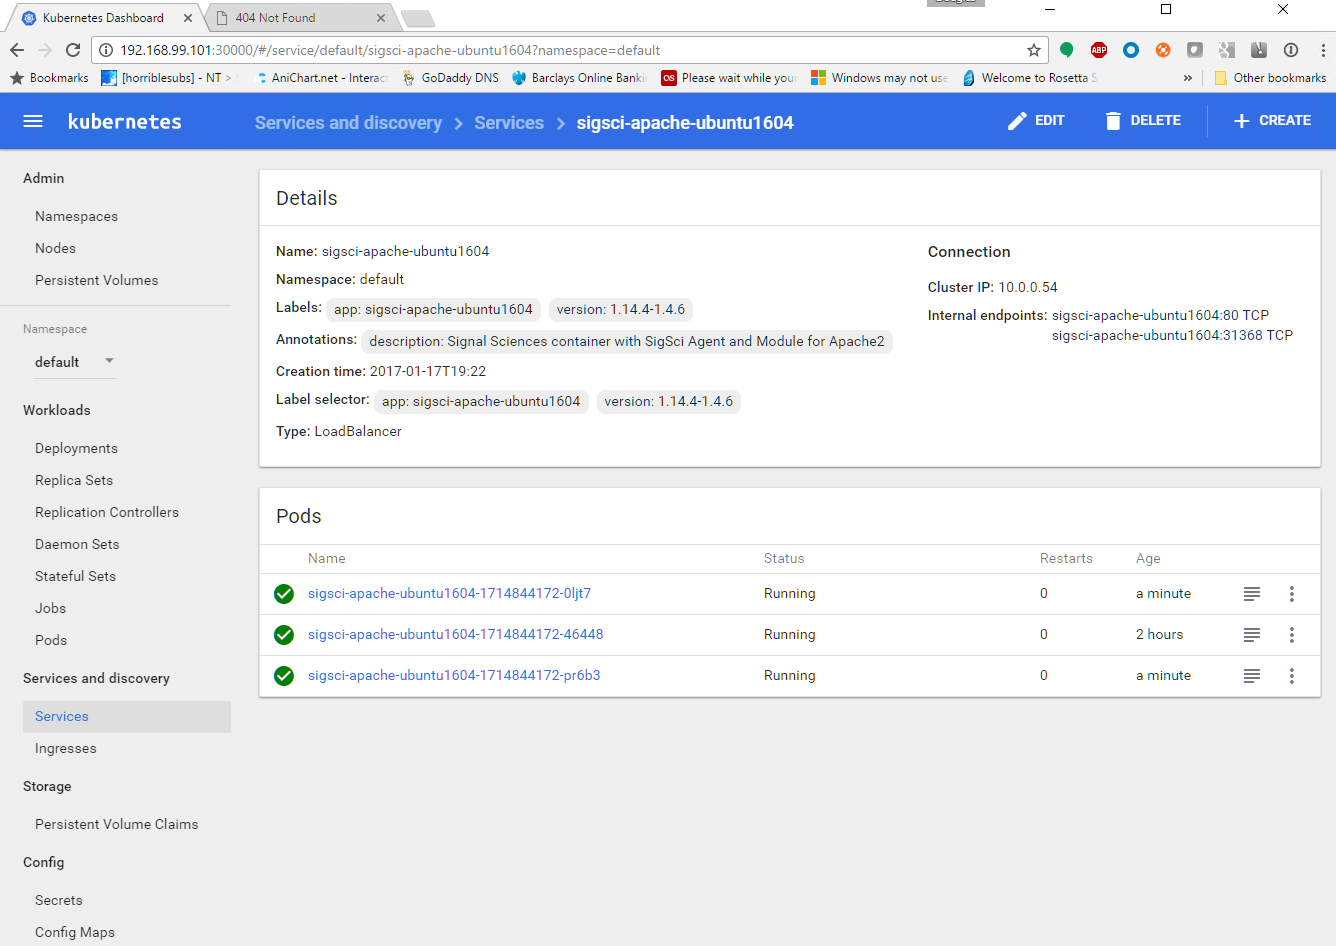
Go to Services -> sigsci-apache-ubuntu1604 and under connections you will see the information about available endpoints.
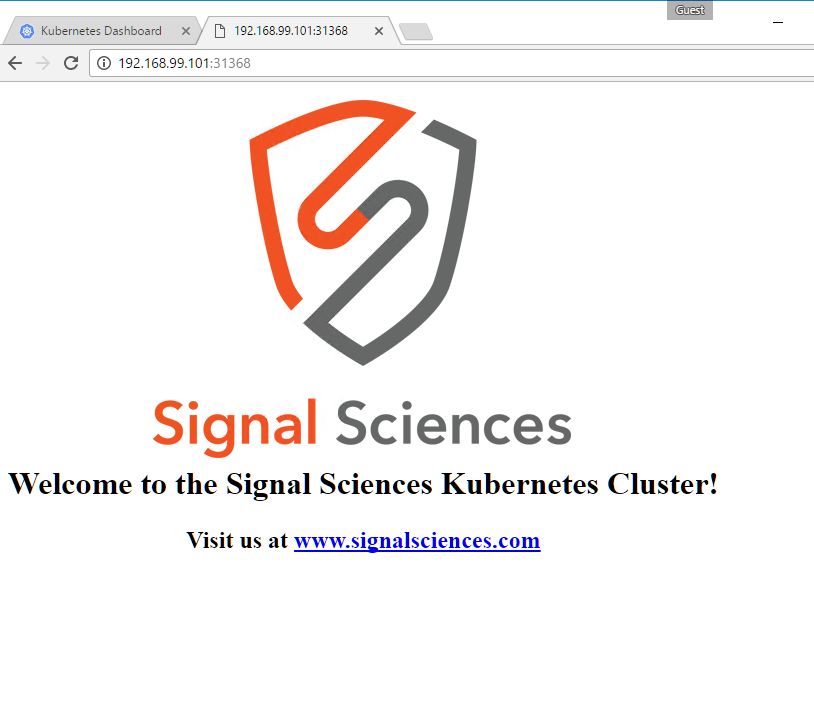
If you hit the URL on the listening port you should now see:
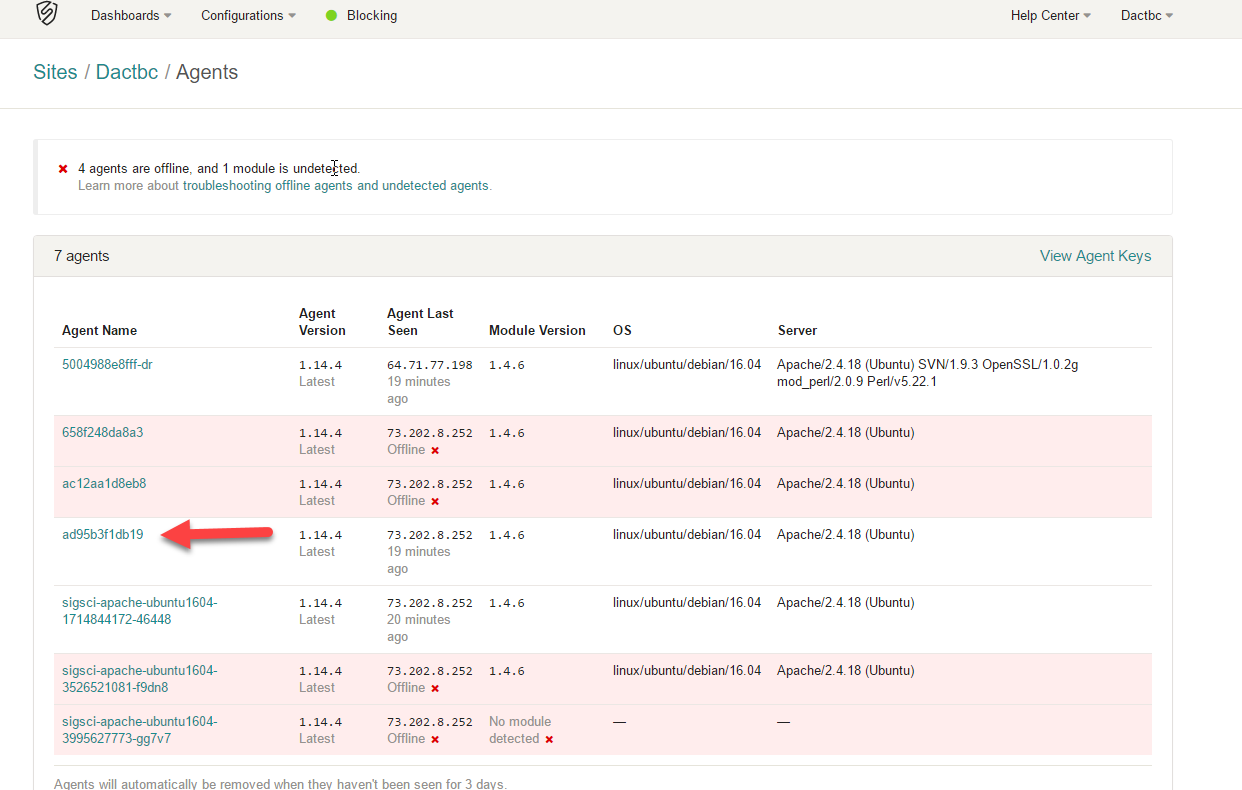
After that check out the Agent information view in the Signal Sciences dashboard. You will see the name of the pod followed by the docker id. This is the hostname as reported back via the container within the guest.
Step 3: Scaling
Scaling is straightforward and easy to do using kubectl.
kubectl scale deployment sigsci-apache-ubuntu1604 — replicas 3This will cause three more pods to be brought up:
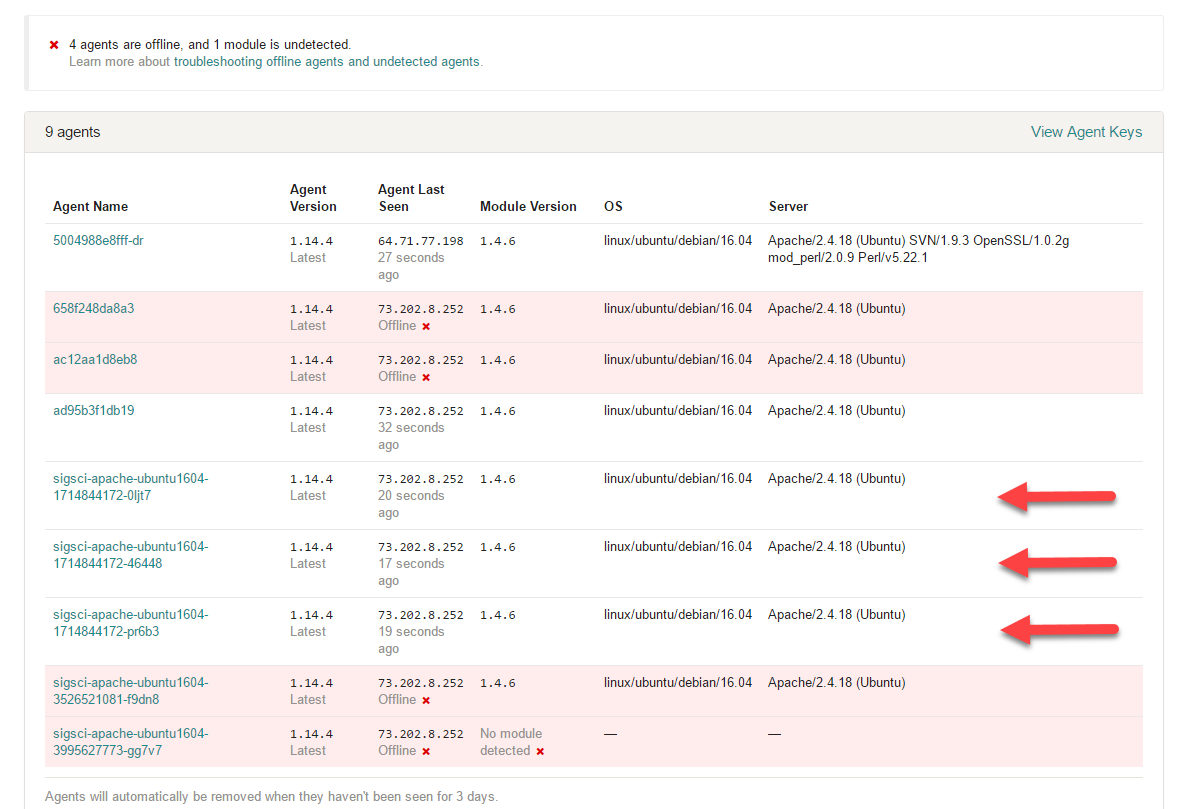
If we check out the agent page we’ll see two new instances, the original plus two more:
Conclusion
One of the biggest challenges for security practitioners is actually getting visibility into everything that is happening within your environment. Being able to include Signal Sciences as part of a template in your container build process helps fill in the gap of covering your web applications. As you deploy new web applications or scale existing ones by including our WPP, you know that they will be protected from day one. There are definitely different ways you can create the Docker container but this gives you an example to get you started on your way!
Published at DZone with permission of Douglas Coburn, DZone MVB. See the original article here.
Opinions expressed by DZone contributors are their own.




Comments