Using Barcodes in iText 7
A developer shows us how to use Java to create several different types of bar codes and explains how these barcodes work to encode data.
Join the DZone community and get the full member experience.
Join For FreeIn my previous article, I reviewed the basics of iText 7. Here, I focus on the barcode support provided by the iText 7 library. Firstly, I'll provide a short overview of barcodes, and then demonstrate barcode generation for every supported barcode type in the library.
Overview
Here is a simple definition of ‘barcode’ according to Wikipedia:
A barcode or bar code is a method of representing data in a visual, machine-readable form.
Most barcode standards are managed by the GS1 organization. If you want to see some examples of barcodes, please check the barcode sheet on their site. In general, we recognize two basic barcode types:
- Linear or one-dimensional (1D).
- Matrix or multi-dimensional (2D).
iText 7 library supports many barcodes, but not all the options mentioned on Wikipedia. Nevertheless, I believe the library supports all the common ones. The section dedicated to 1D barcodes contains some generalization as there are five supported barcodes. Therefore, I'll begin with an explanation of generating the 2D barcodes, because there are only two of them.
Prerequisite: All the codes below, expect iText 7, are basic knowledge. Please check my previous article where I covered that. Additionally, my project has recently been upgraded to the latest libraries (Spring Boot 2.4.2 and iText 7.1.14).
2D Barcodes
Matrix or multi-dimensional (2D) barcodes are represented by black and white "dots." These barcodes are compact and capable of holding high-capacity symbols in the unit area.
iText 7 supports, as already mentioned, only two types of 2D barcodes: QR codes and Data Matrixes. Let's start with QR codes as this barcode is pretty common these days.
QR Code
A QR code (abbreviated from Quick Response code) often contains data for a locator, identifier, or tracker that points to a website or application. See Wikipedia for more details.
To start QR code generation, follow these steps:
- Create an instance of the
PdfDocumentclass as thepdfDocumentvariable will be used as the main entry point to the PDF content. This instance represents the root element where any desired content can be added (lines 11-13). - To create our first QR code, we should proceed with several steps in order to add a barcode instance into the
pdfDocumentproperly. First, we need to create an instance of theBarcodeQRCodeclass dedicated to handling the QR code where we pass the barcode value (to be encoded into the QR code) as the constructor argument (line 15). This instance is assigned into thecodeFormObjectvariable to be used next. - Next, we create an instance of the
PdfFormXObjectclass from ourcodeFormObjectvariable (line 16). Here we need to pass thepdfDocumentinstance. - Also, we need to convert the form referenced by the
codeFormObjectinstance into anImageinstance (line 17). We do that by using thecreateCodeImagemethod (lines 33-37) and storing it as acodeImagevariable for use in the next step. - Finally, we just add the image as the
codeImagevariable into thepdfDocument(line 18). - Additionally, we may add the barcode value into the
pdfDocument(line 20) in order to test PDF generation easily (lines 27-30).
x
class DzoneBarcode2DTests {
final static Logger log = LoggerFactory.getLogger(DzoneBarcode2DTests.class);
static final String GITHUB_URL = "https://github.com/arnosthavelka/itext-poc/";
void qrBarcode() throws IOException {
String targetPdf = "target/example-qrcode.pdf";
try (PdfWriter writer = new PdfWriter(targetPdf);
PdfDocument pdfDocument = new PdfDocument(writer);
Document document = new Document(pdfDocument)) {
var codeObject = new BarcodeQRCode(GITHUB_URL);
PdfFormXObject codeFormObject = codeObject.createFormXObject(pdfDocument);
Image codeImage = createCodeImage(codeFormObject);
document.add(codeImage);
document.add(new Paragraph(GITHUB_URL));
} catch (FileNotFoundException e) {
log.error("PDF creatiion failed", e);
throw new ITextException(e.getMessage());
}
try (PdfDocument pdfDocument = new PdfDocument(new PdfReader(targetPdf))) {
String pdfContent = PdfTextExtractor.getTextFromPage(pdfDocument.getFirstPage(), new LocationTextExtractionStrategy());
assertThat(pdfContent).endsWith(GITHUB_URL);
}
}
private Image createCodeImage(PdfFormXObject codeImage) {
var codeQrImage = new Image(codeImage);
codeQrImage.setWidth(100);
return codeQrImage;
}
}
Note: The test we added in the previous snippet is not testing the correctness of the QR code (the image itself), but just its processing. Hopefully, I will focus on such tests in a future article in this series.
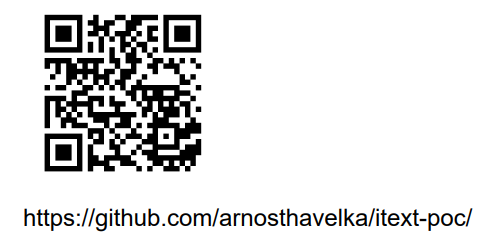
When we look at the generated PDF we should find the QR code and the label of the encoded barcode value. See the below screenshot.
Data Matrix
A data matrix consists of black and white dots arranged in either a square or rectangular pattern, also known as a matrix. The encoded information can be text or numeric data and it can store up to 2,335 alphanumeric letters. See Wikipedia for more details.
As already mentioned, the use of a data matrix barcode is almost the same as QR codes. We just need to use a different class (BarcodeDataMatrix instead of BarcodeQRCode). We can also simplify the previous verbose code. To generate a data matrix barcode, we should follow these steps:
- Create a
pdfDocumentinstance in the same way as before (lines 5-7). - Create an image representing our barcode based on the
BarcodeDataMatrixclass and put it into thepdfDocument(line 9). - We can also add the barcode value into the
pdfDocument(line 10) in order to easily test PDF generation (line 17).
xxxxxxxxxx
void datamatrixBarcode() throws IOException {
String targetPdf = "target/example-datamatrix.pdf";
try (PdfWriter writer = new PdfWriter(targetPdf);
PdfDocument pdfDocument = new PdfDocument(writer);
Document document = new Document(pdfDocument)) {
document.add(createCodeImage(new BarcodeDataMatrix(GITHUB_URL).createFormXObject(pdfDocument)));
document.add(new Paragraph(GITHUB_URL));
} catch (FileNotFoundException e) {
log.error("PDF creatiion failed", e);
throw new ITextException(e.getMessage());
}
... // test PDF content as before
}
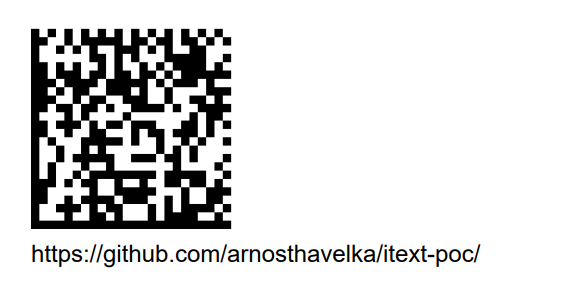
You can see the output of the generated data matrix barcode based on the code above in the next screenshot.
1D Barcodes
Linear (1D) barcodes are represented by lines and spaces of various widths that create specific patterns. Since the library supports many 1D barcodes, I use a generalized code to avoid duplication.
Generalized Barcode Processing
The main principles of using the iText 7 library for barcode generation have been explained above. Therefore, the following steps are slightly simplified. This generalized method can be used to process different 1D barcode types very easily. In order to do that, follow these steps:
- Prepare a general method called
generateBarcodewith these arguments (lines 1-18):- A test method name taken from the
TestInfoinstance (as you can see below) available with the JUnit framework (to be used as a barcode label in our PDF). - A barcode value to be encoded into the barcode.
- A class of the desired Barcode extending the
Barcode1Dclass.
- A test method name taken from the
- Create a
pdfDocumentinstance as usual (lines 5-7). - Add the passed barcode type taken from the
barcodeEANtest method into thedocumentinstance (line 9) in order to easily test PDF generation (line 17). It serves only for demonstration purposes. - Create a
create1DBarcodemethod (lines 20-30) which accepts these arguments:- The
pdfDocumentinstance. - A barcode value to be encoded into the barcode.
- A class of the desired Barcode extending the
Barcode1Dclass (line 10).
- The
- Call the
create1DBarcodemethod and add the result into thedocumentinstance (line 10).
xxxxxxxxxx
private <C extends Barcode1D> void generateBarcode(
String barcodeType, String barcodeValue, Class<C> barcodeClass) throws IOException {
String targetPdf = "target/example-" + barcodeType + ".pdf";
try (PdfWriter writer = new PdfWriter(targetPdf);
PdfDocument pdfDocument = new PdfDocument(writer);
Document document = new Document(pdfDocument)) {
document.add(new Paragraph(barcodeType));
document.add(create1DBarcode(pdfDocument, barcodeValue, barcodeClass));
} catch (FileNotFoundException e) {
log.error("Creating PDF failed", e);
throw new ITextException(e.getMessage());
}
... // test PDF content
}
private <C extends Barcode1D> Image create1DBarcode(
PdfDocument pdfDocument, String code, Class<C> barcodeClass) {
try {
var codeObject = barcodeClass.getConstructor(PdfDocument.class).newInstance(pdfDocument);
codeObject.setCode(code);
return new Image(codeObject.createFormXObject(pdfDocument));
} catch (InstantiationException | IllegalAccessException |
IllegalArgumentException | InvocationTargetException |
NoSuchMethodException | SecurityException e) {
throw new ITextException("The creation of Barcode1D class " + barcodeClass.getName() + "failed", e);
}
}
The create1DBarcode method from the code above is almost the same as the code for 2D barcode generation. Here are the only exceptions:
- A barcode value is not passed in the constructor, but by the
setCodemethod. - An instance of the desired class is not hardcoded into the code. Instead, we use a JDK feature to create a new instance from the passed class as an argument extending the
Barcode1Dclass.
EAN Barcode
The International Article Number (also known as European Article Number or EAN) is used by systems in global trade to identify a specific retail product type, in a specific packaging configuration, from a specific manufacturer. This barcode is represented by the digits (0–9), unlike some other barcodes. See Wikipedia for more details.
To generate an EAN code, we just call the method generateBarcode with these arguments (line 3):
- A test method name provided by the JUnit framework (as mentioned before).
- The barcode value to be encoded into the barcode.
- The
BarcodeEANclass.
x
void barcodeEAN(TestInfo ti) throws IOException {
generateBarcode(ti.getTestMethod().get().getName(), "8590345410081", BarcodeEAN.class);
}
The generated EAN barcode based on the code above looks like this:
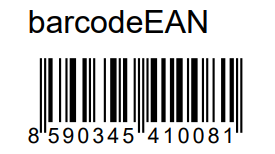
The screenshot of EAN (including test method name) taken from example-ean.pdf.
Code 39
Code 39 allows 43 characters that can be used in the barcode (e.g. A-Z, 0-9, $, %, space, etc.). There is an additional character (denoted as *) that can be used as both start and stop delimiters. Each character is composed of nine elements: five bars and four spaces. Three of the nine elements in each character are wide (binary value 1), and six elements are narrow (binary value 0). See Wikipedia for more details.
We can generate Code 39 using the same method as an EAN barcode mentioned above. We just call the generateBarcode method with the Barcode39 class as the last argument (line 3).
x
void barcode39(TestInfo ti) throws IOException {
generateBarcode(ti.getTestMethod().get().getName(), "A35-8579-78", Barcode39.class);
}
The generated Code 39 barcode based on the code above should look like this:
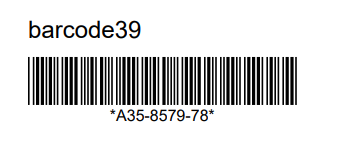 The screenshot of Code 39 (including test method name) taken from example-barcode39.pdf.
Code 128
Code 128 is a high-density linear barcode symbology defined in ISO/IEC 15417:2007. It is used for alphanumeric or numeric-only barcodes. See Wikipedia for more details.
We should use the Barcode128 class as an argument for the generateBarcode method (line 3).
xxxxxxxxxx
void barcode128(TestInfo ti) throws IOException {
generateBarcode(ti.getTestMethod().get().getName(), "https://github.com/arnosthavelka/itext-poc/", Barcode128.class);
}
The generated Code 128 barcode based on the code above looks like this:

The screenshot of Code 128 (including test method name) taken from example-barcode128.pdf.
MSI Barcode
MSI (also known as Modified Plessey) is a barcode symbology developed by the MSI Data Corporation, based on the original Plessey Code symbology. MSI is used primarily for inventory control, marking storage containers and shelves in warehouse environments. See Wikipedia for more details.
We can generate such a barcode by using the BarcodeMSI class as an argument to the generateBarcode method (line 3).
x
void barcodeMSI(TestInfo ti) throws IOException {
generateBarcode(ti.getTestMethod().get().getName(), "9788027107339", BarcodeMSI.class);
}
The generated MSI barcode based on the code above looks like this:
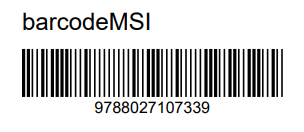
The screenshot of MSI barcode (including test method name) taken from example-barcodeMSI.pdf.
POSTNET
POSTNET (Postal Numeric Encoding Technique) is a barcode symbology used by the United States Postal Service to assist in directing mail. The ZIP Code or ZIP+4 code is encoded in half- and full-height bars. See Wikipedia for more details.
We can generate this final barcode in the same way as all the 1D barcodes above. Just pass the BarcodePostnet class as an argument to the generateBarcode method (line 3).
x
void barcodePOSTNET(TestInfo ti) throws IOException {
generateBarcode(ti.getTestMethod().get().getName(), "9788027107339", BarcodePostnet.class);
}
The generated POSTNET barcode based on the code above looks like this:

The screenshot of POSTNET barcode (including test method name) taken from example-barcodePOSTNET.pdf.
Conclusion
In this article, I provided detailed instructions for generating all barcodes supported by the iText 7 library. I began with an overview of generating every 2D barcode type before demonstrating the usage of 1D barcodes. You can find all the code mentioned above in my GitHub repository.
In my next article, I plan to go back to the beginning and explain text formatting within the PDF page using iText 7.
Opinions expressed by DZone contributors are their own.

Comments