Using API Autodiscovery in Anypoint Platform
In this article, see how to use and configure API Autodiscovery in Anypoint Platform.
Join the DZone community and get the full member experience.
Join For FreeIn this article, I'll be showing you how to use and configure API Autodiscovery in Anypoint Platform.
What Is API Autodiscovery?
We use API Autodiscovery to pair an API in API Manager to its deployed Mule application.
Setting up autodiscovery allows API Manager to manage the API. When set up correctly, it shows the API status represented as a green dot if the API is being tracked (active) or a gray dot if untracked (unregistered).
By configuring autodiscovery, you can use policy management and API Analytics accessed from within API Manager.
When autodiscovery is correctly configured in your Mule application, you can say that your application’s API is tracked by or paired to API Manager.
NOTE: An API in a Mule runtime can only be associated with one autodiscovery instance. No two Autodiscoveries can be associated to the same API in a Mule Runtime.
Step 1: CREATE AN API
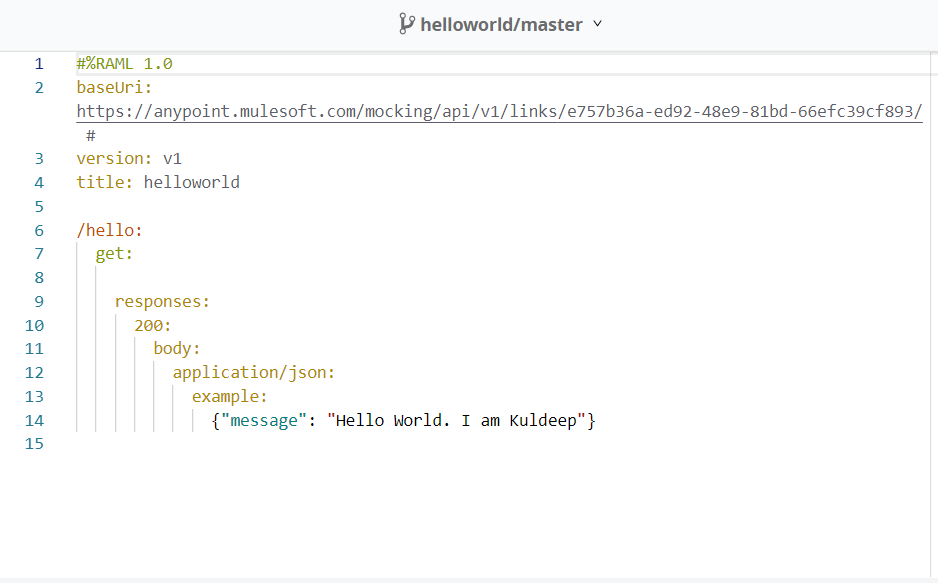
Create a sample API specification in the Design Center. Below is the sample of the RAML file created:

Step 2: TEST THE API
The test is done by enabling the mocking service to see if it is working fine or not. If there are any issues, check out the RAML in the design center and test it again.
If there are no errors, Publish it to Exchange.
Step 3: Manage the API in API manager
Once the RAML is published in Exchange, it needs to be managed in the API manager.
In the API MANAGER tab in Anypoint Platform, click on Manage API and select Manage API from Exchange.
Enter the API name. Select Managing type as Basic Endpoint. Check the box for the Mule version as we are managing it in Mule4.
Once you save the configuration, the API will visible in the API manager but the status of the API will be "UNREGISTERED".
It means that until now, it has not yet been associated with an actual implementation.
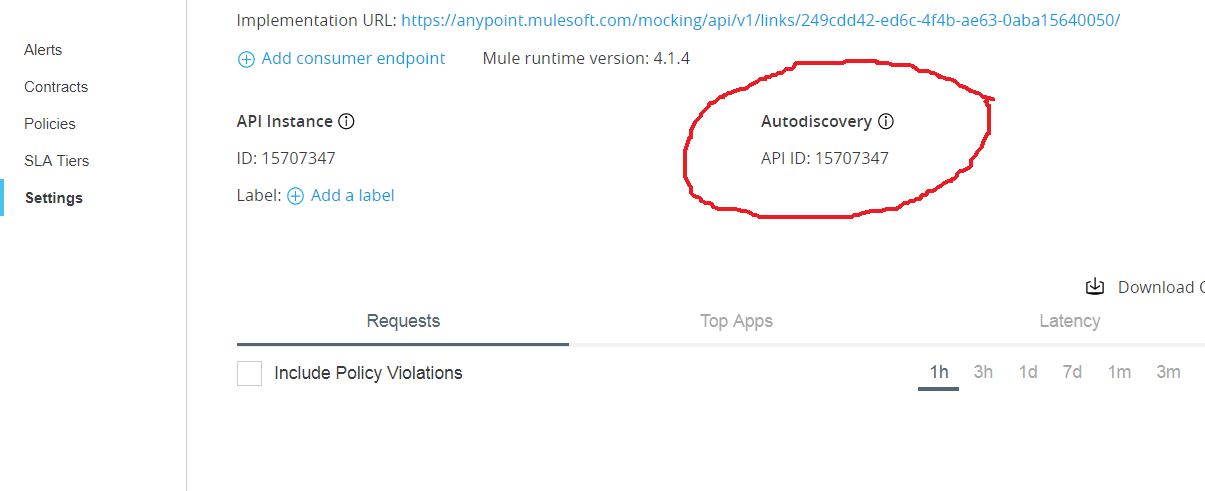
The most important thing to notice in the API is the API Autodicovery tag.
This will help us to pair the API in the API Manger to its deployed Mule Application.
Step 4: CREATE A MULE PROJECT
Go to Anypoint studio. Create a Mule Project, and import the newly created API from the design center. You can do any necessary changes required according to your requirement.
Step 5. Configuring Autodiscovery
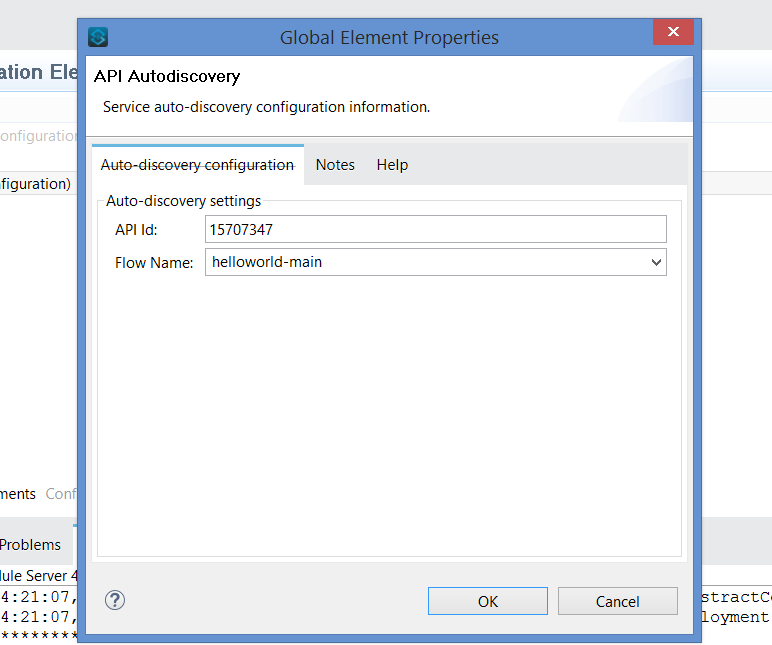
(a) Click on the Global Elements on the canvas.
(b) Click Create àComponent Configurations à API Autodiscovery.

(c) In the Global Element Properties Window, set the API Id with the Autodiscovery Id of the API in the API Manager Anypoint Platform and the flow name to the main flow of the API implementation.

Step 6: TESTING AND DEPLOYING
Test the application to see if it is running fine without any errors.
Once the application is running successfully, deploy the application to cloudhub.
Step 7: Runtime Manager
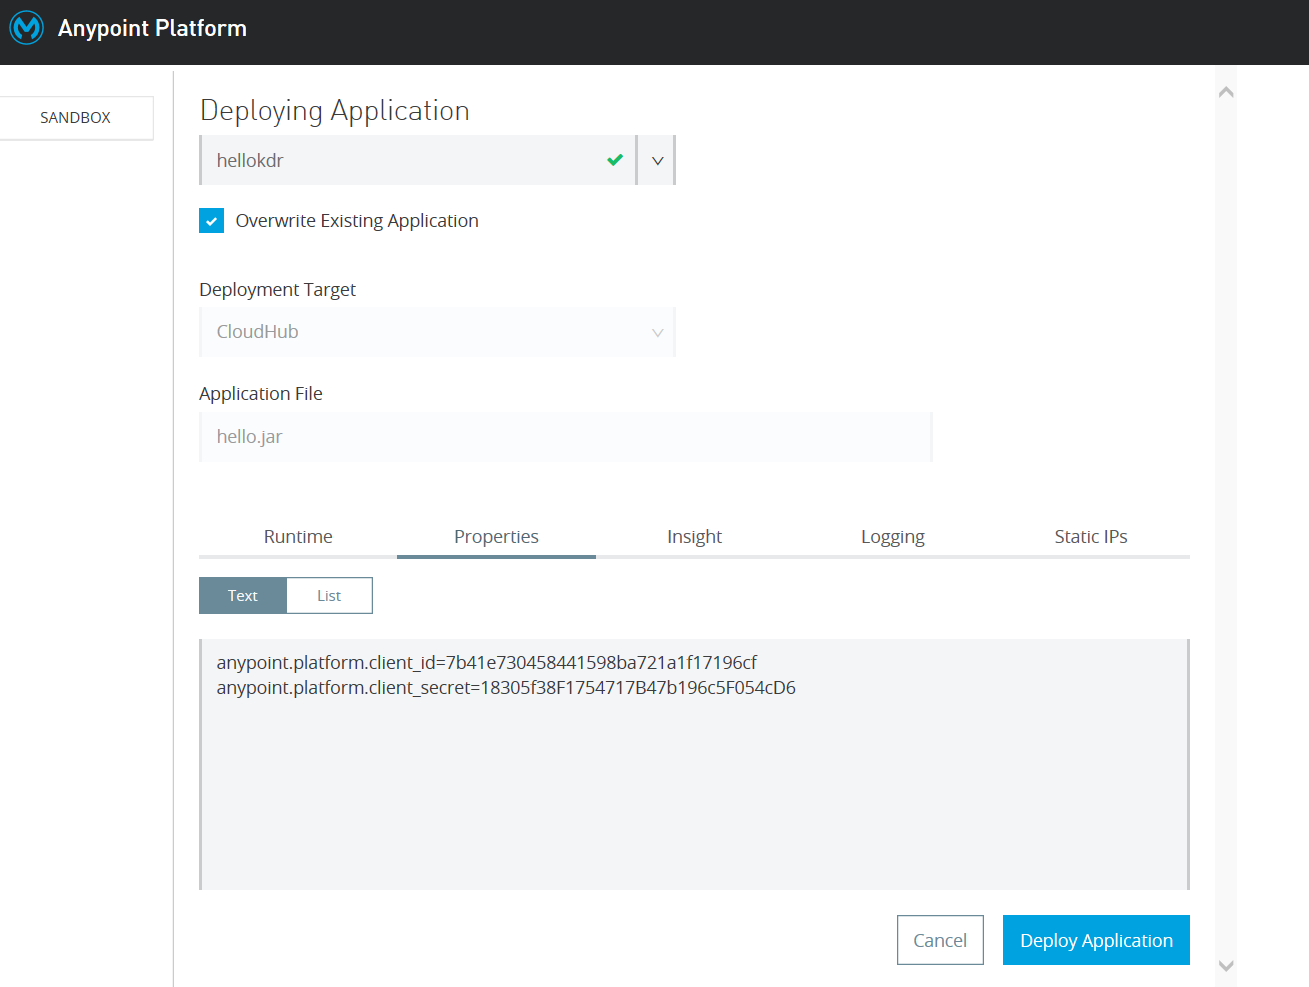
In the Anypoint Platform window that opens up, in the properties tab of the Anypoint Platform window (shown in the image below), set two properties:
the client_id and the client_secret
Note: The client_id and client_secret are the credentials of your master organization or Business Group for whom you are developing the APIs.

Once you set the Client Id and Client Secret, Deploy the application.
Once the application is up and running, you can see the status of the API as active in the API manager.
Conclusion
In this article, I have shown you how to use the API Autodiscovery to pair an API in the API Manager to its deployed Mule Application.
Now, any request that comes to the application passes by the API Manager.
If we apply policies to the API in the API Manager, the request will pass by or intersect the API Manager, and the policies will be applied to it.
Opinions expressed by DZone contributors are their own.

Comments