Tomcat Server Failed to Start From Eclipse
Having problems starting Tomcat from Eclipse?
Join the DZone community and get the full member experience.
Join For FreeA very common problem Java developers face while working on web projects that need to be deployed in Tomcat is the error: 'Failed to Start...'
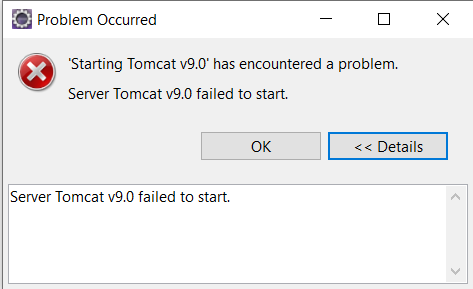
When we debug the application during development time and use Tomcat with Eclipse EE to deploy an application, the common error pops up below...
Server Tomcat v.xx Server at localhost failed to start.
This wastes several hours of developers' time. However, it's very easy to fix once you know the solution — it will also save you time. This error can be resolved in the following three cases:
1. Clean project and server
Or:
2. Remove .snap file from this directory
<workspace-directory>\.metadata\.plugins\org.eclipse.core.resourcesOr
3. Remove temp file from this directory
<workspace-directory>\.metadata\.plugins\org.eclipse.wst.server.core
Another similar problem is shown below. This, too, is a very common and frequent problem.
This is how you can fix the Eclipse Error: Starting Apache Tomcat at localhost has encountered a problem!
The error looks something like this:

Most of the time, this means that Tomcat is already running in the background and Eclipse is trying to open it again on the same ports. This is obviously not possible, as the ports will be in use.
The issue typically arises from either the Eclipse or Tomcat process crash or being stuck.
This is how you can go about fixing the issue:
1. Go to server tab and double click on the Tomcat server, the configuration file for Tomcat will open and look like this:
2. Mark down the Port Number Tomcat is running on.
3. In my case, I see ports: 8013, 8014, and 8015
4. Go to command prompt and execute the following lines in succession (make sure to change ending port numbers to your own Tomcat ports)
netstat -o -n -a | findstr 0.0:8013 netstat -o -n -a | findstr 0.0:8014 netstat -o -n -a | findstr 0.0:8015 Once you do so, you’ll get a result similar to this:
As you can see in the above screenshot, in my case, port 8013 is not running, but ports 8014 and 8015 are being used and they are running using PID (process id): 15484.
This PID number (15484 in my case) is something you need to mark down.
5. Now, all you need to do is to go to your Windows Task Manager, click on Details Tab (in Windows 8), and sort the processes by PID number.
6. Find the Tomcat PID(s) that you found earlier, highlight the task (typically, it’ll be the Java process) and click “End Task Button”

7. Now, you can go back to Eclipse and run the task on your server as you would typically do. It should work again.
Let me know if this helped you in any way in the comments below. Thanks.
Opinions expressed by DZone contributors are their own.


Comments