Token Based Security: Angular Applications, Part 3
In part three of this series on token based security, we will learn how to authorize HTTP calls to resource API by using an Angular HTTP Interceptor.
Join the DZone community and get the full member experience.
Join For FreeIntroduction
In the previous post of this series, we configured our Angular application as a client of IdnentityServer and completed the login/logout process.
However even though the user was logged in, the REST API calls were still not authorized:
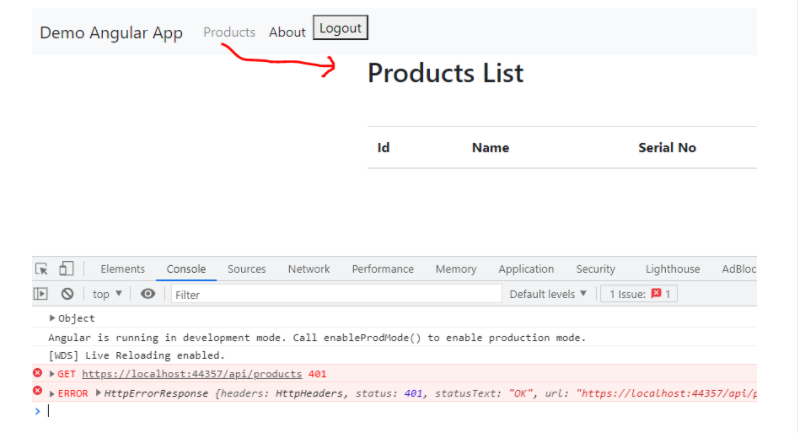
In this post, we will authorize HTTP calls by passing the bearer token as an Authorization Header.
Now, if you are new to token-based security or how we set up the Angular application, I will suggest you first go through the previous posts, and then the topics in this post will much easier to follow. Let’s see how to get an Access Token next.
Get Access Token
I’ve added the following method to authService (we created this service in the previous post) to get the access token:
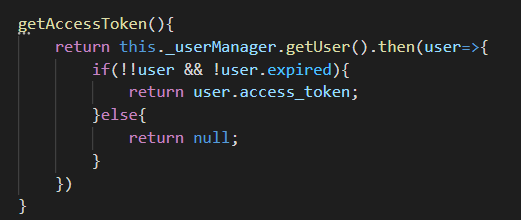
Next, we will build a service based on HTTP Interceptor, which will call this method to get the access token and then further use this access token to set HTTP Headers for calls to the protected API.
Authorizing REST API Calls
We can add the bearer token to HTTP requests manually or we can use the HTTP Interceptor in the pipeline to do this automatically.
Here is the boilerplate code for such a service:

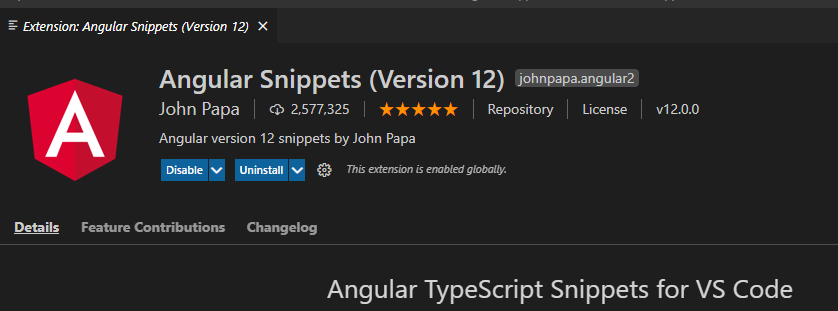
I’ll not go into the details of HttpInterceptor. By the way, I used the Angular Snipped extension for VS-Code to quickly create the template code. You can install this extension and it will help you quickly write code for various purposes:
Setting Up HTTP Interceptor
Let’s update the HttpInterceptor to set header with bearer token:
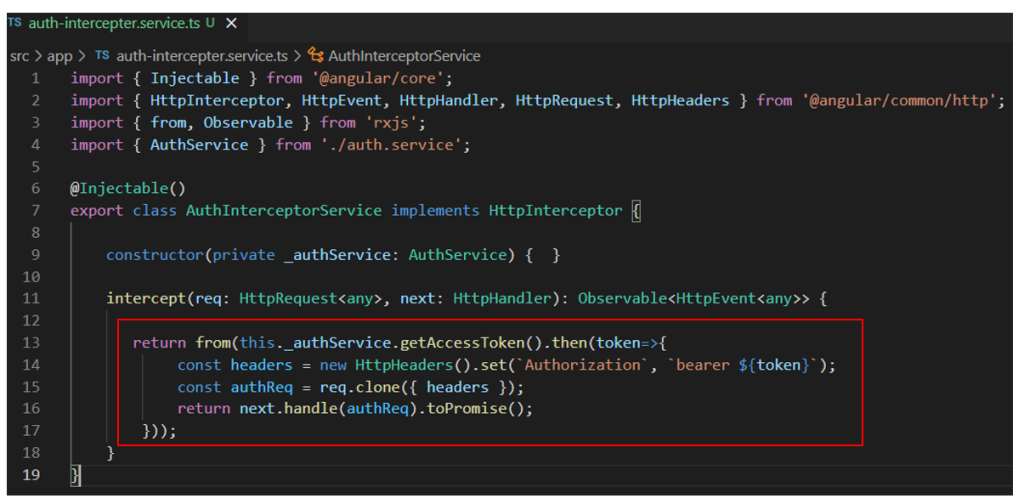
The code is very boilerplate. We are calling the getAccessToken() method which we created earlier in AuthService. Then we just set the retrieved bearer token on HTTP Header. To return an observable, we first used to toPromise function and wrap the code in an rxjs from operator.
Now, any HTTP Call from the Angular application will pass through this interception point and the token will be added automatically.
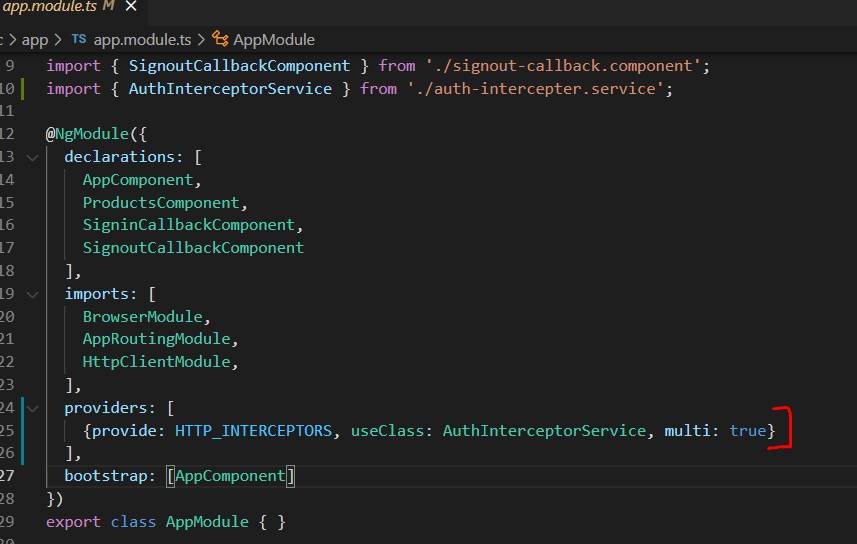
We also need to register this interceptor to the application as shown below:
Testing the Application
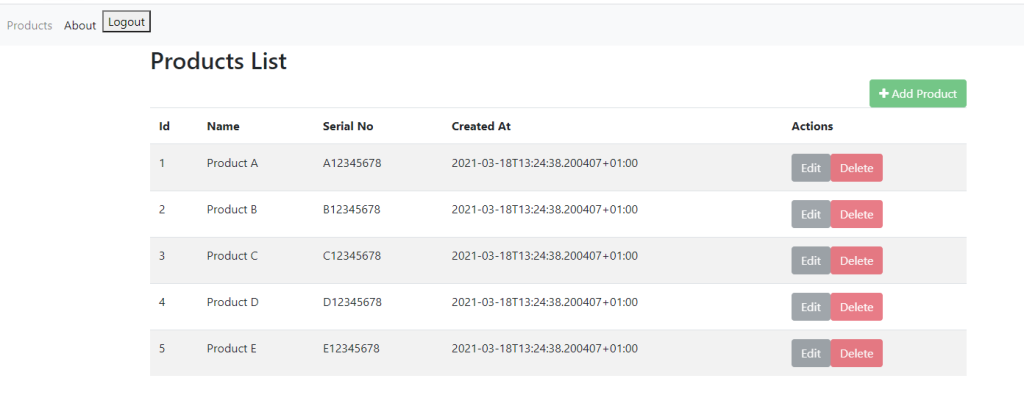
With all of these changes in place, let's run the applications (IdentityServer, ResourceAPI, and Angular client) and visit the Products List page again. This time, the HTTP Request is authorized, data is retrieved, and shown on UI:
Excluding Bearer Token When Needed
There might be situations when for some HTTP calls (maybe those to a different API), you don’t want to set the bearer token automatically or maybe want a different bearer token. One way to do that is to just introduce a simple check as shown below:
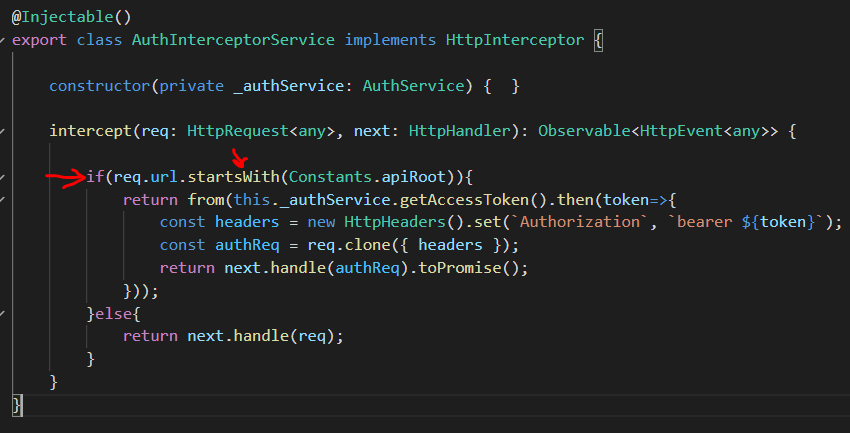
Now, only the call intended for the specific API will have a bearer token added automatically.
Summary
In this post, we learned how to authorize HTTP calls to resource API by using an Angular HTTP Interceptor. You can download the source code from this git repository. If you have some comments or questions, let me know. Until next time, Happy Coding.
Published at DZone with permission of Jawad Hasan Shani. See the original article here.
Opinions expressed by DZone contributors are their own.

Comments