Synchronizing MS SQL Server Databases
In this article, we’ll look at how to synchronize SQL Server database changes between different servers using dbForge Schema Compare for SQL Server.
Join the DZone community and get the full member experience.
Join For Free
General Relevance of SQL Server Database Changes Synchronization
When working with databases, we are often faced with the task of synchronizing changes.
Even if a company only uses one production environment, there still needs to be at least one additional environment for testing purposes. This creates a need to transfer changes from the testing environment to the production one.
As the company grows, the number of servers and virtual environments increases, and the synchronization process becomes more complex.
In general, we can lay out the sequence of steps for transferring and synchronizing changes as follows:
- Between development environments
- From a development environment to a test environment
- Between test environments
- From a test environment to a pre-production environment
- From a pre-production environment to a production one, with the ability to quickly roll the changes back
There are various tools that can be used for synchronizing changes between environments, such as:
- Visual Studio Comparer
- SQL Server Integration Services
- Devart’s dbForge Schema Compare for SQL Server
In this article, we’ll look at how to synchronize SQL Server database changes between different servers using dbForge Schema Compare for SQL Server.
SQL Server Schema Synchronization
We’ll accomplish the task of database schema synchronization with the help of Schema Comparison Tool embedded in Devart’s dbForge Studio for SQL Server. free trials are available. To make things simple, let’s take a source server and a target server.
In this example, we’ll be working with the SRV database, which is used to manage the MS SQL Server RDBM. This database can be accessed freely for any purposes, so you can download it here:
https://github.com/jobgemws/Projects-MS-SQL-Server-DBA/tree/master/SRV
Establishing the Connection
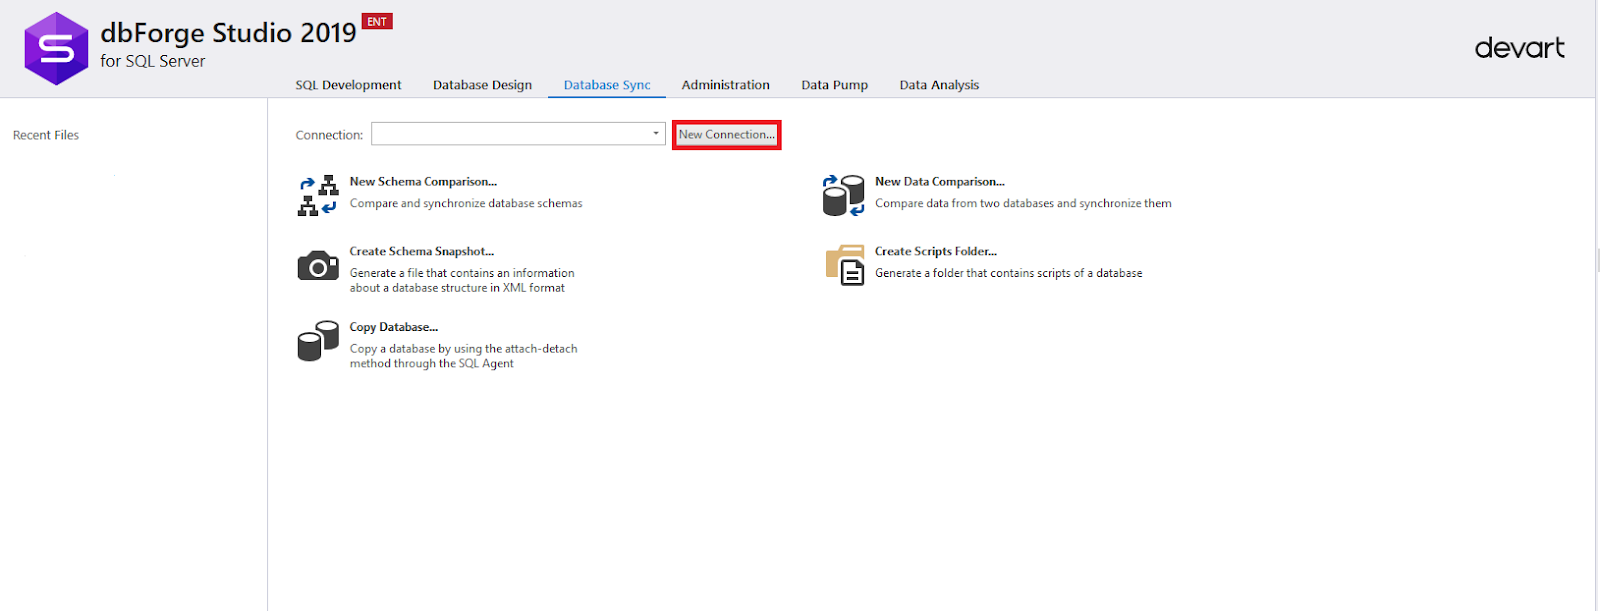
After opening dbForge Studio for SQL Server, you’ll need to go to the "Database Sync" tab and create a new connection by clicking the "New Connection" button:
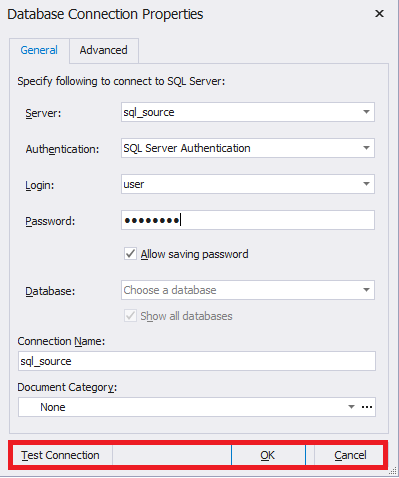
The connection settings window will open, in which you should enter the necessary information to connect to an instance of MS SQL Server (the source server). As you can see, the ‘MFA Authentication’ option is now available in addition to the "MS SQL Server", "Windows" and "Active Directory" authentications. When all the necessary fields are filled in, click the "Test Connection" button to test the connection:
Once the connection is established, the following dialog box will be displayed:
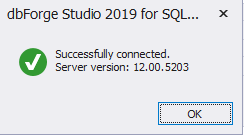
Press "OK" — first in this box, and then in the connection settings window.
A new connection should now be added:

In a similar way, we need to connect to all necessary MS SQL Server instances (in our example, this will be achieved by creating a connection to the target server).
Setting up the Comparison Process
To adjust the database schema comparison process, press ‘New Schema Comparison’:

A window with schema comparison settings will appear.
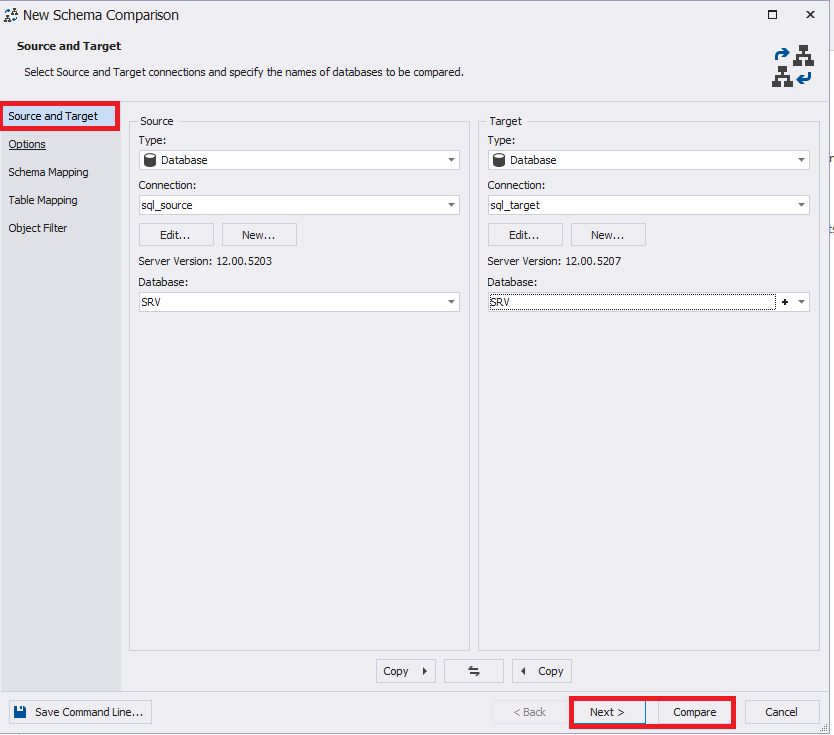
We’ll need to specify the following info in the "Source" pane in the left pane of the "Source and target" tab:
type
connection
source database
In the right "Target" pane, we’ll specify:
type
connection
target database
Keep in mind that "database" is not the only accessible type. When required, you can also choose "script folder," "snapshot," "source control," or "backup." However, in this particular case, we’ll choose the "database" type.
After you specify all the necessary settings in the current tab, press "Next" to continue to the next step in adjusting the database schema synchronization process.
If two initially identical databases are being compared, you can just proceed to the comparison process right away by clicking "Compare."
Any tab can be accessed at any time if needed — just click the corresponding element in the left pane of the window.
You can also save the current settings as a .bat file by clicking the "Save Command Line" button in the bottom left side of the window.
In most cases, when changes are being performed between two initially identical databases, pressing "Compare" at this stage will do the job. However, to explore the tool’s full functionality, we’ll press "Next:"
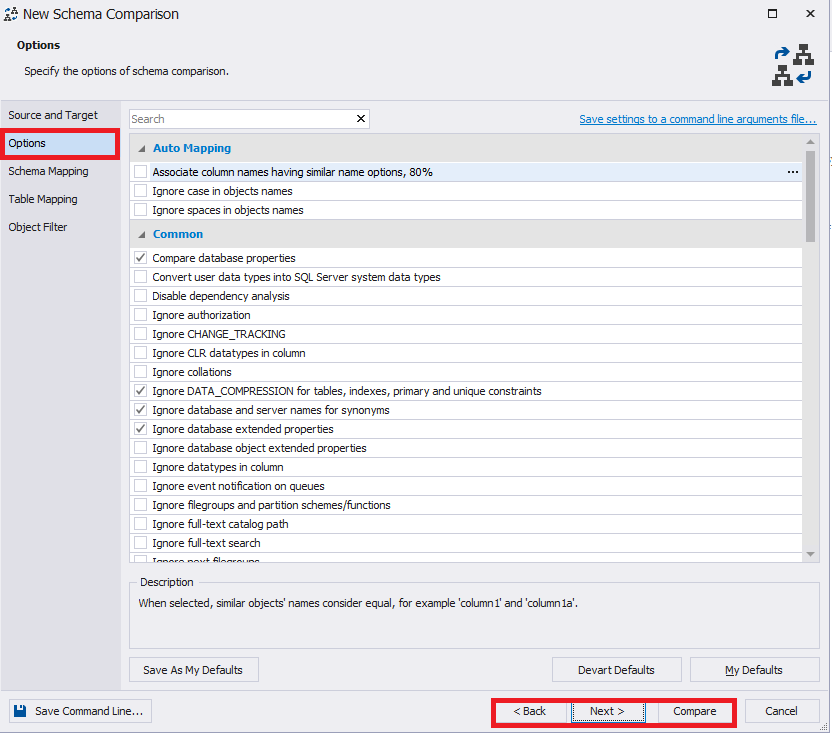
You can tune various settings in the "Options" tab or just leave them in the default state:
You can set the schema mapping by name in the "Schema Mapping" tab:
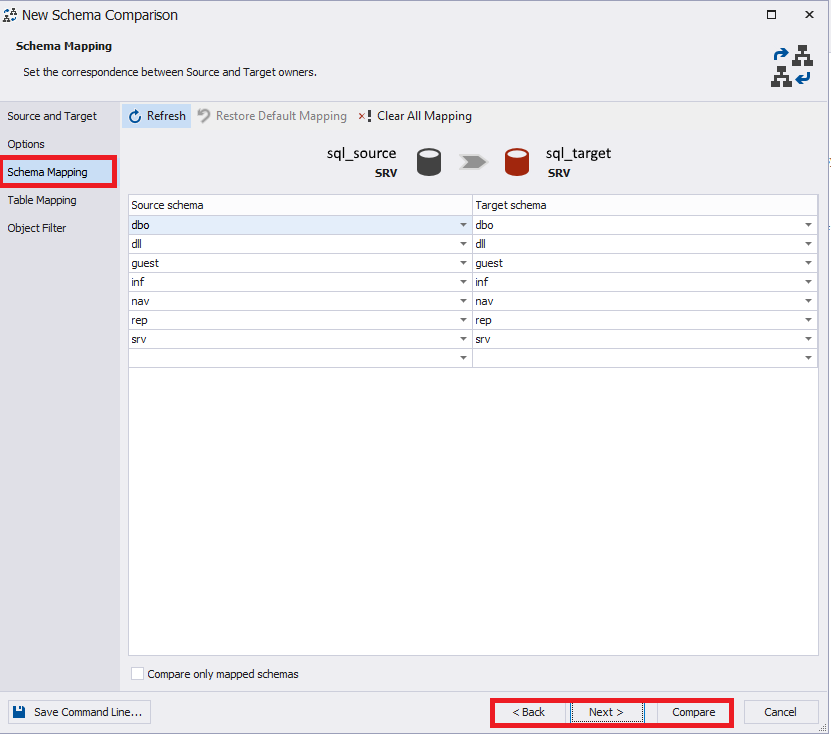
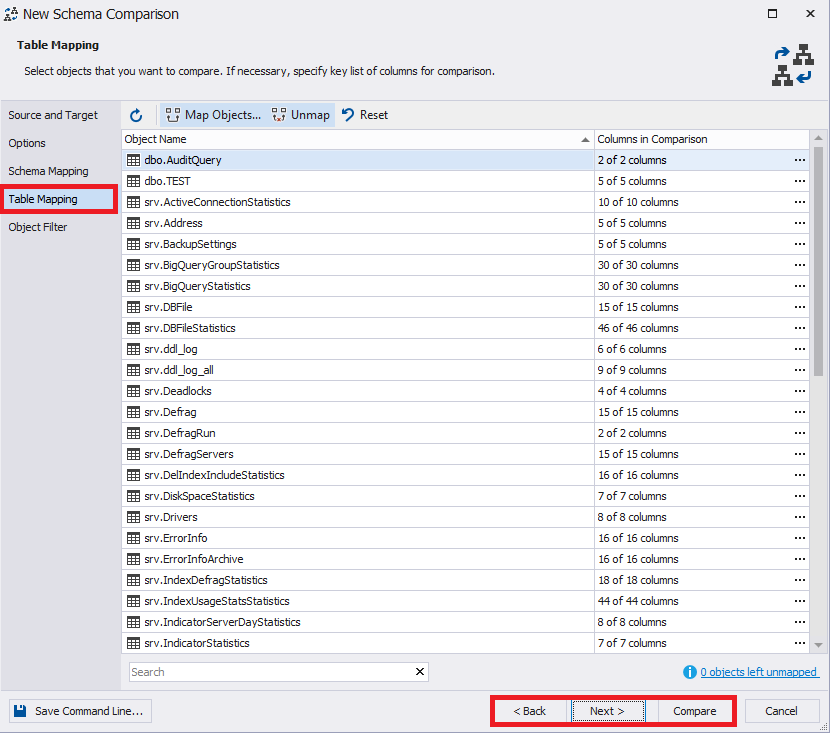
Table and column mapping can be set up in the "Table Mapping" tab:
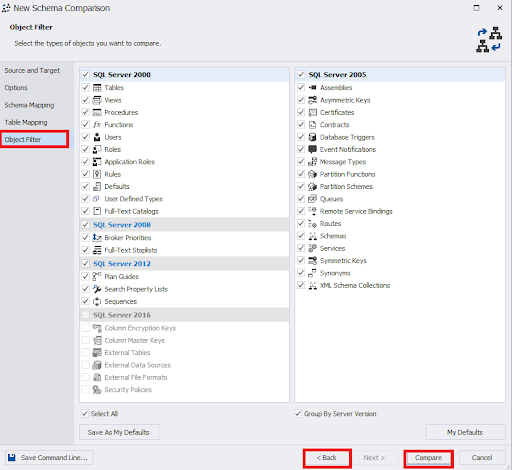
The "Object Filter" tab allows you to set the objects for comparison. You can also get back to any of the previous steps at any time.
Comparing Database Schemas
To start the database schema comparison process, click "Compare:"
The database schema comparison settings window will be closed, and a window with the comparison process progress bar will appear instead:
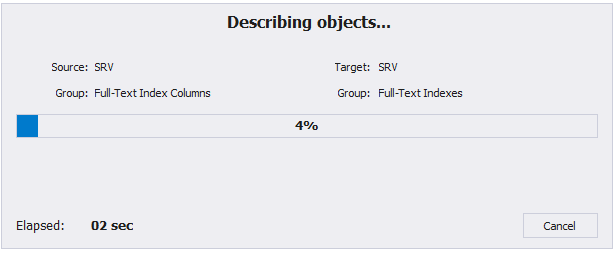
After the process is finished, take a look at the window. You can change the comparison settings by clicking "Edit Comparison" in the top left corner of the screen. To the right of this button, you can see a circle with an arrow icon — it’s a refresh button that will start the MS SQL Server schema comparison process again when being clicked. Also, slightly below, you can find all the servers that were registered earlier:
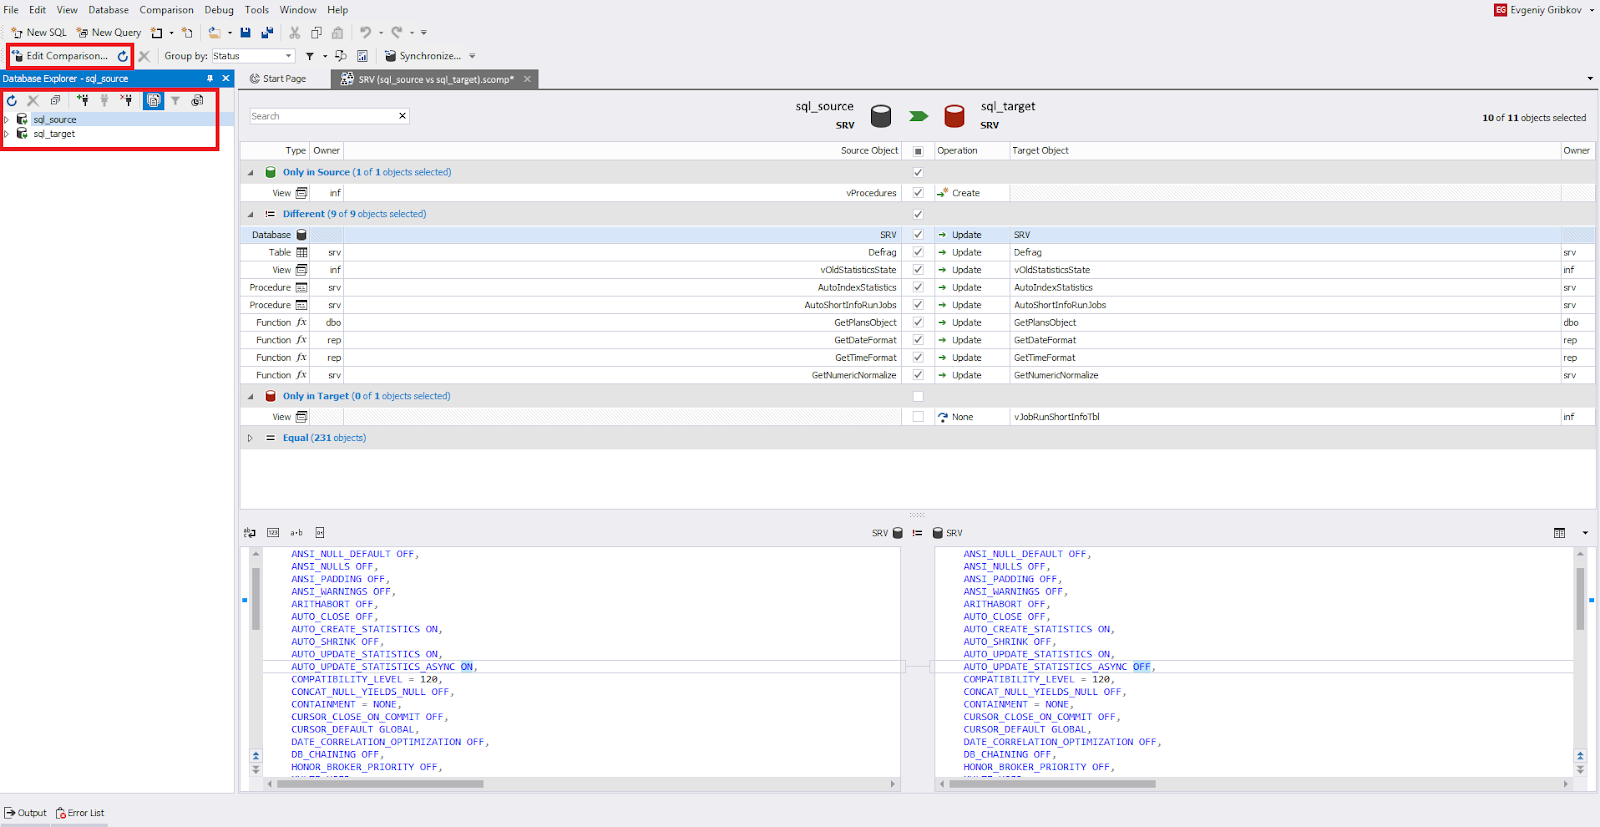
The "File" option in the main menu allows you to save the schema comparison settings as a .scomp file.
Adjusting Synchronization Settings
Now, let’s look at the window’s central top section. Here, you can choose the objects that need to be synchronized by selecting the corresponding checkboxes. Objects from the source are on the left side, while those from the target are on the right. Below, you can see the code of these objects placed in a similar manner. The comparison objects are divided into 4 groups, with the number of objects in each of these groups being accordingly counted.
In this case, we are viewing the code of a specific table, which is located both in the source and in the target. That’s why this object is located in the "Different" group:
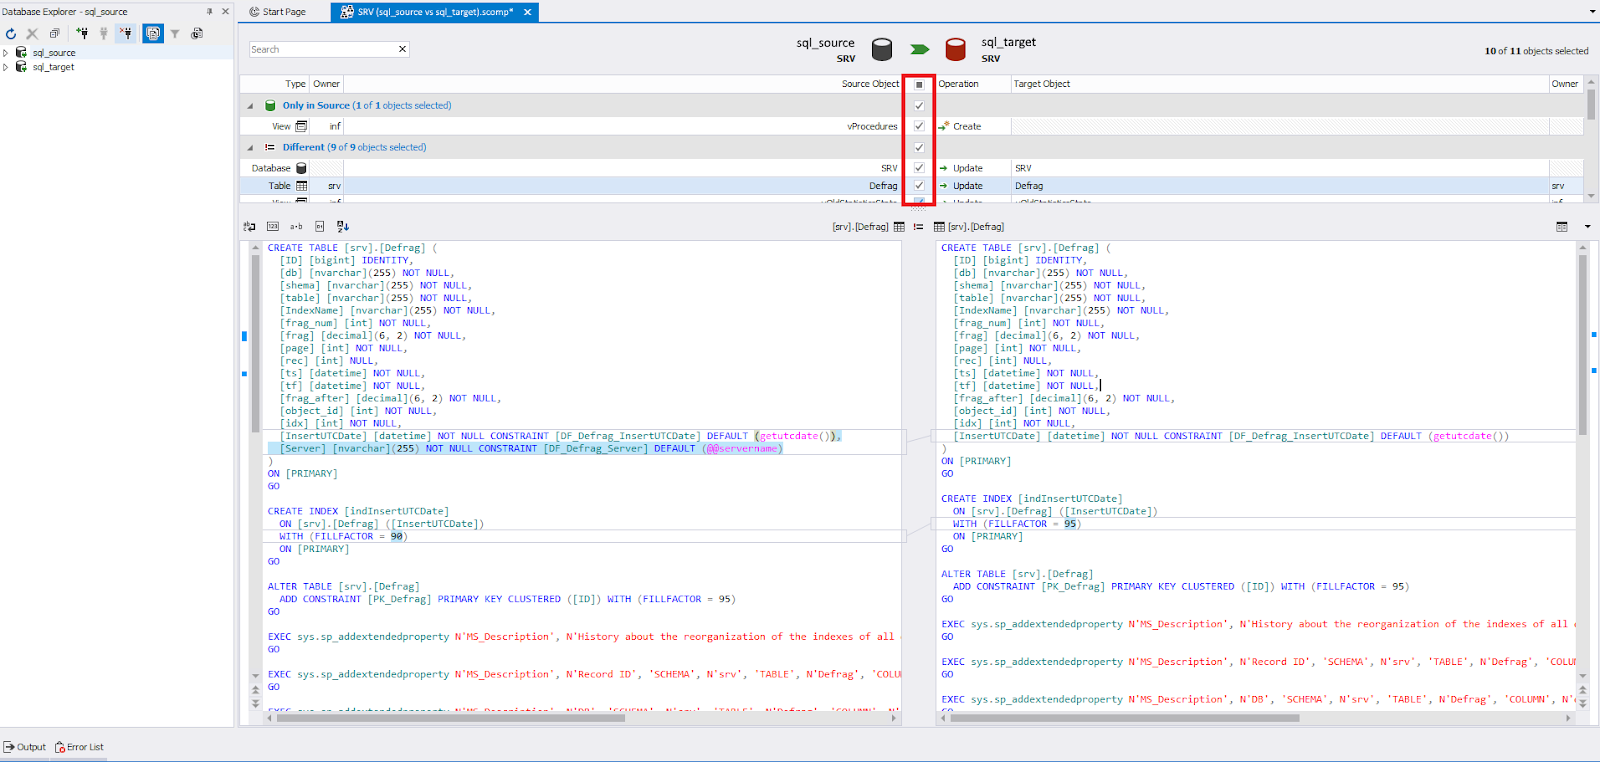
When this object is chosen, its code will be transferred from the left side to the right while the database schemas are synchronized for the target.
Here, we’re looking at the code of a representation that is only present in the source. That’s why this object is placed in the "Only in source" section and no code is visible for it on the right side of the screen:
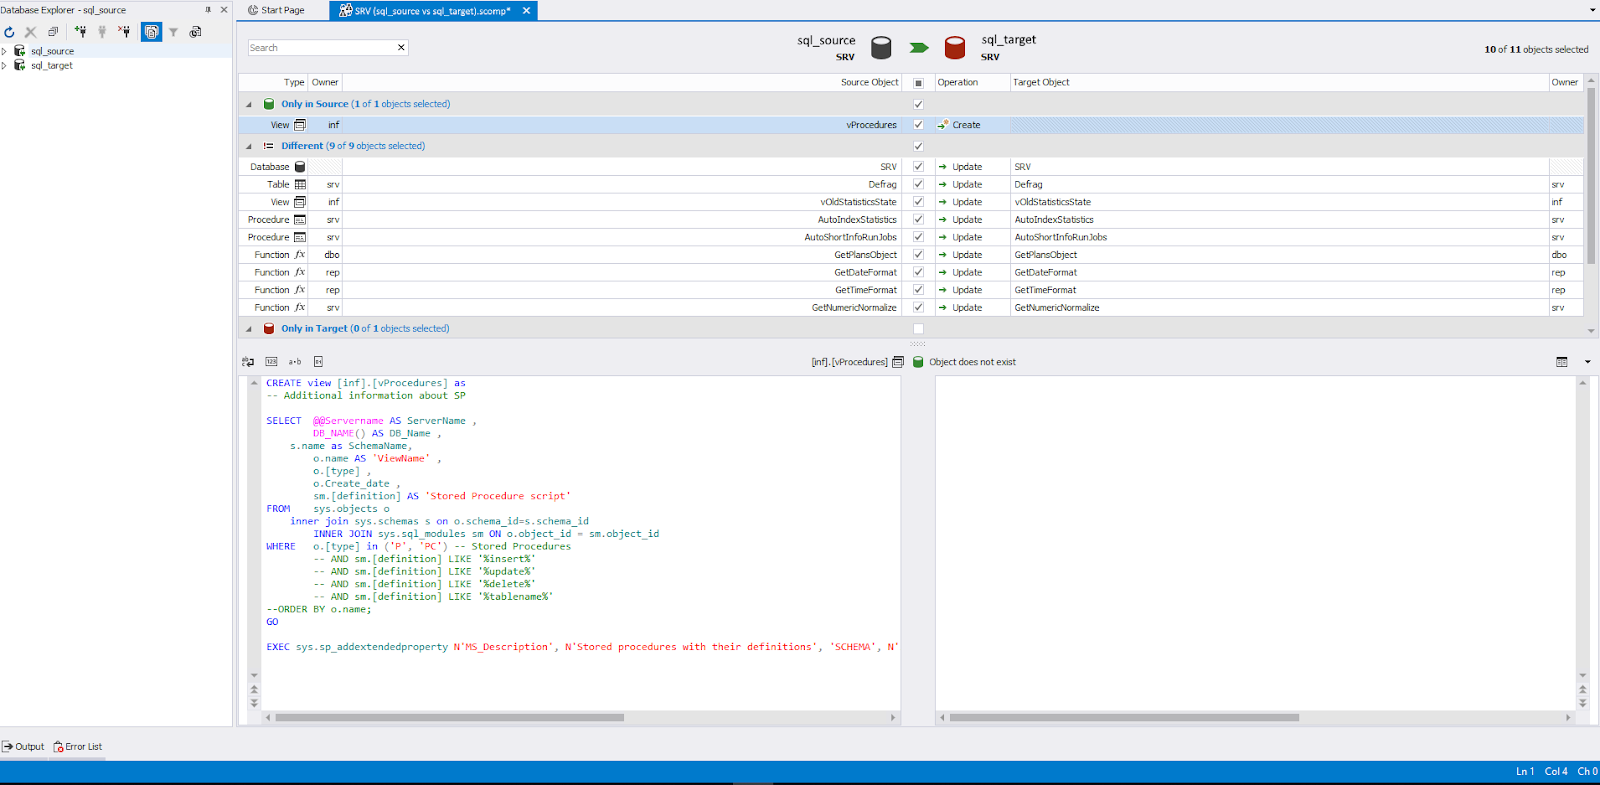
When such an object is chosen, the code for creating it will be generated for the target.
In the following case, we’re looking at the code of a representation that is only present in the target. Therefore, this object is placed in the "Only in target" section, and there is no code visible for it in the left side of the screen:
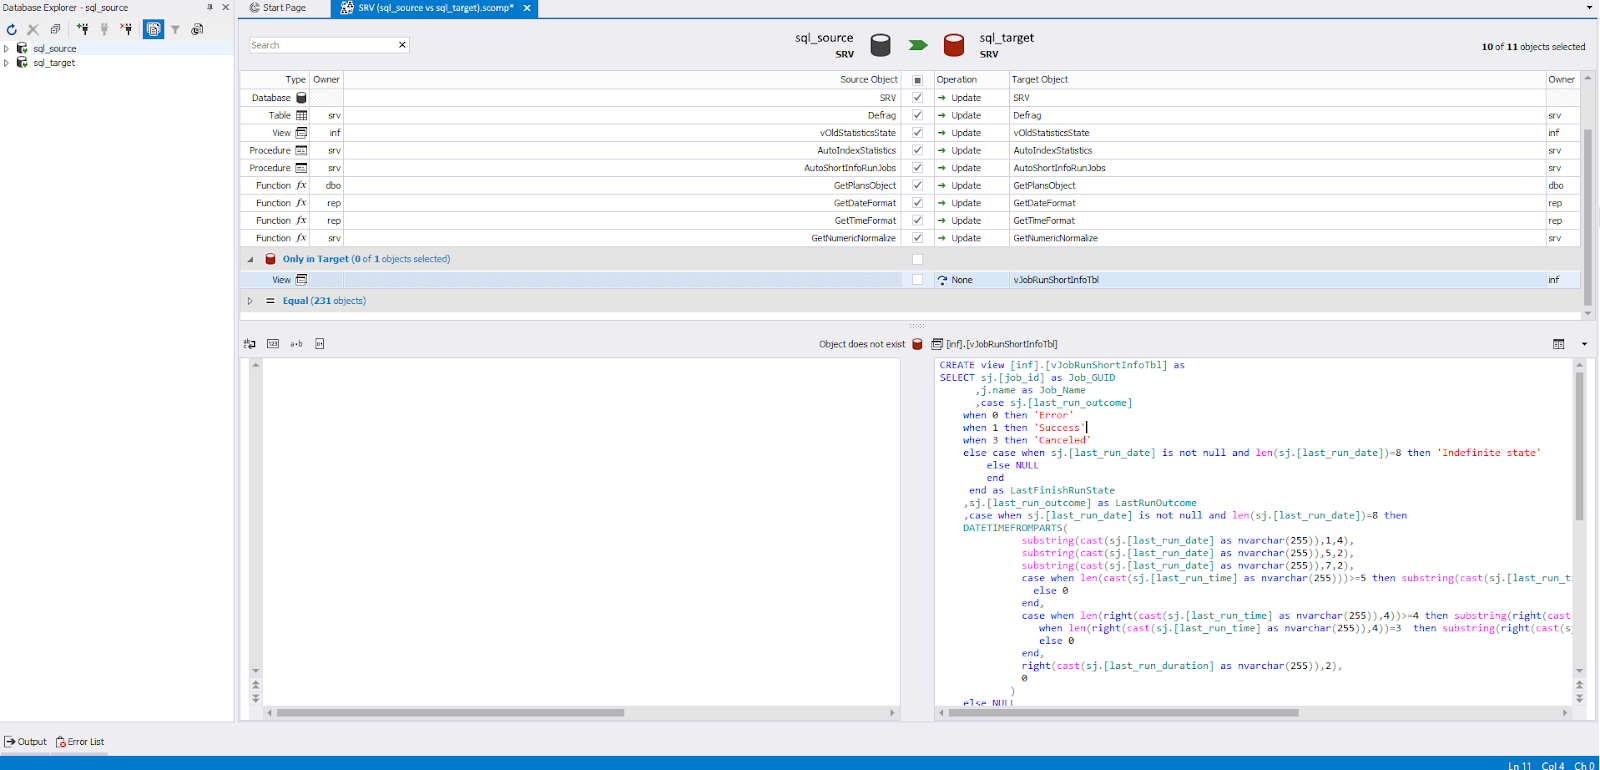
When such an object is chosen, the code for deleting it will be generated for the target.
Next, to start the database schema comparison process, you’ll need to click either one of the buttons you can see highlighted in red on the following screenshot:
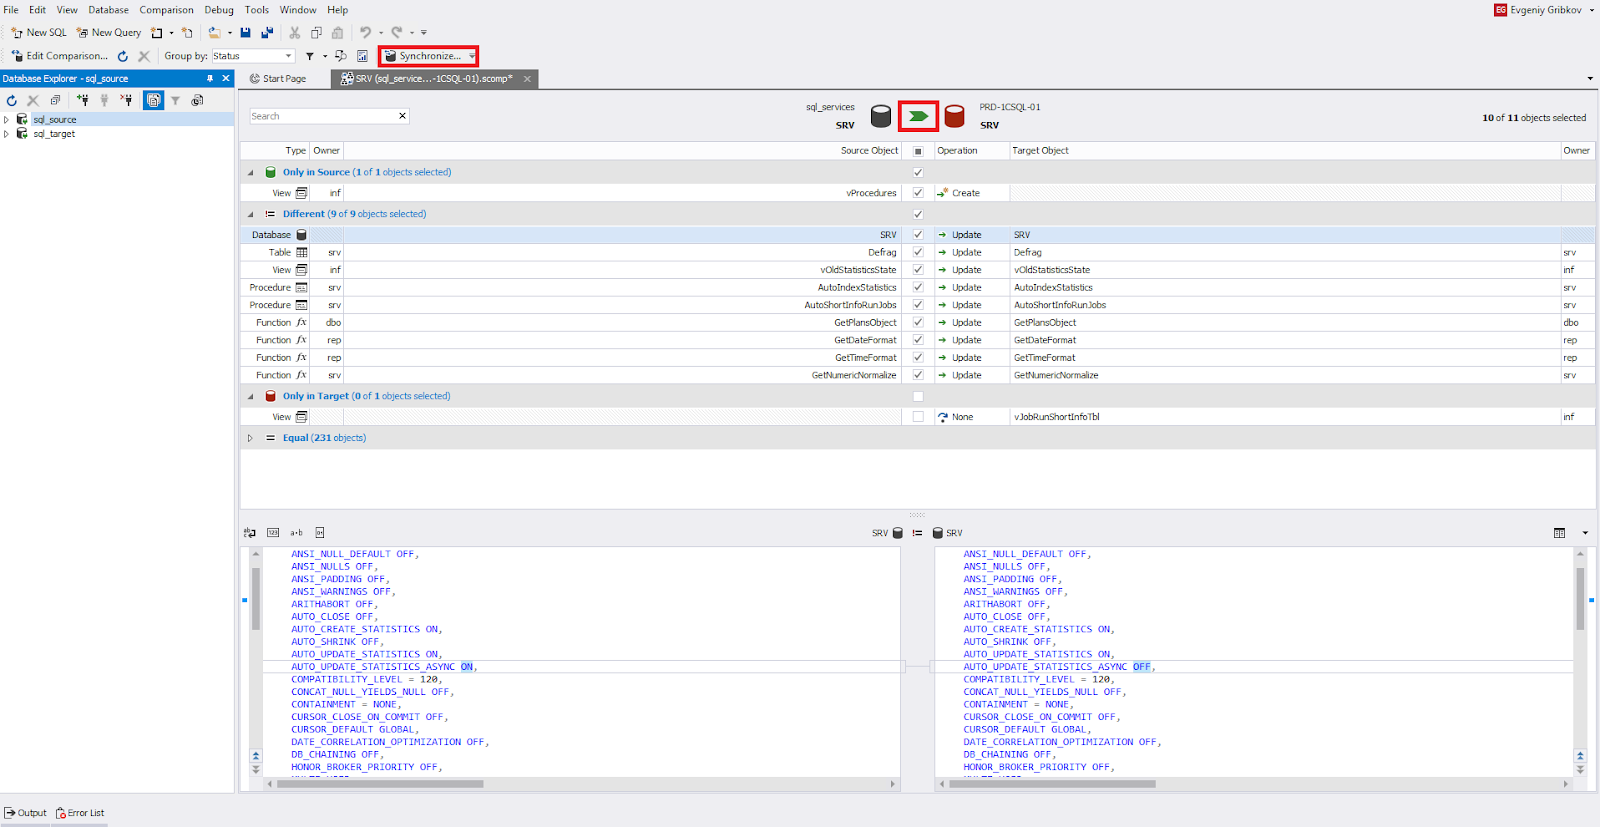
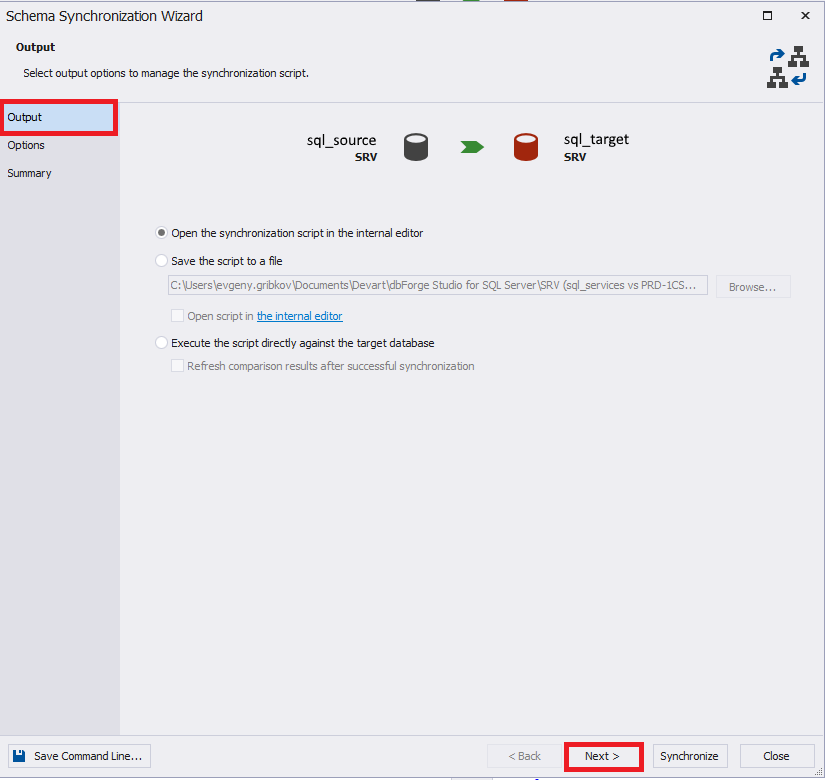
In the "Output" tab, you need to specify how the synchronization process will be carried out. The most common options to choose here are saving the script internally in dbForge Studio for SQL Server or saving it to a file. In this particular case, we need the former option. It is highly recommended to carefully go through the following sequence of tabs while adjusting the synchronization process:
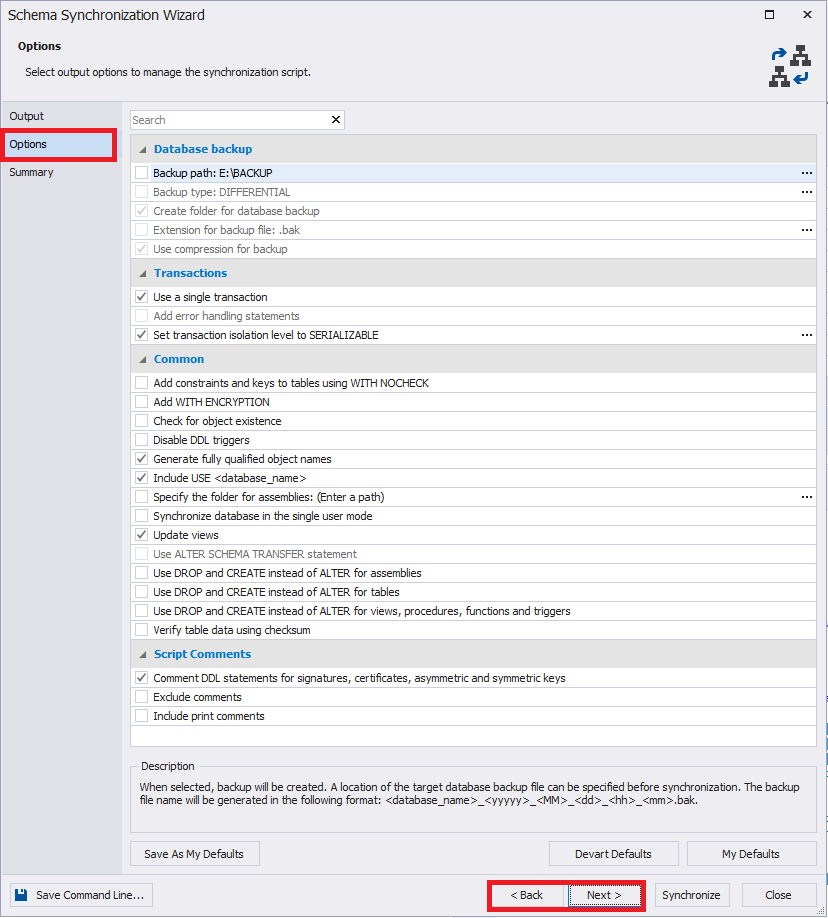
In the "Options" tab, various options can be set for the database schema synchronization process.
Usually, all options from the "Database backup" section need to be cleared.
In the "Transactions" section, the "Use a single transaction" and "Set transaction isolation level to SERIALIZABLE" options are selected. This helps to avoid situations in which the changes can only be applied partially, i.e., with these options enabled, the changes will be either applied fully or won’t be applied at all:
The "Summary" tab summarizes and displays the final synchronization settings. You can go back to any of the previous steps if any changes are needed at this point.
Keep in mind that the database schema synchronization settings can be saved as a .bat file; you can do this by pressing the "Save Command Line" button at the bottom left part of the screen.
Generating a Synchronization Script
To start generating the database schema synchronization script, press "Synchronize:"
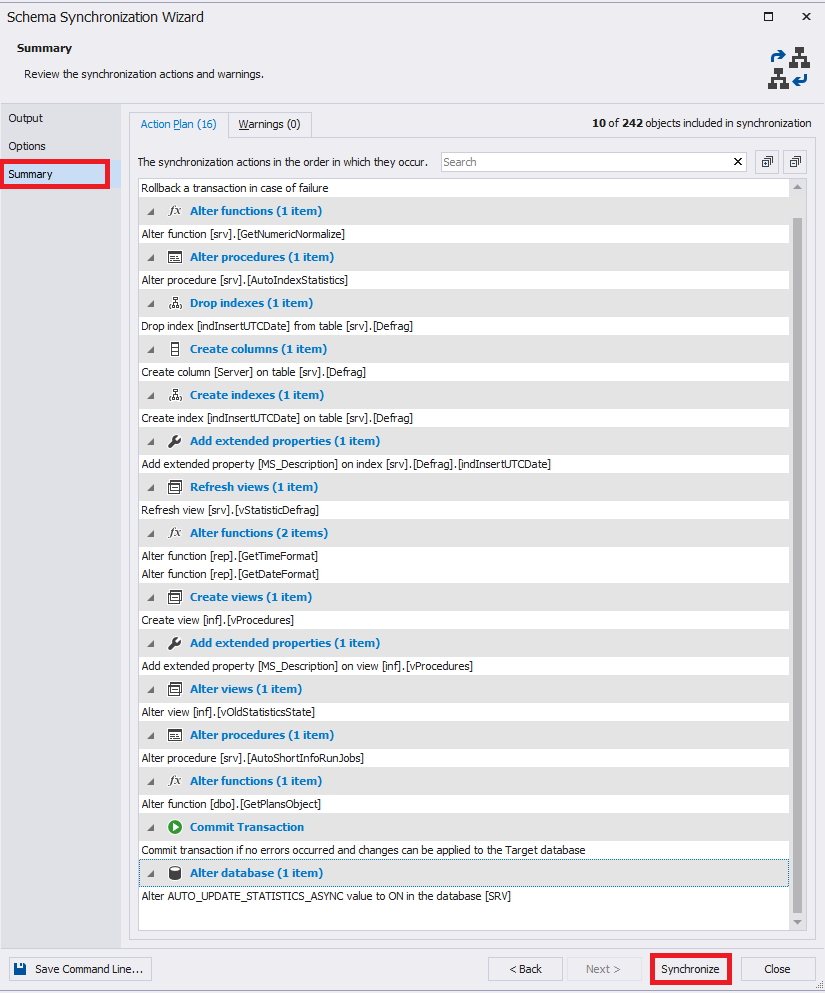
The script will be generated and shown in a new window:
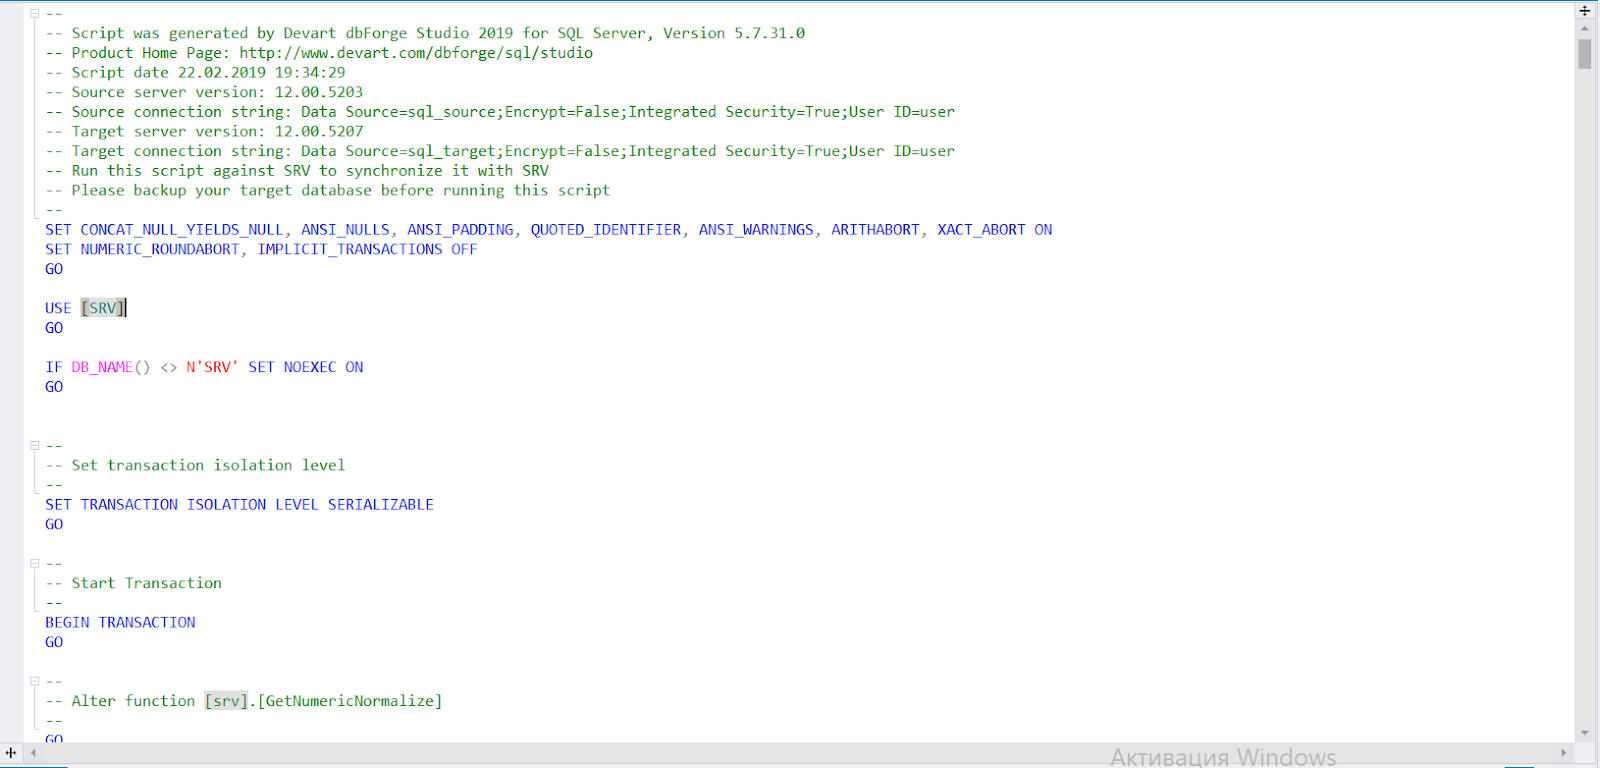
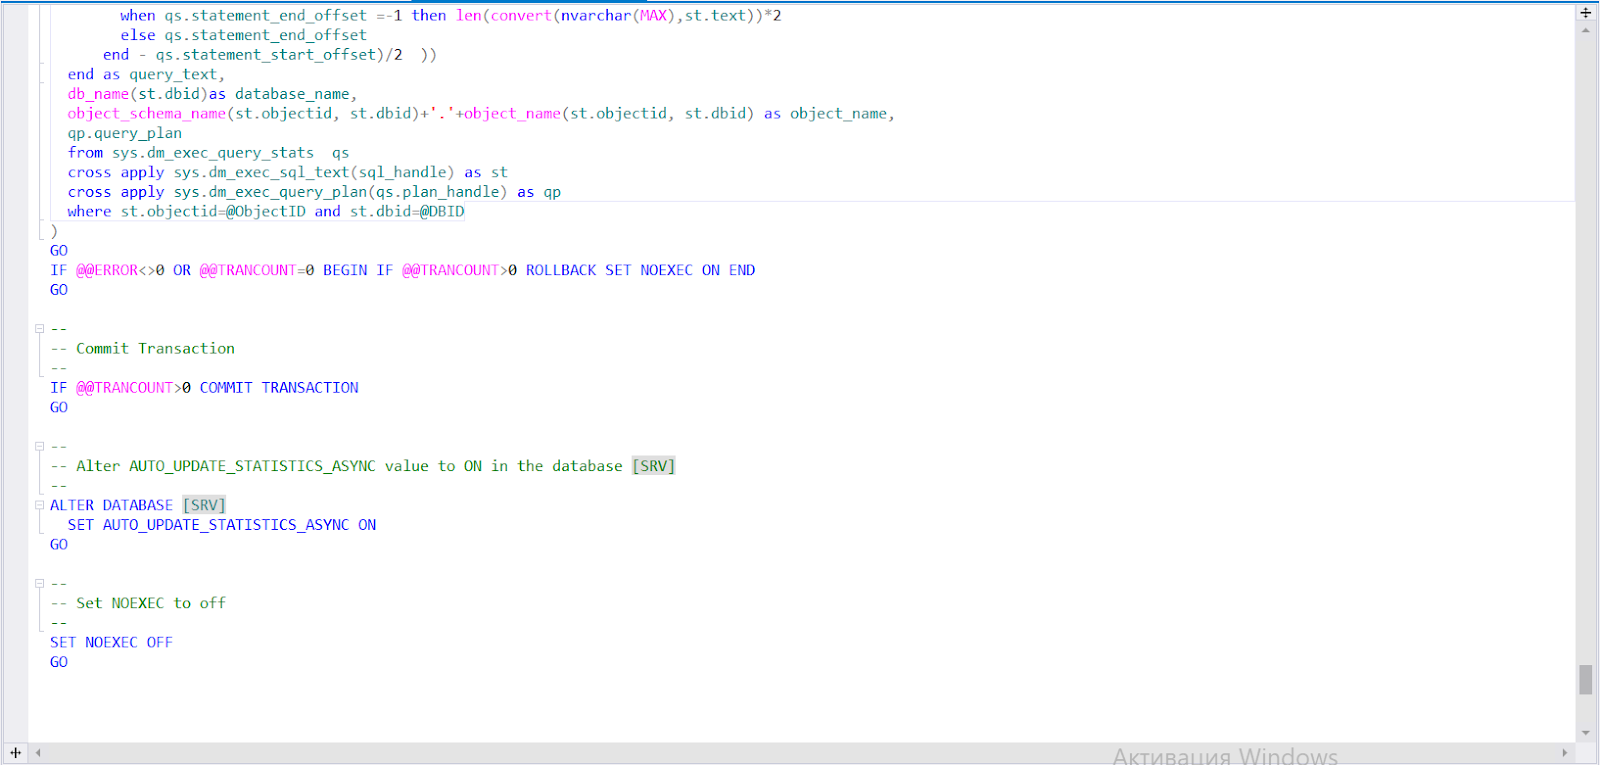
This script is the code we need to transfer the database schema changes from the source to the target. It can be executed against the target server or saved as a file for later use. Usually, this script should be saved in any case — this allows us to run it on several different servers at once for the same database. You can do this by using groups of registered servers in SSMS, sending the resulting script to all servers from the selected group simultaneously:

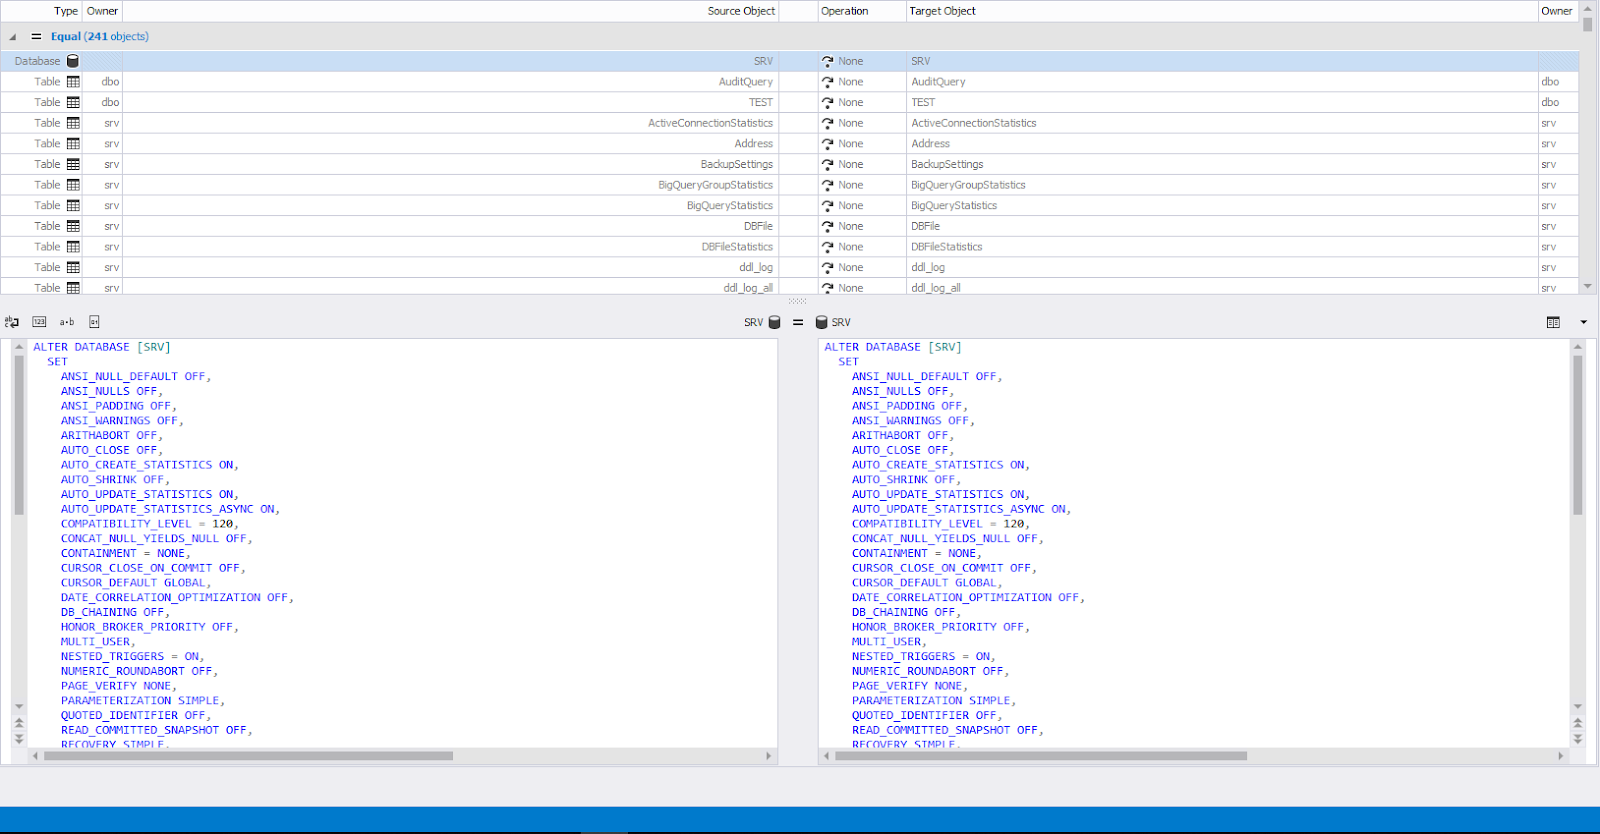
Once the synchronization is over, all previously selected objects should disappear from the schema comparison window:
Conclusion
As you can see, dbForge Studio for SQL Server allows to quickly generate a database schema synchronization script. When compared with SSIS and Visual Studio Comparer, dbForge Studio for SQL Server is faster and easier to use, e.g., fewer clicks are required during the settings adjustment process.
Sources:
Opinions expressed by DZone contributors are their own.

Comments