Spring Boot Centralized Logging with Graylog
In this article, I’ll explain how to centralize the logs of your Spring Boot application with Graylog.
Join the DZone community and get the full member experience.
Join For FreeLogs are an essential part of any system, they give you detailed information about your application, what your system is doing, and what caused the error if something went wrong.
Almost all systems generate logs in one form or another, these logs are written to files on local drives. Debugging the error in a production application through hundreds of log files and on hundreds of servers can be very time consuming and complicated. One approach to this problem is to create a centralized log management system that can collect and aggregate different types of logs in one location.
What is Graylog?
Graylog is a powerful platform that allows for easy log management of both structured and unstructured data along with debugging applications. It is based on Elasticsearch, MongoDB, and Scala. Graylog has a main server, which receives data from its clients installed on different servers, and a web interface, which visualizes the data and allows to work with logs aggregated by the main server.
Setup Graylog
Many installation methods are recommended in official documents. Here we are using docker compose to easily setup a graylog instance with data persistent support.
xxxxxxxxxx
version: '2'
services:
# MongoDB: https://hub.docker.com/_/mongo/
mongodb:
image: mongo:3
volumes:
- mongo_data:/data/db
# Elasticsearch: https://www.elastic.co/guide/en/elasticsearch/reference/6.x/docker.html
elasticsearch:
image: docker.elastic.co/elasticsearch/elasticsearch-oss:6.8.2
volumes:
- es_data:/usr/share/elasticsearch/data
environment:
- http.host=0.0.0.0
- transport.host=localhost
- network.host=0.0.0.0
- "ES_JAVA_OPTS=-Xms512m -Xmx512m"
ulimits:
memlock:
soft: -1
hard: -1
mem_limit: 1g
# Graylog: https://hub.docker.com/r/graylog/graylog/
graylog:
image: graylog/graylog:3.1
volumes:
- graylog_journal:/usr/share/graylog/data/journal
environment:
# CHANGE ME (must be at least 16 characters)!
- GRAYLOG_PASSWORD_SECRET=somepasswordpepper
# Password: admin
- GRAYLOG_ROOT_PASSWORD_SHA2=8c6976e5b5410415bde908bd4dee15dfb167a9c873fc4bb8a81f6f2ab448a918
- GRAYLOG_HTTP_EXTERNAL_URI=http://127.0.0.1:9000/
links:
- mongodb:mongo
- elasticsearch
depends_on:
- mongodb
- elasticsearch
ports:
# Graylog web interface and REST API
- 9000:9000
# Syslog TCP
- 1514:1514
# Syslog UDP
- 1514:1514/udp
# GELF TCP
- 12201:12201
# GELF UDP
- 12201:12201/udp
# Volumes for persisting data, see https://docs.docker.com/engine/admin/volumes/volumes/
volumes:
mongo_data:
driver: local
es_data:
driver: local
graylog_journal:
driver: local
Start the graylog instance with docker-compose up -d
Sending Application Logs (Spring Boot Application)
After creating the Spring Boot application, add a logback-gelf dependency in the pom file.
xxxxxxxxxx
<dependency>
<groupId>de.siegmar</groupId>
<artifactId>logback-gelf</artifactId>
<version>2.0.0</version>
</dependency>
We used Logback-gelf which is used here to generate logs in Graylog. There is a detailed introduction to using logback-gelf on here.
- logback.xml file
xxxxxxxxxx
<configuration>
<appender name="STDOUT" class="ch.qos.logback.core.ConsoleAppender">
<encoder>
<pattern>%green(%date) %highlight(%-5level) %yellow([%-4relative]) %magenta([%thread]) %cyan(%logger{10}) %gray([%file:%line]) %blue(: %msg%n)</pattern>
<charset>UTF-8</charset>
</encoder>
</appender>
<appender name="GELF" class="de.siegmar.logbackgelf.GelfUdpAppender">
<graylogHost>127.0.0.1</graylogHost>
<graylogPort>12201</graylogPort>
<maxChunkSize>508</maxChunkSize>
<useCompression>true</useCompression>
<encoder class="de.siegmar.logbackgelf.GelfEncoder">
<originHost>127.0.0.1</originHost>
<includeRawMessage>false</includeRawMessage>
<includeMarker>true</includeMarker>
<includeMdcData>true</includeMdcData>
<includeCallerData>false</includeCallerData>
<includeRootCauseData>false</includeRootCauseData>
<includeLevelName>false</includeLevelName>
<shortPatternLayout class="ch.qos.logback.classic.PatternLayout">
<pattern>%m%nopex</pattern>
</shortPatternLayout>
<fullPatternLayout class="ch.qos.logback.classic.PatternLayout">
<pattern>%m%n</pattern>
</fullPatternLayout>
<staticField>app_name:backend</staticField>
<staticField>os_arch:${os.arch}</staticField>
<staticField>os_name:${os.name}</staticField>
<staticField>os_version:${os.version}</staticField>
</encoder>
</appender>
<root level="INFO">
<appender-ref ref="STDOUT" />
</root>
<logger name="com.logging.springboot2graylog">
<appender-ref ref="MAIN_LOG_FILE" />
<appender-ref ref="GELF" />
</logger>
<logger name="com.logging.springboot2graylog.interceptor.RestControllerInterceptor" additivity="false">
<level value="DEBUG"/>
<appender-ref ref="GELF" />
</logger>
</configuration>
Receiving Logs (Graylog Server)
Access to the Graylog server in the browser http://ip:9000.
To send the data to Graylog, you must, therefore, configure an entry. This will tell Graylog to accept the log messages.
Go to the Web interface -> System -> Entries and select "GELF UDP" and click on "Launch a new entry".
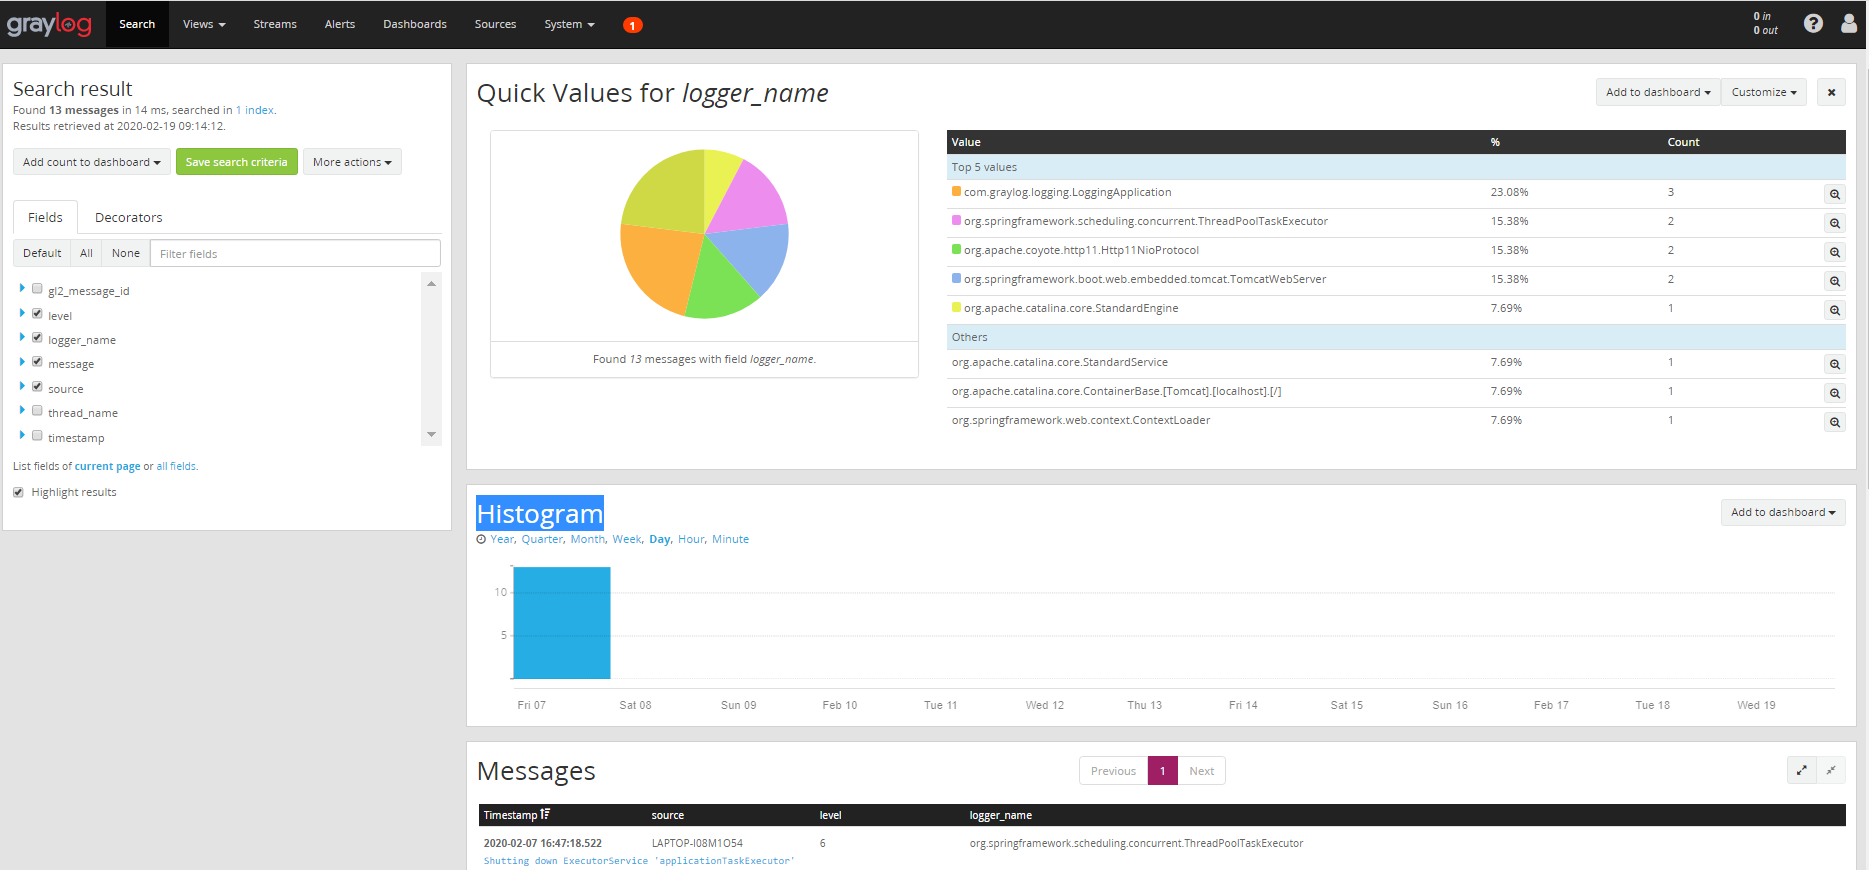
Run your Spring Boot application. you can see the captured logs in the Graylog interface.

You can find the complete source code in my Github page.
Opinions expressed by DZone contributors are their own.

Comments